
This post contains affiliate links. This means that when you purchase through one of these links we will receive a small commission at no additional cost to you. Thank you for supporting Rich Texture Crochet!
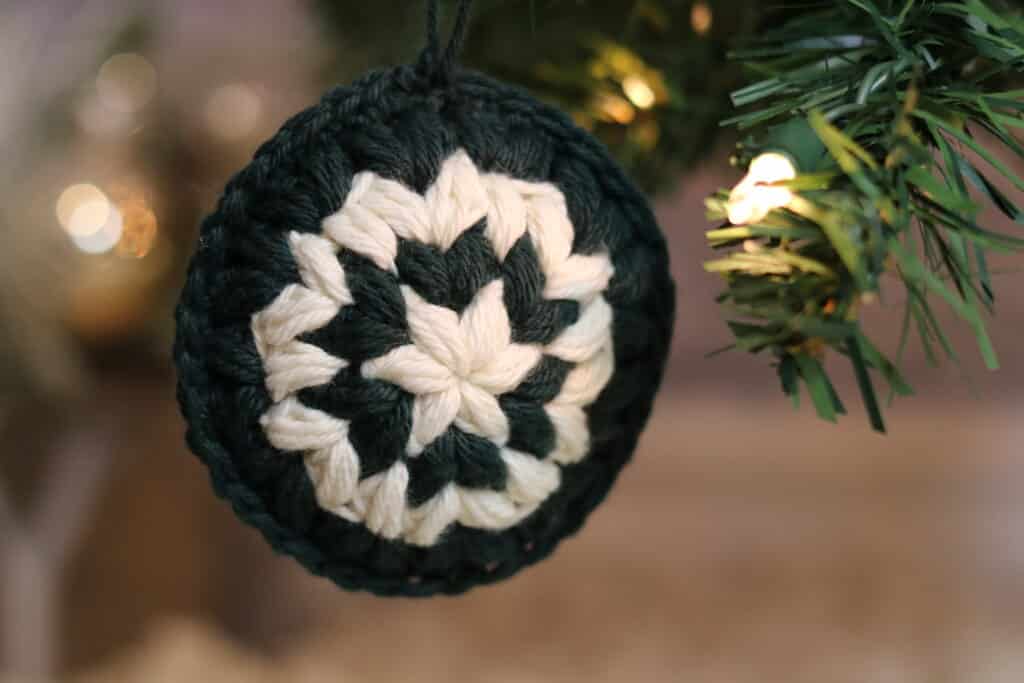
The Rustic Village Christmas Ornament Crochet Pattern has a traditional Christmas feel, making it an ornament that you will want to hang on your tree year after year!
Every year I like to add a few new crochet Christmas Ornaments to our family Christmas tree. In years past I have added ornaments the Country Christmas Ornament Crochet Pattern which is crocheted a placed in a small embroidery hoop, and the Windowpane Christmas Ornament Crochet Pattern Which is crocheted and then placed over a clear DIY plastic ornament bauble. This year I will be bringing you a few new traditional and minimalistic ornaments. These crochet Christmas ornaments are simple, yet beautiful. To me they have the feel and appeal of a country patch work quilt!
This post contains affiliate links. This means that when you make a purchase through one of these links, Rich Textures Crochet will earn a small commission at no additional cost to yourself. Thank you for supporting Rich Textures Crochet!
The Construction:
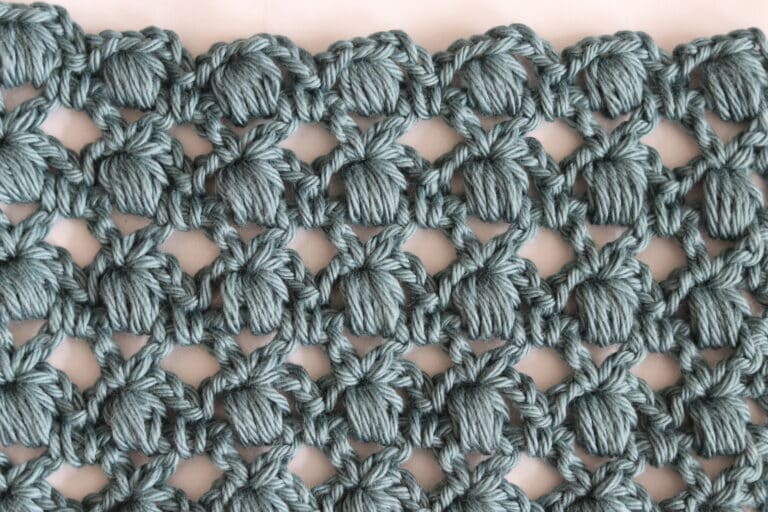
The Rustic Village Christmas Ornament Crochet Pattern is quite easy to work and it is very quick to make up. You will work the two faces and then crochet a single round of single crochet stitches to hold them together. As the puff stitches are so thick, there is no poly fill needed, unless, of course, you would like to have it more rounded in shape and so you’ll need to stuff it a bit more.
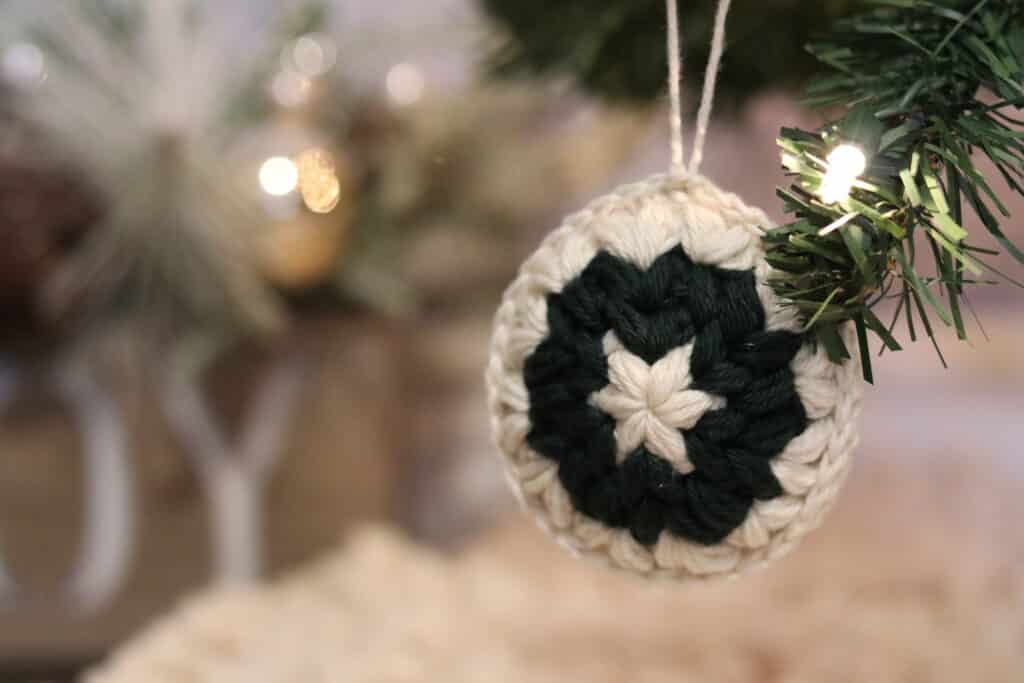
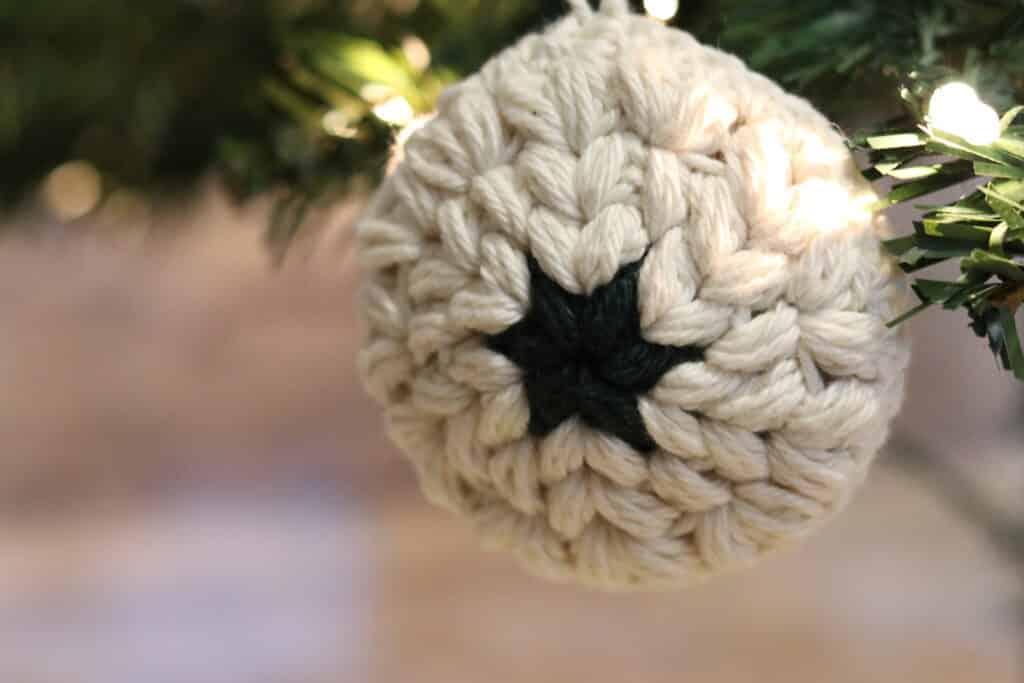
My favourite thing about this design is that depending on the colour combinations you choose, your ornaments can look drastically different from one another! I have worked them in two different colours, and even by changing the colour pattern with the two colours can really change the look. You’ll see it in the photos below!
The Materials:
For this pattern I have used a 100% cotton yarn called Dishie by WeCrochet. It is a worsted/medium weight yarn. You will need two different colours (if you would like yours similar to the ones I have here!) and you will not need much – only about 30-40 yards in total! This is the same yarn that I used in the Reusable Gift Bag Crochet Pattern.
You will also need a 3.5 mm crochet hook. The hook shown in the video below is a 3.5 mm birchwood crochet hook by Rowan Yarns.
PDF Copies:
The pattern will be written out in full below and always remain free on my website, however if your would like to purchase an ad free PDF or add this pattern to your library, you may do so from my Etsy or Ravelry Shops Below:
Click here for the Rustic Village Christmas Ornament on Etsy
Click Here for the Rustic Village Christmas Ornament on Ravelry
Thank you for stopping by! Don’t forget to sign up for my e-newsletter so you’ll be notified of all my new free crochet patterns.
Happy Crocheting!
Sarah
Rustic Village Christmas Ornament Crochet Pattern:
Skill Level: Easy
Gauge: 20 sc x 16 rows = 4 inches
Finished Size: Approximately 3.5 in. diameter.
Yarn: Dishie by KnitPicks/WeCrochet® (190 yds; 100g; 100% cotton; (4) worsted weight). You will need about 30 yards each colour per ornament: Colours shown: Swan and Douglas Fir.
Hook: Size E/4 (3.5 mm) hook.
Notions: Yarn Needle
Stitches and Abbreviations:
Blo – Back Loop Only
Ch – Chain
Puff – Puff Stitch ([yo, insert your hook in the indicated st, yo and draw up a loop] 3 times. Yo and draw through all the loops on your hook. Puff St made)
Rpt – Repeat
Sc – Single Crochet
Sk – Skip
Sl st – Slip stitch
Yo – Yarn over
Pattern Notes:
- Pattern is written in American English terms.
- Pattern is worked in rounds.
- Make two motifs and then crochet them together as shown above.
- Ch 1 at beginning of round does not count as stitch.
- Weave in ends as needed.
- Experiment by mixing up the colour changes to get a drastically different look in each ornament!
Free Crochet Pattern:
(Make 2):
With Colour A, make a magic ring (OR ch 2 and work into the 2nd ch from your hook).
Rnd 1: Ch 1, [puff, ch 1] 6 times into the centre of the magic ring. Join with a sl st in the top of the first puff st. Dot not turn (here and throughout). Fasten off colour A. Join colour B in any ch-1 sp.
Rnd 2: With colour B, ch 1, [puff, ch 1, puff] in the same ch-1 sp as joining, [puff, ch 1, puff] in the next ch 1 sp 5 times. Join with a sl st in the 1st st. Fasten off colour B. Join colour A in any ch-1 sp.
Rnd 3: With colour A, ch 1, [puff, ch 1, puff] in the same ch-1 sp as joining, *puff in the sp between the next 2 puff sts, [puff, ch 1, puff in the next ch-1 sp]; Rpt from * around to the final 2 puff sts, puff in the sp between the next 2 puff sts. Join with a sl st in the 1st st. Fasten off colour A. Join colour B in any ch-1 sp.
Rnd 4: With colour B, ch 1, [puff, ch 1, puff] in the same ch-1 sp as joining, sk the next puff st, *[puff, ch 1, puff] in the top of the next puff st, [puff, ch 1, puff in the next ch-1 sp]; Rpt from * around to the final puff st, [puff, ch 1, puff] in the top of the final puff st. Join with a sl st in the 1st st. Fasten off colour B.
Edging:
Once two sides are made, place one over the other with the wrong sides facing. Working through both sides, join colour B with a sl st in any st. Ch 1, sc in each st and ch-1 sp around. Join with a sl st in the 1st st. Make and attach a hanger.
Video Tutorial:


Gorgeous!! And thank you.