
This post contains affiliate links. This means that when you purchase through one of these links we will receive a small commission at no additional cost to you. Thank you for supporting Rich Texture Crochet!
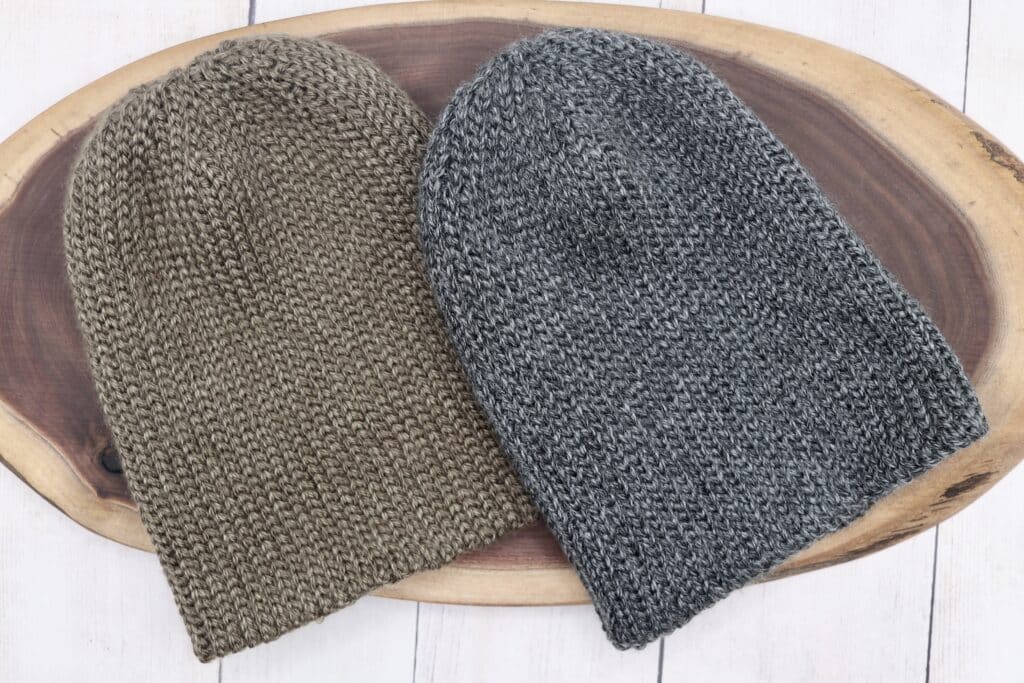
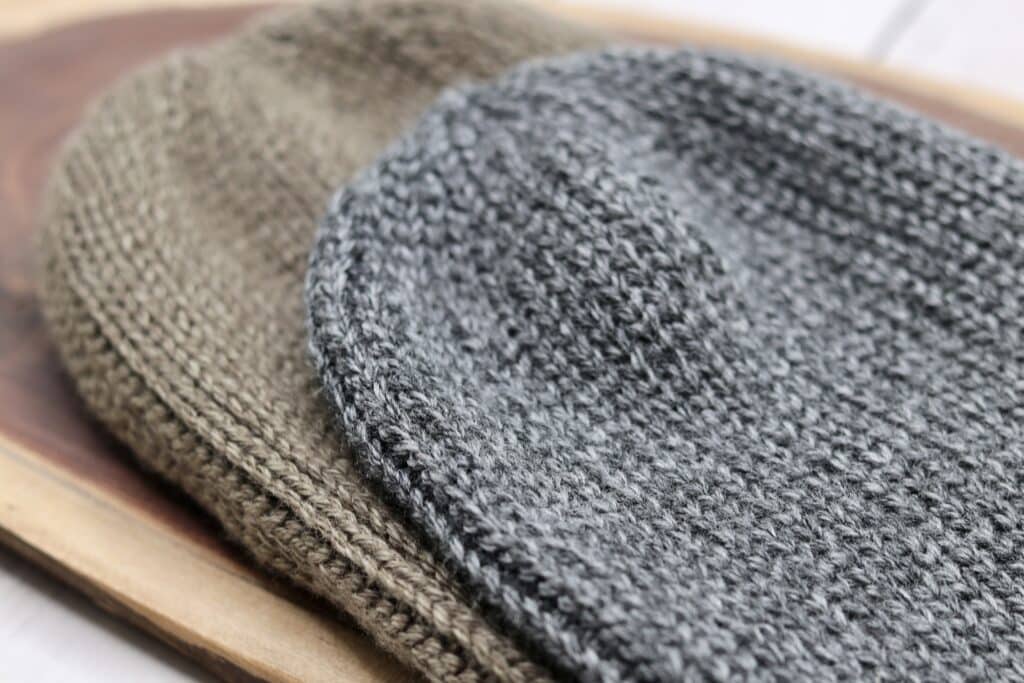
The Classic Knit Look Beanie is a timeless crochet hat pattern perfect for everyone! And it is worked entirely in one of my favourite crochet stitches!
The month of March is National Crochet Month by many! And while we like to show off our crochet art all throughout the year, the month of March is a time when we can really celebrate all the things we love about crochet!
Today I am combining one of my favourite stitches with one of my favourite things to make: Slip stitches and crochet hats!
How to Crochet this ribbed crochet hat:
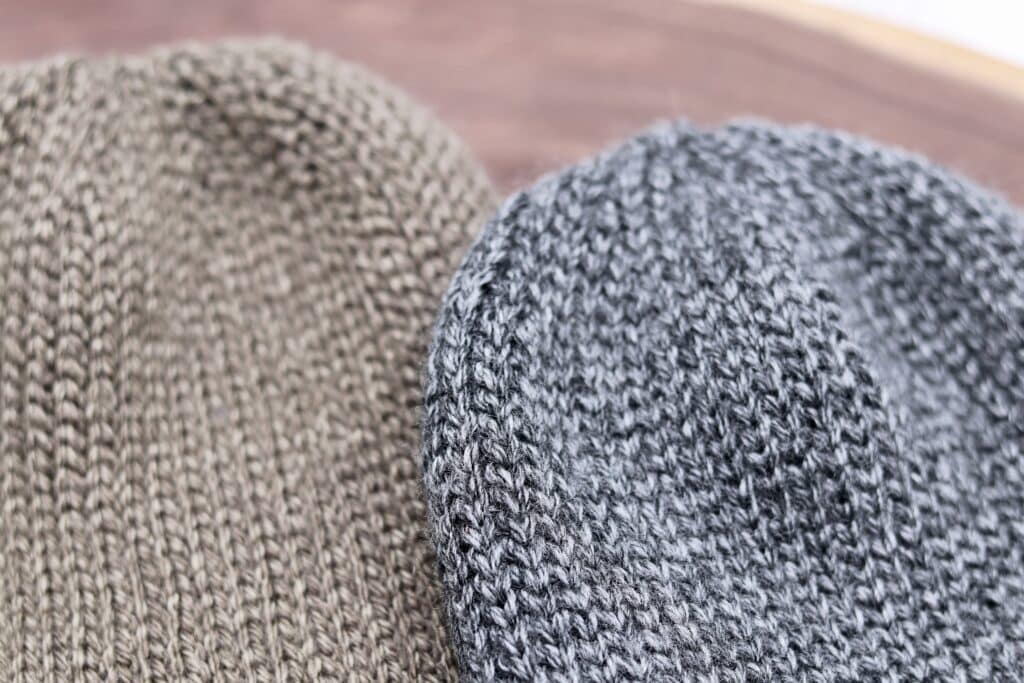
The Classic Knit Look Crochet Beanie is a fairly straight forward and simple pattern to work. The design is worked side to side and in rows. The key difference between this beanie and some of the other side to side designs I have worked such as the Men’s Classic Beanie and the Rocky Beanie, is that the top of this hat is tapered. This means that there is no bulk and it features a more smooth crown.
This crochet hat is perfect for men and women alike. And while I only provide the adult size below, adjusting the size of the crochet beanie is quite easy. You will simply work your foundation chain to the desired height (add an inch as the chain will shorten as you work into it) and then work the pattern to the desired circumference before working your seam. Be sure to check out the full video tutorial below which will help to answer any questions!
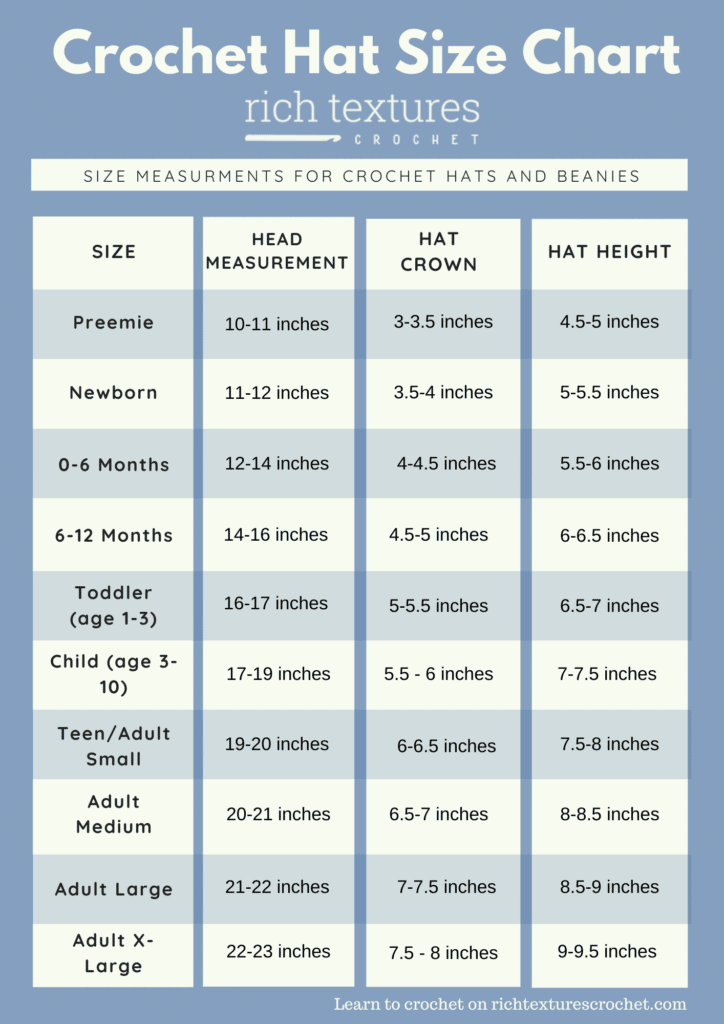
How many chains do you need to crochet a beanie?
That will depend on the size of crochet hat you would like to make. You can check out this handy crochet hat sizing chart to help determine the measurements for the hat size you would like:
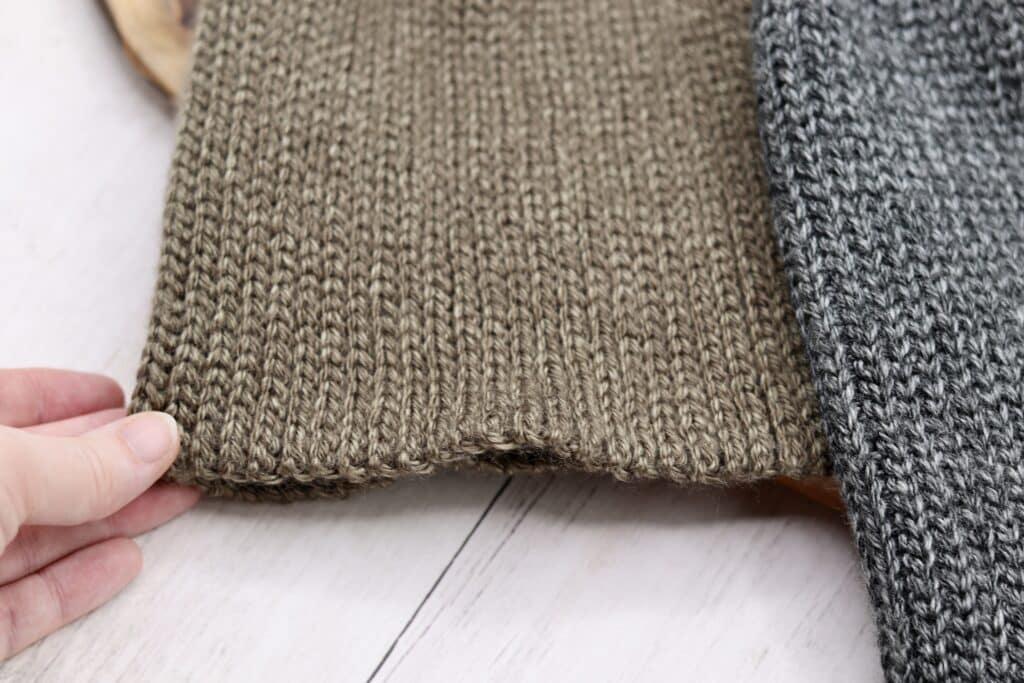
This hat can also be worn with the brim turned up! It is stretchy and feels as though it is knit. It is so comfortable to wear! I just know you are going to love it.
Tips for working entirely in crochet slip stitches:
Slip Stitches are not everyone’s favourite stitch to work so the thought of working an entire beanie in them can be overwhelming! Here are a few tips:
Keep your stitches loose!
Even sloppy loose! You will find that when you are working into the slip stitches that they will pull a little tighter so it won’t hurt to work the stitch a little looser than you might another stitch like a single crochet. They are also very forgiving. After working your slip stitches in the back loop only, you can stretch the fabric a little that will help even out any stitches that haven’t settled yet. The fabric in this beanie is quite stretchy, but the great thing about slip stitches is that they like to keep their shape!
The Hook Matters!
When selecting a crochet hook, look for one with a round but slightly pointed tip. You don’t want the tip to be too sharp or you risk splitting the yarn. You also don’t want the tip to be too blunt as it will make it more difficult to push the hook through. Another trick, if you find your stitches are too tight when using the recommended 5 mm (H/8) crochet hook, don’t hesitate to go up a hook size as it will naturally loosen your tension. Two crochet hooks I enjoy when working slip stitches are the Birchwood Hooks by Rowan Yarns and the Clover Hooks.
PDF Copies of this crochet hat:
The Classic Knit Look Crochet Beanie is being featured in the National Crochet Month Blog Hop hosted by Marie from Underground Crafter! Every day during the month of March she will be featuring new, free crochet patterns on her social media channels!
This pattern will be written out in full below followed by a free video tutorial. The pattern is free to follow on my site and will always be free! If, however, you would like a printable copy, you may purchase one from my Etsy and Ravelry Shops linked below:
Click Here for the Classic Knit Look Beanie on Ravelry
Click Here for the Classic Knit Look Beanie on Etsy
Enjoy and Happy Crocheting!
Sarah
Classic Knit Look Crochet Beanie:
Skill Level: Easy
Gauge: 22 sts x 50 rows of sl st in blo = 4 inches
Finished Size: 9.5 x 8 inches laid flat, to fit an adult head with a 20-22 inch circumference
Hook: Size H/8 (5.0 mm) Hook. Adjust hook size if necessary to obtain correct gauge.
Notions: Yarn Needle
Stitches and Abbreviations:
Blo – Back Loop Only
Ch – Chain
Rpt – Repeat
Sc – Single Crochet
Sk – Skip
Sl St – Slip Stitch
Yo – Yarn Over
Pattern Notes:
- Pattern is written in American English terms.
- Pattern is worked in rows.
- Ch 1 at beginning of round does not count as stitch.
- Weave in ends as needed.
Free Crochet Pattern for the Classic Knit Look Beanie:
Ch 53
Row 1: Sl st in the 2nd ch from your hook and in each ch across. Ch 1, turn. (52 sts)
Row 2: Working in the blo all the way across, sl st in the 1st st and each st across. Ch 1, turn. (52 sts)
Row 3: Working in the blo all the way across, sl st in the 1st st and in each of the next 49 sts. Ch 1, turn leaving the remaining sts unworked. (50 sts)
Row 4: Working in the blo all the way across, sl st in the 1st st and each st across. Ch 1, turn. (50 sts)
Row 5: Working in the blo all the way across, sl st in the 1st st and in each of the next 47 sts. Ch 1, turn leaving the remaining sts unworked. (48 sts)
Row 6: Working in the blo all the way across, sl st in the 1st st and each st across. Ch 1, turn. (48 sts)
Row 7: Working in the blo all the way across, sl st in the 1st st and in each of the next 45 sts. Ch 1, turn leaving the remaining sts unworked. (46 sts)
Row 8: Working in the blo all the way across, sl st in the 1st st and each st across. Ch 1, turn. (46 sts)
Row 9: Working in the blo all the way across, sl st in the 1st st and in each of the next 43 sts. Ch 1, turn leaving the remaining sts unworked. (44 sts)
Row 10: Working in the blo all the way across, sl st in the 1st st and each st across. Ch 1, turn. (44 sts)
Row 11: Working in the blo all the way across, sl st in the 1st st and in each of the next 41 sts. Ch 1, turn leaving the remaining sts unworked. (42 sts)
Row 12: Working in the blo all the way across, sl st in the 1st st and each st across. Ch 1, turn. (42 sts)
Row 13: Working in the blo all the way across, sl st in each of the next 42 sts, sl st in each of the next 2 sts of row 10, sl st in each of the next 2 sts of row 8, sl st in each of the next 2 sts of row 6, sl st in each of the next 2 sts of row 4, sl st in each of the next 2 sts of row 2. Ch 1, turn. (52 sts)
Repeat rows 2-13 nine more times.
How to finish and seam the hat:
Join your two long sides together by working through both thickness and in the blo of each side all the way across, sl st in each st across. (52 sts) Fasten off, weave in your ends.
Take a piece of yarn and sew the top of the hat closed. Once again fasten off and weave in any ends.
Video Tutorial:


What would I need to do if I want to beanie to fit a 24” head?
Same! I’m new to crocheting and have no idea how to scale a pattern.
how can i print it out without all the ads? I am new, I have one hook its a 6.5mm
If you wish to view the pattern without the ads, you may purchase the ad free PDF from my Etsy and Ravelry shops which you will find linked above in the post.
Not sure how old this is but I have tried with several hooks and this stitch is quite difficult to get my hook through. After row 2, several different tries and and it being too tight, I’ve given up! :/ Any tips? Would love to make this beanie.
I would try going up a hook size, or if you have already tried the larger hook you can try to crochet simply keeping your tension super loose – I’d even describe it as sloppy loose because when you work into the slip stitches they will come together and straighten out. The other trick I’ve learned is simply changing the direction of the hook when you insert your hook into the stitch. Some find it easier when the hook is facing toward you, or you may try inserting the hook with it pointing away from you. I hope that helps!
Hello! I just started this pattern and have a question on Row 3 – it says to slst across 49 stitches, then the end count says you should have 50 stitches. Should I leave 3 stitches unworked or 2? Thanks so much!
I would really like to try to make this hat, but I would need to make a size that is different from the written instructions. As far as I can tell, nothing in the notes or video explains how to adapt to different sizes. I see the chart for different sizes, but nothing from that chart carries into the pattern… What am I missing here? Would love some help knowing how I can I make this in a different size than the standard adult!
Yes same question!! I need to make an XL size for 24in head circumference