
This post contains affiliate links. This means that when you purchase through one of these links we will receive a small commission at no additional cost to you. Thank you for supporting Rich Texture Crochet!
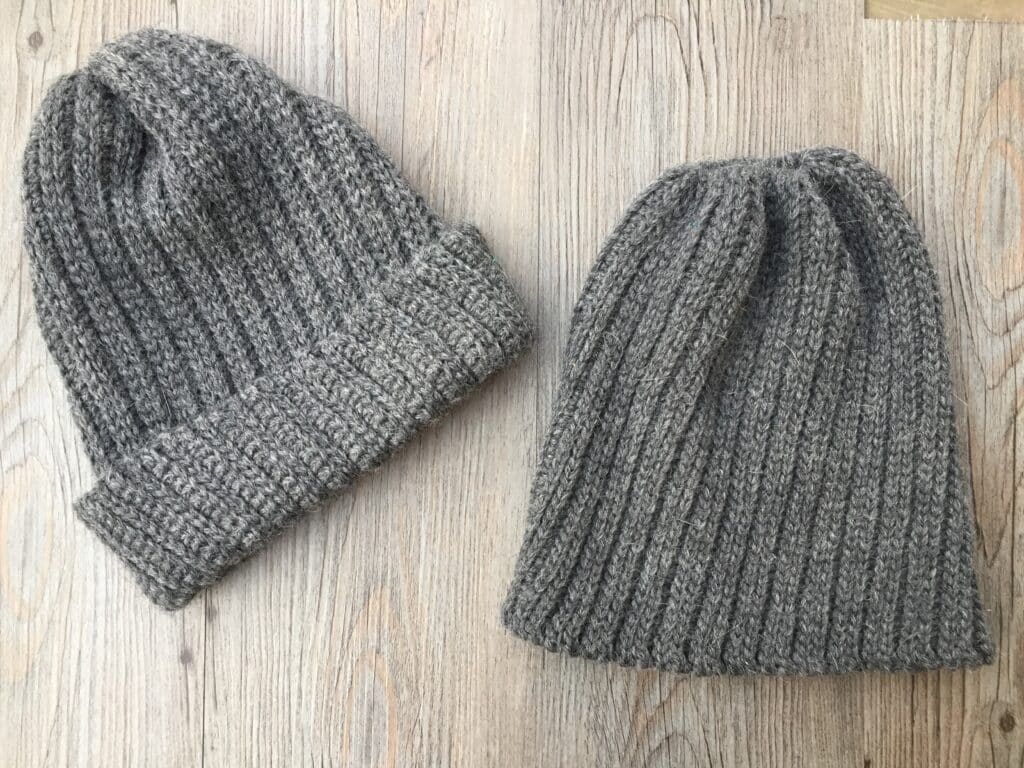
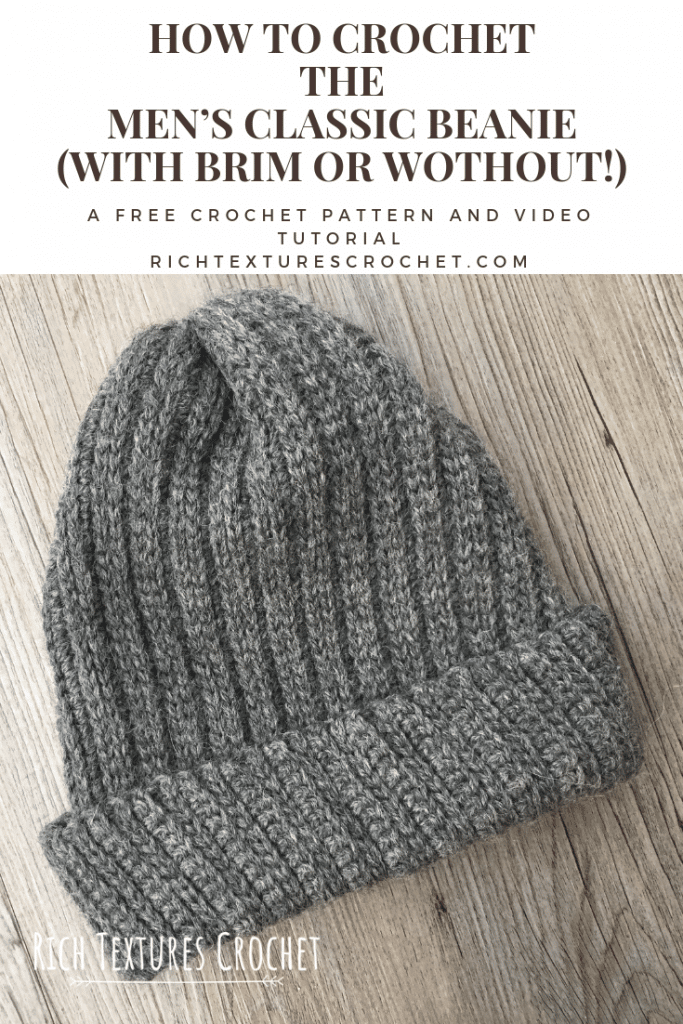
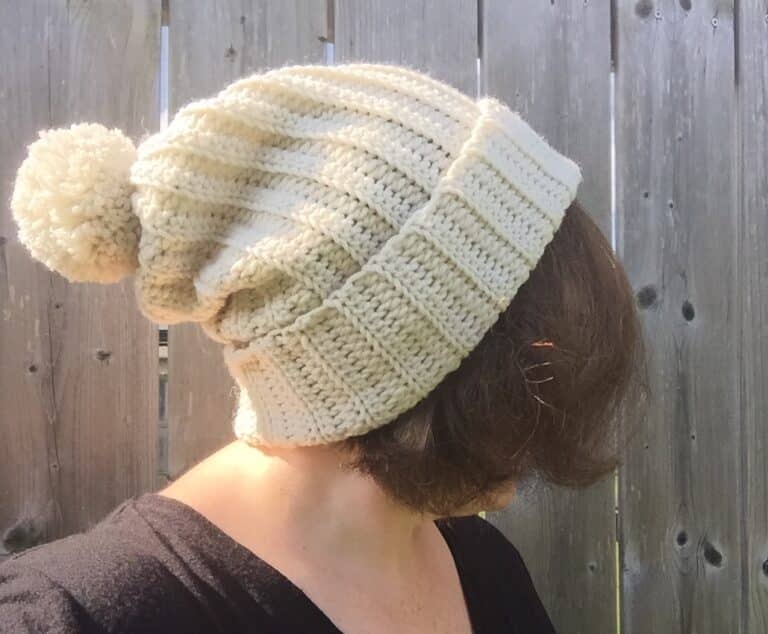
Welcome to Rich Textures Crochet! Today we are going to learn how to crochet a classic knit looking men’s beanie! This pattern contains two variations – with a brim and without.
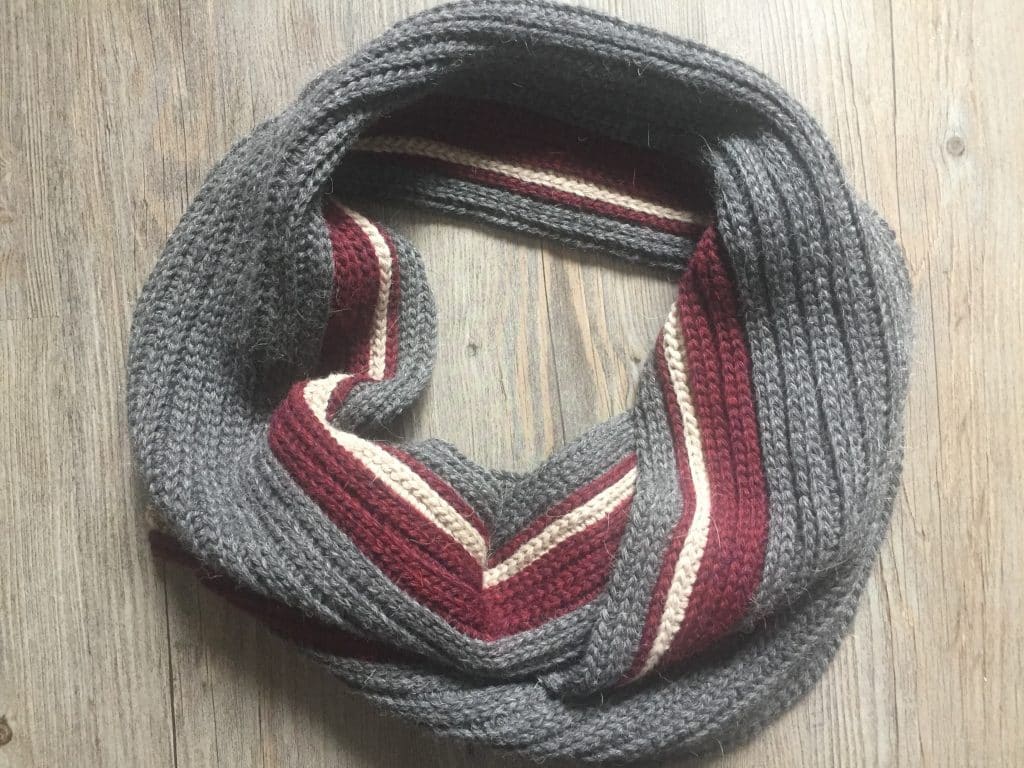
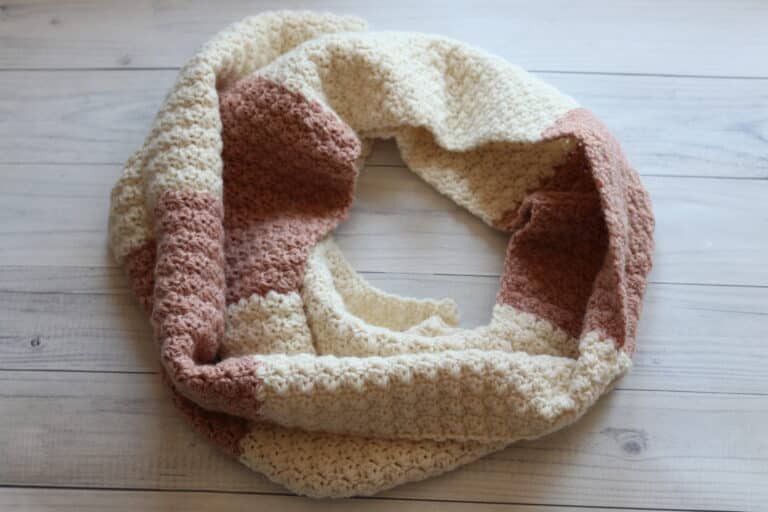
I mentioned in a previous post that my husband had been looking forward to the day when I would finally crochet something for him! I set to work designing a classic looking scarf and men’s beanie combination that he fell in love with!
This post contains affiliate links. This means that when you make a purchase through one of these links, Rich Textures Crochet will earn a small commission at no additional cost to yourself. Thank you for supporting Rich Textures Crochet!
Did you miss the men’s scarf crochet pattern from last week? Don’t worry, you can find the free pattern and video tutorial here: Men’s Classic Crochet Scarf – Free Crochet Pattern. This is the scarf pictured below:
Gorgeous right? He definitely needed a hat to go with it! Something simple, easy to make and easy to coordinate.
You will see that there are two variations for this hat, and I include the instructions for both in this post. You see, I really couldn’t decide between the hat with a brim or without – you’ll have to let me know in the comments which you choose!
The Construction:
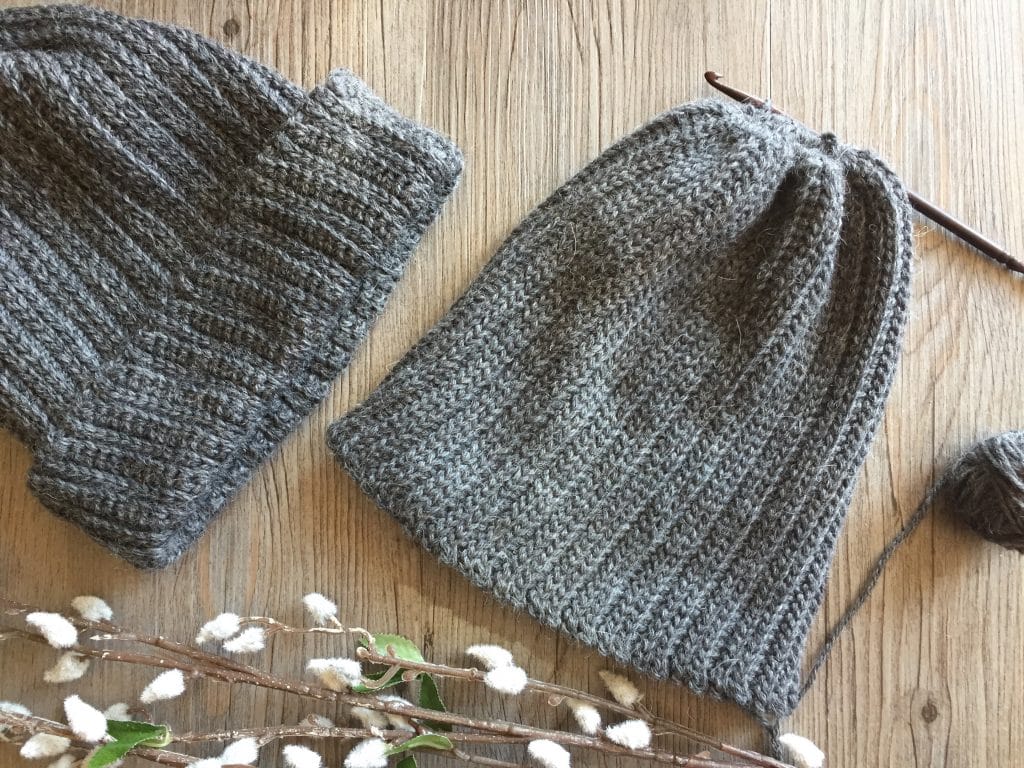
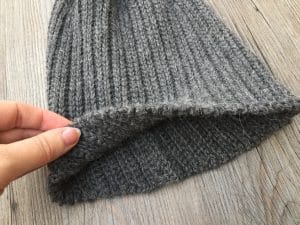
Both hats are constructed the same way, worked sideways. I started by making a small chain loop, and then after crocheting a longer chain, worked the pattern in rows. Each time I returned to that small starting chain in a loop, I slip stitched into the centre. Confused? Check out the free video tutorial following the written pattern.
The Yarn:
This hat and the scarf are both made using the gorgeous yarn called “Rapture” by Sugar Bush Yarns. This yarn is a Llama/Merino blend. So it carries the warmth of wool, but is super soft! For my husband, he loved it as he always finds wool a bit too itchy against his skin. Rapture is a happy medium!
If you would like to check out Sugar Bush Yarn’s selection of premium fibre, you may do so on their website: https://www.sugarbushyarns.com. I highly recommend it and I thank them for generously supporting this new pattern!
Where to find the pattern:
The written pattern will be written out below, followed by a free video tutorial. However, if you would like to purchase a PDF copy of the pattern or add this pattern to your library, you may do so from either my Etsy or Ravelry Shop linked below:
Click here for the Classic Men’s Crochet Beanie on Etsy
Click here for the Classic Men’s Crochet Beanie on Ravelry
Thank you so much for stopping by! Happy Crocheting!
Sarah
Men’s Classic Crochet Beanie:
Skill Level: Easy
Gauge: 20 sts x 31 rows of pattern = 4 inches.
Finished Size: Approximately 8 x 9 inches laid flat, 20-21 inch circumference when stretched.
Yarn: Rapture by Sugar Bush Yarns (50% merino/50% Llama Soft; 3.5 oz/100g; 211 yds/193 m); For Hat with Brim: 1.5 Skeins Smoky Spirit; For Hat with no brim: 1 Skein Smoky Spirit
Buy the yarn now:
Sugar Bush Rapture Yarn, Fierce Flame![]()
Hook: Size J/10 (6.0 mm). Adjust hook size if necessary to obtain correct gauge.
Notions: Yarn Needle
Stitches and Abbreviations:
Blo – Back Loop Only
Ch – Chain
Rpt – Repeat
Sc – Single Crochet
Sk – Skip
Sl St – Slip Stitch
Yo – Yarn Over
Pattern Notes:
- This pattern contains the instructions for 2 styles, one with a brim and one without.
- Pattern is written in American English terms.
- Pattern is worked in rows lengthwise.
- Ch 1 at beg of row does not count as stitch.
- After row 1, the rest of the pattern will be worked in the BLO.
- Each time you return to your starting loop after working the row, sl st into the centre of the loop before turning.
- Weave in ends as needed.
Free Crochet Pattern:
Ch 12, without twisting chain, join in first ch with a sl st.
For hat with brim ch 66, for hat without brim ch 56.
Row 1: Sc in the 2nd ch from hook and in each across; at the end of the chain, when you reach your beginning loop, sl st into the centre of the loop. Turn. (65/55 sc)
Row 2: Ch 1, working in the blo sl st in each sc all the way across; turn. (NOTE: Do not work in either the turning sl st or chain.)
Row 3: Ch 1, working in the blo sl st in each st all the way across; at the end of the chain, when you reach your beginning loop, sl st into the centre of the loop. Turn
Row 4: Ch 1, working in the blo sl st in each st all the way across; turn.
Row 5: Ch 1, working in the blo, sc in each st across; at the end of the chain, when you reach your beginning loop, sl st into the centre of the loop. Turn.
Row 6: Ch 1, working in the blo sl st in each st all the way across; turn.
Row 7: Ch 1, working in the blo sl st in each st all the way across; at the end of the chain, when you reach your beginning loop, sl st into the centre of the loop. Turn
Row 8: Ch 1, working in the blo sl st in each st all the way across; turn.
Repeat rows 5-8 until work from the beginning measures approximately 18 inches.
Turn hat inside out so that wrong side is facing. Working through both thickness and the blo of both sides, sl st in each st across crocheting the two ends together. Fasten off leaving a long tail.
Using the long tail, sew the top of the hat closed. Fasten off and weave in your ends.
Video Tutorial:


I love the way the hat was made. It’s very easy and quick to follow. I want to make one for a boy. The yarn is gorgeous though I will use a different yarn since Sugar Bush is not available where I live. Thanks for the pattern
You’re welcome!
This is a great pattern! I can’t wait to try it. If I wanted to make it for a woman, what # of chains do you recommend I start with?
Hello, just bought this one on Ravelry looks really nice. I thought it was knitted. One question I have is would it be able to changer colours going horizontally. I’m sure I could figure it out to go vertically, as it’s made, but was hoping there is a way to do it the other way.
This will be my first toque I will be making. My wife is getting me into crocheting. Thank you
It is possible to change the colours horizontally. What I would do, say if you wanted to have the colour change on the bottom, is for that first starting chain, work the chain in colour A until you want the change, drop the colour A (do not fasten it off), pick up your next colour and keep going. Turn your work, work the next row in your colour B until you want to change back to the colour A, then drop the colour B, pick up the colour A and continue on to the end of the row. Continue working like this dropping and picking up the colours as you go. You can change the number/width/colours of the stripes making it as complex as you’d like 🙂 I hope that helps 🙂
In your tutorial video, I can’t stop looking at your hook!!! I love wooden hooks, and it is hard to find one with the right glide for certain yarns!!! May I ask what kind of wooden hook it is?? This one made your crochet look like it is a dream to work with!!!
Thank you!
-Sam
This is a handmade hook by Viscount Woodturning on Etsy 🙂 I absolutely love his hooks and they are a pleasure to work with.
Hi! I loved the beanie. Since I am a newbie I started with as instructions but later got list so now I am using front dbl crotchet and back dbl crochet ?. This way by son can have a reversible beanie ??.
Ok, I am not sure if it’s a typo that’s why confirming with you. So finished length for brimmed beanie is 8 inches or more (18 inches in instructions seems toooo big).
I love your instruction, and I want to make this hat for a 13 years old boy, but I am concerned about been to long, because 66 stiches, it may make the hat to long, even with the brim.
Thank you so much for your help.
Love this hat! I did have one question. If I wanted a smaller circumference, would It work to make less than 12 chains to sl st together in the beginning?
For a smaller circumference you will work the Dow’s until the width of the fabric reaches your desired size. At the moment you work the pattern until it measures approximately 19 inches. For a smaller circumference work until it measures 18/17/etc. Changing the length of the starting chain will decrease the hats height 🙂
With doing the brim, what is the actual height of the beanie including the brim? I have a beanie that my husband bought from the store that he wears all the time, and I’m trying to use it to compare for size.
Hi Sarah. I finished the hat today but not sure what I did wrong, the lines or ribs (not sure what they are called) are going sideways, not straight down like yours.
Hello Brenda. Same happened with me. Let me know if you get a reply to your question ???
Will do. Glad it wasn’t only me ??
Hello Vandana, if you’d like feel free to send me a photo and I’ll see if I can figure out what is going on 🙂 richtexturescrochet@gmail.com
Hi Brenda, if you’d like feel free to send me a photo and I’ll see if I can figure out what is going on 🙂 richtexturescrochet@gmail.com
Thank you, will do
Hi Sarah,
Thank you for this pattern.
I am on row three and am wanting to make one with a brim. I chained 66, but the whole strip turns out to be 19 inches long from the top circle… way too tall of a hat, I was thinking maybe 9 inches. Did I miss something? I’m using a different yarn, yarn bee tender touch, dove.
Thank you,
Mary
It could just be that your yarn is thicker than the one I used. I would work your starting chain to the desired length and then add 1-2 inches as it will shorten when you work into it. You don’t need to worry about having a certain multiple of stitches
I think it would help if another note was made concerning Row 1. When making a sc in the 2nd ch from the hook and in each across, one should pass the hook under only the TOP loop of the chain! Otherwise when you get to the end of making the hat, you find that you do no have the blo of both sides to sl st in to crochet the hat together. I looked in five sources on how to crochet. Four said to slip the hook through the top two loops of the chain. Only one said to work through the top.
My husband has a head circumference of 24”. Is there a way to make this a bit bigger for him? I’ll be using a Spinrite tent sale acrylic yarn that seems to be a cross between baby and satin, so a light worsted 4.
Once you finish crocheting the hat, how do you bind off before stitching it together? I have never crocheted before, only knitted and your pattern doesn’t mention this step.
Thanks!
Hi Genna, cut your yarn leaving enough to weave into the hat. Make a chain like stick with your hook but pull the yarn tail all the way through. Pull light and weave in your end. At least I do it this way and it has never failed me.
I’ve started twice, my edge is going upwards & I’m not sure why? I’ve been counting stitches too & remember to Ch 1 any ideas?
I’m having exactly the same issue! I’m not sure what I’m doing wrong, it’s driving me nuts.
@ELLY This has happened me also. Did you get any answers on it?
Hi! Yes, counting my stitches after each row has worked well – my edge is looking even now I’ve learnt a lot on this project
My yarn must be a bigger size. A chain of 50 equals 15.5” in length. What are the specific lengths of your beanies with and without brims so that I can make the adjustments. And then to obtain your lengths I would need to add 2”?
Hello Deb, the hat without a brim is approximately 8 inches long laid flat and then add 3 inches for the one with a brim.
Hi! I feel dumb because I’m really struggling with this one and I consider myself to be a decent crocheter! I don’t know if it’s the type of yarn I’m using or my hook… but I’m finding it so hard to get my hook through each stitch… I have to use my nails to pull each loop up and it’s taking forever. I’m trying to keep my stitches loose, too. Has anyone else had this problem?
Thank you!
Yes!! I’m about to give up!
Me too! I have unraveled and adjusted my tension more than once. I feel like it should not be *this* hard. Am I using the wrong back loop? I just don’t know. Let me know if you get it resolved.
That makes 3 of us with the same difficulty ??! We can’t be the only ones. Hopefully someone who has been successful will reply. ????
I think I know how to help!! First, find a video about “the golden loop” I like this one
https://youtu.be/97Vpxaf8wvk
Now, with this knowledge, (it was new to me) , take a pause between loops as you make your slip stitch; instead of trying to yank it through both loops at once. I found that the extra slack in the golden loop really helped with this issue. Happy crocheting ???
I am using the Sugarbush yarn, but 56 stitches gave me a 13 inch hat-way too big! having to unravel and start over.
Was arduous at first to do all those slip stitches (but it does get way easier as you go). But I’m happy with the way the hat came out! I worked with an aran yarn and ended up doing about 40 chain stitches and continued until about 17 inches wide for a small adult hat with brim. Thank you for this pattern!
Lovely pattern! Started again concentrating hard with good results many thanks
I’m finding that my crocheted fabric is not particularly square as I work around the loop so it looks like a trapezium! I expect it will work itself out as I go on ….
As long as when you count the stitches you still have the same number, when you join the two sides together it will work out 🙂
Thank you! I’m counting as I go……
Wow! Such a cool beanie, I crochet some hats but they are not as good as these! It looks knitted! I can’t wait to try it out, thanks!
Finished this fab beanie today in a superwash merino yarn (after several restarts cos I’m new at this!) husband really pleased with it and so am I! Really good pattern to learn loads on I found thanks Sarah ?
You’re welcome! I’m glad you both liked it!
I’m so glad I persevered with this pattern I learnt a lot from restarting several times. Counting each row really is a must here I think
This was a fun pattern-easy to adjust length/circumference and I was able to easily keep the same tension comfortably throughout (which is is often hard for me!) to make nice even looking stitches. Also love how stretchy it is- makes sizing for another person easy 🙂
I’m working on making my boyfriend a hat and scarf, and when I measured his head circumference he was about 24 inches around. Is this too big for this hat? And if so is there any way to make the hat a little bigger?
It’s not too big for the hat! When you are working the rows, simply work one extra inch
Too bad this hat is so nice looking. I spent two days trying to crochet this and hate the slip stitch. I take taken over 8 hours for me to make a 4 in wide piece of fabric and I’m pulling the whole thing apart. NOTHING I do makes the slip stitches loose enough for this to be an easy piece. Maybe it’s just me. None of this pattern is difficult.
Hey love the pattern but when we progress with the beanie is it supposed to look like from the beginning to the end like a positive slope?
Plz do respond quickly I want to impress my crush!
Hi! It took me a while to get into the habit of counting my number of stitches after each row so I hadn’t increased or decreased by mistake! This made sure that I was crocheted straight I did unpick a few times ! Hope this helps
Thank you so it helped!!!
But question though? When I count I get to 68 or 69 at the end (away from the loop or circle on top) but when I get buck up to the top of circle it get to 67 after that once I get to the 5 row it get to 66 why it it normal???
Glad that helped you! Yes, it can take a while to crochet every stitch and not miss one, also to be doing the exact same thing at the end of each row loop and other end takes a bit of patience but it will work don’t give up & you’ll be proud of your achievement
So frustrated. I have followed this pattern perfectly and my hat is ridiculously long.
Hello Mary, if you did not use the sugar bush yarn, it is possible that you will not have the same gauge. You can change the length of the hat simply by working a shorter starting chain
I am useing size 4 yarn feelslikebutta but chained 42 at start to give me 10 inches. Has reduced to 81/2 as i work it. I have 20 stitches to 4” as in gauge but only 22 rows so assume that is why stitches are are to slipstich at times. But i try to do loosely. Looks neat and as per pattern in pic but slow work. Am i doing something wrong?
No you’re not doing anything wrong – the feels like Butta will work up differently. I would make the starting chain to the desired length (can be any multiple) and the. Work to the desire circumference before joining the sides 🙂
Tx for your helpful response??
The foundation chain does shorten when you work into it (maybe an inch depending on the yarn). If you are concerned about losing stitches, count them occasionally while working to make sure you’re not dropping them and/or mark the first and last
Can you help me? I’m having so much trouble inserting my hook into the back loop. Does that mean my tension is not right? Or is my hook too blunt? I’m not really a newbie but after just a few rows I don’t feel I can go on.
Do you know what I’m doing wrong?
I made a hat with this pattern for my boyfriend. The pattern was very easy to follow. I used a 3-weight yarn and a smaller hook, and the finished project looked very professional. Thanks for making a great classic pattern!
So wonderful to hear! Thank you for sharing!