
This post contains affiliate links. This means that when you purchase through one of these links we will receive a small commission at no additional cost to you. Thank you for supporting Rich Texture Crochet!
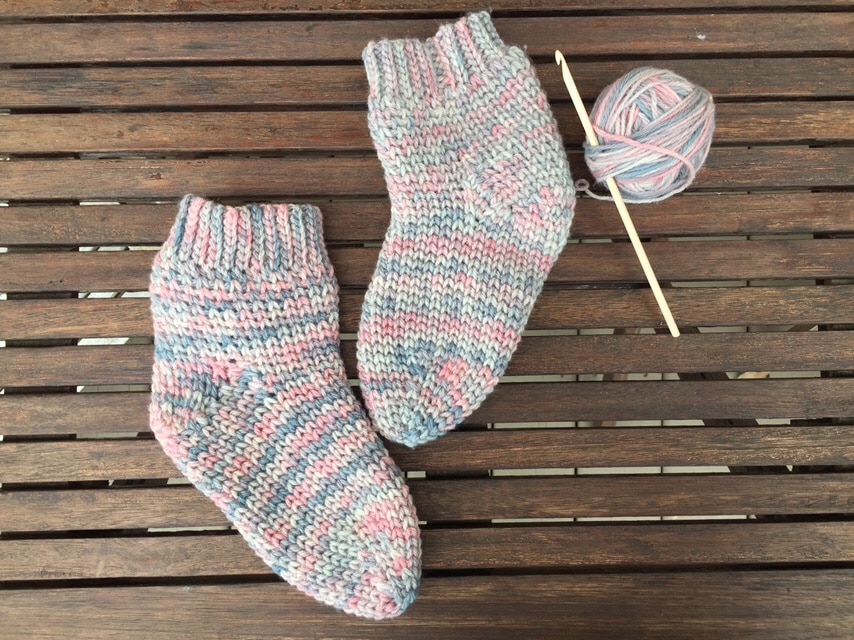
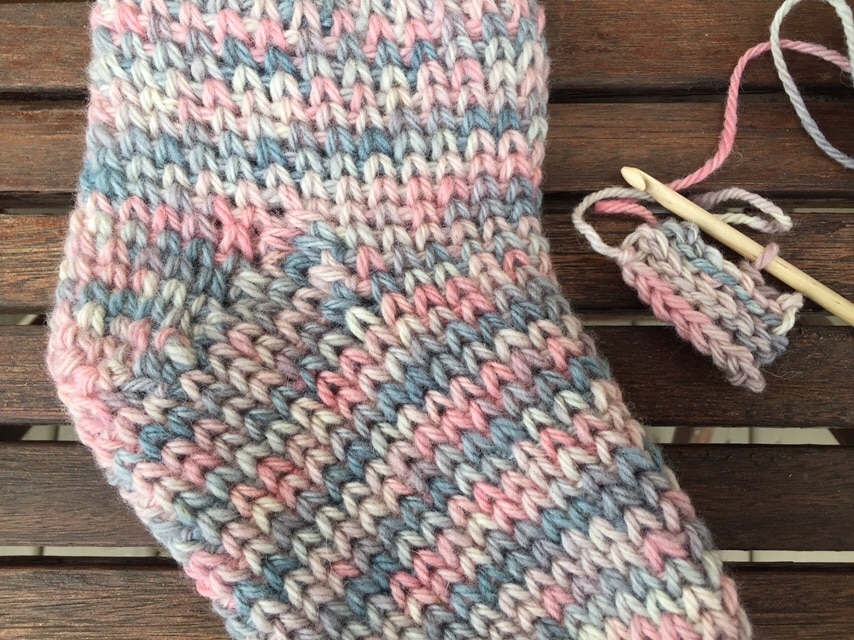
These Cozy Cottage Socks are made by a simple design. And the pattern is available in multiple sizes.
I love socks! Especially cozy ones! So I thought it only fitting (and practical) to design myself a pair for our cold cottage floors.
I have always loved socks. I loved getting them for Christmas when I was younger, I still love to get them now. So after I picking up this %100 Canadian Wool by Fleece and Harmony and playing with it for a bit, I knew exactly what I wanted to make!
Wool Socks!
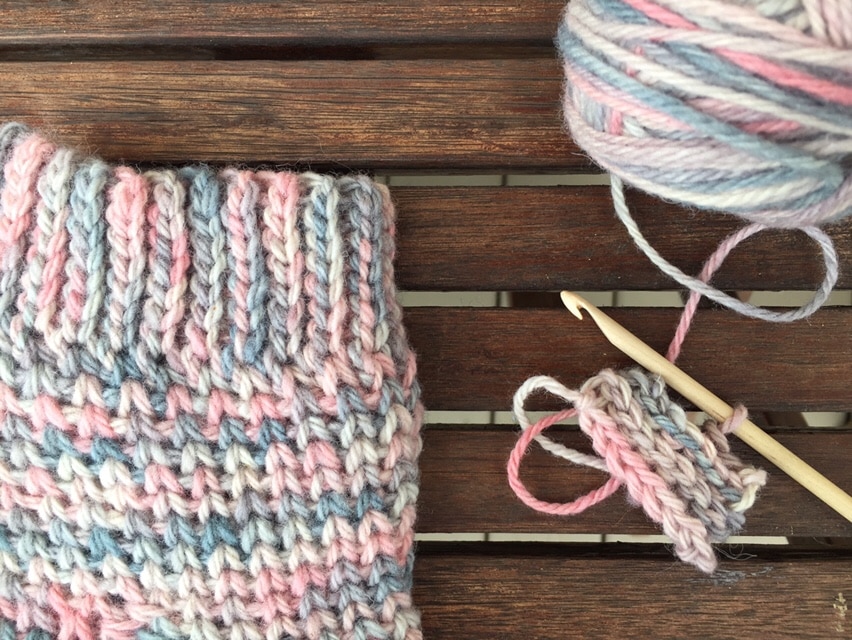
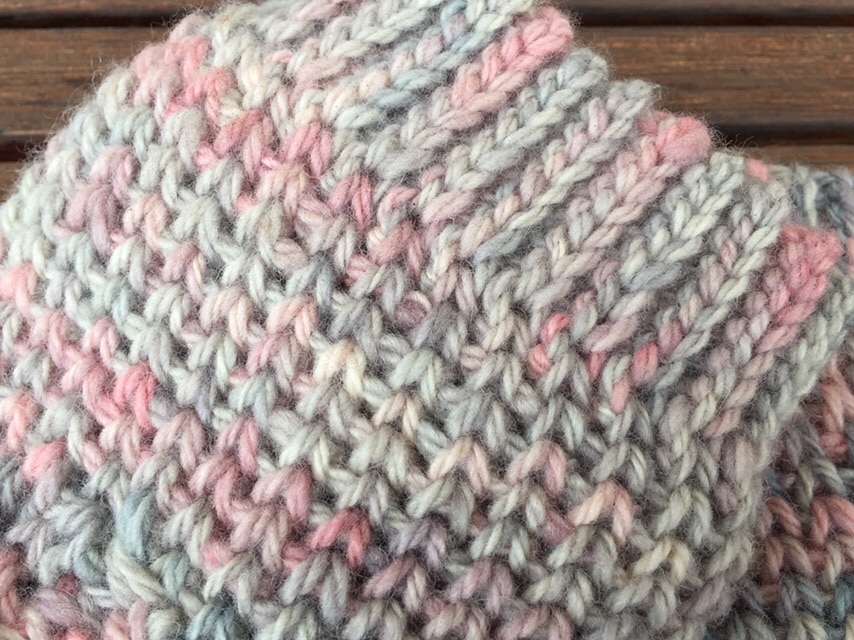
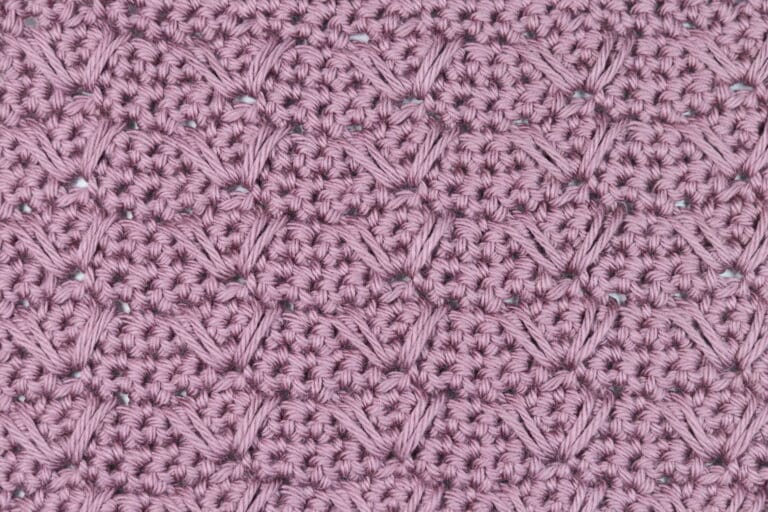
The Knit Look:
If you’ve been following me for a little bit you’ll know that I absolutely love the knit look, but I’m terrible at knitting. I was so happy when I discovered the knit stitch (Sometimes called the waistcoat stitch). I could have that knit look I desired in my crochet! (Feel free to browse my blog for more great patterns featuring this stitch such as my Canada Toque or Classic Christmas Stocking).
The Yarn by Fleece and Harmony:
These socks are crocheted in a beautiful %100 Canadian made wool by Fleece and Harmony. They are out of Prince Edward Island in Canada and I had the pleasure of visiting them last summer while on holidays with my family. You can check out some of their gorgeous yarns HERE and best of all, they ship!
The wool I used is worsted (10 WPI) weigh yarn so these socks are quite cozy, great as reading socks and for lounging around the house or cottage. Once you get the hang of the knit stitch, I am sure that you will love them.
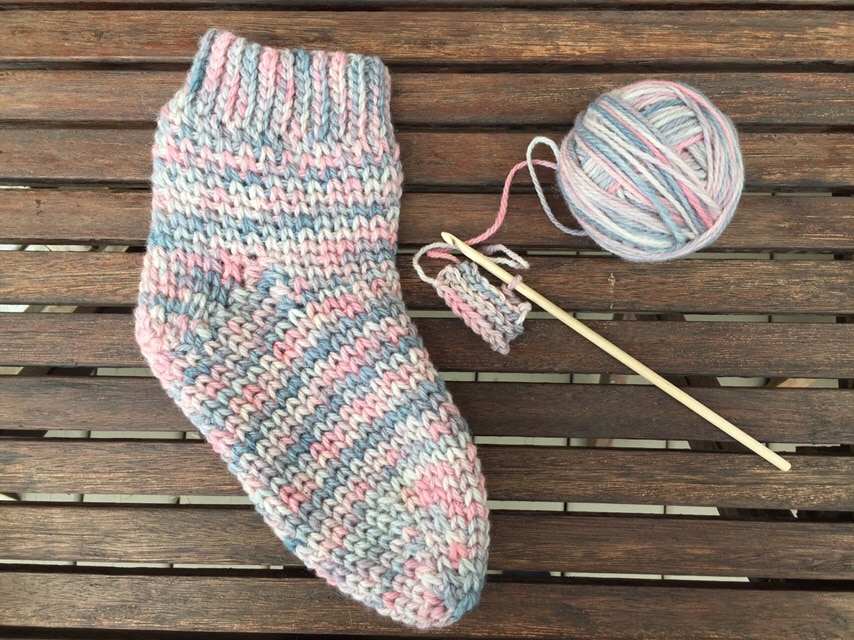
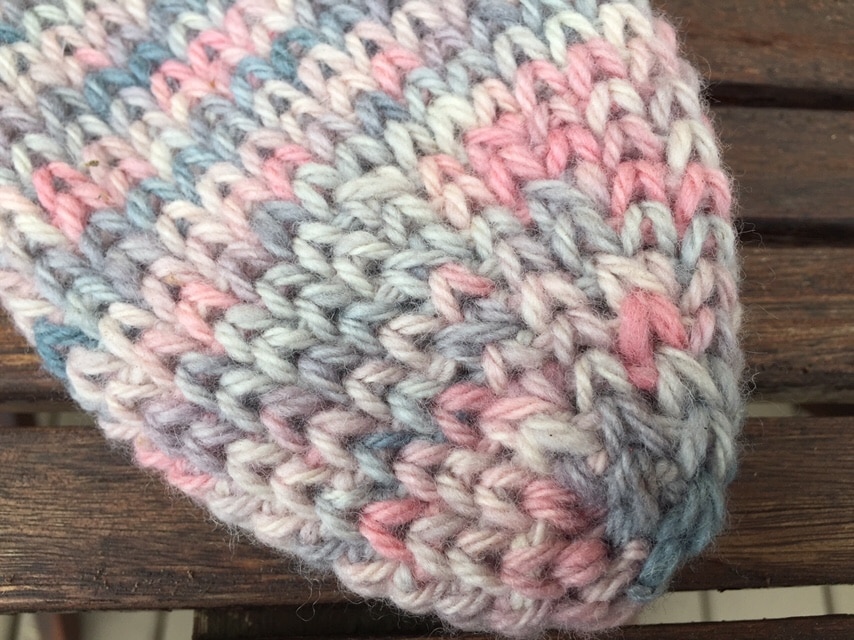
The Design:
I’ve designed them with a shorter cuff, I you would like to make them longer, you may do so, just remember to take into account the extra yarn you will need.
The pattern includes three women’s sizes: shoe size 5/6, 7/8, 9/10.
Following the written pattern you will find a handy video tutorial where I will make the smallest size for you.
Pattern PDFs are available!
If you would like to save this pattern to your Ravelry or Etsy shops, or purchase a convenient ad free pdf, you may do through the links below:
Click here for the Cozy Cottage Socks on Etsy
Click here for the Cozy Cottage Socks on Ravelry
Thank you so much for stopping by and supporting me at Rich Textures Crochet! Feel free to follow me on Facebook (HERE).
Happy Crocheting!
Sarah
Cozy Cottage Socks:
Skill Level: Intermediate
Gauge: 12 sts x 16 rows = 4 inches
Finished Sizes:
Women’s shoe size 5/6: Foot Length approx. 8.5 inches, Foot cir. 7 inches, Height 4 inches
Women’s shoe size 7/8: Foot Length approx. 9 inches, Foot cir. 8 inches, Height 4 inches
Women’s shoe size 9/10: Foot Length approx. 10.5 inches, Foot cir. 9 inches, Height 5 inches
Yarn: 2 skeins Signature Yarn by Fleece and Harmony™ (3 skeins for shoe size 9/10), colour Gale
(100% Wool; 100g, 10 WPI, 150 yards; weight: 4 – Medium – Worsted)
Hook: 6 mm (US 10/J)
Notions: Yarn Needle, stitch markers (x3), measuring tape
Stitches and Abbreviations:
Blo – Back Loop Only
Ch – Chain
Ks – Knit Stitch (Also called the Waistcoat Stitch)
Ks2tog – knit stitch two together
Lp – loop
Lps – loops
Rpt – Repeat
Sc – Single Crochet
Sk – Skip
Sl st – Slip stitch
Yo – Yarn over
Pattern Notes:
– Pattern is written in American English terms.
– The cuff and heel are worked in rows while the rest of the sock is worked in rounds.
– Do not join at the end of a round unless otherwise stated. Instead use a stitch marker
to mark the first stitch and move it up as your work progresses.
– Weave in ends as needed.
– All rounds are worked with the right side facing.
– Feel free to shorten or lengthen the cuff of the sock to your desired length.
Free Crochet Pattern:
Women’s Shoe Size 5/6:
Cuff (Worked in Rows and in the blo unless stated otherwise):
Ch 9.
Row 1: Working in the blo (continue unless otherwise stated), sl st in the 2nd ch from hook and in each ch across. Turn. (8 sl sts)
Row 2: Ch 1, working in blo, sl st in the 1st st and in each across. Turn. (8 sts)
Rows 3 – : Rpt row 2 until cuff measures approximately 6.5 inches (approximately 8.5 inches when stretched).
Fold cuff so that two ends of ribbed strip meet and working in the front loop of the side closest to you and back loop on the opposite, working through both thicknesses, sl st across. (8 sl sts).
Turn work so that you are working along the long edge.
Rnd 1: Ch 1, evenly and LOOSELY crochet 25 sc all the way around. Do not join, continue working in rounds. (25 sc)
Rnd 2: Ks in the first st (mark this stitch) and in each st around. Do not join. (25 ks)
Rnds 3 – : Continue working in rounds, rpt rnd 2 until work from beginning measures 4 inches (you may choose to make it longer or shorter and adjust the amount of yarn needed as necessary). Do not join. Do not fasten off.
Heel (worked in rows):
With right side facing
Row 1: Ch 1, Ks in the first 13 sts across. Turn, leaving remaining unworked. (13 sts)
Row 2: Ch 1, ks in each across. Turn. (13 sts)
Rows 3-7: Rpt row 2.
Heel Shaping:
Row 8: Ks in the next 9 sts. Turn leaving remaining unworked. (9 sts)
Row 9: Ks in the next 5 sts. Turn leaving remaining unworked. (5 sts)
Row 10: Ks in the next 4 sts, ks2tog over the next st and in the next on the row below, ks in the next st. Turn. (6 sts)
Row 11: Ks in the next 5 sts, ks2tog over the next st and in the next on the row below, ks in the next st. Turn. (7 sts)
Row 12: Ks in the next 6 sts, ks2tog over the next st and in the next on the row below, ks in the next st. Turn. (8 sts)
Row 13: Ks in the next 7 sts, ks2tog over the next st and in the next on the row below, ks in the next st. Do not Turn. (9 sts)
Foot (worked in rounds):
Rnd 1: Working along the side of the heel, work 6 sc evenly, sc2tog placing the first leg in the side of heel and second in the ks on the row below, ks in the next st (mark this st) and in the next 8 sts (mark the last one made), ks2tog over the next st and in side of heel, evenly work 6 sc evenly alongside of heel, ks in the next 6 sts across the top. Do not turn. Do not join. Move stitch markers up as work progresses. (29 sts)
Rnd 2: Ks in each st to the st before the first stitch marker, ks2tog over the next 2 sts, ks in each st to the next stitch marker, ks2tog over next 2 sts, ks in each st to stitch before next marker. Do not turn. Do not join.
Continue to repeat rnd 2 (decrease rnd) until only 25 sts remain. Remove the first stitch marker (leaving in the second) and work continuous rnds of ks in each stitch around until work from heel measures 4.5 inches.
Toe (Worked in rnds):
Laying the sock flat with the sole of the foot down, find the two sides of the foot and mark each with a stitch marker (There should be 12 sts between the two markers across the bottom of the foot). Move stitch markers as work progresses.
Rnd 1: Ks in the first st, ks2tog over the next 2 sts, ks in each st to next st marker, ks2tog over the next two sts, ks in each to next marker. (23 sts)
Next Rnds: Repeat Rnd 1 working decreases in each stitch marker until 11 sts remain.
Next Rnd: Ks in each st around. Join in first ks with a sl st. Fasten off leaving a long tail.
Turn work inside out, sew tow seam. Weave in ends.
Repeat this pattern for second Sock.
Women’s Shoe Size 7/8:
Cuff (Worked in Rows and in the blo unless stated otherwise):
Ch 9.
Row 1: Working in the blo (continue unless otherwise stated), sl st in the 2nd ch from hook and in each ch across. Turn. (8 sl sts)
Row 2: Ch 1, working in blo, sl st in the 1st st and in each across. Turn. (8 sts)
Rows 3 – : Rpt row 2 until cuff measures approximately 7 inches (approximately 9 inches when stretched).
Fold cuff so that two ends of ribbed strip meet and working in the front loop of the side closest to you and back loop on the opposite, working through both thicknesses, sl st across. (8 sl sts).
Turn work so that you are working along the long edge.
Rnd 1: Ch 1, evenly and LOOSELY crochet 27 sc all the way around. Do not join, continue working in rounds. (27 sc)
Rnd 2: Ks in the first st (mark this stitch) and in each st around. Do not join. (27 ks)
Rnds 3 – : Continue working in rounds, rpt rnd 2 until work from beginning measures 4 inches (you may choose to make it longer or shorter and adjust the amount of yarn needed as necessary). Do not join. Do not fasten off.
Heel (worked in rows):
With right side facing
Row 1: Ch 1, Ks in the first 13 sts across. Turn, leaving remaining unworked. (13 sts)
Row 2: Ch 1, ks in each across. Turn. (13 sts)
Rows 3-7: Rpt row 2.
Heel Shaping:
Row 8: Ks in the next 9 sts. Turn leaving remaining unworked. (9 sts)
Row 9: Ks in the next 5 sts. Turn leaving remaining unworked. (5 sts)
Row 10: Ks in the next 4 sts, ks2tog over the next st and in the next on the row below, ks in the next st. Turn. (6 sts)
Row 11: Ks in the next 5 sts, ks2tog over the next st and in the next on the row below, ks in the next st. Turn. (7 sts)
Row 12: Ks in the next 6 sts, ks2tog over the next st and in the next on the row below, ks in the next st. Turn. (8 sts)
Row 13: Ks in the next 7 sts, ks2tog over the next st and in the next on the row below, ks in the next st. Do not Turn. (9 sts)
Foot (worked in rounds):
Rnd 1: Working along the side of the heel, work 6 sc evenly, sc2tog placing the first leg in the side of heel and second in the ks on the row below, ks in the next st (mark this st) and in the next 10 sts (mark the last one made), ks2tog over the next st and in side of heel, evenly work 6 sc evenly alongside of heel, ks in the next 6 sts across the top.
Do not turn. Do not join.
Move stitch markers up as work progresses. (31 sts)
Rnd 2: Ks in each st to the st before the first stitch marker, ks2tog over the next 2 sts, ks in each st to the next stitch marker, ks2tog over next 2 sts, ks in each st to stitch before next marker. Do not turn. Do not join.
Continue to repeat rnd 2 (decrease rnd) until only 27 sts remain. Remove the first stitch marker (leaving in the second) and work continuous rnds of ks in each stitch around until work from heel measures 5 inches.
Toe (Worked in rnds):
Laying the sock flat with the sole of the foot down, find the two sides of the foot and mark each with a stitch marker (There should be 13 sts between the two markers across the bottom of the foot). Move stitch markers as work progresses.
Rnd 1: Ks in the first st, ks2tog over the next 2 sts, ks in each st to next st marker, ks2tog over the next two sts, ks in each to next marker. (25 sts)
Next Rnds: Repeat Rnd 1 working decreases in each stitch marker until 13 sts remain.
Next Rnd: Ks in each st around. Join in first ks with a sl st. Fasten off leaving a long tail.
Turn work inside out, sew tow seam. Weave in ends.
Repeat this pattern for second Sock.
Women’s Shoe Size 9/10:
Cuff (Worked in Rows and in the blo unless stated otherwise):
Ch 13.
Row 1: Working in the blo (continue unless otherwise stated), sl st in the 2nd ch from hook and in each ch across. Turn. (12 sl sts)
Row 2: Ch 1, working in blo, sl st in the 1st st and in each across. Turn. (12 sts)
Rows 3 – : Rpt row 2 until cuff measures approximately 8 inches (approximately 10 inches when stretched).
Fold cuff so that two ends of ribbed strip meet and working in the front loop of the side closest to you and back loop on the opposite, working through both thicknesses, sl st across. (12 sl sts).
Turn work so that you are working along the long edge.
Rnd 1: Ch 1, evenly and LOOSELY crochet 31 sc all the way around. Do not join, continue working in rounds. (31 sc)
Rnd 2: Ks in the first st (mark this stitch) and in each st around. Do not join. (31 ks)
Rnds 3 – : Continue working in rounds, rpt rnd 2 until work from beginning measures 5 inches (you may choose to make it longer or shorter and adjust the amount of yarn needed as necessary). Do not join. Do not fasten off.
Heel (worked in rows):
With right side facing
Row 1: Ch 1, Ks in the first 15 sts across. Turn, leaving remaining unworked. (15 sts)
Row 2: Ch 1, ks in each across. Turn. (15 sts)
Rows 3-7: Rpt row 2.
Heel Shaping:
Row 8: Ks in the next 11 sts. Turn leaving remaining unworked. (11 sts)
Row 9: Ks in the next 7 sts. Turn leaving remaining unworked. (7 sts)
Row 10: Ks in the next 6 sts, ks2tog over the next st and in the next on the row below, ks in the next st. Turn. (8 sts)
Row 11: Ks in the next 7 sts, ks2tog over the next st and in the next on the row below, ks in the next st. Turn. (9 sts)
Row 12: Ks in the next 8 sts, ks2tog over the next st and in the next on the row below, ks in the next st. Turn. (10 sts)
Row 13: Ks in the next 9 sts, ks2tog over the next st and in the next on the row below, ks in the next st. Do not Turn. (11 sts)
Foot (worked in rounds):
Rnd 1: Working along the side of the heel, work 7 sc evenly, sc2tog placing the first leg in the side of heel and second in the ks on the row below, ks in the next st (mark this st) and in the next 12 sts (mark the last one made), ks2tog over the next st and in side of heel, evenly work 7 sc evenly alongside of heel, ks in the next 6 sts across the top.
Do not turn. Do not join. Move stitch markers up as work progresses. (35 sts)
Rnd 2: Ks in each st to the st before the first stitch marker, ks2tog over the next 2 sts, ks in each st to the next stitch marker, sc2tog over next 2 sts, ks in each st to stitch before next marker. Do not turn. Do not join.
Continue to repeat rnd 2 (decrease rnd) until only 31 sts remain. Remove the first stitch marker (leaving in the second) and work continuous rnds of ks in each stitch around until work from heel measures 6 inches.
Toe (Worked in rnds):
Laying the sock flat with the sole of the foot down, find the two sides of the foot and mark each with a stitch marker (with 15 stitch between the two markers along bottom of sock toe opening). Move stitch markers as work progresses.
Rnd 1: Ks in the first st, ks2tog over the next 2 sts, ks in each st to next st marker, ks2tog over the next two sts, ks in each to next marker. (29 sts)
Next Rnds: Repeat Rnd 1 working decreases in each stitch marker until 17 sts remain.
Next Rnd: Ks in each st around. Join in first ks with a sl st. Fasten off leaving a long tail.
Turn work inside out, sew tow seam. Weave in ends.
Repeat this pattern for second Sock.
Video Tutorial:
Please check out this free video tutorial for the Cozy Cottage Socks below:


These are adorable! I’ve never made socks before but my feet are screaming for these!
I love wearing mine 🙂
Thank you for this amazing pattern and video tutorial. I have pinned it and plan on making a bunch for Christmas gifts.
I love it when I find Canadian designers!!!! You have a new follower!
Thank you so much 🙂
This is so beautifully explained, in a sweet voice.
After knee surgery, I was looking for a pattern for knee [not leg!] warmers. I modified your pattern by omitting the toe, making a few rounds of ribbing, and making the heel turn as large as I needed to accomodate my knee. I want to thank you for demonstrating how to do short rows in crochet. Love your website — I keep it bookmarked.
Sara I am trying to crochet the grey sock for 0 to 6 months, I can not see the written pattern for those, would you please put it under the sock video. Thank you I LOVE YOUR VIDEOS, VERY WELL EXPLAINED.