
This post contains affiliate links. This means that when you purchase through one of these links we will receive a small commission at no additional cost to you. Thank you for supporting Rich Texture Crochet!
Christmas is one of my favourite times of the year.
I love the sounds of my kid’s excitement at the first snow and the thought of Christmas presents, the smells of wood fires burning, crisp air and Christmas baking, the sights of the lights and Christmas Decor. Although many in Canada (including myself) choose not to decorate their homes until after November 11th, our Remembrance Day, it doesn’t mean that the planning has not started. And if you crochet you are well on your way to planning this year’s holiday decorations and handmade Christmas presents.
I love the classic red and white look. And even more I love the look of knit and feel of knit at Christmas. But I will be the first to confess that I am a terrible knitter. I can knit basic socks with four needles, but that’s it. Scarves, afghans – no way! For some reason four needles is easier than two for me, I can’t keep my rows and edges straight. And if I make a mistake in knitting? The only way i can fix it is if it take it all out… so I don’t typically knit, but once I got the hang of the crochet knit stitch (aka the waistcoat stitch), my desire for that knit look was solved!
I have come to love the knit stitch. It was a bit tricky to get the hang of. You really have to keep your tension loose in order to be able to guide the hook through the center of the sc. And for someone like myself who typically crochets a tight tension, at first the loose stitches felt sloppy. But trust me, keep the tension loose, and I’m sure you’ll come to love this under appreciated stitch too!
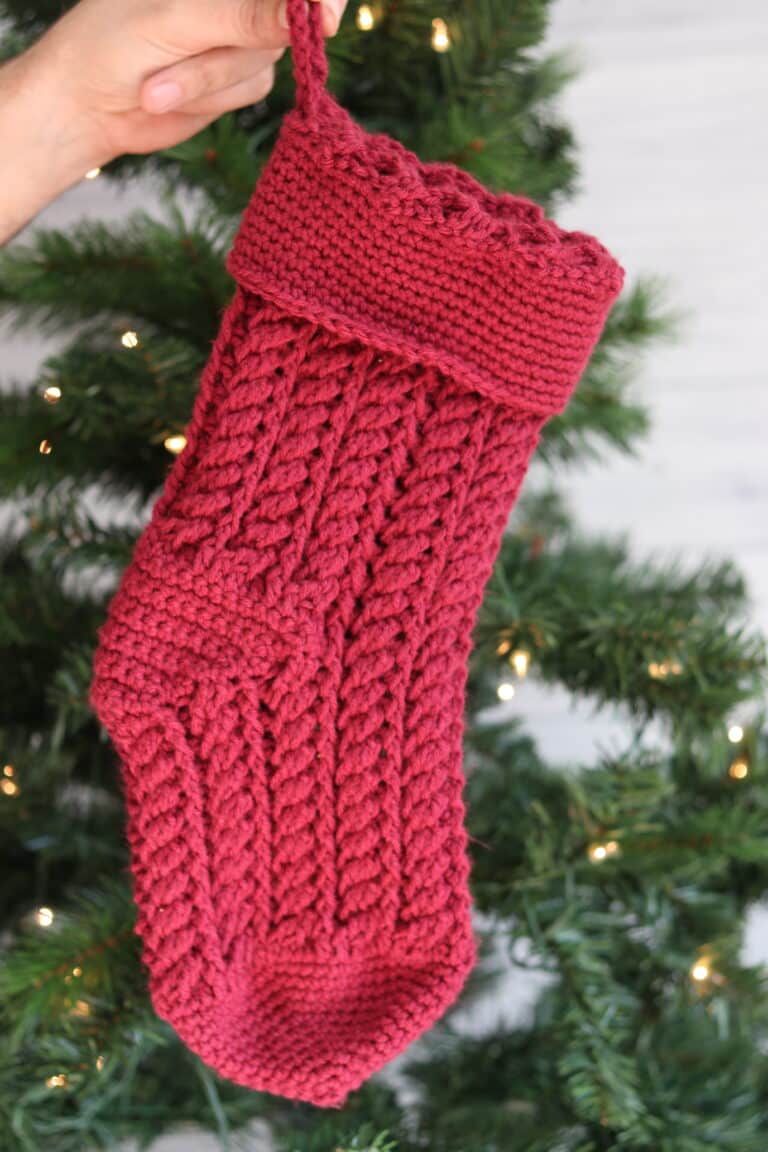
All that being said, here it is! A Classic Christmas Stocking featuring the knit stitch. Grab a cup of coffee (or beverage of choice), a 6 mm hook, worsted weight yarn and maybe turn on some Christmas music. I hope you enjoy this classic stocking as much as I do!
Would you like a cozy stocking using a super bulky weight yarn? You may want to check out this one here: Home for Christmas Stocking – Free Crochet Pattern
This website is supported by ads which allows me to offer this pattern for free on my blog. Would you like a convenient ad free, download and go PDF (which also includes photo tutorial for the knit stitch)? You may purchase one for $2.50 CAD in my shops:
Etsy – https://www.etsy.com/ca/listing/555682694/classic-christmas-stocking-crochet
Ravelry: https://www.ravelry.com/patterns/library/classic-christmas-stocking-7
Stay in Touch!
I would love to keep in touch! Feel free to join Rich Textures Crochet on Facebook (https://www.facebook.com/RichTextures/)
Instagram here: https://www.instagram.com/RichTexturesCrochet/
YouTube here: https://www.youtube.com/c/RichTexturesCrochet/
Happy Crocheting!
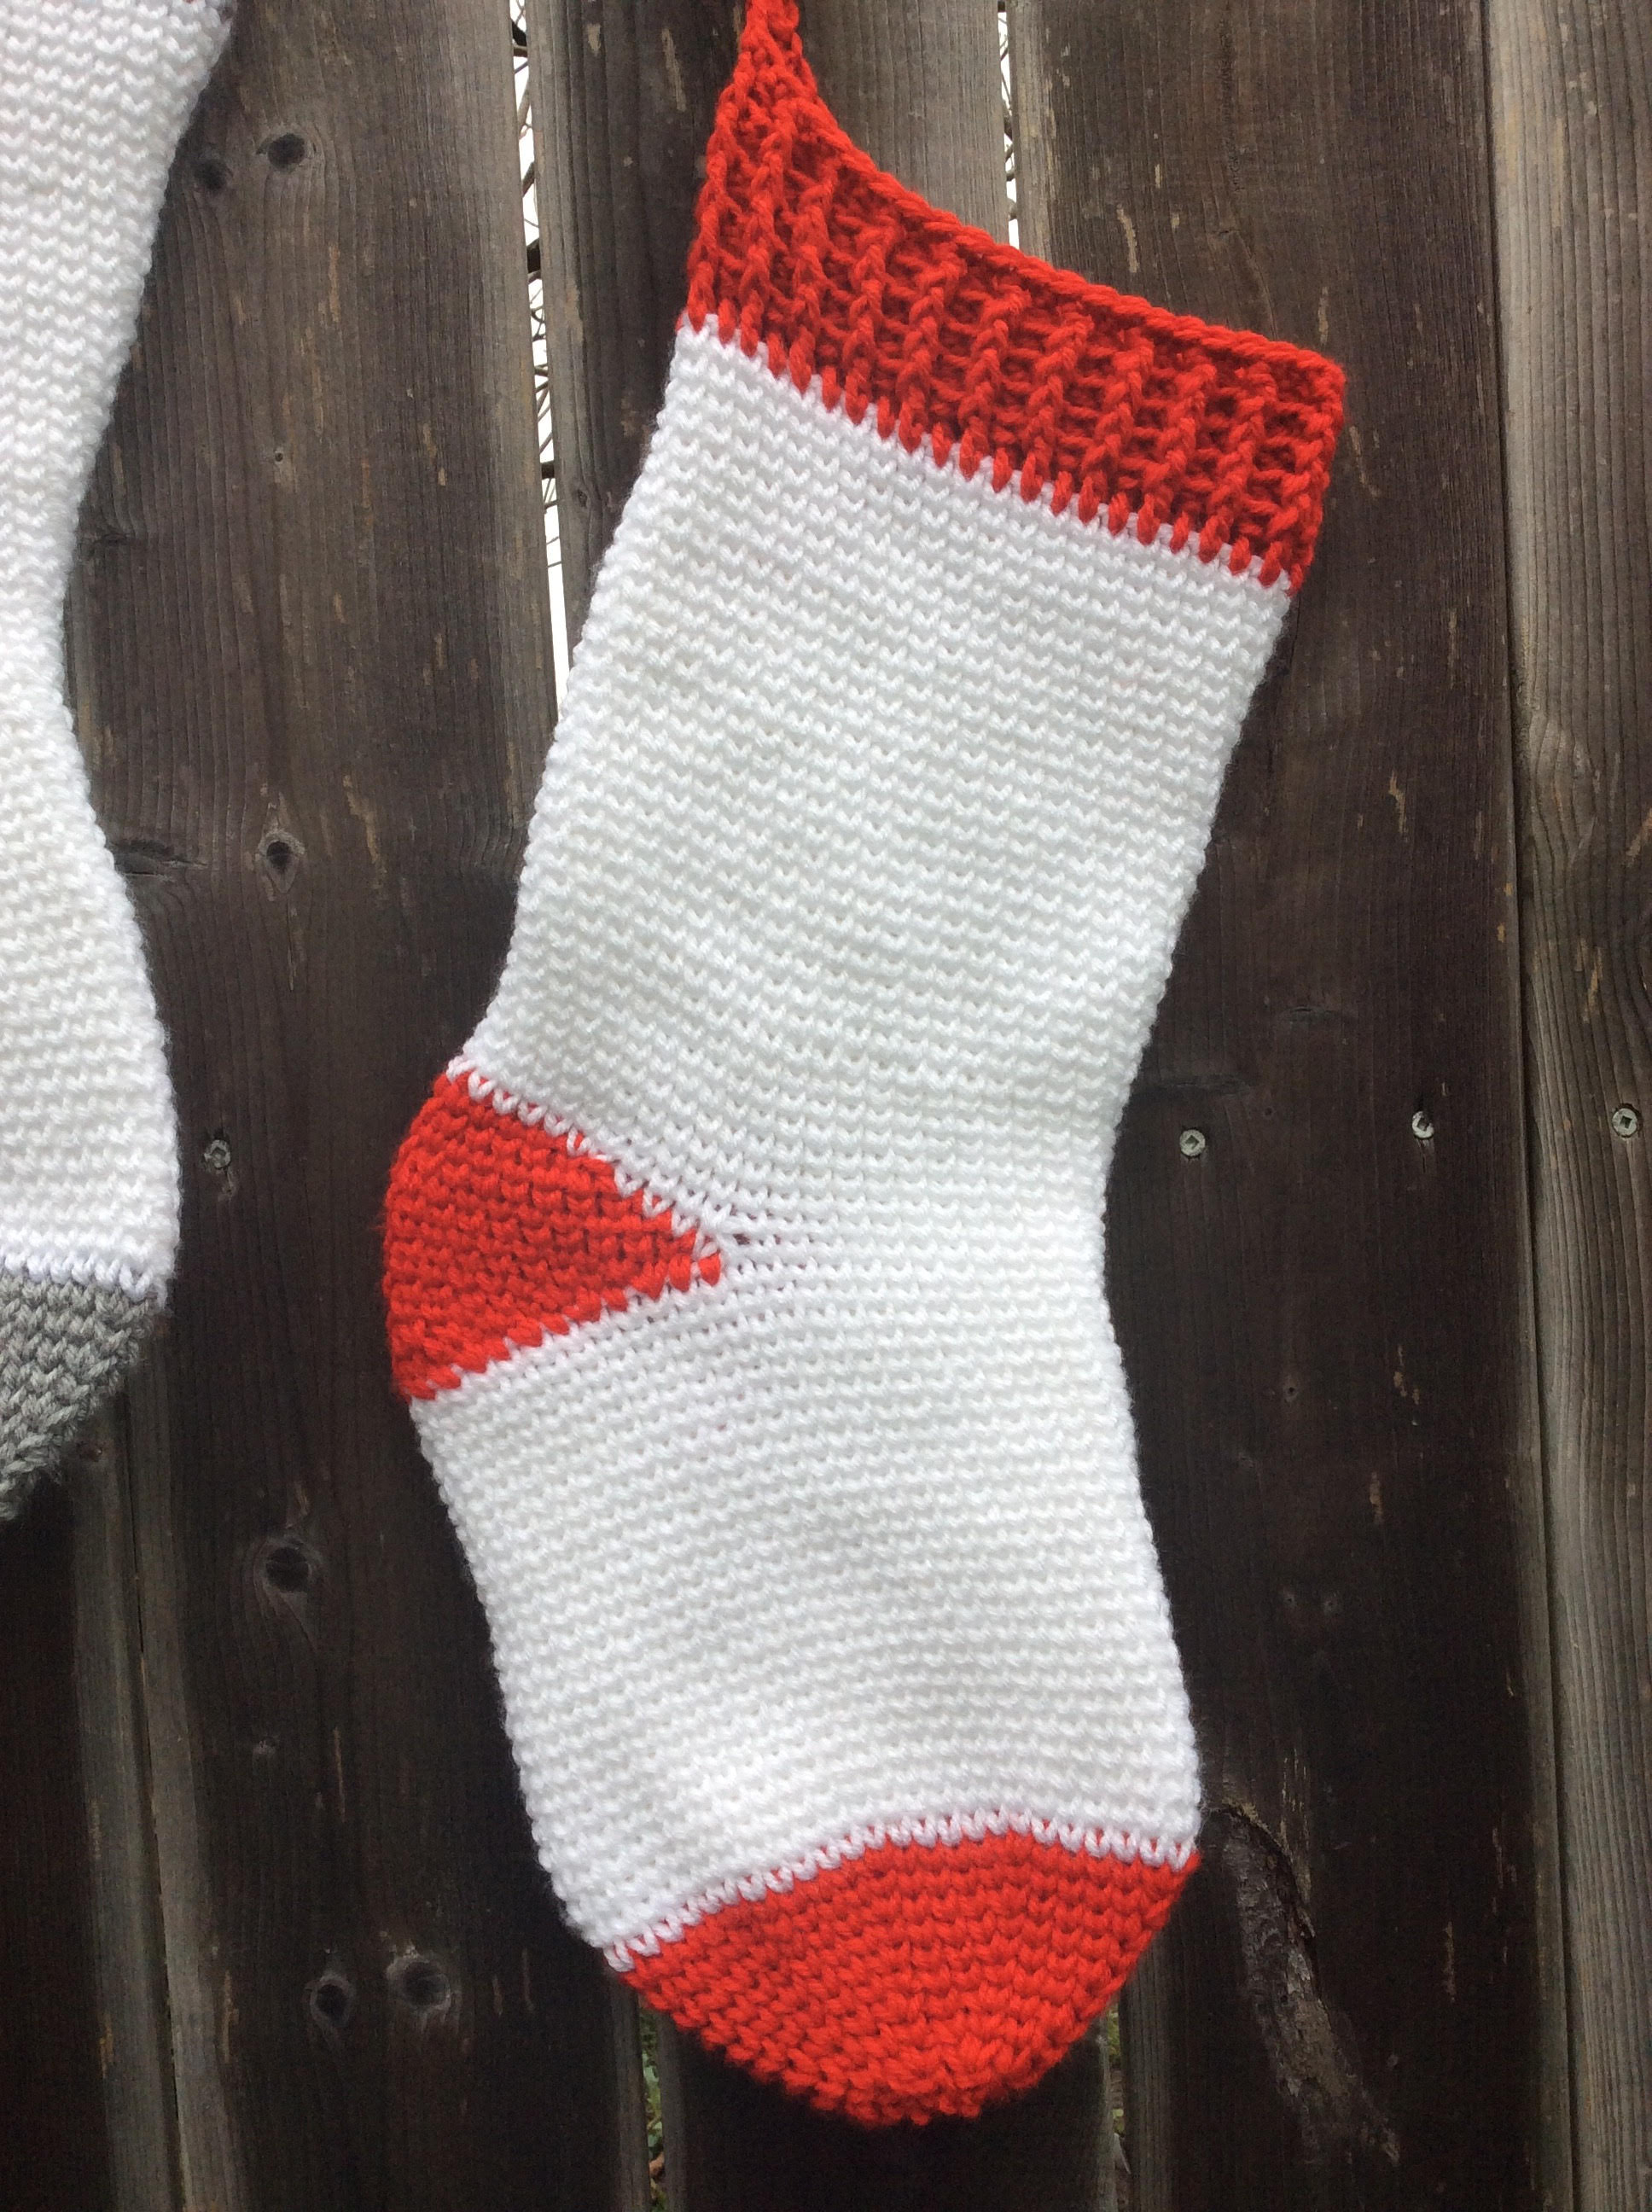
Classic Christmas Stocking:
Skill Level: Easy
Gauge: 3 ks x 4 rows = 1 inch
Finished Size: 14.5 inch circumference at top, 20 inches long.
Yarn: Bernat Premium™ (%100 acrylic, 198g., 329m/360 yds). Worsted Weight. 2 Balls, Colours shown include: White (colour A), Red and Soft Gray Heather (Colour B). You may substitute this yarn for any other worsted weight yarn.
Hook: Size J-10 (6 mm) Hook. Adjust hook size if necessary to obtain correct gauge.
Notions: Yarn Needle.
Stitches and Abbreviations:
Ch – Chain
Bpdc – Back post double crochet
Dc – Double Crochet
Fpdc – Front post double crochet
Knit Stitch (ks) – Also called the “waistcoat stitch,” the knit stitch is a single crochet worked through the middle of the single crochet or knit stitch of the previous round. Because you are working your stitch through the middle of the stitch in the previous round and pulling your loop up through the center, a knit look is created.
Knit Stitch 2 together (ks2tog) – Work the ks2tog as you would the sc2tog, but working through the space in the stitch of the previous round that you would typically work a knit stitch.
Rpt – Repeat
Sc – Single Crochet
Sk – Skip
Sl st – Slip stitch
Pattern Notes:
- Pattern is written in American English terms.
- Pattern is worked in rounds from the toe of the sock to the cuff.
- The Heel Shaping is worked in rows.
- Ch 1 at beg of rnd does not count as sc or ks.
- Ch 2 at beg of rnd does not count as dc.
- Do not turn work unless indicated otherwise.
- Weave in ends as needed.
- I find the knit stitch works best when your tension is kept quite loose. Loose stitches allow for you to insert the hook in the proper space more easily.
Free Crochet Pattern:
Pattern:
Toe:
With Colour B, Ch 8. Being careful not to twist ch, join with a sl st in first chain to make a round.
Rnd 1: Ch 1, sc in each ch around. Join with a sl st in first sc. (8 sc)
Rnd 2: Ch 1, 2 ks in each st around. Join with a sl st in the first ks. (16 ks)
Rnd 3: Ch 1, ks in each st around. Join with a sl st in the first ks. (16 ks)
Rnd 4: Ch 1, *2 ks in first st, 1 ks in the next. Repeat from * around. Join with a sl st in the first ks. (24 ks)
Rnd 5: Ch 1, ks in each st around. Join with a sl st in the first ks. (24 ks)
Rnd 6: Ch 1, *2 ks in the first st, 1 ks in the next 2 sts. Repeat from * around. Join with a sl st in the first ks. (32 ks)
Rnd 7: ks in each st around. Join with a sl st in the first ks. (32 ks)
Rnd 8: Ch 1, *2 ks in the first st, 1 ks in the next 3 sts. Repeat from * around. Join with a sl st in the first ks. (40 ks)
Rnd 9: ks in each st around. Join with a sl st in the first ks. (40 ks)
Rnd 10: Ch 1, *2 ks in the first st, 1 ks in the next 4 sts. Repeat from * around. Join with a sl st in the first ks. Fasten off, switch to colour A. (48 ks)
Rnd 11: With Colour A, Ch 1, ks in each st around. Join with a sl st in the first ks. (48 ks)
Continue, repeating rnd 11 until work from toe measures 9 inches. Fasten off.
Heel Shaping (Worked in rows):
From joining space of previous round, count 3 stitches to the right, and, with colour B, join yarn with a sl st.
Row 1: Ch 1, ks in the next 4 sts, sl st in the nexy st, leaving the remaining sts unworked, turn. (4 ks, 1 sl st)
Row 2: Sk first sl st, sl st in the next ks, ks in each of the next 7 sts, sl st in the next st, turn. (7 ks, 2 sl sts)
Row 3: Sk first sl st, sl st in next st, ks in each of the next 7 sts, ks in the same st as sl st of row 1, ks in the next st, sl st in the next st, turn. (9 ks, 2 sl sts)
Row 4: Sk first sl st, sl st in next st, ks in each of the next 9 sts, ks in the same st as sl st of row 2, ks in the next st, sl st in the next st, turn. (11 ks, 2 sl sts)
Row 5: Sk first sl st, sl st in next st, ks in each of the next 11 sts, ks in the same st as sl st of row 3, ks in the next st, sl st in the next st, turn. (13 ks, 2 sl sts)
Row 6: Sk first sl st, sl st in next st, ks in each of the next 13 sts, ks in the same st as sl st of row 4, ks in the next st, sl st in the next st, turn. (15 ks, 2 sl sts)
Row 7: Sk first sl st, sl st in next st, ks in each of the next 15 sts, ks in the same st as sl st of row 5, ks in the next st, sl st in the next st, turn. (17 ks, 2 sl sts)
Row 8: Sk first sl st, sl st in next st, ks in each of the next 17 sts, ks in the same st as sl st of row 6, ks in the next st, sl st in the next st, turn. (19 ks, 2 sl sts)
Row 9: Sk first sl st, sl st in next st, ks in each of the next 19 sts, ks in the same st as sl st of row 7, ks in the next st, sl st in the next st, turn. (21 ks, 2 sl sts)
Row 10: Sk first sl st, sl st in next st, ks in each of the next 21 sts, ks in the same st as sl st of row 8, ks in the next st, sl st in the next st, turn. (23 ks, 2 sl sts)
Row 11: Sk first sl st, sl st in next ks, ks in next 21 sts, sl st in next st, turn. (21 ks, 2 sl sts)
Row 12: Sk first sl st, sl st in next ks, ks in next 19 sts, sl st in next st, turn. (19 ks, 2 sl sts)
Row 13: Sk first sl st, sl st in next ks, ks in next 17 sts, sl st in next st, turn. (17 ks, 2 sl sts)
Row 14: Sk first sl st, sl st in next ks, ks in next 15 sts, sl st in next st, turn. (15 ks, 2 sl sts)
Row 15: Sk first sl st, sl st in next ks, ks in next 13 sts, sl st in next st, turn. (13 ks, 2 sl sts)
Row 16: Sk first sl st, sl st in next ks, ks in next 11 sts, sl st in next st, turn. (11 ks, 2 sl sts)
Fasten off.
Leg (Worked in Rnds):
Rnd 1: At center back of heel, join colour A with a sl st. Ks in same as joining, ks in the next 11 sts, ks2tog over the next two sts, ks in the next 19 sts, ks2tog over the next 2 sts, ks in next 11 sts. Do not turn. Do not join, but continue to work in rnds. (42 ks, 2 ks2tog)
Continue to 1 ks in each st around until work from back of heel measures 8 inches. Fasten off. Join Colour B with a sl st in joining st.
Cuff (Worked in Rnds):
Rnd 1: Ch 2, dc in each ks around. Join with a sl st in first dc. (44 dc)
Rnd 2: Ch 2, *bpdc in first dc, fpdc in next dc. Rpt from * around. Join with a sl st in first st.
Rnd 3-5: Rpt Rnd 2.
Rnd 6: Ch 1, sc in each st around. Do not join or fasten off, but for hanger ch 10, join with a sl st in next sc. Turn, working in ch, sl st in each ch, join with a sl st in previous sc of rnd 6.
Fasten off. Weave in ends.
The photographs and pattern contained in this document are the property of Rich Textures Crochet. This pattern is for personal use only.
No unauthorized reproduction, in whole or in part, or distribution of this pattern or content is permitted. ALL FINISHED PRODUCTS from this pattern can be used for local sales and sold online.
Thank you so much for supporting Rich Textures Crochet! To stay in touch or see more great products, be sure to visit me on Facebook and Instagram (Rich Textures Crochet). Thanks again! Happy Crocheting!


Love this classic stocking with the knit stitch. I Find having a video is very helpful. Can I use the comfort and joy video as a guide using the knit stitch instead?