
This post contains affiliate links. This means that when you purchase through one of these links we will receive a small commission at no additional cost to you. Thank you for supporting Rich Texture Crochet!
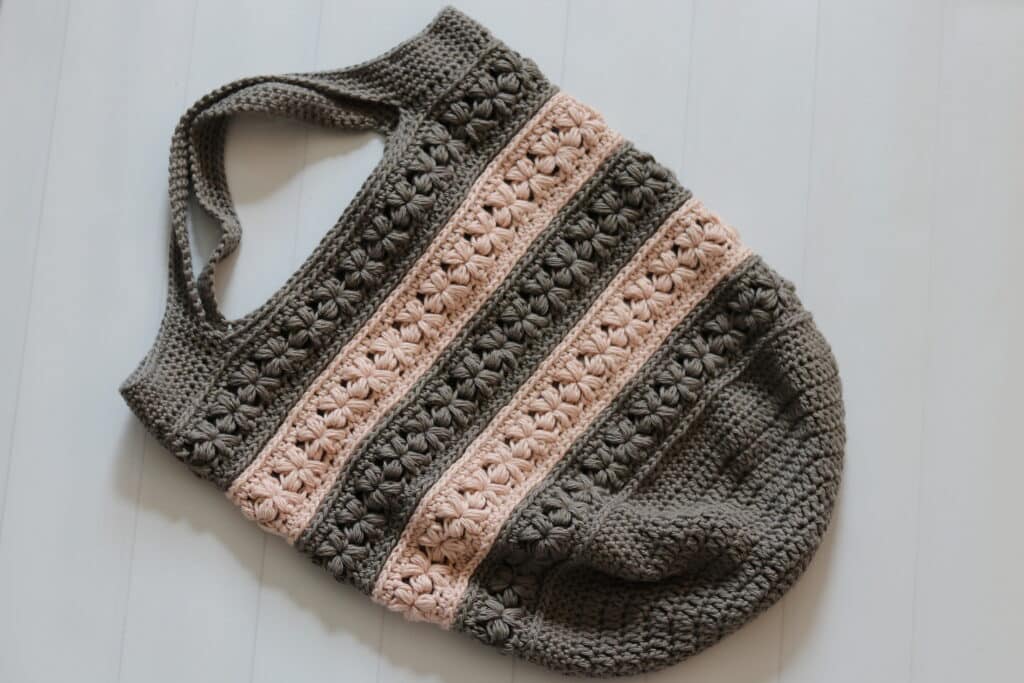
Out of all of the five market bags in this Fall Market Bag Crochet Along, this Jasmine Market Bag is my favourite!
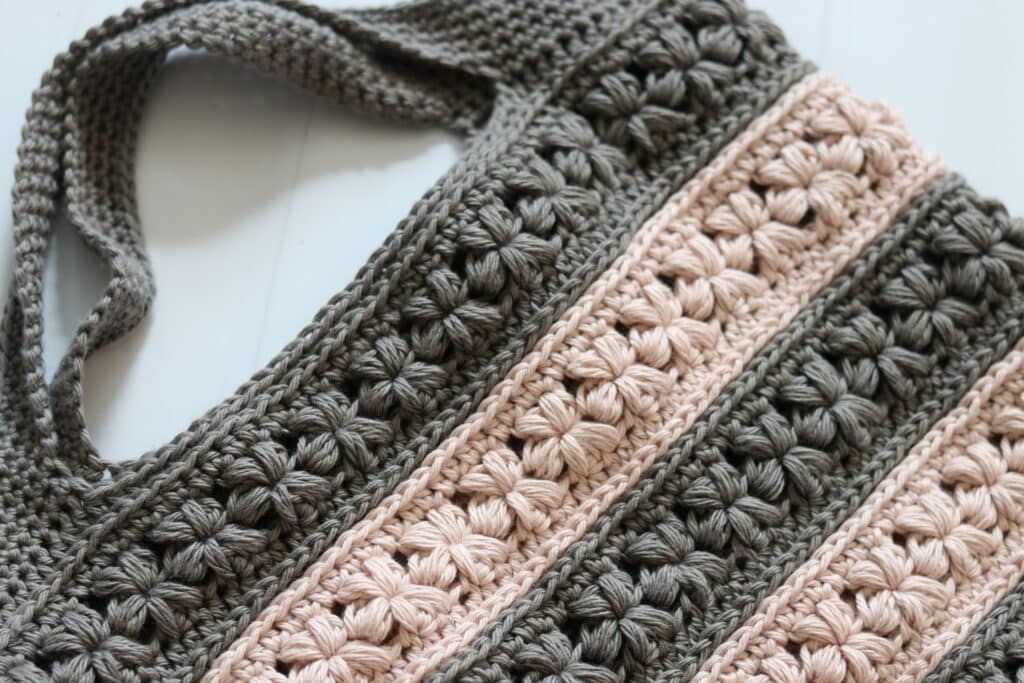
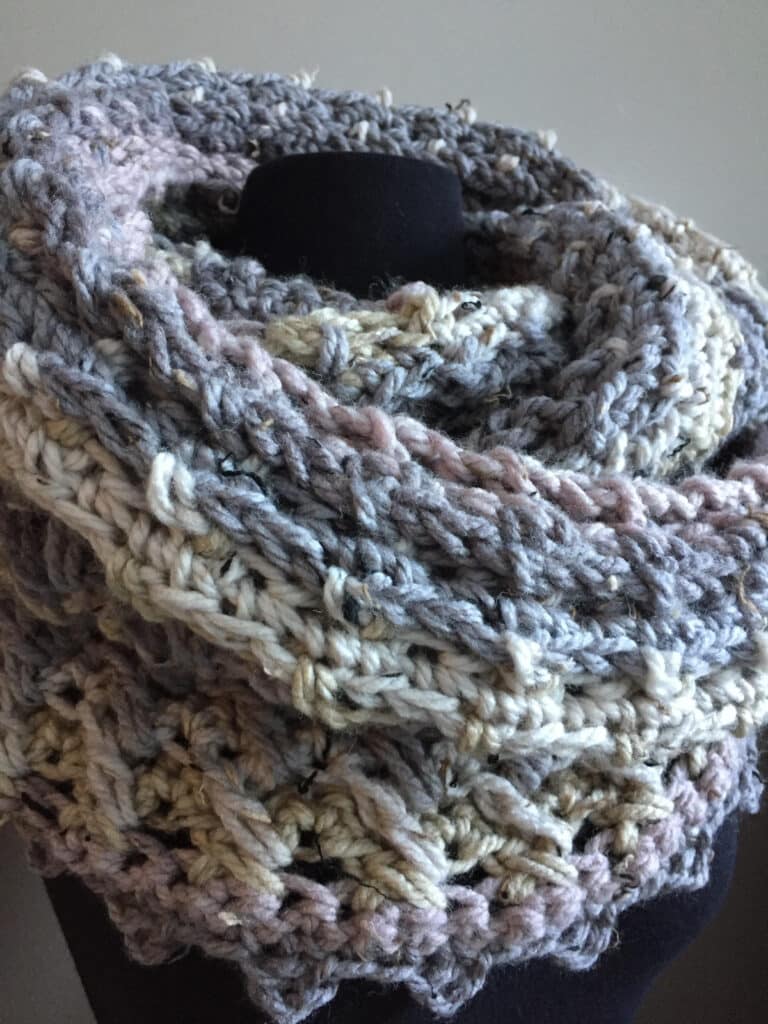
And it’s my favourite for so many reasons! First of all I love the flower stitches that are featured in this bag. They are big, they are pretty and they have lots of texture! The other reason why I love this bag is that once you learn how to make the flower blossoms, this bag works up so quickly! The flowers are fairly easy to get the hang of and as they are big it means that you are covering more distance in less time! Even though the bag works up quite quickly, it looks as though it belongs in a boutique!
This post contains affiliate links. This means that when you make a purchase through one of these links, Rich Textures Crochet will earn a small commission at no additional cost to yourself. Thank you for supporting Rich Textures Crochet!
The Fall Marvellous Market Bag Crochet Along:
This is week five of the Fall Marvellous Market Bag crochet along and I’m so glad that you have joined me on this adventure! If you missed any of the previous four crochet market bags, don’t worry! The patterns will remain here on Rich Textures Crochet, in my shops and on my YouTube channel. The previous market bags are as follows:
Lavender Market Bag Crochet Pattern
Rosemary Market Bag Crochet Pattern
Uptown Market Bag Crochet Pattern
Downtown Market Bag Crochet Pattern
It has been absolutely wonderful to see all of your finished bags so far and I look forward to seeing more in the months to come!
The Construction:
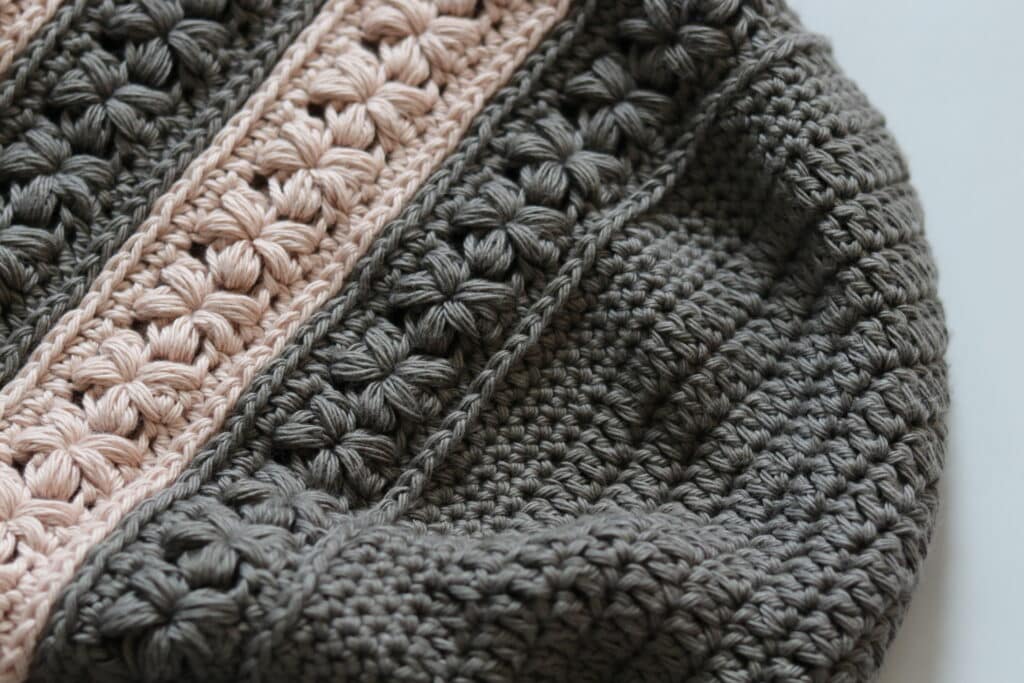
Like all of the bags in this crochet along, the Jasmine Market Bag is worked from the bottom up and all as one piece. I have worked the bag in two different colours using a 100% cotton yarn. I highly recommend a cotton yarn for your market bags as it is durable and will not stretch as an acrylic will. Plus, with cotton, there are so many colours to choose from
PDF Copies are also Available:
The pattern will be written out in full below and will forever remain free when viewed here on Rich Textures Crochet, and the written instruction will be followed by a video tutorial. However if you would like to add this pattern to your library or purchase an ad free PDF, you may do so from either my Etsy or Ravelry Shop linked below:
Click Here for the Jasmine Market Bag on Etsy
Click Here for the Jasmine Market Bag on Ravelry
Thank you for stopping by and I look forward to seeing you again soon! If you have not already, I invite you to sign up for my e-newsletter so that you will be notified each time I release a new free crochet pattern or stitch tutorial.
Happy Crocheting!
Sarah
Jasmine Market Bag Crochet Pattern:
Skill Level: Easy
Gauge: 16 sc x 16 rows = 4 inches
Finished Size: Approximately 16 x 14.5 inches laid flat, excluding the handles.
Yarn: Pima Cotton by Lion Brand® (186 yds/170 m; 100g/3.5 oz; 100% cotton; (4) worsted weight). You will need 2 balls Pewter (Colour A), 1 ball Mademoiselle (Colour B)
Hook: Size H/8 (5 mm) hook.
Notions: Yarn Needle
Stitches and Abbreviations:
3rd lp – Third Loop (This can be found at the back of your hdc st. It is the loop that can be found just under the back loop only of the hdc.)
Ch – Chain
Dc – Double Crochet
Hdc – Half Double Crochet
Puff St – Puff Stitch ([yo, insert your hook in the st indicated, yo and draw up a loop] 3 times, yo and draw through all lps on your hook. Puff Stitch made)
Puff Cl – Puff Cluster ([yo, insert your hook in the next st, yo and draw up a loop] 3 times, sk the next st, [yo, insert your hook in the next st, yo and draw up a loop] 3 times, yo and draw through all lps on your hook, ch 1 to close. Puff Cluster Stitch made)
Rpt – Repeat
Sc – Single Crochet
Sk – Skip
Sl st – Slip stitch
Yo – Yarn over
Pattern Notes:
- Pattern is written in American English terms.
- Pattern is worked in rounds, as one piece, from the bottom up to the handles.
- Ch 1 at beginning of row does not count as stitch.
- Weave in ends as needed.
- Do not turn unless stated otherwise.
Free Crochet Pattern:
Bag Bottom:
With Colour A, Ch 4
Rnd 1: 11 dc in the 4th ch from hook (ch 3 counts as a st), join with a sl st in the 1st st. (12 Sts)
Rnd 2: Ch 3, dc in the same st as joining, 2 dc in each st all the way around, join with a sl st in the 1st st. (24 sts)
Rnd 3: Ch 3, 2 dc in the next st, * dc in the next, 2 dc in the next st; Rpt from * around, join with a sl st in the 1st st. (36 sts)
Rnd 4: Ch 3, dc in the next st, 2 dc in the next st, * dc in each of the next 2 sts, 2 dc in the next st; Rpt from * around, join with a sl st in the 1st st. (48 sts)
Rnd 5: Ch 3, dc in each of the next 2 sts, 2 dc in the next st, * dc in each of the next 3 sts, 2 dc in the next st; Rpt from * around, join with a sl st in the 1st st. (60 sts)
Rnd 6: Ch 3, dc in each of the next 3 sts, 2 dc in the next st, * dc in each of the next 4 sts, 2 dc in the next st; Rpt from * around, join with a sl st in the 1st st. (72 sts)
Rnd 7: Ch 3, dc in each of the next 4 sts, 2 dc in the next st, * dc in each of the next 5 sts, 2 dc in the next st; Rpt from * around, join with a sl st in the 1st st. (84 sts)
Rnd 8: Ch 3, dc in each of the next 5 sts, 2 dc in the next st, * dc in each of the next 6 sts, 2 dc in the next st; Rpt from * around, join with a sl st in the 1st st. (96 sts)
Rnd 9: Ch 3, dc in each of the next 6 sts, 2 dc in the next st, * dc in each of the next 7 sts, 2 dc in the next st; Rpt from * around, join with a sl st in the 1st st. (108 sts)
Rnd 10: Ch 3, dc in each of the next 7 sts, 2 dc in the next st, * dc in each of the next 8 sts, 2 dc in the next st; Rpt from * around, join with a sl st in the 1st st. (120 sts)
Rnds 11-13: Ch 1, sc in each st all the way around, join with a sl st in the 1st st. (120 sts)
Sides:
Rnd 1: Ch 1, hdc in the 1st st and in each st around, join with a sl st in the 1st st.
Rnd 2: Ch 1, working in the 3rd lp, hdc in each st around, join with a sl st in the 1st st.
Rnd 3: Ch 1, *Puff cl over the next 3 sts, ch 1, puff st in the top of the puff cl just made, sk the next st; Rpt from * around, join with a sl st in the top of the 1st puff cl.
Rnd 4: Ch 1, [Puff St, ch 1, puff st] in the top of the 1st puff cl, ch 1, *[puff st, ch 1, puff st] in the top of the next puff cl, ch 1; rpt from * around, join with sl st in the top of the 1st puff st.
Rnd 5: Ch 1, hdc in the top of each puff st and in each ch-1 sp around. Join with a sl st in the 1st st. Fasten off colour A. Join colour B in the 1st st.
Rnd 6: With colour B, ch 1, working in the 3rd lp, hdc in each st around, join with a sl st in the 1st st.
Rnds 7-11: With colour B repeat rounds 2-6 switching back to colour A for rnd 5.
Rnds 12-21: Repeat Rnds 2-11.
Rnds 22-26: With Colour A, repeat rnds 2-6, do not change colour in rnd 5 repeat, but continue working with colour A.
Top and Handles:
Rnd 1: With Colour A, ch 1, sc in each of the next 30 sts, ch 40, sk the next 30 sts, sc in each of the next 30 sts, ch 40, sk the next 30 sts, join with a sl st in the 1st st.
Rnds 2-6: Ch 1, sc in each st (including each ch st) around. Join with a sl st in the 1st st. (140 sts)
Fasten off, weave in your ends.
Video Tutorial:
The photographs and pattern contained in this document are the property of Rich Textures Crochet.
This pattern is for personal use only.
No unauthorized reproduction, in whole or in part, or distribution of this pattern or content is permitted. ALL FINISHED PRODUCTS from this pattern can be used for local sales and sold online.
Thank you so much for supporting Rich Textures Crochet! To stay in touch or see more great products, be sure to visit me on Facebook and Instagram (Rich Textures Crochet). Thanks again! Happy Crocheting!


How many stitches are there supposed to be once the sides start? I’ve restarted this bag several times and it just shrinks and cinches as you do the sides since you’re losing stitches each time you make the flowers. I’ve re-watched and re-read everything here and it makes no sense
There are 120 stitches when the sides start