
This post contains affiliate links. This means that when you purchase through one of these links we will receive a small commission at no additional cost to you. Thank you for supporting Rich Texture Crochet!
Decorate your home this season with this adorable and easy to make Wooden People Ornament.
I love these little people! They are so simple and a great way to use up scrap yarn. They can be simply displayed on a mantle or table in a holiday village or you may use a piece of thread to make a hanger and hang them on your tree!

These little Wooden People Ornaments measure approximately 3.5 inches tall. You will need a 3 inch wooden peg doll (I purchased mine on Amazon), a couple of small wooden beads, a mini pompom and a little bit of a fingering weight yarn.
For my Wooden People Ornament crochet pattern I used a little bit of Valley Tweed Yarn by Rowan Yarn and a 3 mm crochet hook. In the free video tutorial below you will see me using a Birchwood Crochet Hook also by Rowan Yarn.
The dolls clothing is worked in three separate pieces and then hot glued on to the peg doll. They are so simple and so cute! You may wish to embellish them further by adding buttons or other little decorative accessories. Play around with colour a little bit and work them in multiple colours. There are so many ways you can customize them.

The Christmas in July Blog Hop
This crochet pattern is featured in the 2024 Christmas in July Blog Hop being hosted by Underground Crafter. This month long crochet along will get you started with your holiday gifting and decorating including free crochet, knit and sewing patterns. I highly recommend that you check it out here: 2024 Christmas in July Make Along.

PDF Copies of this crochet pattern are also available:
This Wooden People Ornament crochet pattern will be written out in full below followed by a video tutorial. If, however, you wish to add this pattern to your library and purchase an ad free PDF you may do so through my Etsy and Ravelry Shops below:
CLICK HERE FOR THE WOODEN PEOPLE ORNAMENT ON ETSY
CLICK HERE FOR THE WOODEN PEOPLE ORNAMENT ON RAVELRY
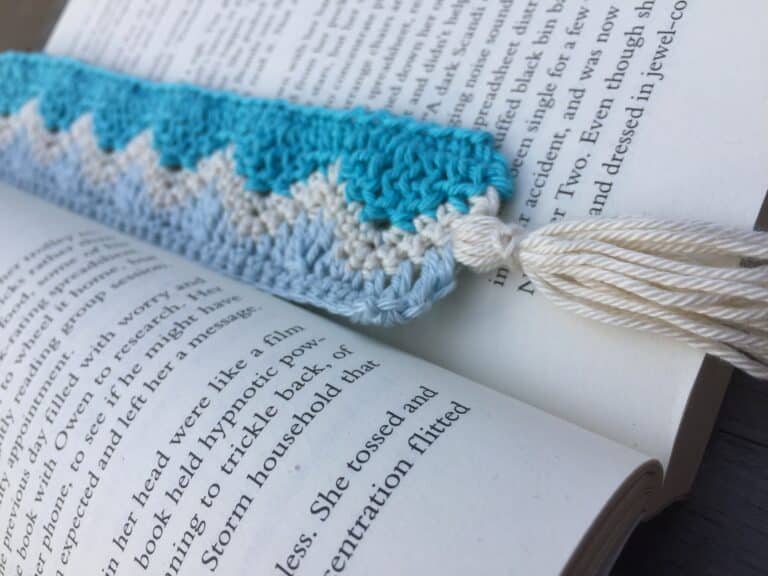
Thank you so much for stopping by! If you have not already, I invite you to sign up for my email newsletter below. If you are looking for another easy crochet pattern that uses the Valley Tweed Yarn, you may wish to check out the Evergreen Bookmark. Do you need another crochet Christmas ornament? Check out the Rustic Village Ornament.
Enjoy and Happy crocheting!
Sarah

Wooden People Ornament Crochet Pattern:
Skill Level: Easy
Gauge: 7 sts x 5 rows = 1 inch
Finished Size: Approximately 3.5 inches tall inches tall
Yarn: Valley Tweed by Rowan® (100% Wool; 1.75 oz, 50 g; 226 yds, 207 m). Fingering Weight (3). Approximately 30 yards.
Hook: Size 11 (3 mm) hook.
Notions: Yarn Needle, wooden peg doll approximately 2 inches tall, hot glue, small wooden beads x 2, mini pompom, piece of thread (for a hanger should you wish to hang the ornament), stitch marker.
Stitches and Abbreviations:
Blo – Back Loop Only
Ch – Chain
Lp – loop
Rpt – Repeat
Sc – Single Crochet
Sc2tog – Single Crochet Two Stitches Together
Sk – Skip
Sl st – Slip stitch
Sp – space
Yo – Yarn over
Pattern Notes:
- Pattern is written in American English terms.
- Pattern is worked in rounds.
- Pattern is worked as 3 separate pieces – the body, arms and hat. Work all three pieces separately and then use hot glue to attach pieces to the wooden peg doll.
- Ch 1 at beginning of row does not count as a Sc.
- Weave in ends as needed

Free Crochet Pattern:
Body:
Ch 20, being careful to not twist the chain, join with a sl st in the first st to make a ring.
Rnd 1: Ch 1, sc in the 1st and in each st around. Join with a sl st in the 1st st. Do not turn.
Rnd 2: Ch 1, working in the blo, sc in the first st and in each st around. Do not join but continue to work continuous rounds using a stitch marker to make the first st.
Rnds 3-12: Working in the blo, sc in each st around. Move stitch marker as work progresses. At the end of round 12, join with a sl st in the 1st st.
Fasten off, weave in your ends.
Fold the top down and the bottom up of the body tube about 1 cm so that the wrong side is facing. Slip the Body over the bottom half of the wooden peg doll and use a small amount of hot glue to secure into place.
Arms:
Ch 8, being careful to not twist the chain, join with a sl st in the first st to make a ring.
Rnd 1: Ch 1, sc in the 1st and in each st around. Join with a sl st in the 1st st. Do not turn.
Rnd 2: Ch 1, working in the blo, sc in the first st and in each st around. Do not join but continue to work continuous rounds using a stitch marker to make the first st.
Rnds 3-15: Working in the blo, sc in each st around. Move stitch marker as work progresses. At the end of round 15, join with a sl st in the 1st st.
Fasten off, weave in your ends.
Use a small amount of hot glue to glue a small wooden bead into each end of the arms tube (to create “hands”). Wrap the arm tube around the back of the Wooden peg body and use a small amount of hot glue to secure in place.
Hat:
Ch 16, being careful to not twist the chain, join with a sl st in the first st to make a ring.
Rnd 1: Ch 1, sc in the 1st and in each st around. Join with a sl st in the 1st st. Do not turn.
Rnd 2: Ch 1, working in the blo, sc in the first st and in each st around. Do not join but continue to work continuous rounds using a stitch marker to make the first st.
Rnds 3-4: Working in the blo, sc in each st around. Move stitch marker as work progresses.
Rnd 5: Working in the blo,*sc in each of the next 6 sts, sc2tog; Rpt from * around.
Rnd 6: Working in the blo,*sc in each of the next 5 sts, sc2tog; Rpt from * around.
Rnd 7: Working in the blo,*sc in each of the next 4 sts, sc2tog; Rpt from * around.
Rnd 8: Working in the blo, *sc in each of the next 3 sts, sc2tog; Rpt from * around.
Rnd 9: Working in the blo, *sc in each of the next 2 sts, sc2tog; Rpt from * around.
Fasten off leaving a long tail and use the long tail to sew the top of the hat closed, weave in your ends.
Use a small amount of hot glue to glue a mini pompom to the top of the hat. Turn the bottom of the hat up so that the wrong side is facing about 1/2 cm. Using a small amount of hot glue, secure the hat to the head of the wooden peg doll.
If desired, take a small amount of thread and thread it through the top of the hat and then tie to make a hanger.
Video Tutorial:


Where did you get the arms? I only see the head and body doll but no arms on Amazon.com.
Hello! The arms are actually created by working a long narrow tube and then glueing two small beads into the holes on each end for the “hands.”