
This post contains affiliate links. This means that when you purchase through one of these links we will receive a small commission at no additional cost to you. Thank you for supporting Rich Texture Crochet!
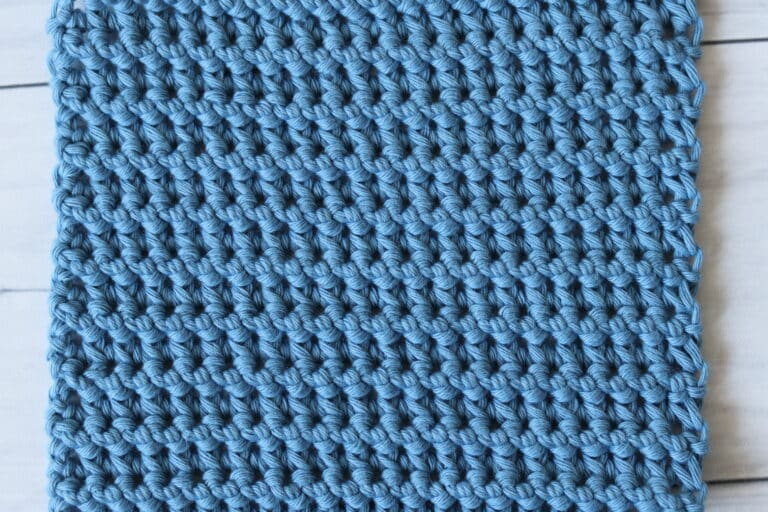
The Picot Waves Stitch pattern is a unique looking stitch that really stands out when worked in two different colours!
Overall this stitch pattern is fairly simple to work as it is worked in single crochet, double crochet and picot stitches. It’s the picot stitches that create the “wave” look.
There are a number of options for this crochet stitch when it comes to projects. Of course, the Picot Waves stitch would look wonderful in crochet blankets and wash cloths. But it would also add some interest to crochet bags, and perhaps around an edging for a cardigan. I look forward to seeing what you make with it.

Materials for this Tutorial:
For this tutorial today I will be using a small amount of the Basic Stitch Anti Pilling yarn by Lion Brand. It is a soft worsted weight 100% acrylic yarn. The hook shown in the video below is a 5 mm Birchwood Crochet Hook by Rowan Yarn – one of my favourites! However you may use any hook and yarn combination you choose.
Thank you so much for stopping by! If you enjoy the tutorial below, be sure to also check out some of the many other crochet stitch tutorials on my site and pin this for later! You may wish to start with the Slanted Clusters Stitch | How to Crochet.
Picot Waves Crochet Stitch:
Stitches and Abbreviations:
Ch – Chain Stitch
Dc – Double Crochet
Picot – Ch 3, sl st into the 1st st (Note: When working the picot stitch I will often sl st back into the top of the previous st made at the base of the ch-3 for a tighter picot st)
Rpt – Repeat
Sc – Single Crochet Stitch
Sl St – Slip Stitch
Yo – Yarn Over
Pattern Notes:
This stitch is worked in rows in this tutorial and it may be worked in one colour or many. I will be working this pattern in a two colours: A and B.
This pattern is written using American crochet terms.
To begin make a slip knot and make a foundation chain. For this stitch you will need a multiple of 3 stitches for your foundation chain.
For example, with colour A, ch 30.
Row One:
Sc in the 2nd ch from your hook and in each st across. Ch 3 (counts as a dc here and throughout), turn.
Row Two:
Sk the next st, 3 dc in the next st, *sk the next 2 sts, 3 dc in the next st; Rpt from * across until 2 sts remain, sk the next st, dc in the final st. Ch 1, turn.
Row Three:
Sc in the 1st st and in each st across. Switch to colour B in the final st, ch 1, turn.
Row Four:
With colour B, sc in the 1st st and in each st across. Ch 1, turn.
Row Five:
Sc in each of the 1st 2 sts, [sc, picot] into the next st, *sc in each of the next 2 sts, [sc, picot] into the next st; Rpt from * across until 2 sts remain, sc in each of the final 2 sts switching to colour A. Ch 3 (counts as a dc), turn.
Row Six:
Sk the next st, 3 dc in the next st (at the base of the picot st), *sk the next 2 sts, 3 dc in the next st (at the base of the picot st); Rpt from * across until 2 sts remain, sk the next st, dc in the final st. Ch 1, turn.
And that’s it!
For the rest of the pattern repeat rows 3-6 for the pattern. Fasten off, weave in your ends.


Sarah, I always enjoy your tutorials and I love your patterns too. Thank you for all you do and for sharing your knowledge with us newbies!! I have learned so much from you since I started crocheting back in October 2023. I find your youtube channel very useful and your patterns too, Thank you! 🙂 Have a great Sunday!!