
This post contains affiliate links. This means that when you purchase through one of these links we will receive a small commission at no additional cost to you. Thank you for supporting Rich Texture Crochet!
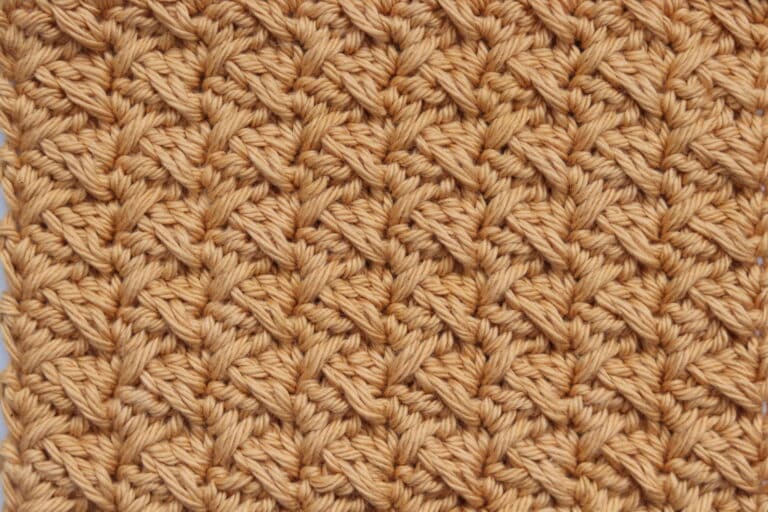
The Grate Stitch crochet pattern is a light weight, mesh design perfect for those lace projects!
I love how simple this Grate stitch is. It is worked using half double crochet stitches, chain stitches and single crochet stitches. This stitch is great for the beginner and more advanced crocheter alike!
The Grate Stitch crochet pattern is a simple two row repeat and you can use the grid-like pattern in almost any design.

The Materials:
For this tutorial today I will be using a small amount of Heatherly by KnitPicks and WeCrochet in a single colour. It is a worsted-weight yarn. You could also work this pattern in two or more colours. I will also be working with a 5 mm (H/8) crochet hook. In the video tutorial below you will see me working with a Birchwood Crochet Hook by Rowan. However, you may use any hook and yarn combination you choose.
Thank you so much for stopping by! If you enjoy the tutorial below, be sure to also check out some of the many other crochet stitch tutorials on my site and pin this for later! You may wish to start with the beautiful Textured Star Stitch Crochet Pattern.
Grate Stitch Crochet Pattern:
Stitches and Abbreviations:
Ch – Chain Stitch
Dc – Double Crochet
Rpt – Repeat
Sl St – Slip Stitch
Yo – Yarn Over
Pattern Notes:
This stitch is worked in rows in this tutorial and it may be worked in one colour or many. I will be working this pattern in a solid colour.
This pattern is written in American crochet terms.
To begin, make a slip knot and make a foundation chain. For this stitch, you will need an even number of stitches for your foundation chain.
For example, ch 30.
Row One:
Sc in the 2nd ch from your hook and in each st cross, ch 2, turn.
Row Two:
Hdc in the next st, *ch 1, sk the next st, hdc in the next st; Rpt frp, * across until you have 1 st remaining, hdc in the final st, ch 1, turn.
Row Three:
Work 2 sc in 1st st, *sk the next hdc, 2 sc in next ch-1; Rpt from * across, sc in top of turning ch, ch 2 turn.
And that’s it!
For the rest of the pattern, repeat 2 and 3. Fasten off, weave in your ends.


Thank you for all your wonderful stitches! Whenever I see a pretty stitch, I try it out on what is my blanket sampler. I do a few rows of the stitch and if I like it, I keep it – if not it’s gone. My sister-in-law recently passed away suddenly and last time I saw her she told me how she wanted to learn to crochet. We had bought the yarn and I eagerly trying to gather easy stitches to show her. I ended up using the yarn on my blanket sampler and have every intention to give it to my brother-in-law once I finish it. Simpler stitches are easier to do with my arthritic hands and are faster to create a big blanket. It will not only keep him warm during our cold winter days but perhaps it will give him a little comfort. So thank you very much for all your wonderful stitches and explanations which are greatly appreciated.