This post contains affiliate links. This means that when you purchase through one of these links we will receive a small commission at no additional cost to you. Thank you for supporting Rich Texture Crochet!
Treat your favourite hanging plants with this easy to crochet Easy Plant Hanger crochet pattern.
Plant hangers are a great way to add depth and height to your indoor or patio garden. They also add texture and colour!
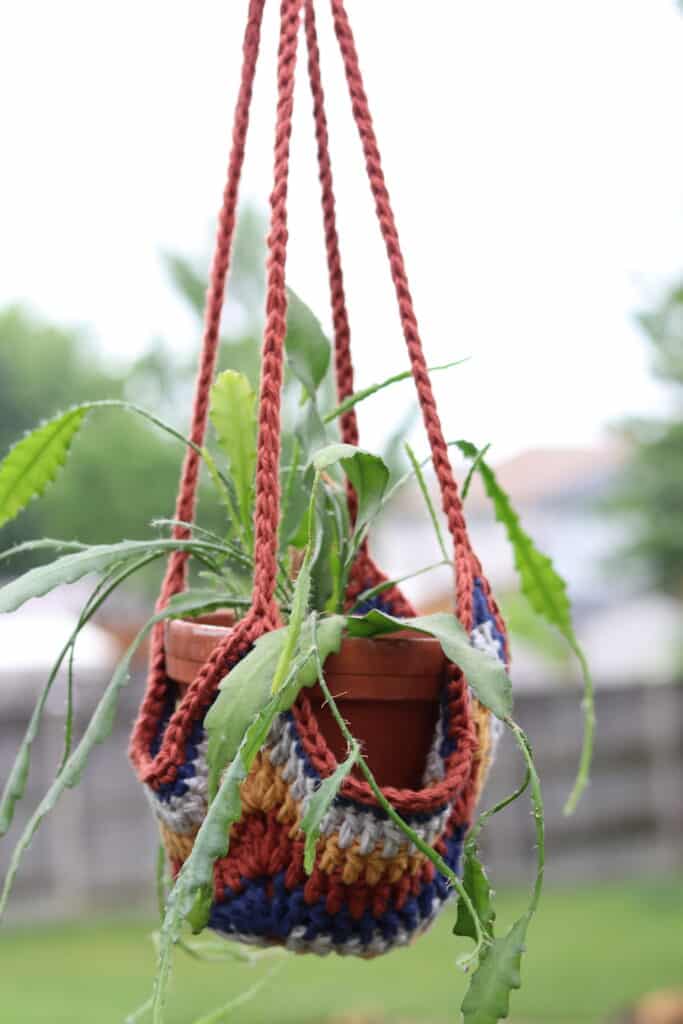
I love gardens, and have a small collection of indoor plants. A little while ago I was given some newly rooted cuttings of an Orchid Cactus. These plants love to have space all the way around them so that they have room to hang their leaves and stems. Once my cuttings grew large enough, I picked out a perfect spot to hang it in a window of my home and set to work making this crochet Easy Plant Hanger. Over the summer I have had it hanging from a pergola on my back deck.

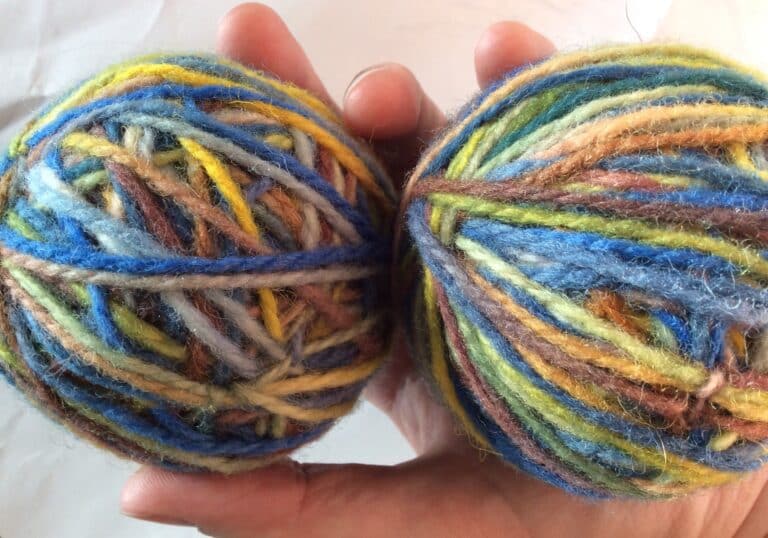
It’s turned out beautifully! I love this plant hanger. It is so easy to work. You can make it using the yarn scraps that you have at home and you can adjust the colours to suit your own personal home decor and style! I have already made a few of them! One thing I did not try when making my sample one is adding beads – but I believe this could be done super easily and it would add a little more interest and design. Try it and let me know what you think!
The Construction and Materials:
This plant hanger is worked in a simple square from the centre out. As for the materials, for the crochet plant hanger shown in the photos and video tutorial below, I used some Pima Cotton Yarn by Lion Brand Yarn. It is a worsted weight 100% cotton yarn. You will also need a 5mm crochet hook such as the Soft touch 6 mm crochet hook by Clover. However you may use any hook and yarn combination you choose.

PDF Copies:
The Easy Plant Hanger crochet pattern will be written out in full below followed by a free video tutorial. The pattern is free to follow on my site and will always be free! If, however, you would like a printable copy, you may purchase one from my Etsy and Ravelry Shops linked below:
Click here for the Easy Plant Hanger Crochet Pattern on Etsy
Click here for the Easy Plant Hanger Crochet Pattern on Ravelry
Thank you so much for stopping by! If you are looking for other patterns that will help you use up some of this cotton yarn scraps, you may wish to check out the Summer Measuring Tape Cover Crochet Pattern.
Happy Crocheting!
Sarah

Easy Plant Hanger
Skill Level: Easy
Gauge: 11 stitches x 7 rows of double crochet = 4 inches
Finished Size: Approximately 8.5 x 8.5 inches excluding the handles
Hook: Size J/10 (6 mm) hook.
Notions: Yarn Needle
Stitches and Abbreviations:
Ch – Chain
Dc – Double Crochet
Dc3tog – Double Crochet Three Together (Note: this is all worked around the post of one stitch: [Yo, insert your hook around the post of the stitch indicated from front to back, yo and draw up a loop, yo and pull through 2 loops on your hook] 3 times. Yo and draw through all the loops on your hook.)
Rpt – Repeat
Sc – Single Crochet
Sk – Skip
Sl st – Slip stitch
Yo – Yarn over
Pattern Notes:
- Pattern is written in American English terms.
- Pattern is worked in rounds. You will make a front piece, then a back piece and crochet them together.
- Ch 1 at beginning of round does not count as stitch.
- Ch 3 at the beginning of round counts as a double crochet stitch.
- Weave in ends as needed.
- Do not turn unless stated otherwise.
- This pattern is worked holding two strands of yarn together.
- This plant pot holder is shown holding a 6 inch pot. If you wish to make it larger you will simply continue working the increase rounds until the desired size is reached.
Free Crochet Pattern:
With Colour A, holding 2 strands of yarn together, Ch 4
Rnd 1: Work 11 dc into the 4th ch from your hook (starting ch 3 counts as a dc). Join with a sl st in the 1st st. Fasten off colour A, Join colour B in the same st as joining. (12 sts)
Rnd 2: With colour B, ch 1, dc3tog (See “stitches and abbreviations” above) around the post of the 1st st, *ch 1, dc in the next st, ch 1, dc3tog around the post of the next st; Rpt from * around ending with a dc in the next st, ch 1. Join with a sl st in the 1st st. Fasten off colour B, Join colour C in the 1st st. (12 sts, 12 ch-1 sps)
Rnd 3: With colour C, ch 3 (counts as a dc), dc in each of the next 5 sts, *ch 2, dc in each of the next 6 sts; Rpt from * around ending with a ch 2, join with a sl st in the top of the starting ch-3. Fasten off colour C, join colour D in the same st as joining. (24 sts)
Rnd 4: With colour D, ch 3 (counts as a dc), dc in each of the next 5 sts, *[2 dc, ch 2, 2 dc] in the next ch-2 sp, dc in each of the next 6 sts; Rpt from * around ending with a [2 dc, ch 2, 2 dc] in the next ch-2 sp, join with a sl st in the top of the starting ch-3. Fasten off colour D, join colour A in the same st as joining. (40 sts)
Rnd 5: With colour A, ch 3 (counts as a dc), dc in each of the next 7 sts, *[2 dc, ch 2, 2 dc] in the next ch-2 sp, dc in each of the next 10 sts; Rpt from * around ending with a dc in each of the final 2 sts, join with a sl st in the top of the starting ch-3. Fasten off colour A, join colour B in the same st as joining. (56 sts)
Rnd 6: With colour B, ch 3 (counts as a dc), dc in each of the next 9 sts, *[2 dc, ch 2, 2 dc] in the next ch-2 sp, dc in each of the next 14 sts; Rpt from * around ending with a dc in each of the final 4 sts, join with a sl st in the top of the starting ch-3. Fasten off colour B, join colour C in the same st as joining. (72 sts)
Rnd 7: With colour C, ch 3 (counts as a dc), dc in each of the next 11 sts, *[2 dc, ch 2, 2 dc] in the next ch-2 sp, dc in each of the next 18 sts; Rpt from * around ending with a dc in each of the final 6 sts, join with a sl st in the top of the starting ch-3. Fasten off colour C, join colour D in the same st as joining. (88 sts)
Rnd 8: With colour D, ch 1, sc in each of the first 14 sts, *[2 sc, ch 2, 2 sc] in the next ch-2 sp, sc in each of the next 22 sts; Rpt from * around ending with a sc in each of the final 8 sts, join with a sl st in the top of the 1 st. Fasten off colour D, join colour A in the same st as joining. (104 sts)
Rnd 9: With colour A, ch 1, sc in each of the first 16 sts, *[sc, ch 40, sk the next 5 chs, sl st into the next ch and each of the next 34 chs, sc] in the next ch-2 sp, sc in each of the next 26 sts; Rpt from * around ending with a sc in each of the final 10 sts, join with a sl st in the top of the 1 st. Fasten off colour A. Weave in your ends.
Place plant pot in the centre of the square, gather the 4 long chains and loop through a hook/hanger at the top loops.
Video Tutorial:
The photographs and pattern contained in this document are the property of Rich Textures Crochet.
This pattern is for personal use only.
No unauthorized reproduction, in whole or in part, or distribution of this pattern or content is permitted. ALL FINISHED PRODUCTS from this pattern can be used for local sales and sold online.
Thank you for supporting Rich Textures Crochet! To stay in touch, be sure to visit me on Facebook and Instagram. Thanks again! Happy Crocheting!