
This post contains affiliate links. This means that when you purchase through one of these links we will receive a small commission at no additional cost to you. Thank you for supporting Rich Texture Crochet!
You’ve made it! Welcome to week six of the Spring Blossom Throw Crochet Along. By now you will have completed thirty crochet squares. Today we’re going to learn how to join our crochet squares together!
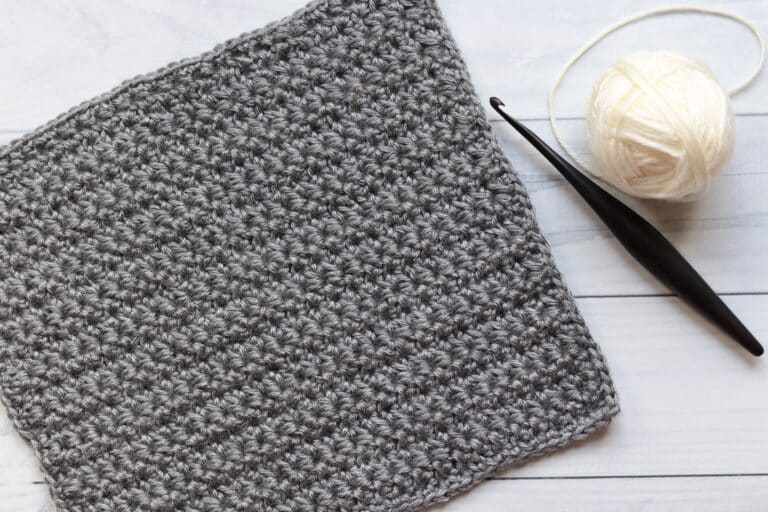
Can you believe it? Six weeks have simply flown by! I want to thank you for joining me on this crochet journey! Together we have added five new stitches to our repertoire: The small daisy stitch, petal stitch, tulip stitch, blossom stitch, and the primrose stitch. I hope that they are all stitches that you will be willing and excited to try in future projects.

The Spring Blossom Throw CAL:
If you are popping in and have not heard about the Spring Blossom Throw Crochet along, be sure to check it out! The Spring Blossom Throw is a stitch sampler crochet afghan. And you can find all the details about it here: Spring Blossom Throw Crochet Along.
The Spring Blossom Throw PDF:
As this is the final week of the crochet along, as promised, the PDF is now available! If you have been waiting for it, it can now be purchased from my Etsy and Ravelry shops linked below:
The Spring Blossom Throw on Etsy
The Spring Blossom Throw on Ravelry
Thanks so much!
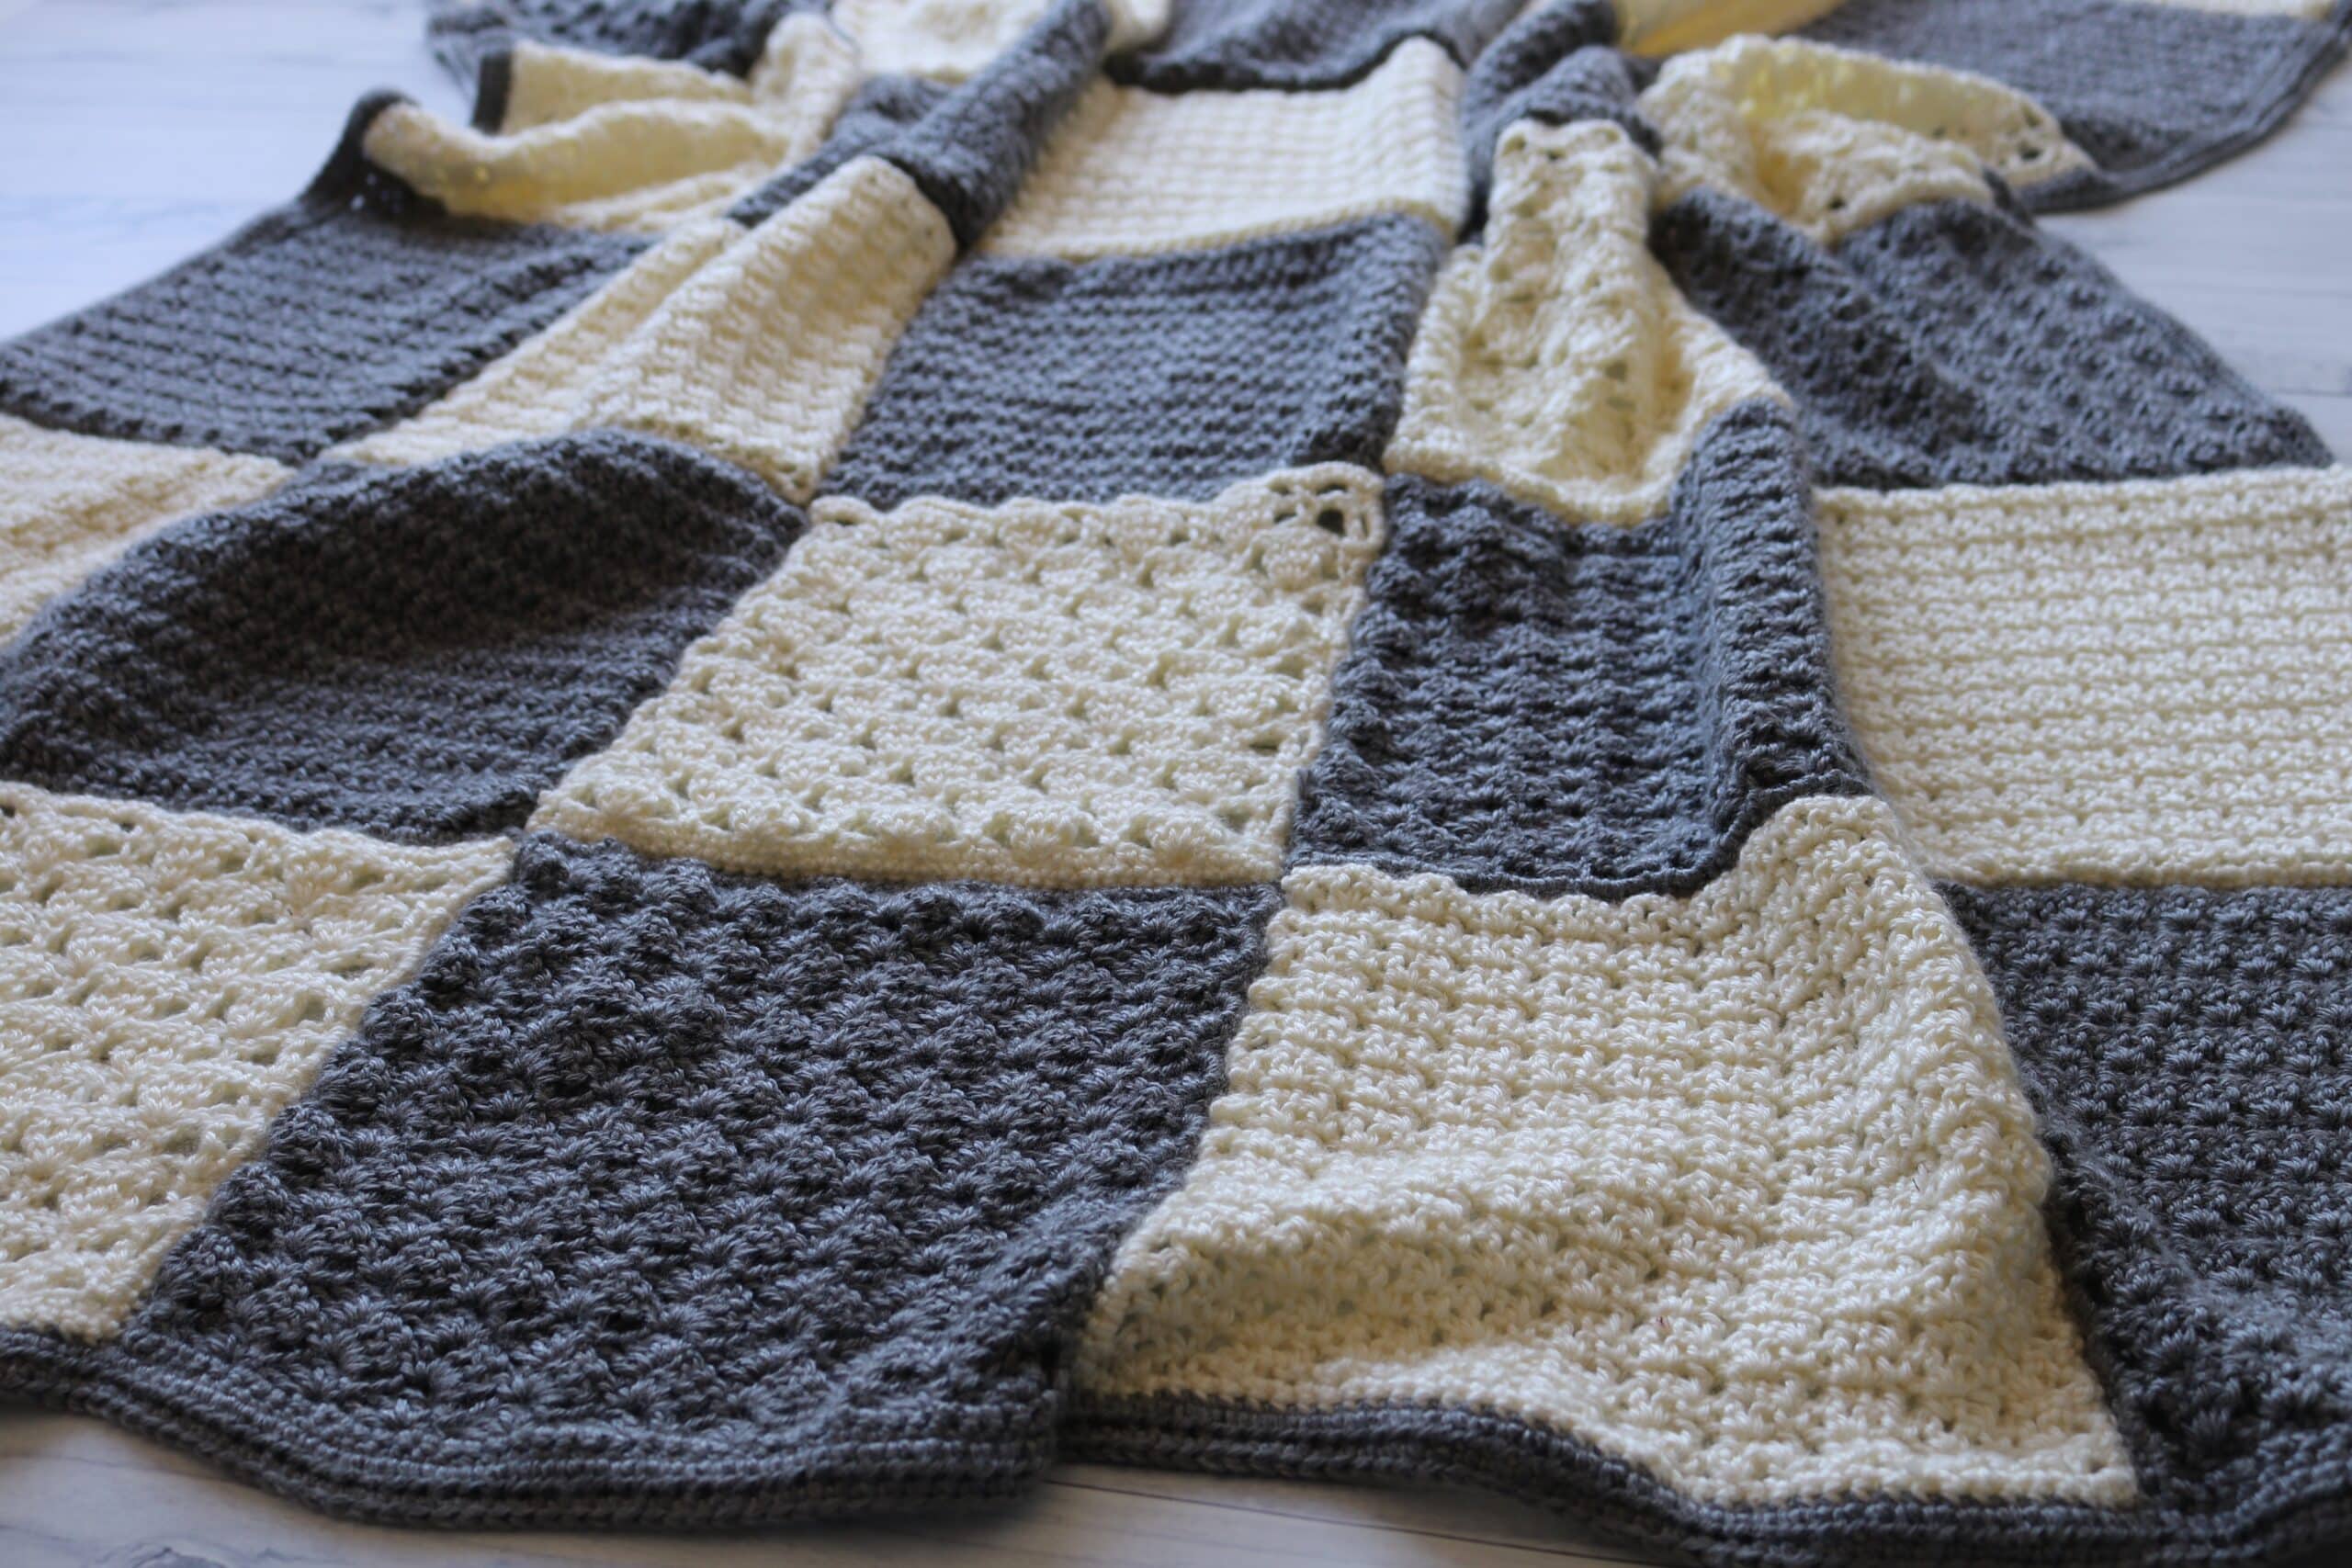
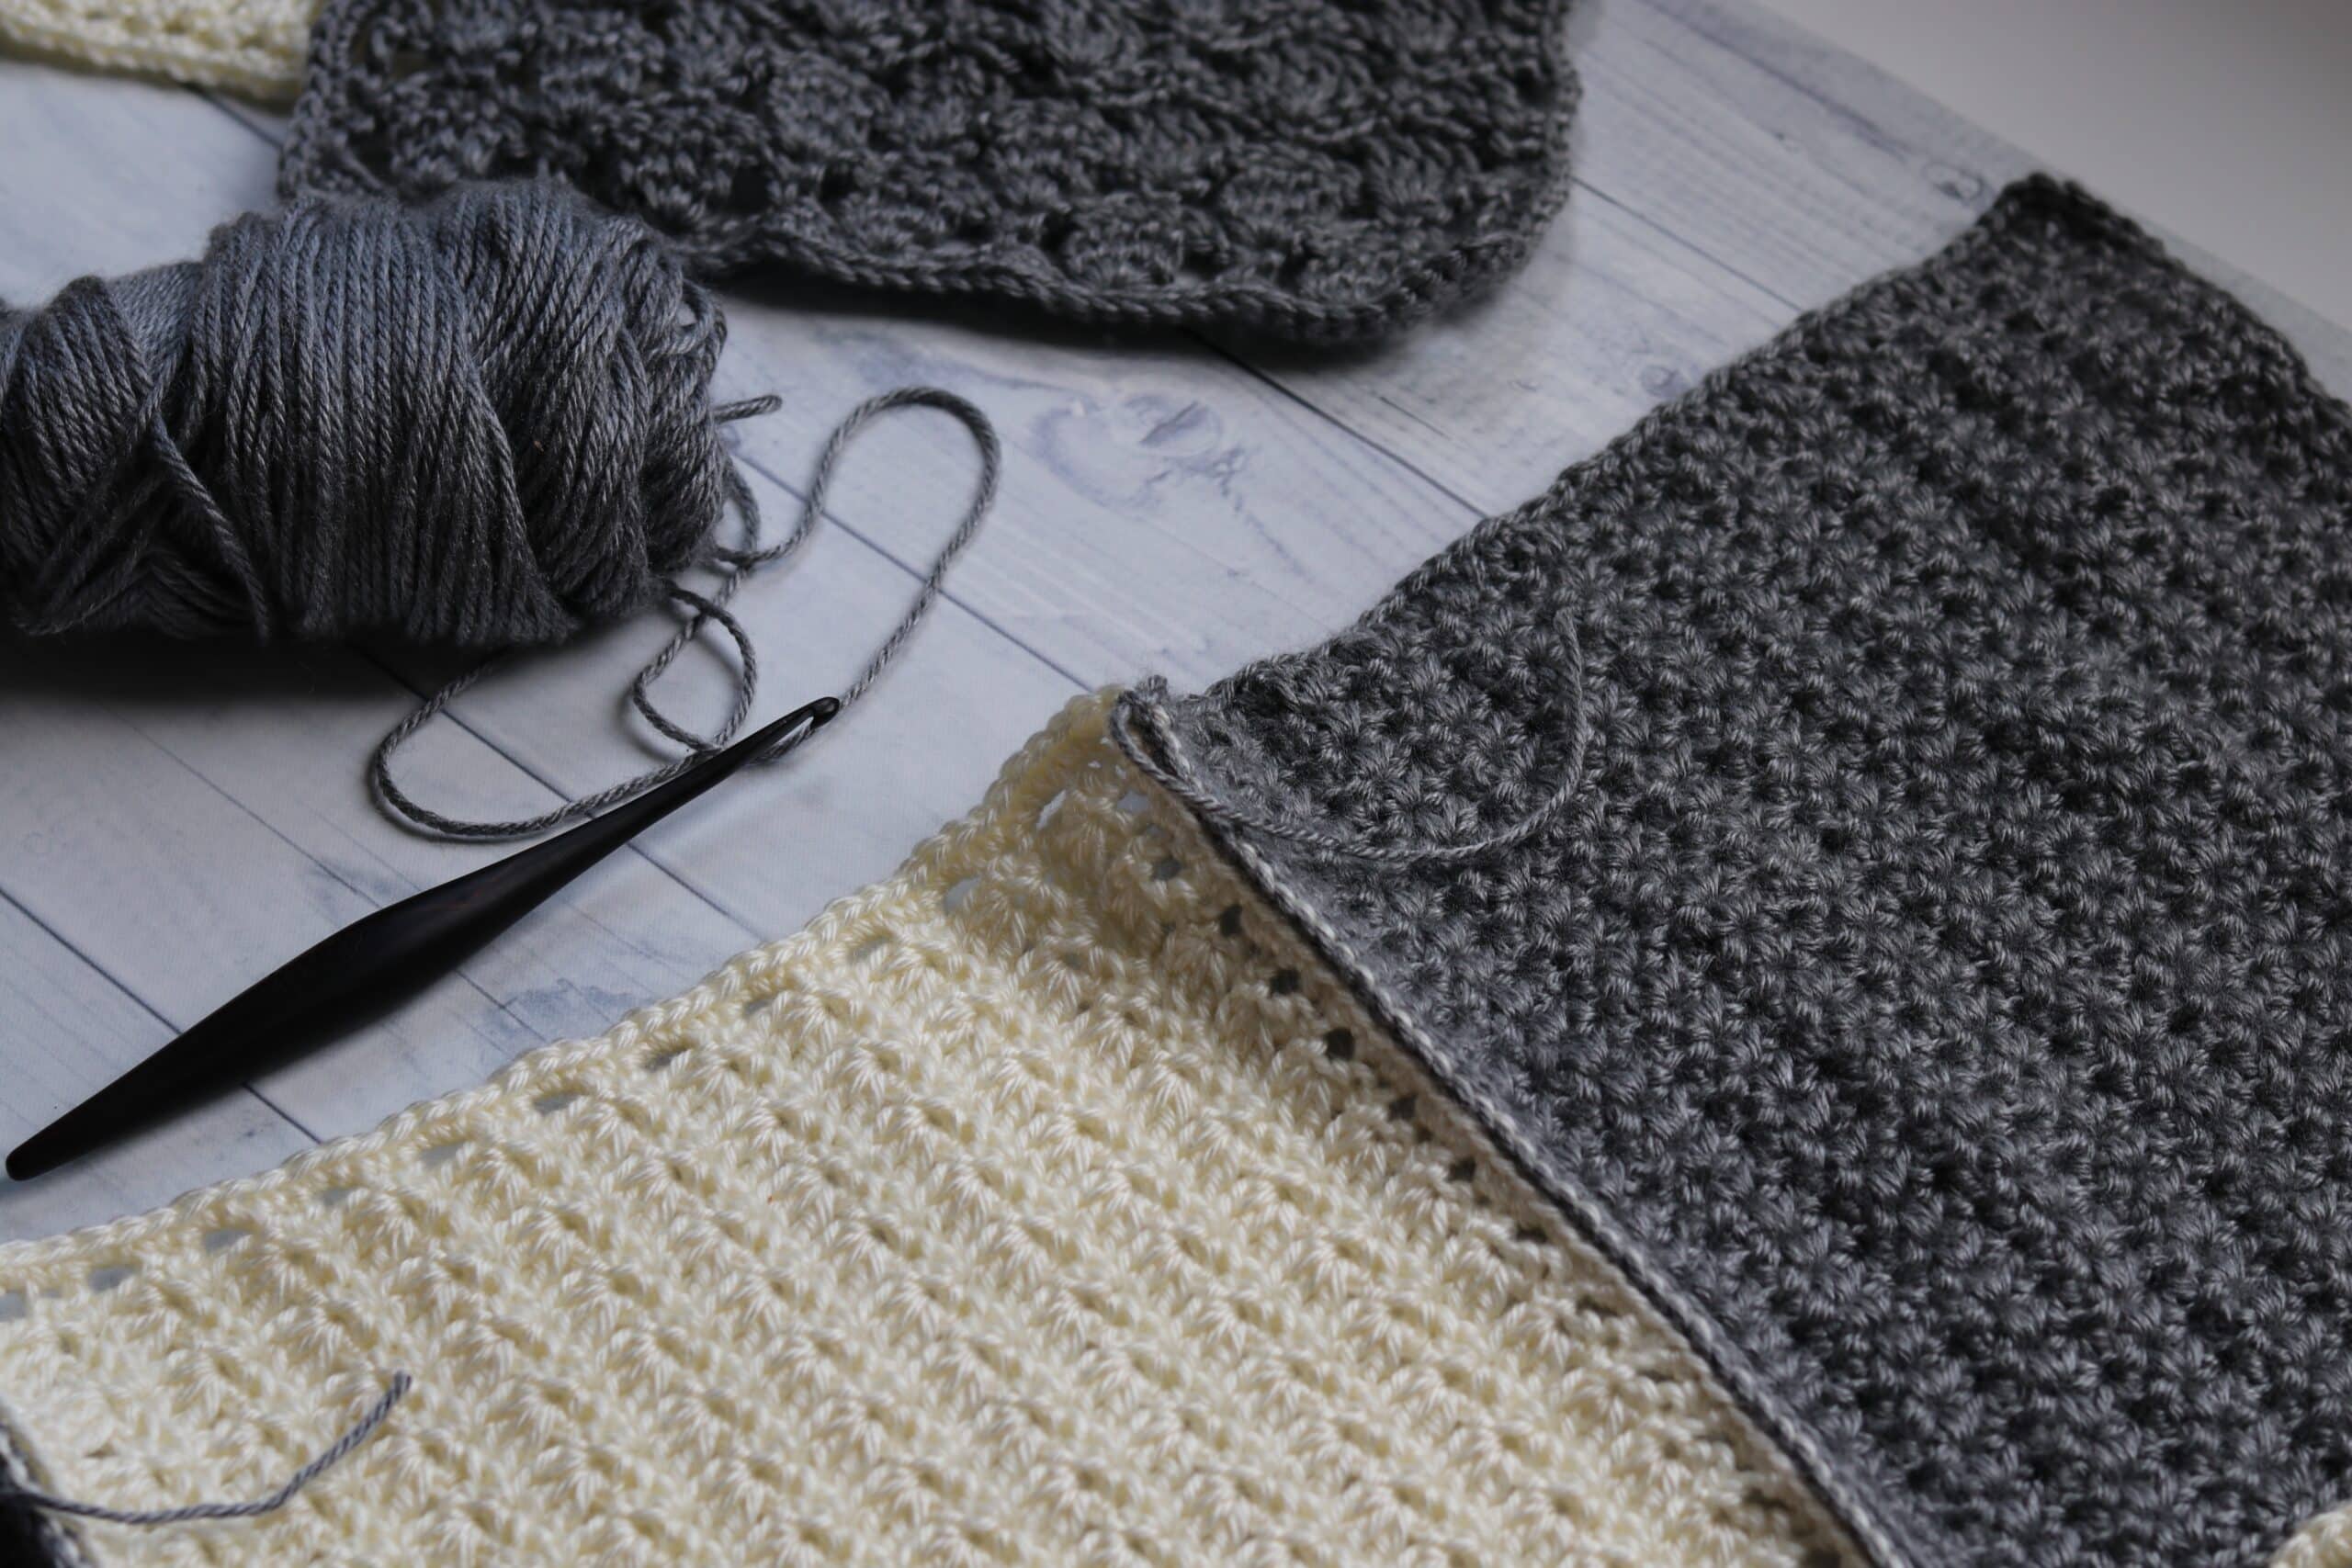
Now that you have done all of the hard work, it is time to finally join all of those squares together.
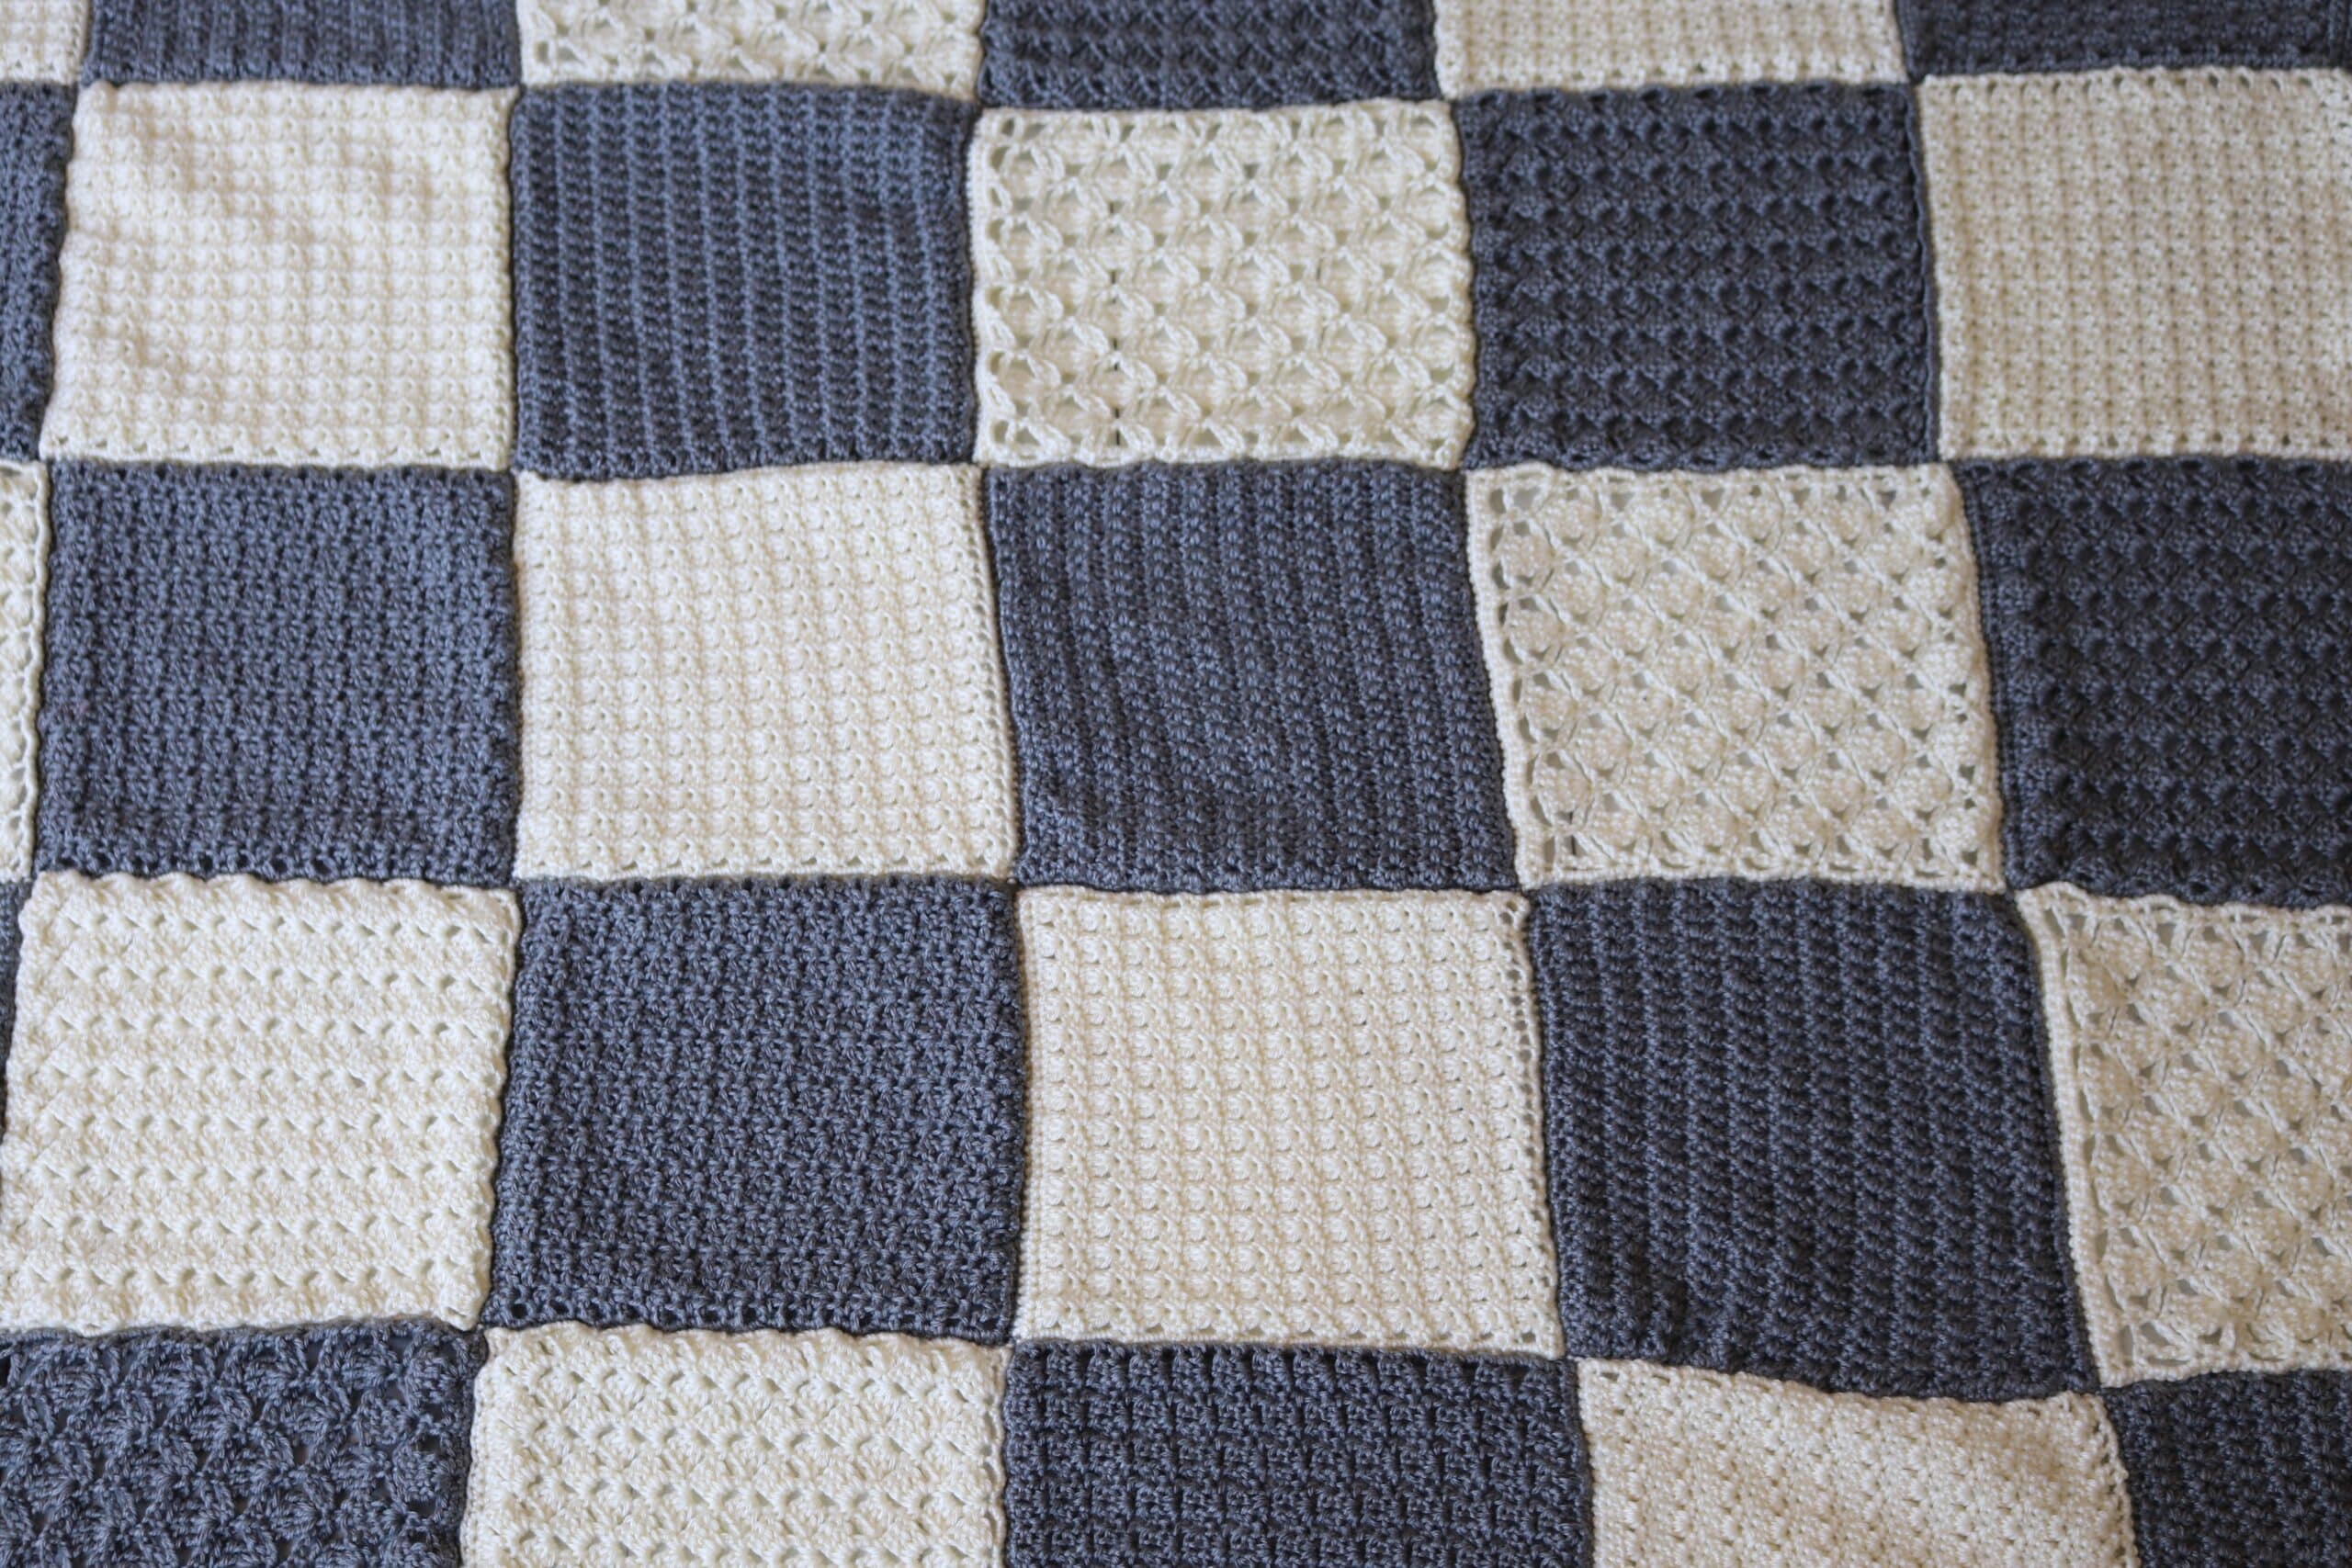
First, decide how you’re going to place the squares:
The first thing you are going to want to do is mare sure you have finished any blocking that you may have required and make sure that all your ends have been woven in. As for the layout of the blanket squares, you may choose your own layout or refer to the diagram below:
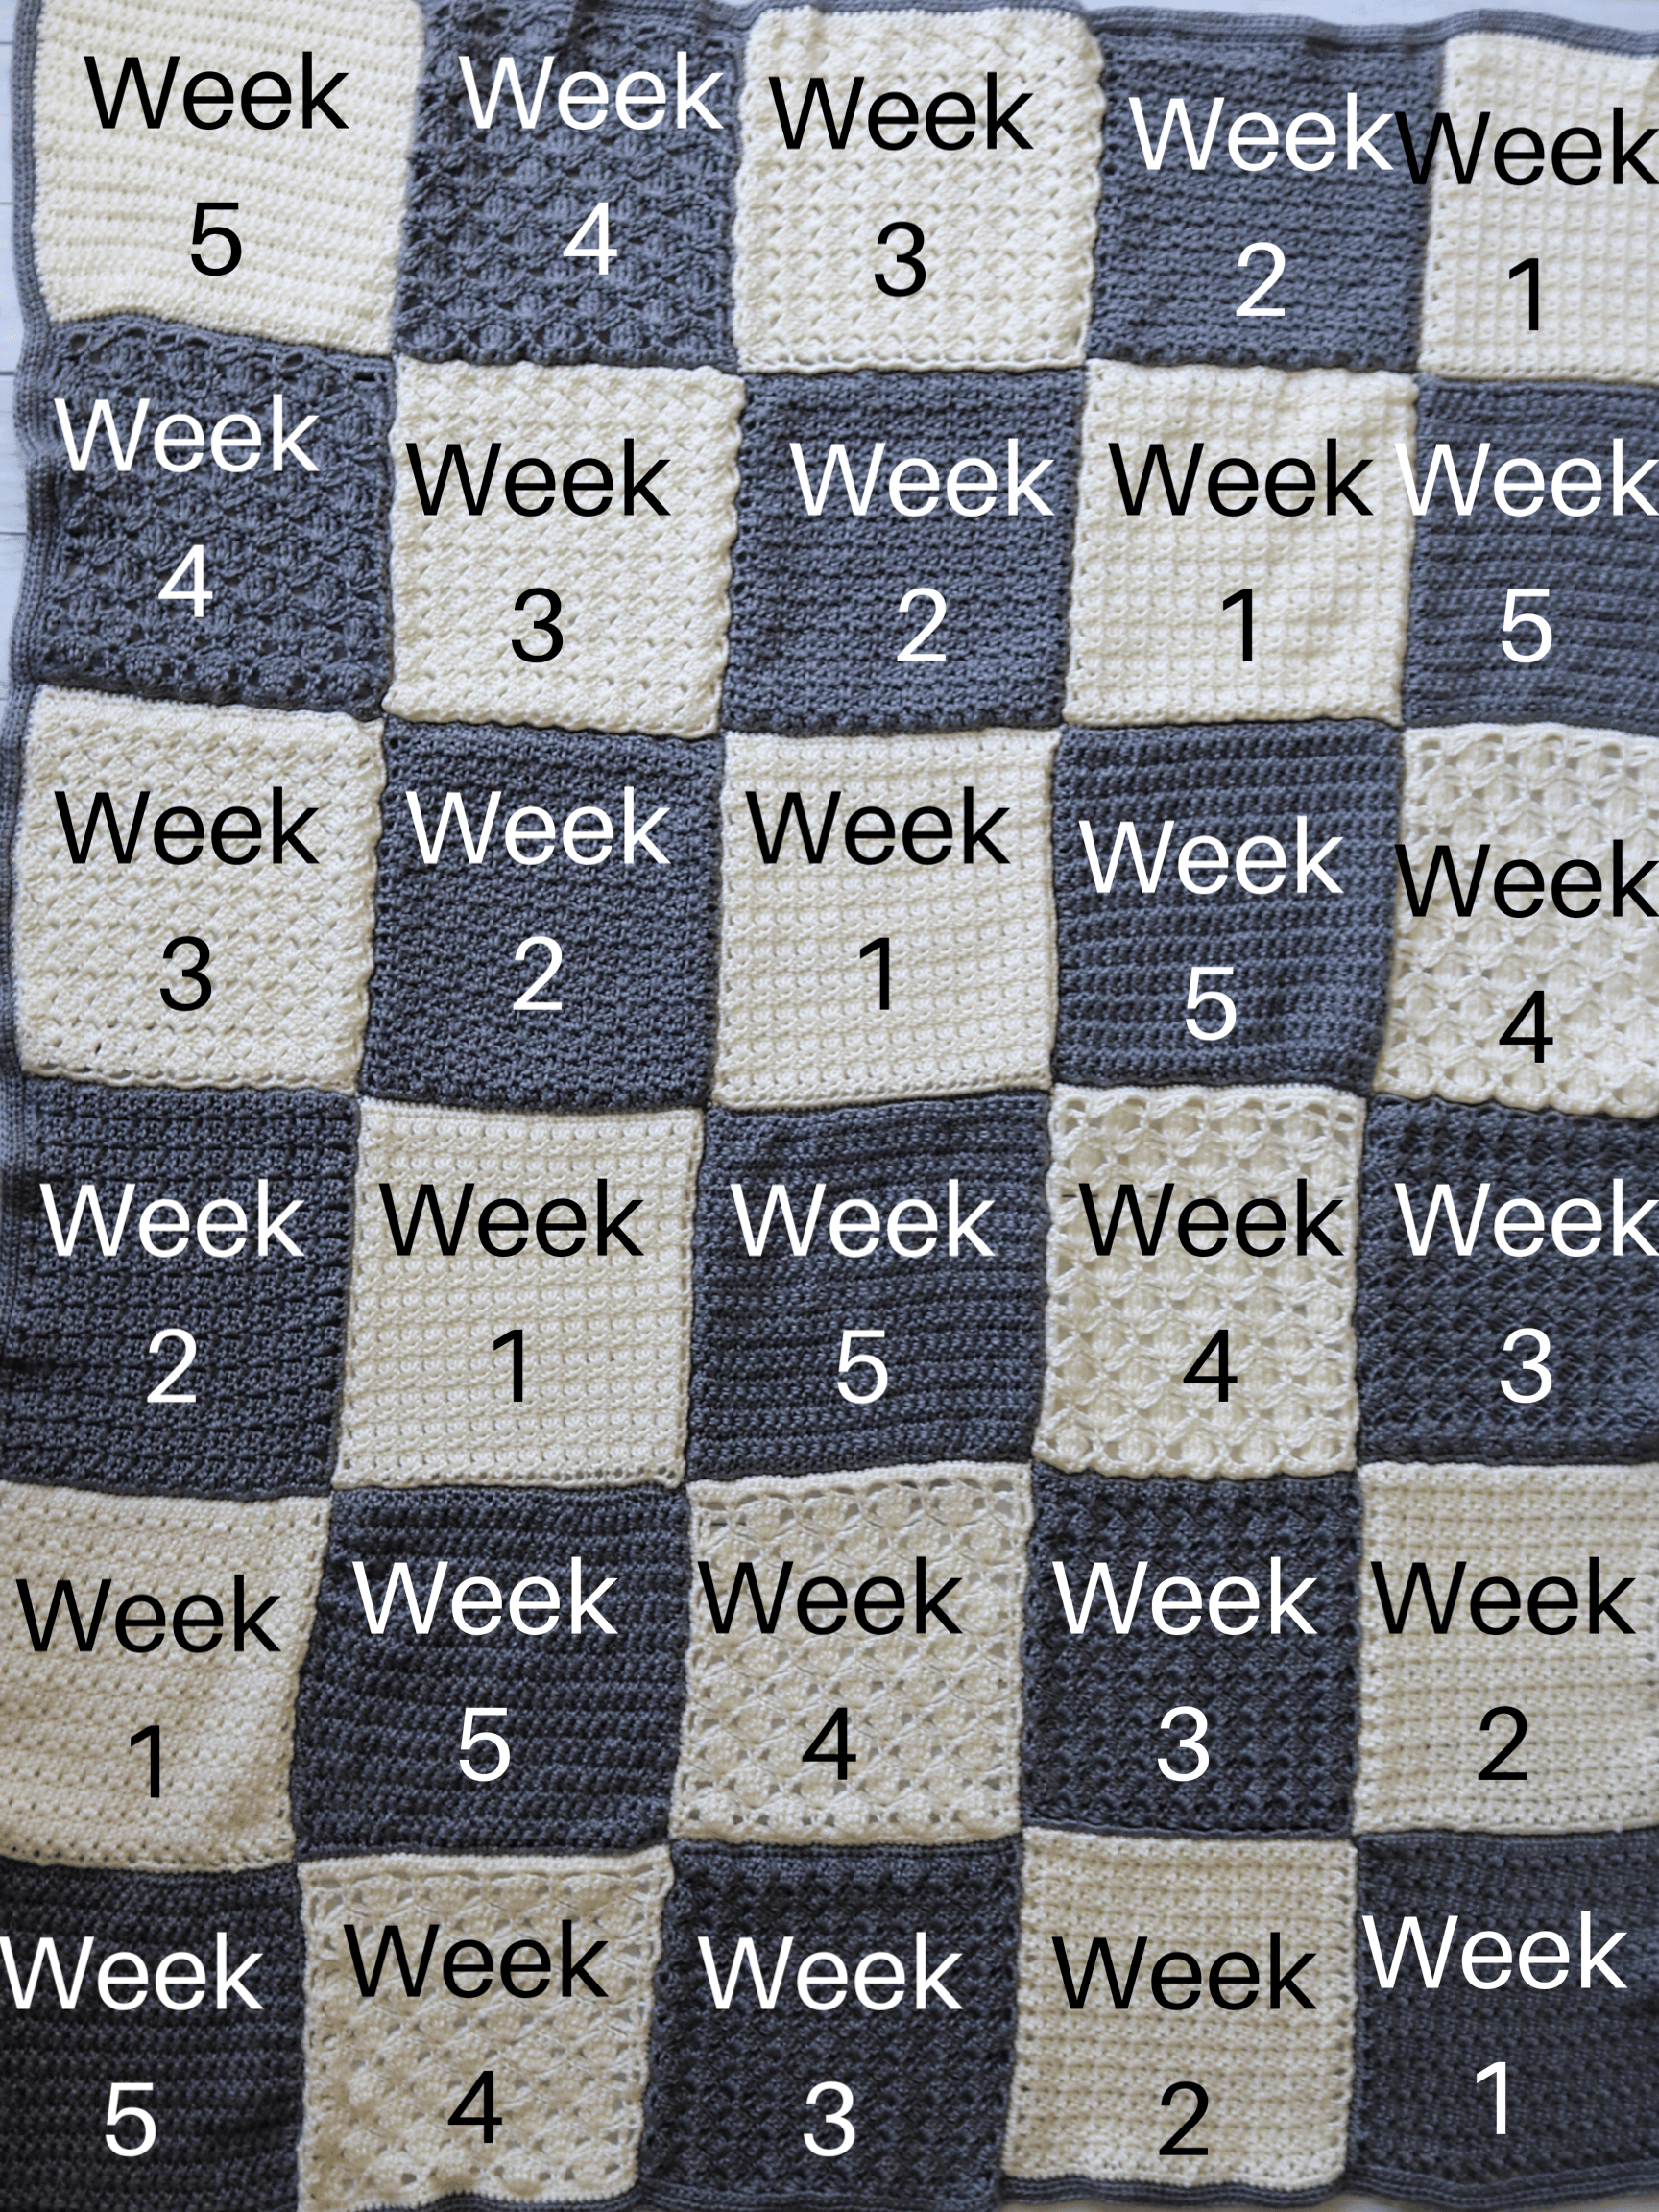
Once you have decided how the squares are going to lay in the blanket, you’re ready to begin.
Join your squares together:
To join you squares together we are going to use a method called the slip stitch flat join.
It is one of my favourite ways to join crochet squares together. It’s a simple join that is crocheted which means there is no sewing! When complete it also lays nearly flat which makes for a smooth clean finish.
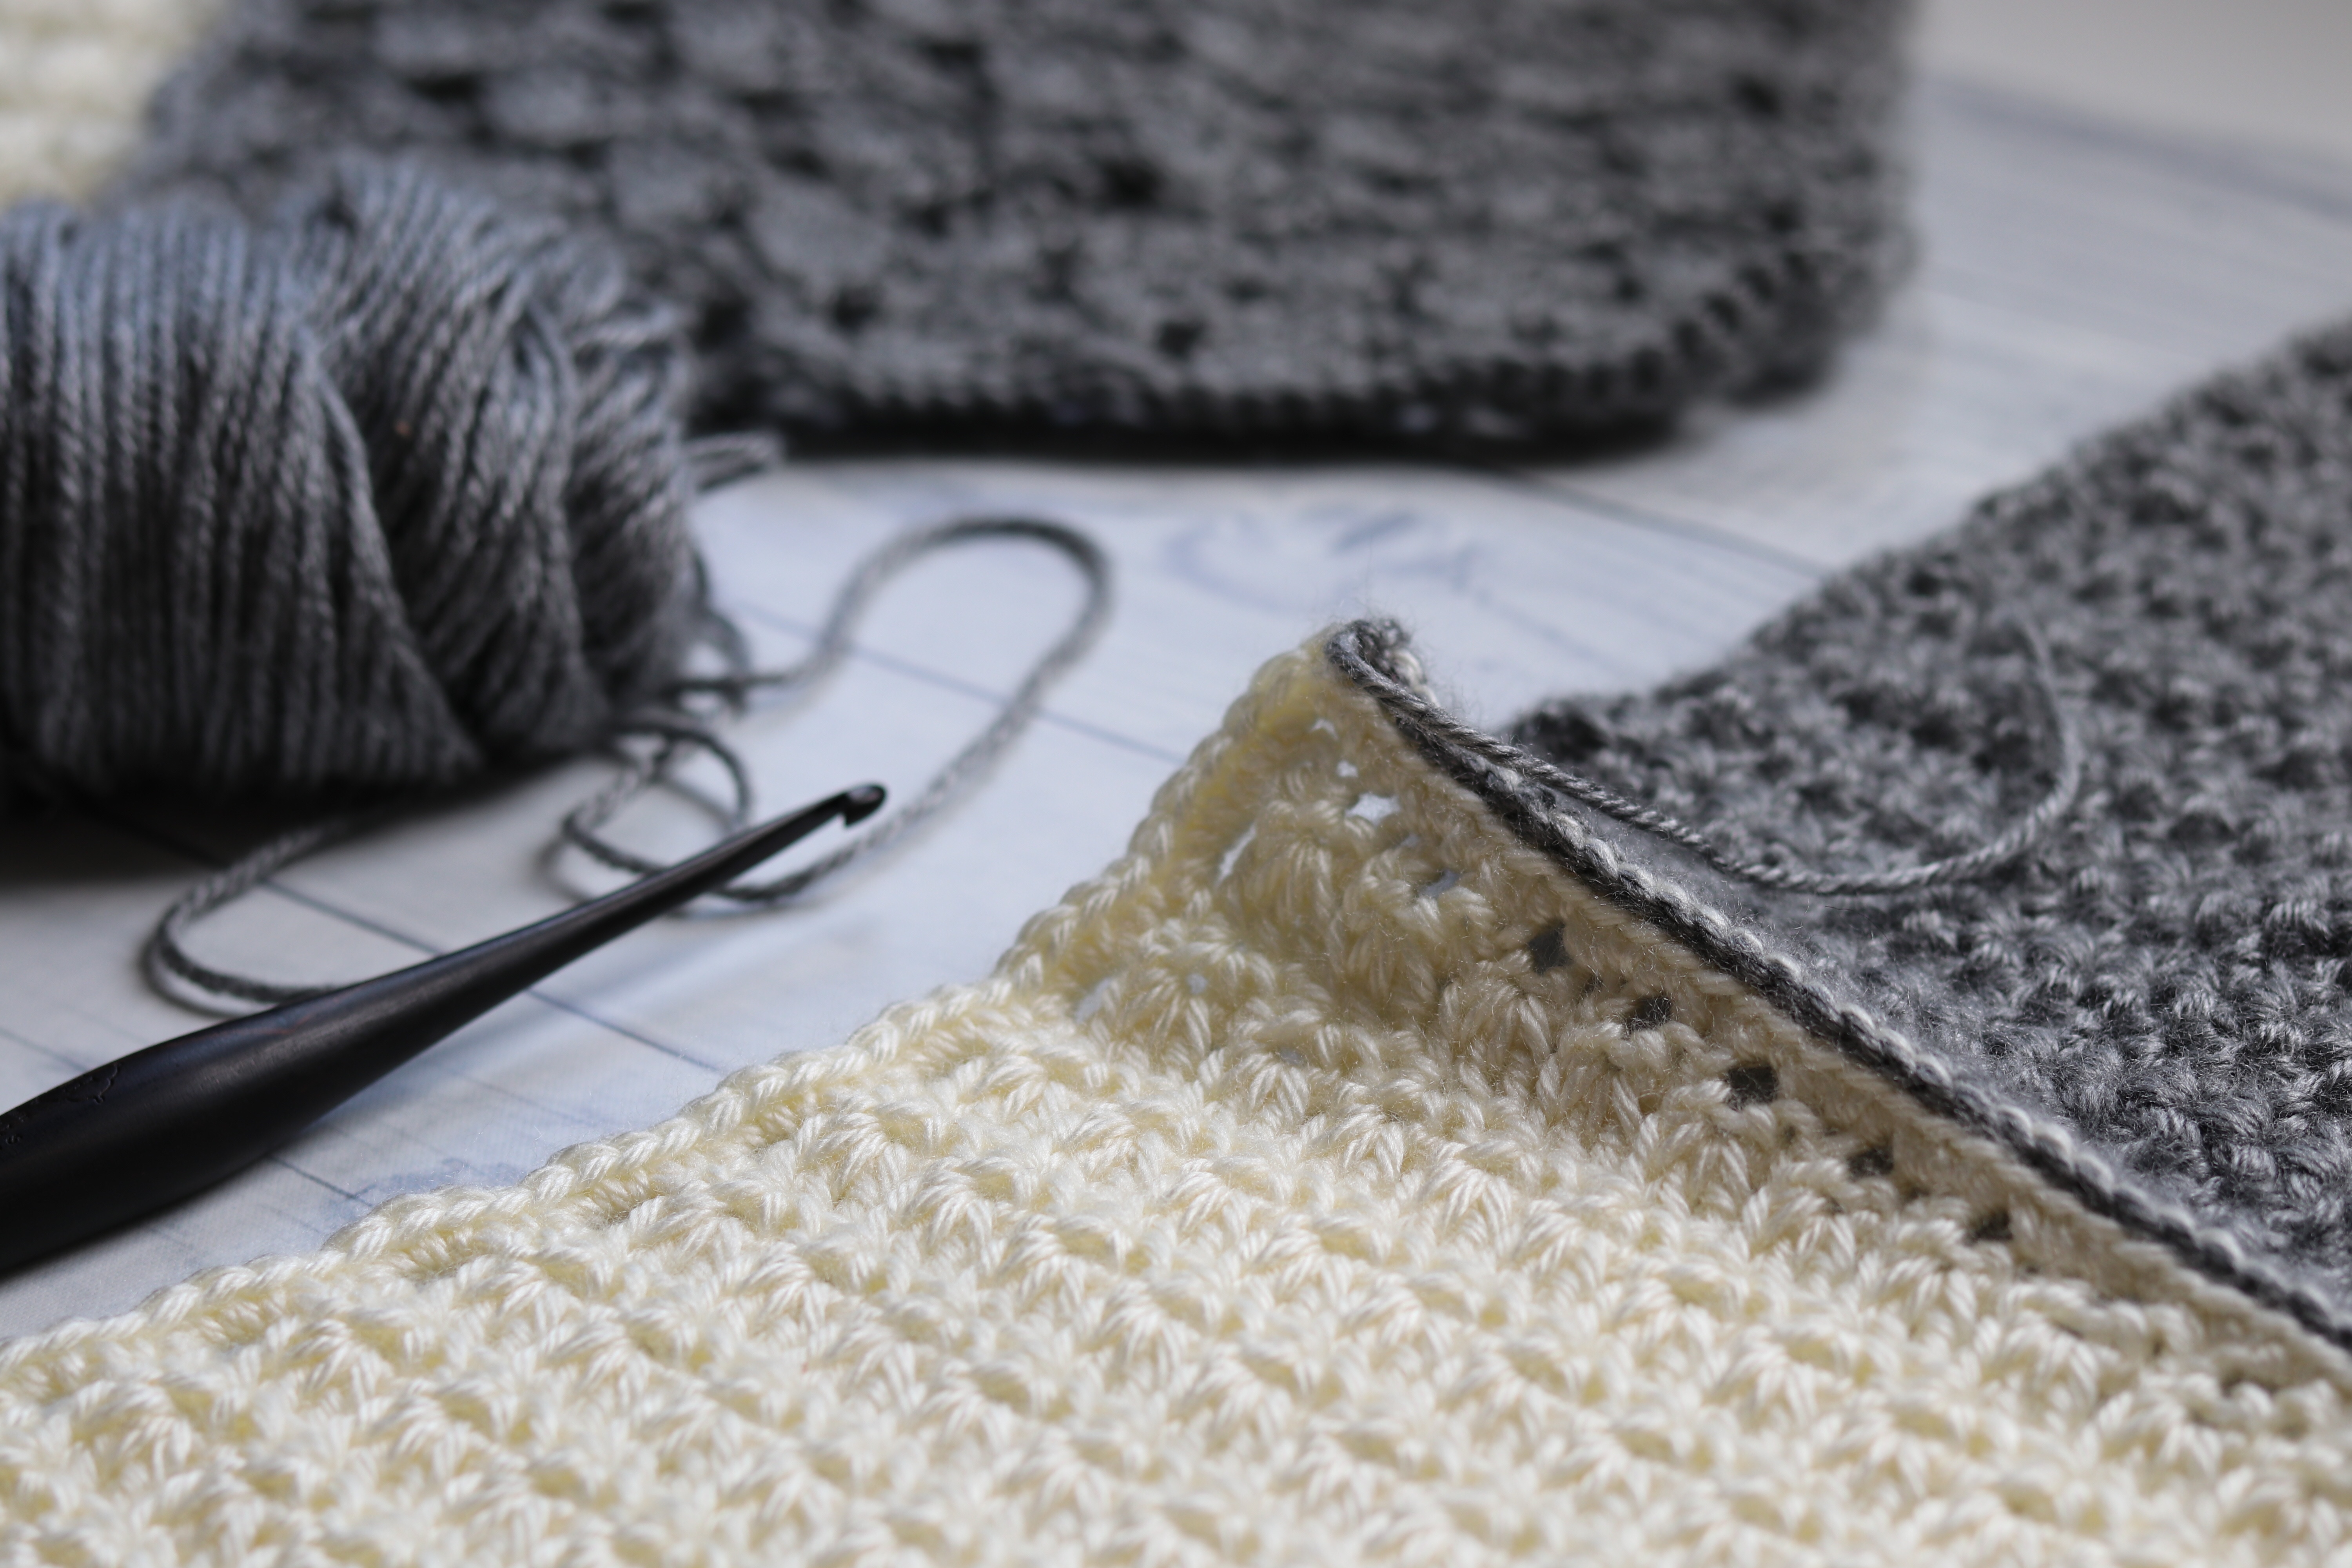
Begin by laying two of your squares together. I like to work the long rows first (The lengthwise rows), so I start at the bottom right of the blanket, and work my way up lengthwise.
Place your squares along side one another with the wrong side facing you.
Join your yarn into the corner of one of the afghan squares along the edge you will be working.
Slip Stitch Flat Join:
Working in the back loops only, and through both thicknesses, insert your hook into the corner stitches on both squares, and work a slip stitch. Continue working in the back loops only working slip stitches all the way across. When you come to the end of your square, line up the next two squares along side the ones you are working on, and your next slip stitch will be worked into their corner stitches. Continue working your slip stitches across.
When you reach the end of your row, fasten off and weave in your ends. Then repeat until all the rows have been crocheted together.
Need Help? Check out this video tutorial:
Video Tutorial:
https://youtu.be/kugJZ_RSsr8
A Simple Edging:
Once you have joined all of the rows together, you will want to add a simple edging to your blanket. I wanted my edging to be simple because I wanted to show off the various textures and patterns in the blanket.
For the blanket edging, join your yarn with a slip stitch in any corner and proceed as follows:
Ch 1
Rnd 1: Sc in each stitch all the way around, working 3 sts in each corner st. Join with a sl st in the first st, turn.
Rnd 2: Ch 1, hdc in each st all the way around, working 3 hdc in each of the corner sts. Join with a sl st in the first st, turn.
Rnd 3: Ch 1,Sc in each stitch all the way around, working 3 sts in each corner st. Join with a sl st in the first st, turn.
Fasten off, weave in ends.
And you’re done! How fun is that?? Congratulations!
Thank you so much for joining me on this crochet along and don’t be shy, connect on social media and don’t forget to show off your work! You can find me at all these places here:
Rich Textures Crochet Community Group on Facebook
Rich Textures Crochet Facebook Page
Rich Textures Crochet on Instagram
Rich Textures Crochet on YouTube
These are the main platforms on which I will be sharing updates – of course you can also follow me on Pinterest, Twitter and TikTok! You can sign up for my e-newsletter by clicking on the link in the sidebar on the right ?
When sharing your work across social media, use the hashtag #springblossomcal so we can admire it!
Happy Crocheting!
Sarah


I purchased your This and that way throw. I am so very stumped on rows 15 and 19 and was wondering if you have a video of these stitches. Congrats on the pattern it is beautiful.
Hello Theresa,
Unfortunately I do not have a video tutorial for the This and that way throw. It’s now a Mary Maxim Exclusive so I don’t have the rights anymore to do a video. I’m happy that you like it though! It was a favourite blanket to design 🙂
Thank you anyway. Maybe sometime you can just do a video on the stitches.trdcCl using the first leg and second leg method.
That is possible!
I’m stumped on row 13 and 15. Please help Same pattern this way and that