This post contains affiliate links. This means that when you purchase through one of these links we will receive a small commission at no additional cost to you. Thank you for supporting Rich Texture Crochet!
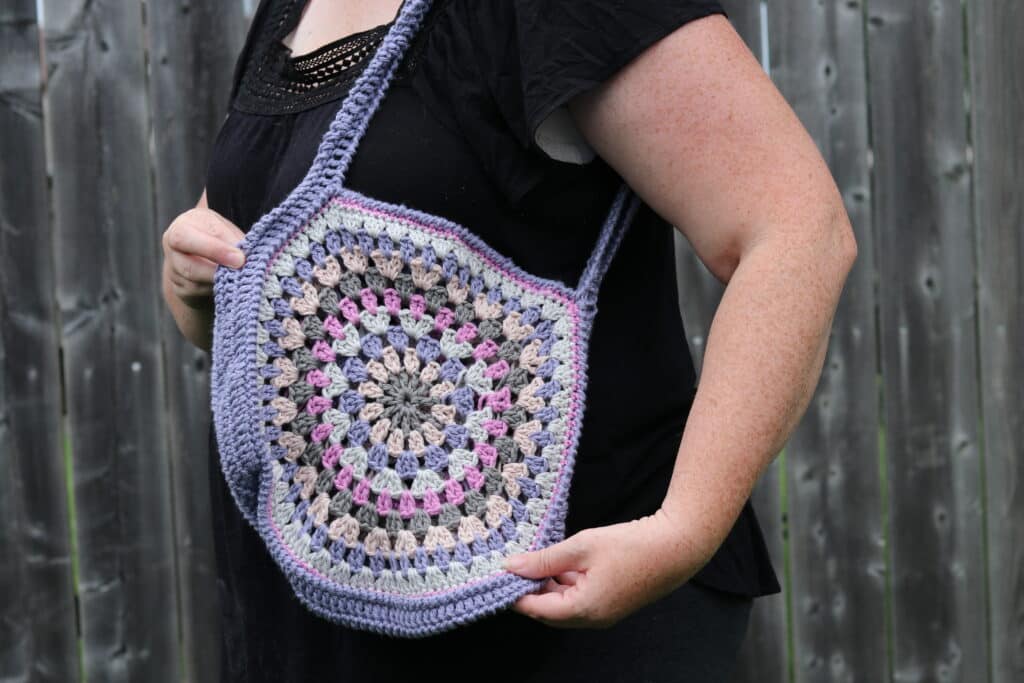
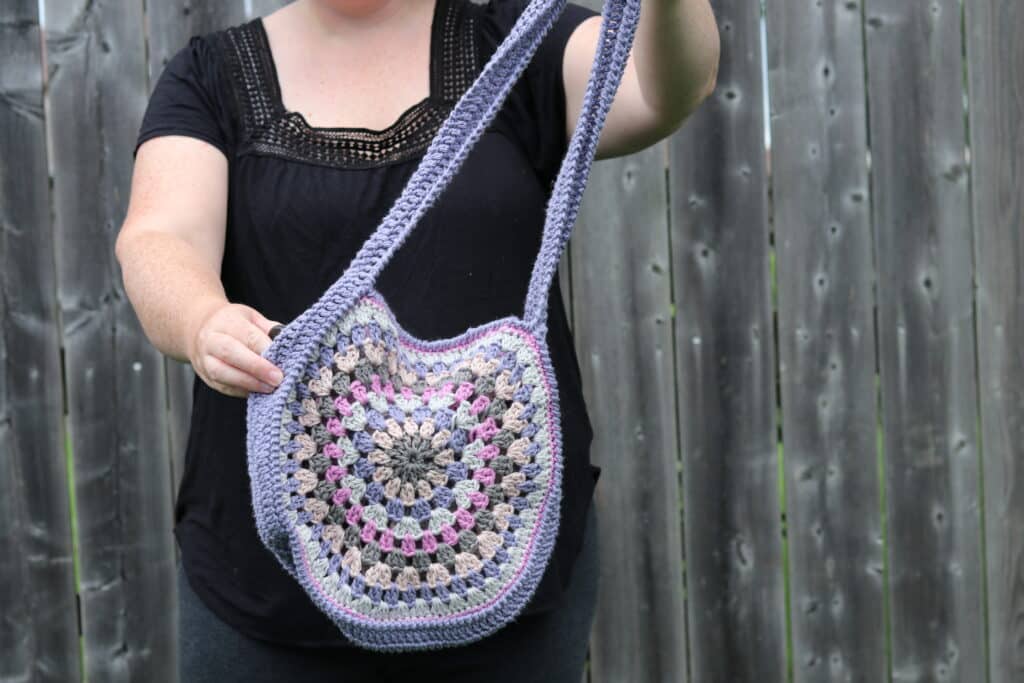
This fun Granny Circle Crochet Bag is fun to work! It is an easy design and would make a great scrap busting project!
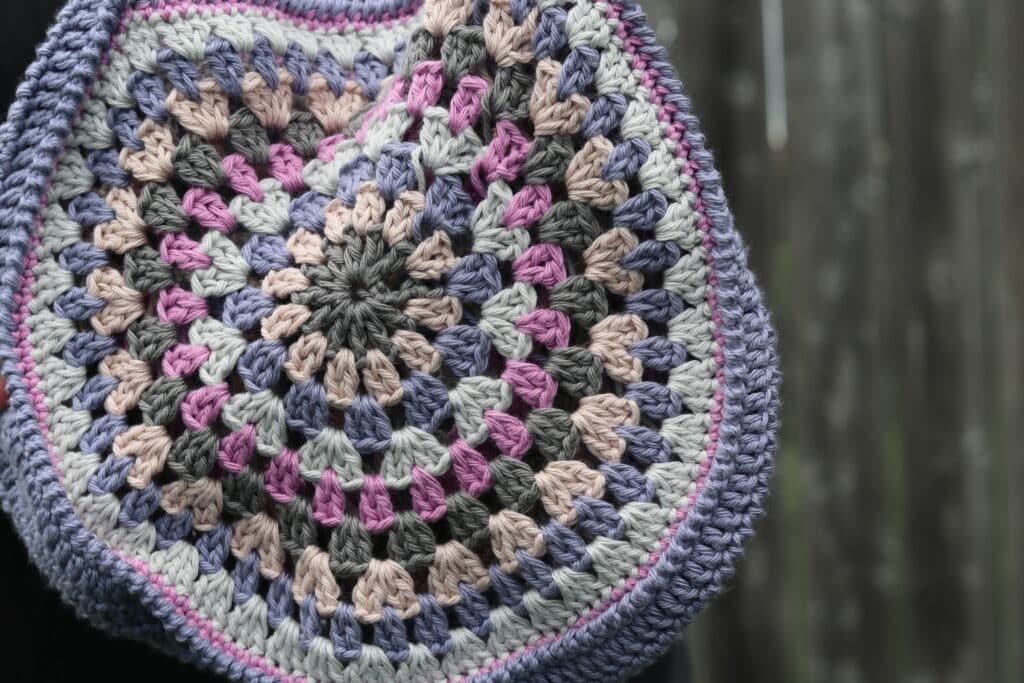
Granny Squares and circles have been long known as excellent users of scrap yarn. Each round in a granny circle or square only requires a little amount of yarn and each motif can use a variety of colours!
In this easy unique shoulder bag, I have used five different colours of yarn using the yarn scraps and partial balls that I had left over from my The Marvellous Market Bag Crochet Along that I hosted not too long ago.
It was a great way to use up those extra pieces!
This post contains affiliate links. This means that when you make a purchase through one of these links, Rich Textures Crochet will earn a small commission at no additional cost to yourself. Thank you for supporting Rich Textures Crochet!
The Construction:
This shoulder bag uses only one strap that can easily be flag over a shoulder. The bag is not too large in size, but perfect for a wallet, phone, keys, water bottle and a good book!
The bag is worked in three separate pieces that are seamed together. That being said it is a pattern that can be worked in a relatively short period of time!
The Materials:
I worked this bag using a 100% cotton yarn by Lion Brand Yarns. Cotton holds its shape quite well, especially when it comes to wear and tear. I mentioned about that I used five different colours, but you may use more or less!
For a crochet hook, I used a 5 mm and you will see me using a Clover Armor hook in the full video tutorial below.
PDF Copies are also available!
The complete pattern will be written out below followed by a full video tutorial, however I you would like to add this pattern to your library or purchase an ad free PDF, you may do so through my Etsy or Ravelry Shop linked below:
Click Here for the Granny Circle Shoulder Bag on Etsy
Click Here for the Granny Circle Shoulder Bag on Ravelry
Thank you so much for stopping by! Don’t forget to sign up for my e-newsletter so that you are notified about all my new patterns and connect on social media!
If you like this bag, and haven’t already, you may also wish to check out the Granny Square Market Bag Crochet Pattern also here on richtexturescrochet.com!
I hope to see you again soon!
Sarah
Granny Circle Shoulder Bag:
Skill Level: Easy
Gauge: 4 rounds = 4 inches
Finished Size: Approximately 11 x 11 inches laid flat, excluding handle.
Yarn: Pima Cotton Yarn by Lion Brand® (186 yds/170m; 3.5 oz/100g; 100% cotton; medium/worsted weight). You will need 1/2 ball each of 5 colours: Colour A: Mademoiselle, Colour B: Stone, Colour C: Raincloud, Colour D: Mulberry, Colour E: Pewter.
Hook: Size H/8 (5 mm) hook.
Notions: Yarn Needle.
Stitches and Abbreviations:
Ch – Chain
Dc – Double Crochet
Rpt – Repeat
Sc – Single Crochet
Sk – Skip
Sl st – Slip stitch
Yo – Yarn over
Pattern Notes:
- Pattern is written in American English terms.
- Pattern is worked in rounds.
- Ch 1 at beginning of row does not count as stitch.
- Ch 3 at beginning of row counts as a dc.
- Weave in ends as needed.
Free Crochet Pattern:
Side Panels (Make 2):
With Colour A, Ch 5, join with a sl st in the first st to form a ring.
Rnd 1: Ch 4 (counts as a dc, ch 1), * [dc, ch 1] 11 times into the centre of the ring, join with a sl st in the 3rd ch of the starting ch-4. Fasten off. (12 dc)
Rnd 2: Join with colour B in any ch-1 sp, [Ch 3, dc, ch 1] all in the same sp, *[2 dc, ch 1] in the next ch-1 sp; rpt all the way around, join with a sl st in the top of the starting ch-3. Fasten off.
Rnd 3: Join with colour C in any ch-1 sp, [Ch 3, 2 dc, ch 1] all in the same sp, *[3 dc, ch 1] in the next ch-1 sp; rpt all the way around, join with a sl st in the top of the starting ch-3. Fasten off.
Rnd 4: Join with colour D in any ch-1 sp, [Ch 3, 3 dc, ch 1] all in the same sp, *[4 dc, ch 1] in the next ch-1 sp; rpt all the way around, join with a sl st in the top of the starting ch-3. Fasten off.
Rnd 5: Join with colour E in any ch-1 sp, [Ch 3, dc, ch 1] all in the same sp, *sk the next 2 dc, [2 dc, ch 1] in between the next 2 sts, Sk the next 2 sts, [2 dc, ch 1] in the next ch-1 sp; rpt all the way around, sk the next 2 dc, join with a sl st in the top of the starting ch-3. Fasten off.
Rnd 6: Join colour A in any ch-1 sp, repeat rnd 3.
Rnd 7: Join colour B in any ch-1 sp, repeat rnd 4.
Rnd 8: Join colour C in any ch-1 sp, repeat rnd 5.
Rnd 9: Join colour D in any ch-1 sp, [ch 3, 2 dc] in the same sp, * 3 dc in the next ch-1 sp; Rpt from * around changing to colour E in the final st, join with a sl st in the top of the starting ch-3.
Rnd 10: With colour E, ch 1, sc in the same st as joining and in each st around. Join with a sl st in the first st.
Fasten off, weave in all ends and repeat the above for the second side.
Bag Bottom and Sides (worked as one piece in rounds):
With Colour C, ch 193, without twisting the chain, join with a sl st in the 1st st.
Rnd 1: Ch 3 (counts as a dc) , dc in the same st as joining and in each st around.
Rnds 2-3: Ch 3, dc in the next st and in each st across.
Fasten off, weave in ends.
Joining Sides, bottom and handles:
Hold one side panel against bottom panel with wrong sides together, starting at the top side on one of the side panels and working through both the bottom and side panel, rsc in each of the next 112 sts around the side working through both thickness. Next, continue working along the top side of the bag only, continuing in rsc. Fasten off and weave in your ends.
Repeat the same for the second side.
Next, working along the sides of the handles, join yarn with a sl st where the bag strap attaches to the side, rsc along the edge of the strap to the opposite side. Fasten off and weave in your ends. Repeat for the second side.
Video Tutorial:
The photographs and pattern contained in this document are the property of Rich Textures Crochet.
This pattern is for personal use only.
No unauthorized reproduction, in whole or in part, or distribution of this pattern or content is permitted. ALL FINISHED PRODUCTS from this pattern can be used for local sales and sold online.
Thank you so much for supporting Rich Textures Crochet! To stay in touch or see more great products, be sure to visit me on Facebook and Instagram (Rich Textures Crochet). Thanks again! Happy Crocheting!


Thank you..Love it