This post contains affiliate links. This means that when you purchase through one of these links we will receive a small commission at no additional cost to you. Thank you for supporting Rich Texture Crochet!
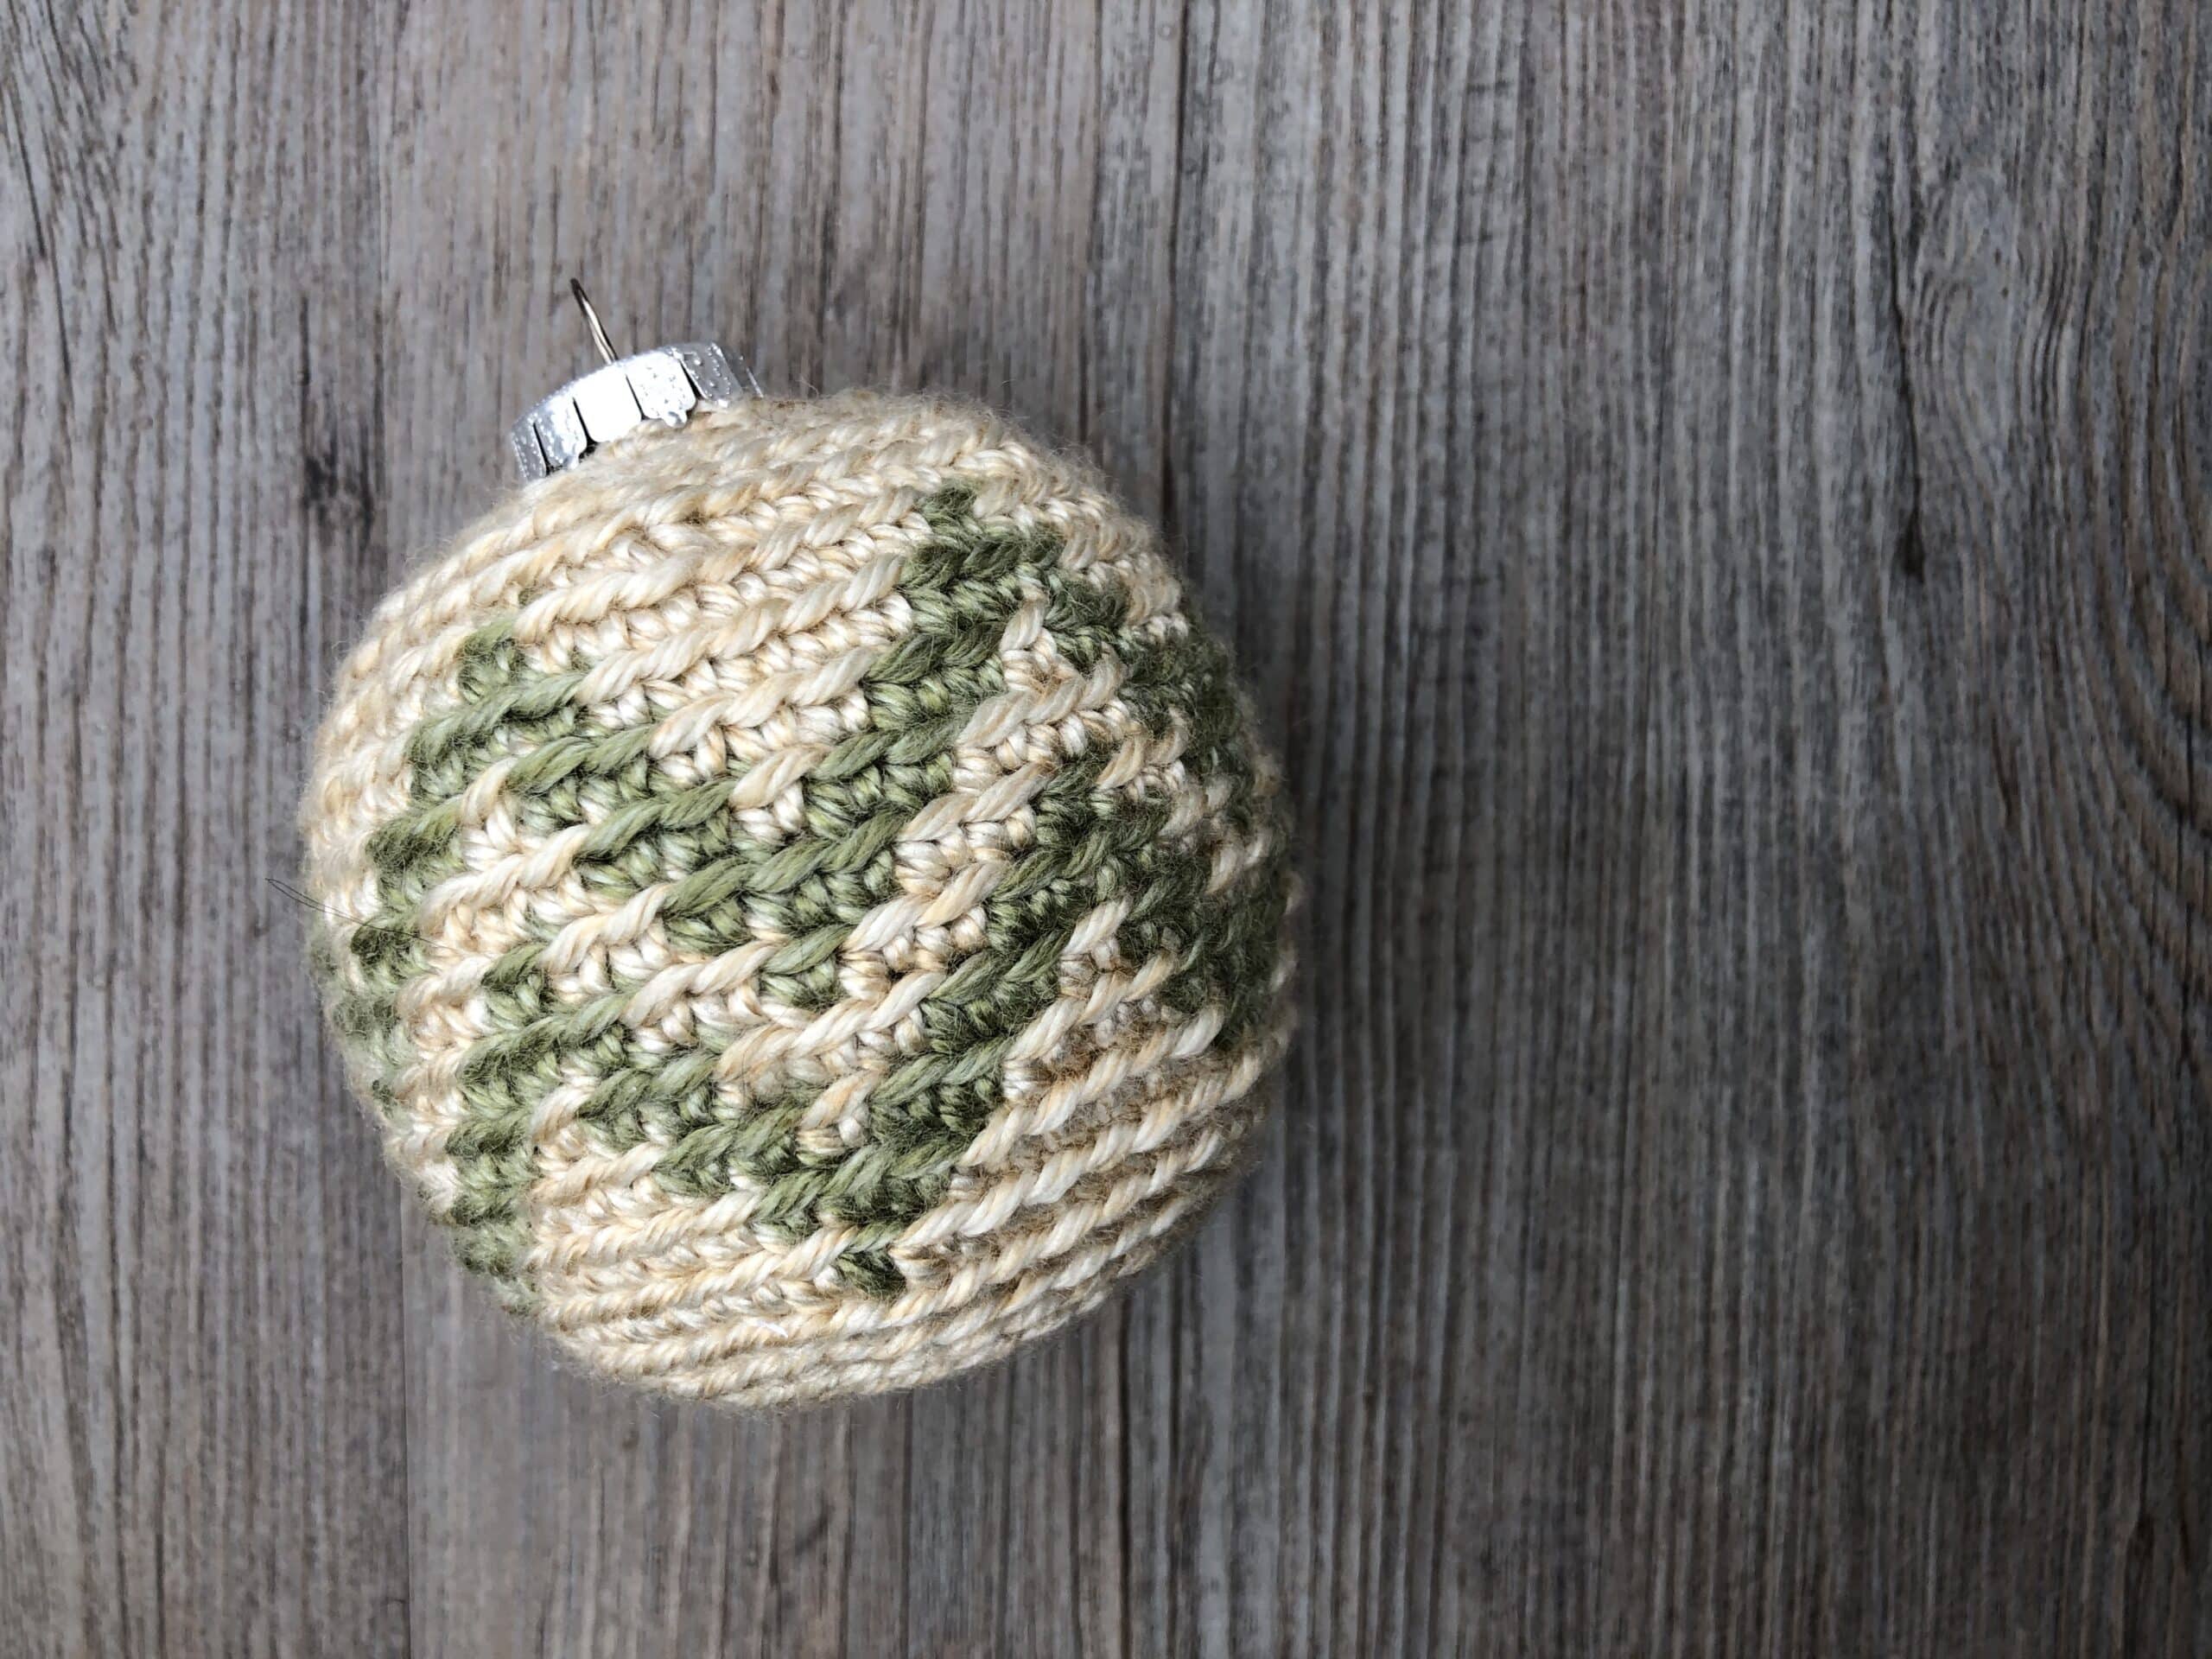
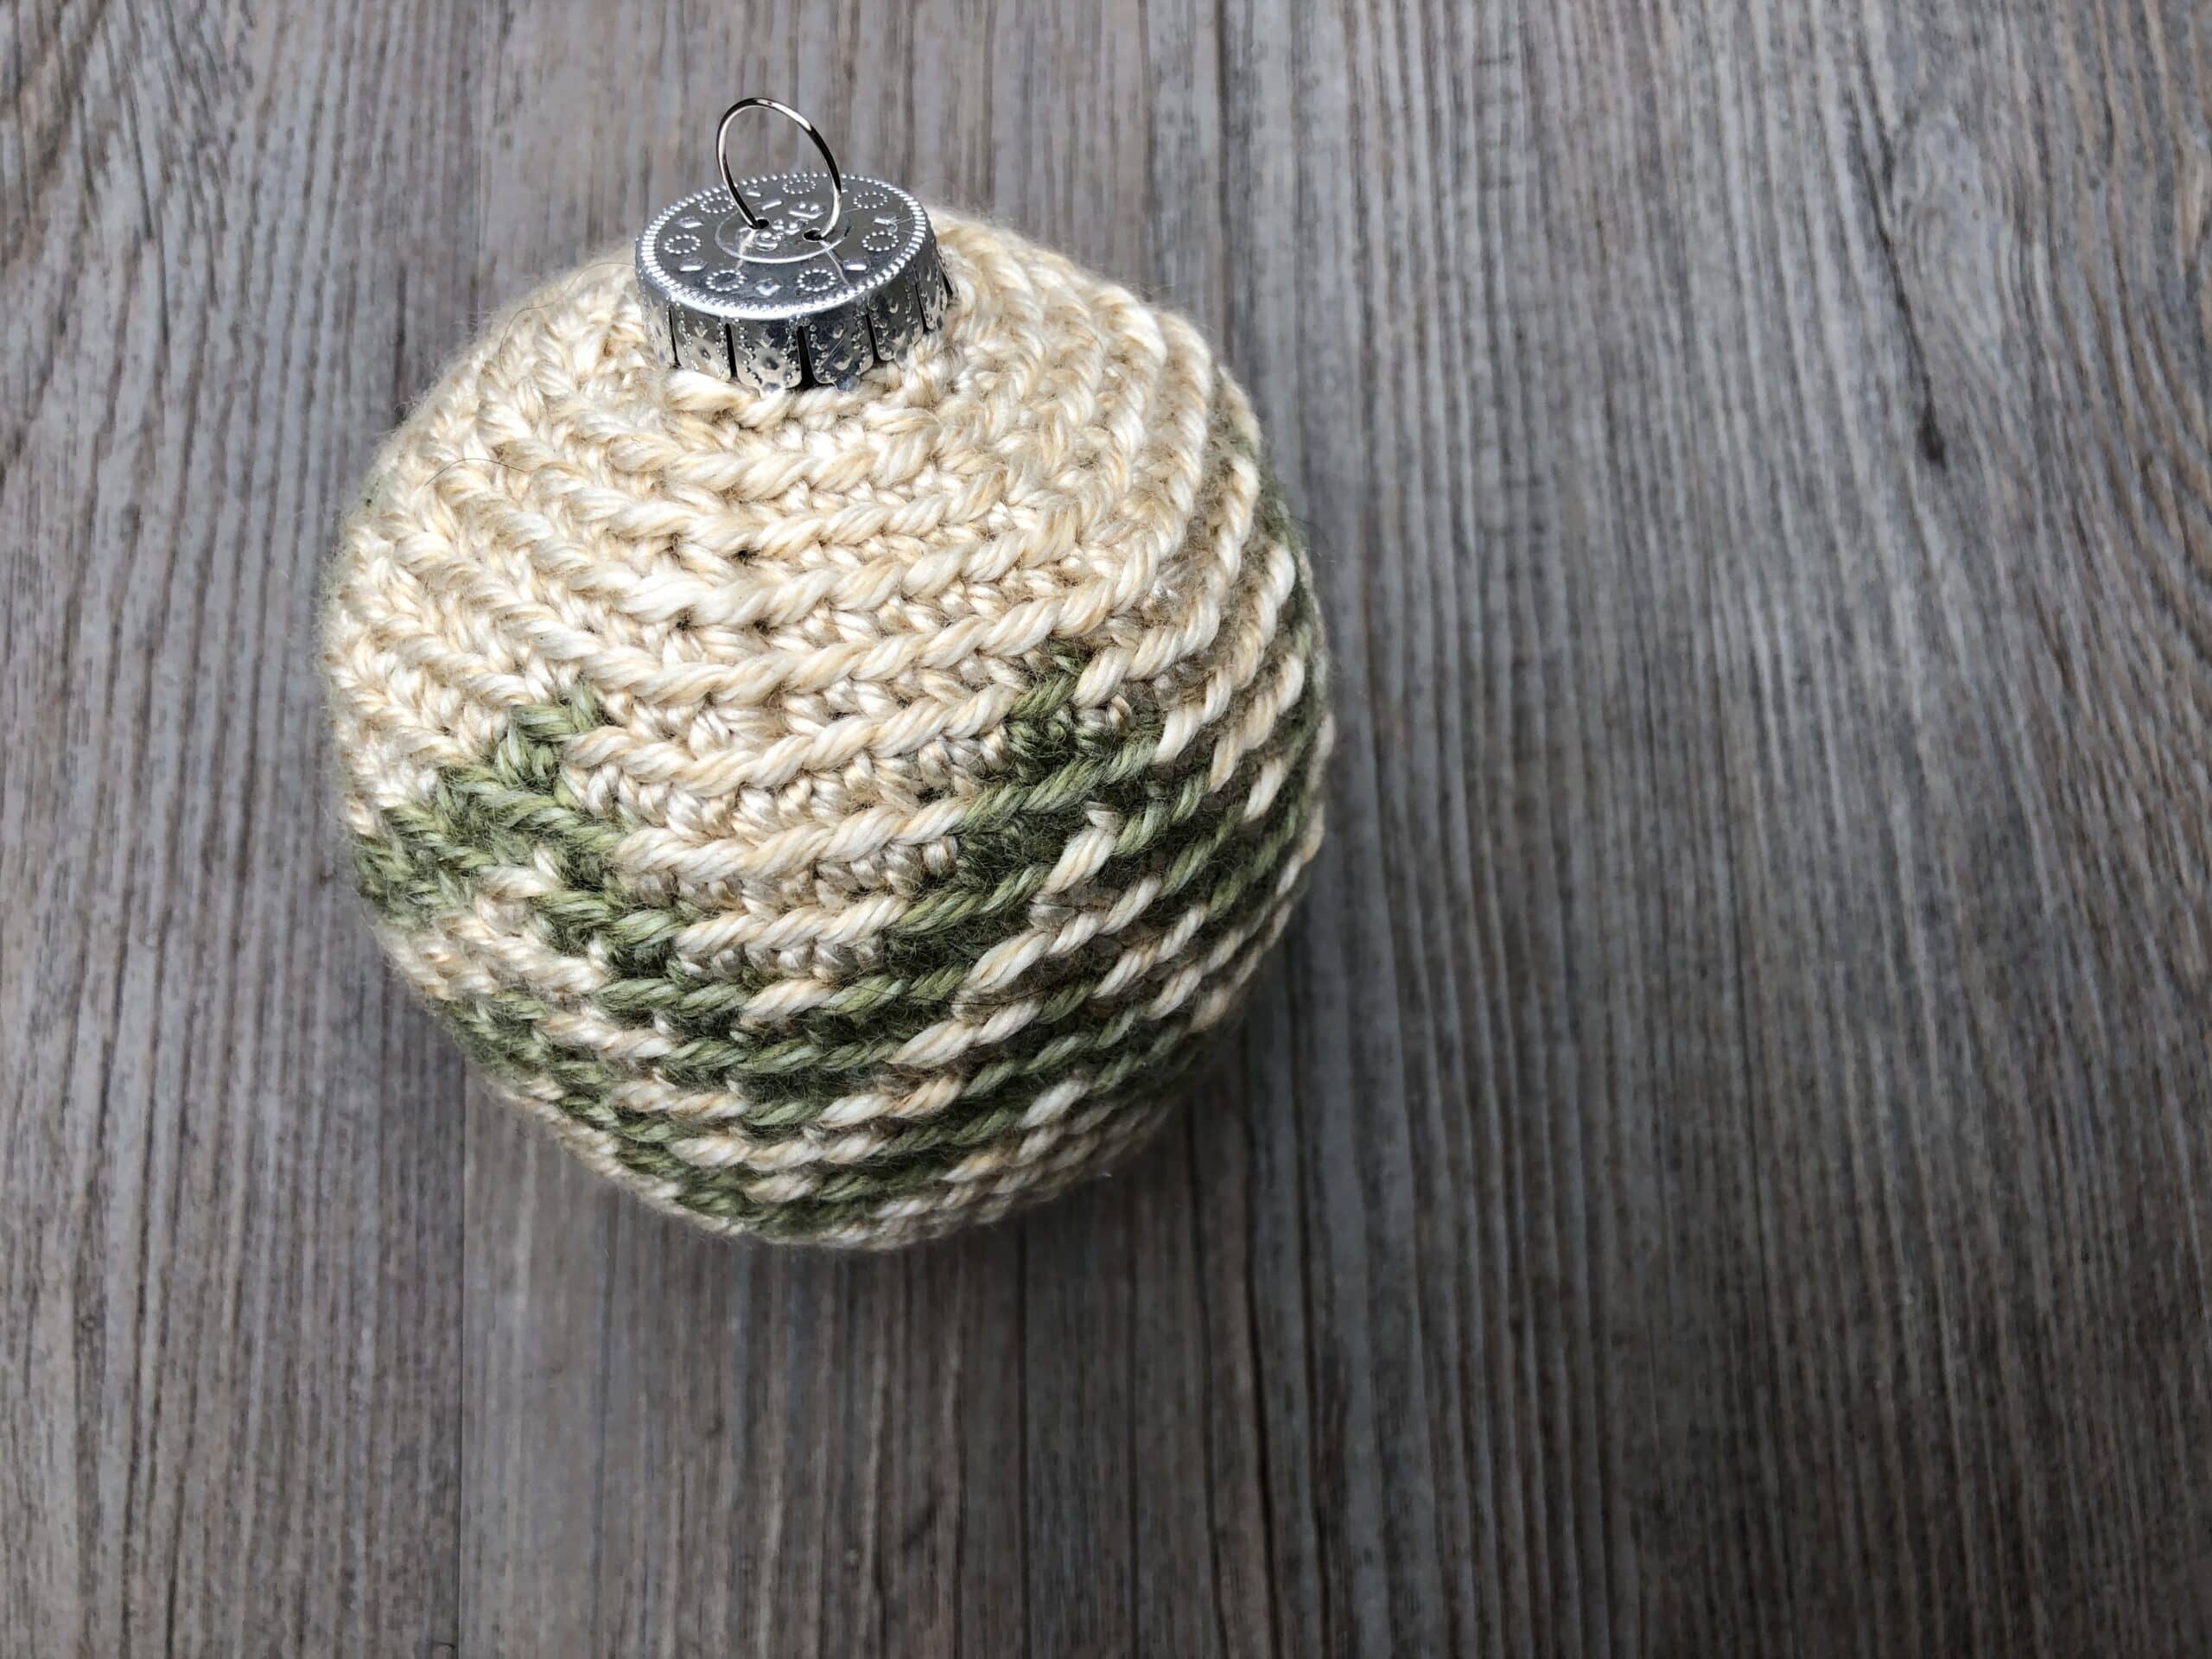
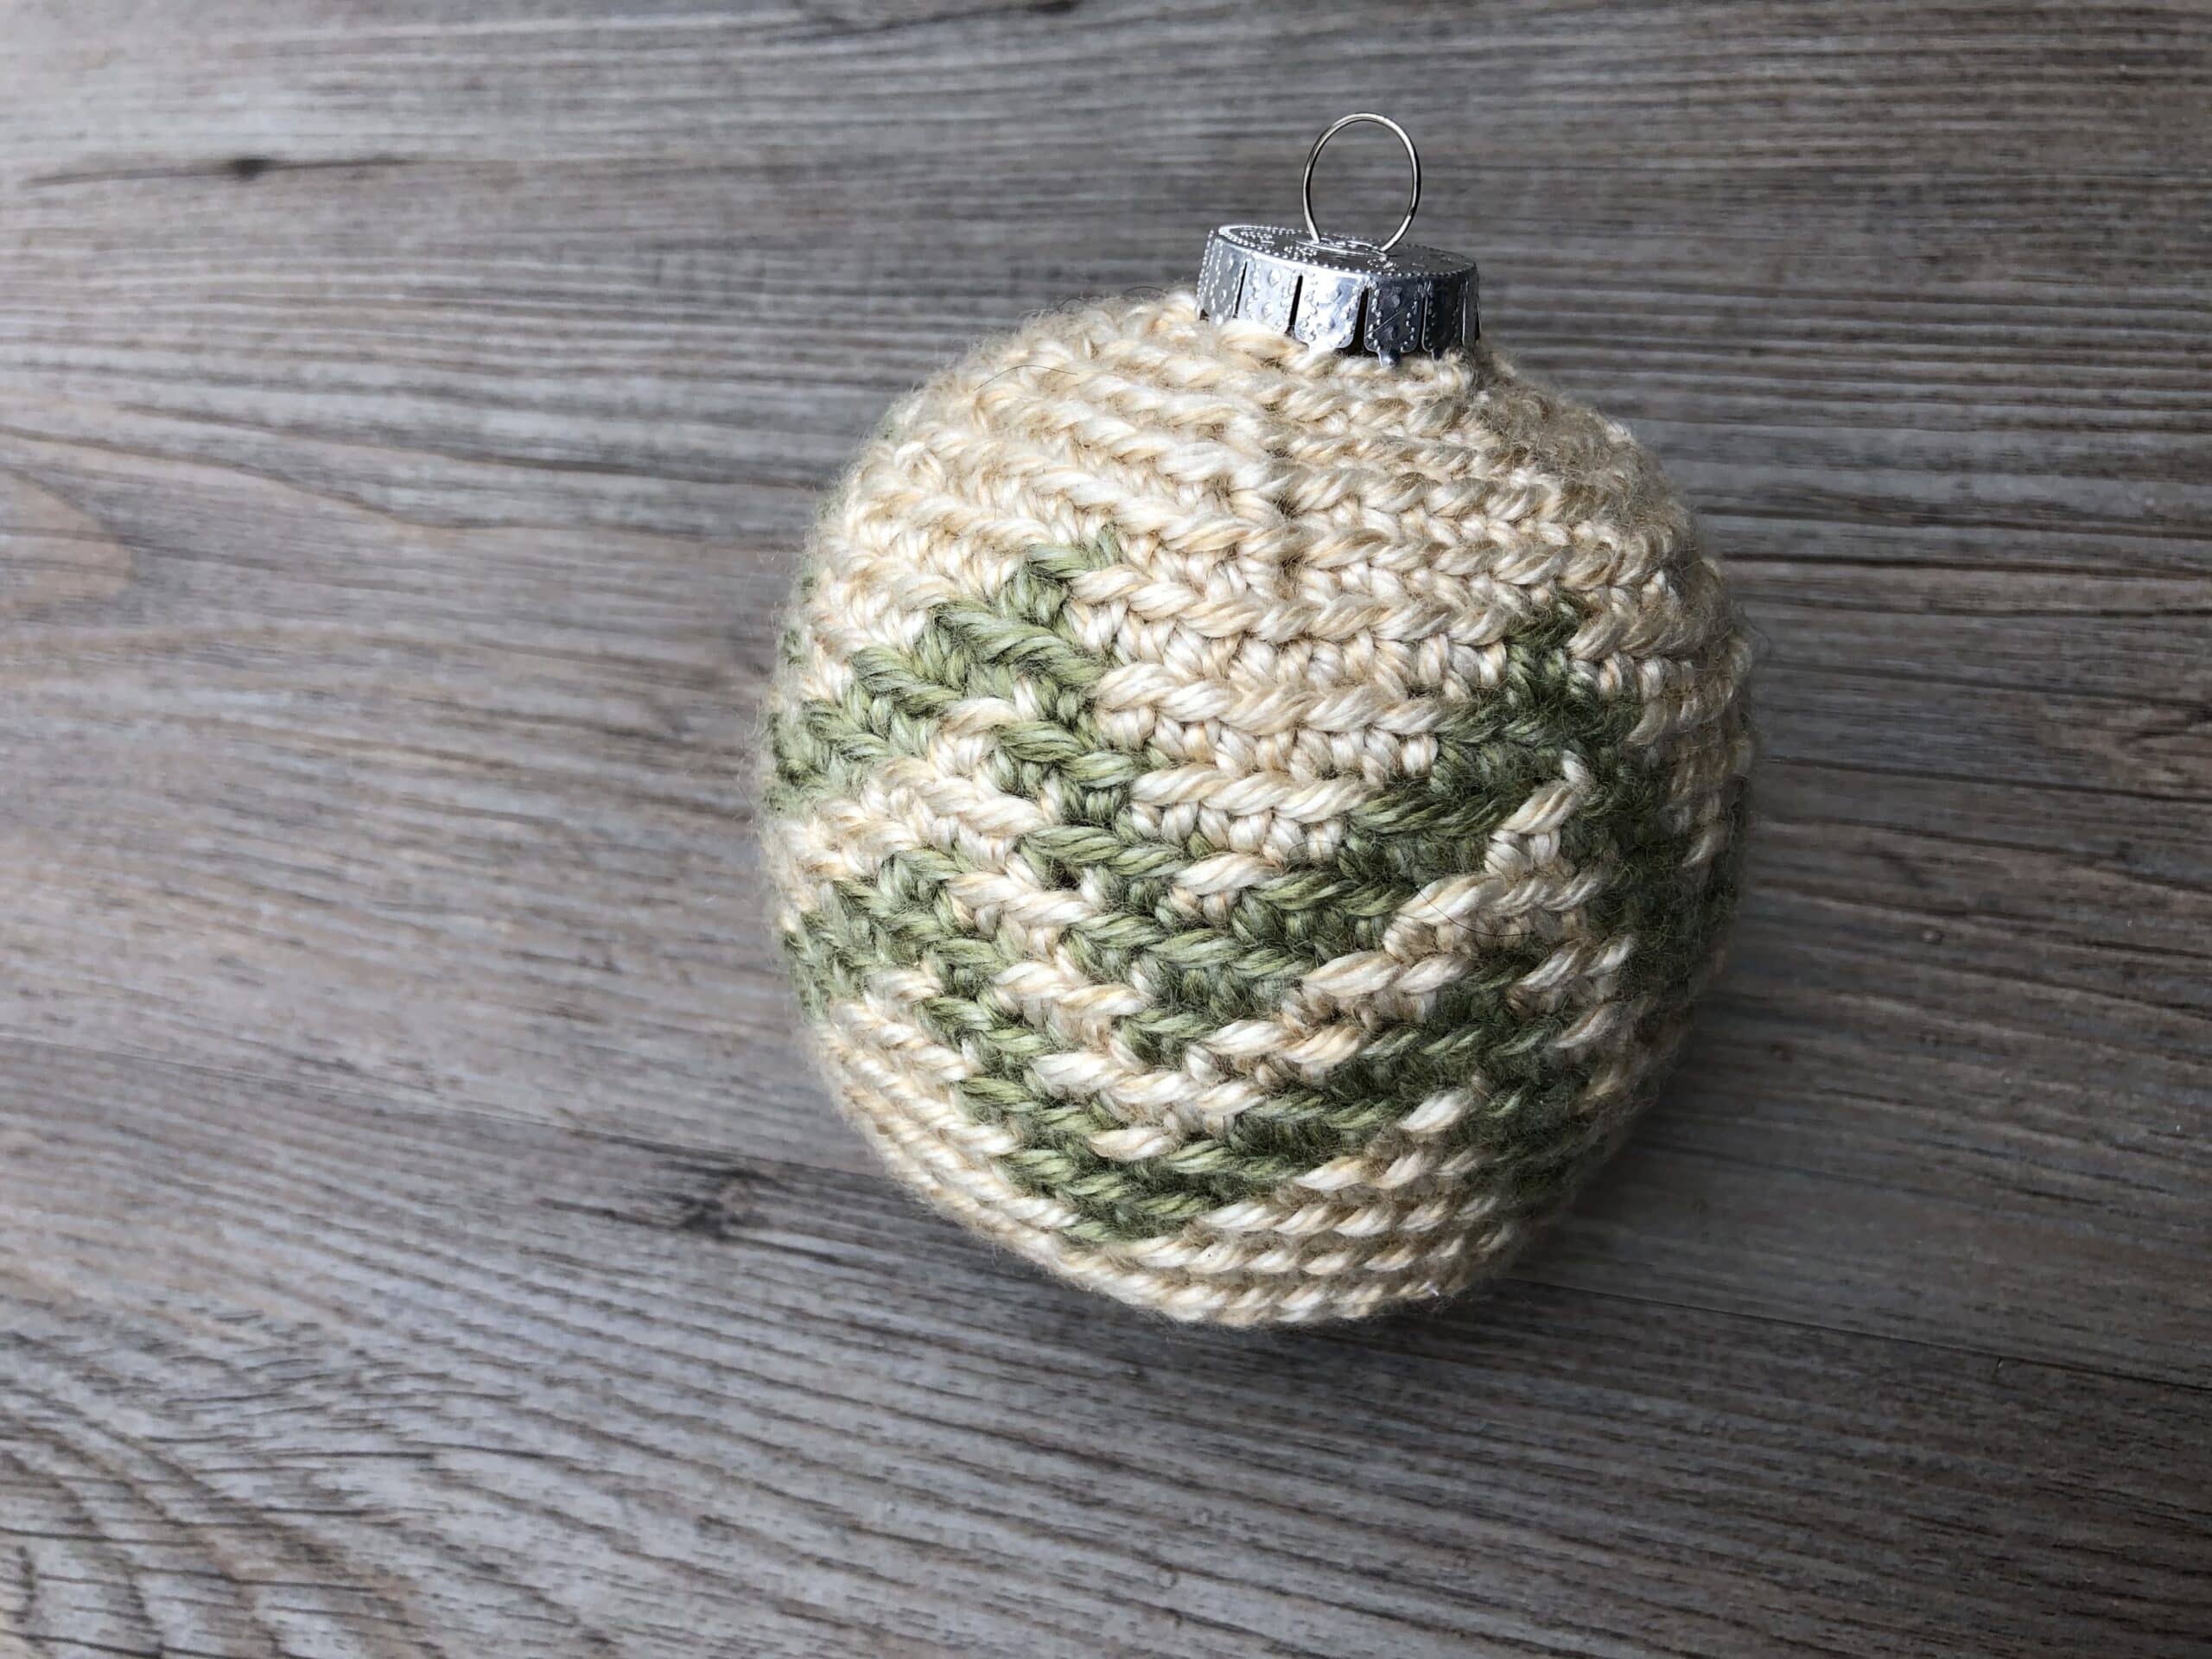
Hello and welcome to day four of the Seven days of Christmas Baubles! Today we are going to learn how to crochet this Christmas Bauble with a chevron design.
By now, if you have been crocheting along with me and have completed the Christmas Baubles one to three you will be a pro at this mosaic crochet technique! So today we are going to continue to work on our colour changing technique with this chevron design.

The chevron ripples on this bauble continue all the way around joining seamlessly. It is a pretty and classic design that is fun to work. Each of these Christmas Baubles took me about one to two hours to make.
Days One to Three:
Did you miss days one to three? No worries! Find them here:
Day One: Easy Crochet Christmas Ornament Free Pattern
Day Two: Christmas Tree Bauble Crochet Pattern
Day Three: Free Christmas Star Bauble Crochet Pattern
PDF Copy:
The pattern will be written out in full followed by a video tutorial. However if you would like to purchase a PDF copy you may do so from either my Etsy or Ravelry Shop linked below:
Click here for the Chevron Christmas Bauble on Etsy
Click here for the Chevron Christmas Bauble on Ravelry
These are so fun and I hope you are enjoying them as much as I am!
Happy crocheting!
Sarah
Free Chevron Bauble Crochet Pattern:
Skill Level: Easy
Gauge: 17 sts x 20 rows of sc = 4 inches
Finished Size: 3.5 x 3.5 inches diameter (10 inch circumference)
Yarn: Heartland® by Lion Brand® (100% Acrylic; 5 oz, 142 g; Approx. 251 yds, 230 m). Worsted/medium Weight (4). Colour A: Acadia and Colour B: Saguaro – Approximately 50 yards of each colour.
Hook: Size G/6 (4.0 mm) Hook. Adjust hook size if necessary to obtain correct gauge.
Notions: Yarn Needle, stitch marker, Christmas Bauble with 10 inch circumference OR some fibrefill.
Stitches and Abbreviations:
Blo – Back Loop Only
Ch – Chain
Rpt – Repeat
Sc – Single Crochet
Sc2tog – Single Crochet Two Stitches Together
Sk – Skip
Sl St – Slip Stitch
Yo – Yarn Over
Pattern Notes:
- Pattern is written in American English terms.
- Pattern is worked in rounds.
- Ch 1 at beginning of round does not count as stitch.
- Weave in ends as needed.
- Do not join at the ends of the rounds, instead use a stitch marker to mark the first stitch and move as work progresses.
- Do not turn at the end of each round.
- This pattern may be worked around a Christmas Bauble or without and then filled with a fibrefill afterward.
- When colour is not in use, carry it behind the working yarn.
Free Written Pattern:
With Colour A, make a magic ring OR ch 4 and join with a sl st in the 1st ch to make a ring.
Rnd 1: Into the ring work 6 sc. Do not join but use a stitch marker to mark the first st. Move marker as work progresses. Do not turn. (6 sts)
Rnd 2: In the blo, work 2 sc in each st all the way around. (12 sts)
Rnd 3: In the blo, * 2 sc in the next st, sc in the next st, rpt from * all the way around. (18 sts)
Rnd 4: In the blo, * 2 sc in the next st, sc in each of the next 2 sts, rpt from * all the way around. (24 sts)
Rnd 5: In the blo, * 2 sc in the next st, sc in each of the next 3 sts, rpt from * all the way around. (30 sts)
Rnd 6: In the blo, * 2 sc in the next st, sc in each of the next 4 sts, rpt from * all the way around. (36 sts)
Rnd 7: In the blo, * 2 sc in the next st, sc in each of the next 5 sts, rpt from * all the way around. (42 sts)
Rnd 8: In the blo, * 2 sc in the next st, sc in each of the next 6 sts, rpt from * all the way around. (48 sts)
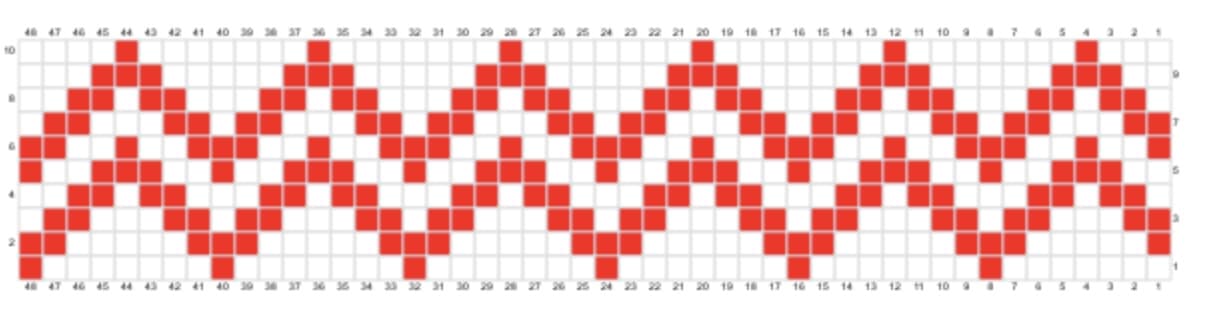
Rnds 9-19: Continue working in the blo, work the graph below beginning at row 1. Each square on the graph is equivalent to one sc, change the yarn colour as the need arises by completing the stitch prior with the new colour yarn (i.e. In the stitch prior to the stitch worked in the new colour, with colour A insert your hook in the next st and draw up a loop. Drop colour A, pick up colour B and draw through the two loops on your hook completing the stitch, work the next st in the new colour). Carry the non working yarn in behind the working yarn. Do not join or turn at the end of each round.
If working around a plastic bauble, insert the bauble into the sleeve you have created now. The rest of the pattern will be worked around the plastic bauble.
Rnd 20: In the blo, * sc2tog, sc in each of the next 6 sts, rpt from * all the way around. (42 sts)
Rnd 21: In the blo, * sc2tog, sc in each of the next 5 sts, rpt from * all the way around. (36 sts)
Rnd 22: In the blo, * sc2tog, sc in each of the next 4 sts, rpt from * all the way around. (30 sts)
Rnd 23: In the blo, * sc2tog, sc in each of the next 3 sts, rpt from * all the way around. (24 sts)
Rnd 24: In the blo, * sc2tog, sc in each of the next 2 sts, rpt from * all the way around. (18 sts)
If working around a bauble, fasten off here leaving a long tail.
If intending to fill with fibrefill continue:
Rnd 25: In the blo, * sc2tog, sc in each of the next st, rpt from * all the way around. (12 sts)
Rnd 26: In the blo, sc2tog all the way around. Fasten off leaving a long tail (6 sts)
Using the long tail, weave around the top opening of bauble and pull to close. Fasten off and weave in ends.
Video Tutorial: