
This post contains affiliate links. This means that when you purchase through one of these links we will receive a small commission at no additional cost to you. Thank you for supporting Rich Texture Crochet!
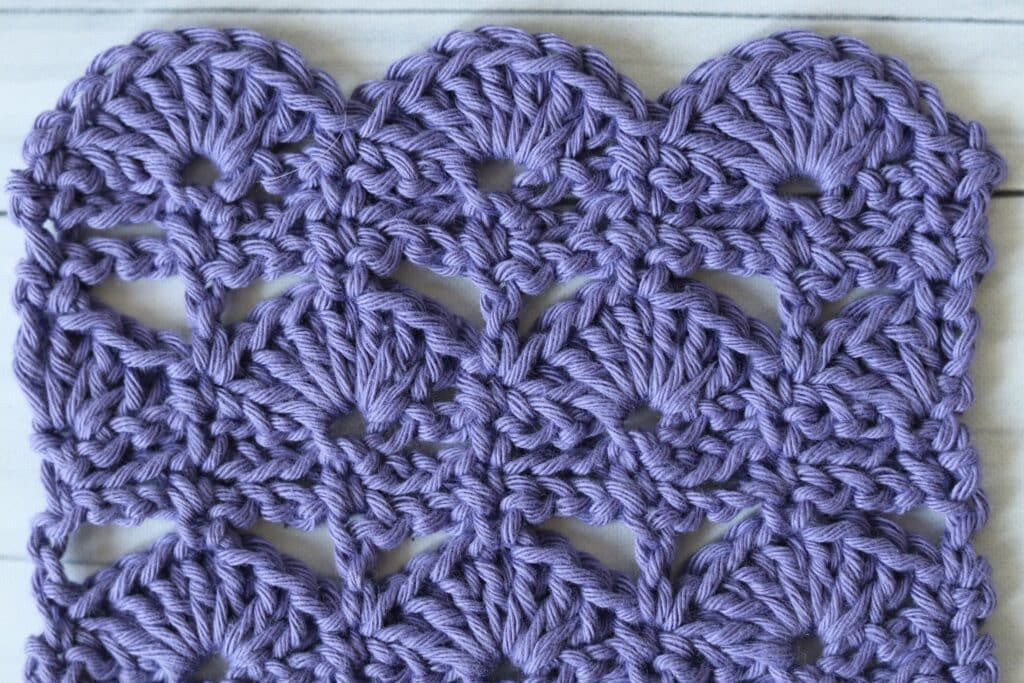
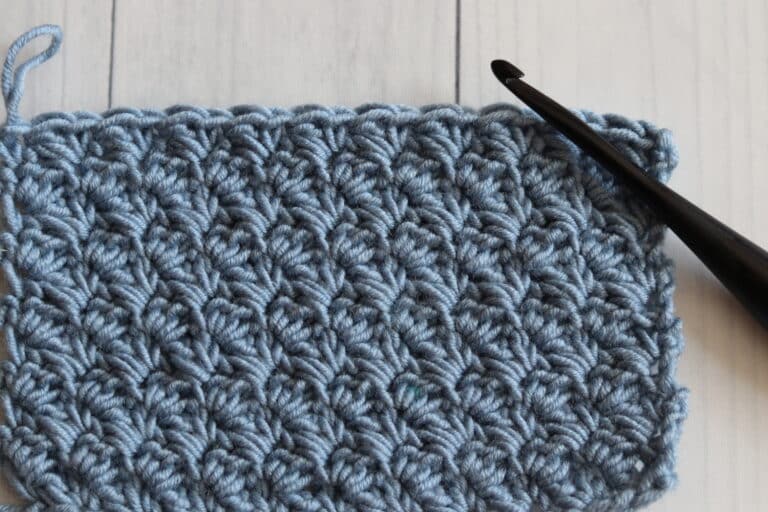
The Dock Shell stitch is a beautiful crochet shell design. The shells are set apart by rows of chain stitches.
While the dock shell stitch is fairly lacy, it also has a fair amount of stability because of its construction. I think this stitch pattern would be beautiful in a shawl or lacy spring cardigan.
This post contains affiliate links. This means that when you make a purchase through one of these links, Rich Textures Crochet will earn a small commission at no additional cost to yourself. Thank you for supporting Rich Textures Crochet!
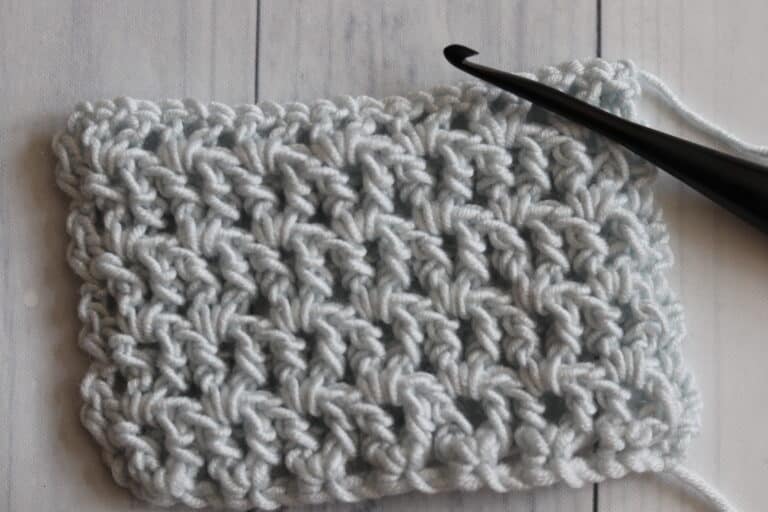
The individual stitches used in this pattern are simple. It is made up of double crochet, single crochet and chain stitches. So while it looks complicated, it is really quite easy and great for the beginner and more advanced crocheter alike.
Materials:
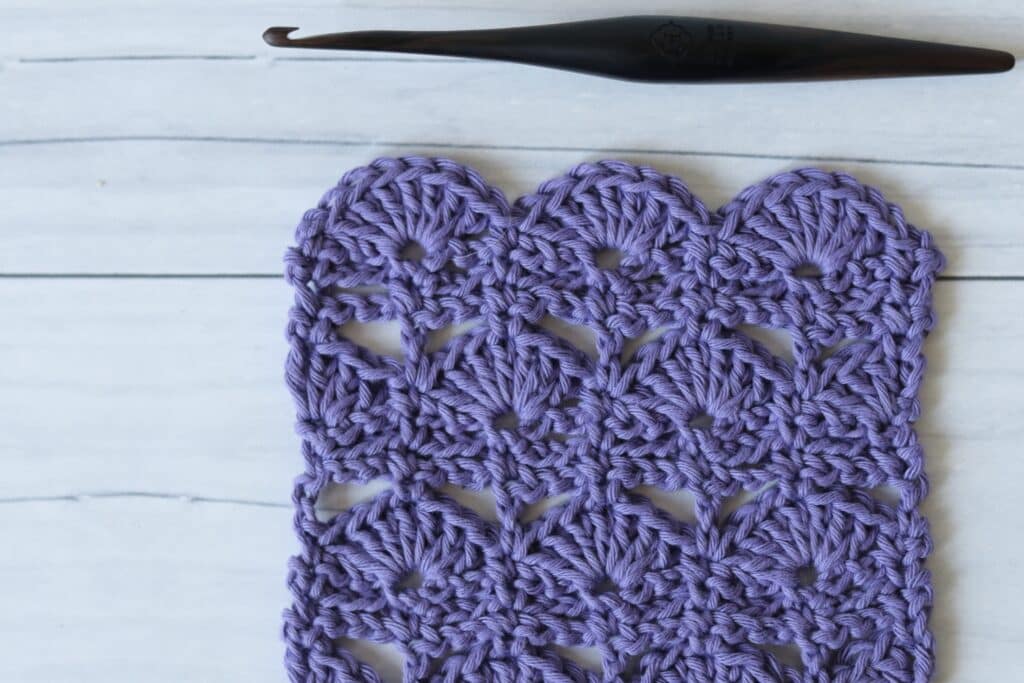
For this tutorial today I will be using a small amount of Cotton Aran by Paintbox Yarns. It is an aran weight yarn. The hook shown here and in the video below is a wooden streamline hook by Furls Crochet. However you may use any hook and yarn combination you choose.
Don’t forget to check out the video tutorial below!
The Dock Shell Stitch:
This stitch is worked in rows in this tutorial.
To begin, make a slip knot and then chain your desired number of chains. For this stitch pattern you will need a multiple of eight stitches, plus four for your foundation chain.
For my swatch I will be making a foundation chain of 28 chain stitches.
Row One:
Work three double crochet into the fourth chain from your hook, skip the next three chains, single crochet in the next stitch.
*Skip the next three chains, seven double crochet in the next chain, skip the next three chains and single crochet in the next stitch.
Repeat from * across to the last four stitches, skip the next three chains and work four double crochet in the last stitch.
Chain one and turn your work.

Row Two:
Single crochet into the first stitch, chain three, Double crochet in the next single crochet stitch, * chain three, skip the next three double crochet, single crochet in the next double crochet stitch, chain three, skip the next three double crochet stitches, double crochet into the next single crochet stitch.
Repeat from * across to the final four stitches, chain three, single crochet in the top of your turning chain.
Chain one and turn.

Row Three:
Single crochet into the first single crochet stitch, chain three, *Single crochet in the next double crochet, chain three, single crochet into the next single crochet stitch.
Repeat from * across to the final stitch. Single Crochet in the third chain of your starting chain six.
Chain one and turn your work.

Row Four:
Single crochet in the first stitch, * chain three, single crochet in the next single crochet.
Repeat from * across.
Chain one and turn.

Row Five:
Single crochet in the first single crochet, * work seven double crochet into the next single crochet, single crochet in the next single crochet.
Repeat from * across, chain 6 (Counts as a double crochet and a chain three) and turn.

Row Six:
Skip the next three double crochet, single crochet in the next double crochet, *chain three, skip the next three double crochet, double crochet in the next single crochet.
Repeat from * across, chain one and turn your work.
Rows Seven and Eight:
Repeat rows three and four. At the end of row eight, chain three.
Row Nine:
Work three double crochet in the first single crochet, single crochet in the next single crochet.
*Seven double crochet in the next single crochet, single crochet in the next single crochet.
Repeat from * across and work four double crochet in the final stitch.

And that’s it!
For the rest of the pattern repeat rows two to nine. Fasten off and weave in your ends.
Video Tutorial:
Thank you so much for stopping by! If you enjoyed this tutorial, you may also wish to check out the Thistle Stitch | How to Crochet.
See you again next week!
Sarah


Hello! I’m using your pattern to make a v-neck cardigan, and am ready to begin decreasing for the neckline. Do the shell stitch rows count as one or two rows for the purpose of calculating the rows per inch? Thank you!