
This post contains affiliate links. This means that when you purchase through one of these links we will receive a small commission at no additional cost to you. Thank you for supporting Rich Texture Crochet!
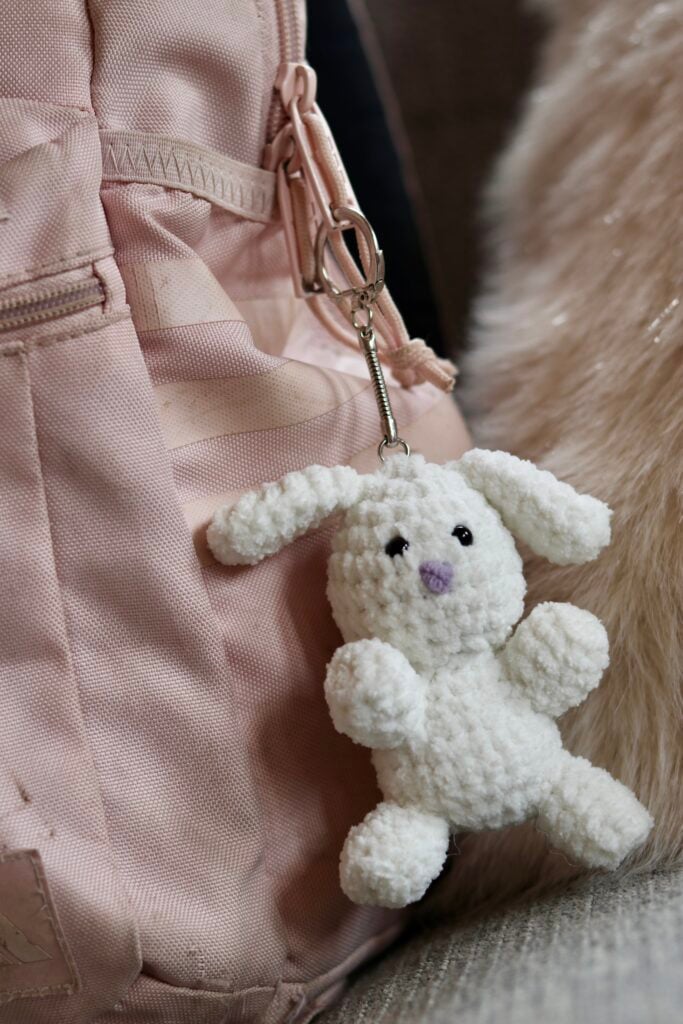
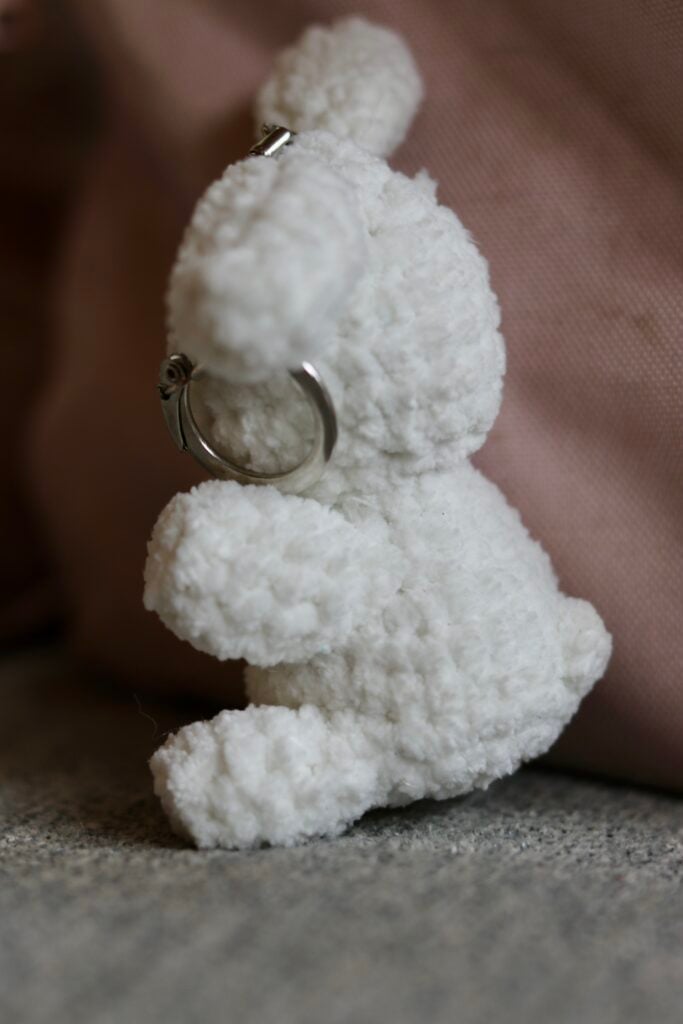
Add a little, adorable and soft keychain to your child’s backpack or bag this season with the Bunny Keychain Crochet Pattern.
I love making crochet keychains! They are quick. make great gifts and are easy to sell at craft markets. My kids also love them as ornaments for their backpacks!
Over the past few weeks I have published a couple of adorable keychain crochet patterns including the Fluffball Keychain and the Teddy Bear Keychain.
Our adorable Bunny Keychain today is worked in a similar way and with the same soft and fuzzy yarn as the Teddy Bear.
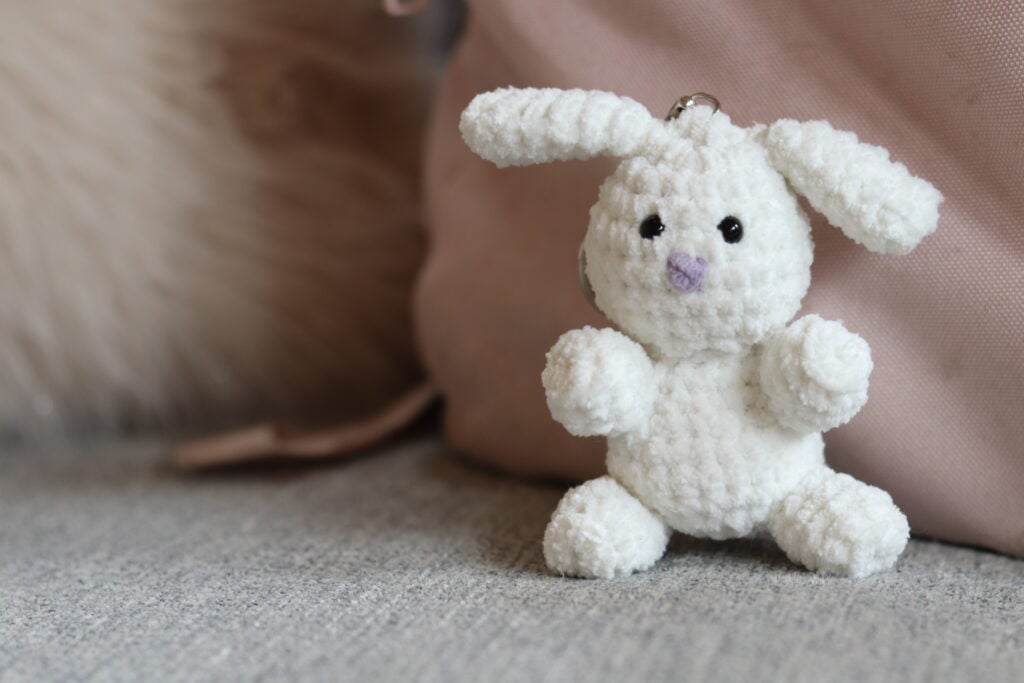
This little bunny measures approximately 4.5 inches tall and it is worked using a soft, plush type yarn called Bernat Future™ Hope by Yarnspirations ®. Each ball of yarn has approximately 333 yards of yarn in it which means that you will be able to make A LOT of bunnies from one ball! But I hope that once you make the pattern the first time, you will want to make it again and again.
For this pattern you will work all of the piece separately before filling them with a polyester fibrefill and sewing the pieces together.
Of course, you may substitute the yarn for any medium/worsted weight yarn you choose. And along with your yarn you will need a 4mm crochet hook.
I used a couple of very small safety eyes for my rabbit. Just remember that safety eyes are not recommended on items for small children. For a younger child, you may wish to embroider the eyes along with the nose instead.
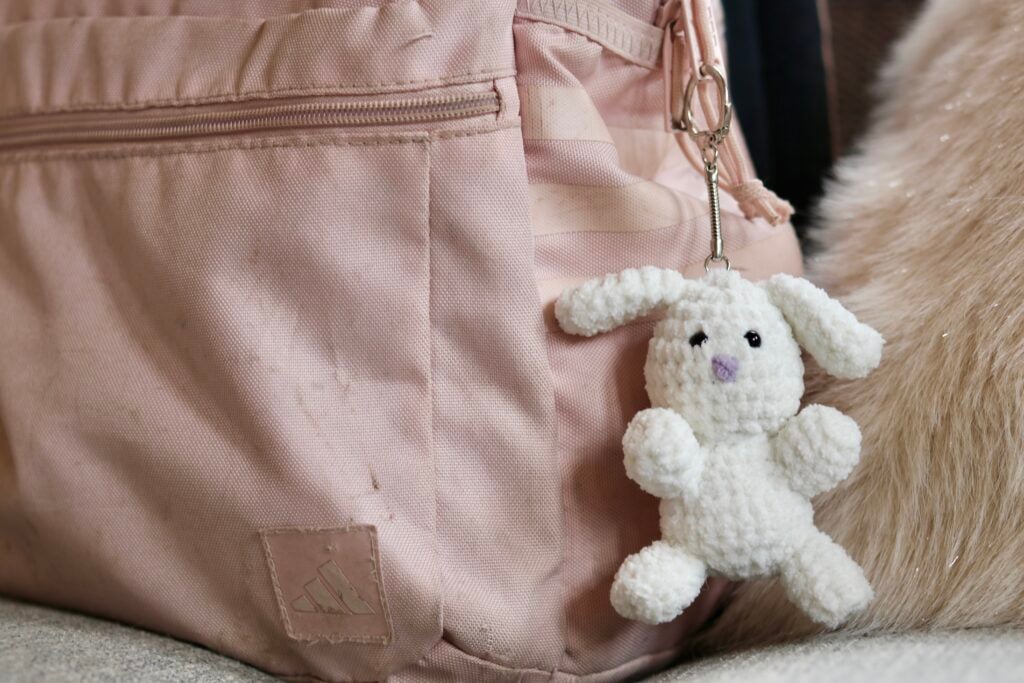
PDF Copies are also Available:
The crochet pattern for this keychain will be written out in full below and will forever remain free when viewed here on Rich Textures Crochet, and the written instruction will be followed by a free video tutorial. However if you would like to add this pattern to your library or purchase an ad free PDF, you may do so from either my Etsy or Ravelry Shop linked below:
CLICK HERE FOR THE BUNNY KEYCHAIN CROCHET PATTERN ON ETSY
CLICK HERE FOR THE BUNNY KEYCHAIN CROCHET PATTERN ON RAVELRY
Thank you for stopping by and I look forward to seeing you again soon! If you have not already, I invite you to sign up for my e-newsletter so that you will be notified each time I release a new free crochet pattern or stitch tutorial.
Check out my new books! I have three crochet books now available on Amazon in ebook and paperback format. These books include two books of blanket crochet patterns and one of my favourite crochet stitches. You can see them all by clicking HERE. Enjoy!
Bunny Keychain Crochet Pattern:
Skill Level: Easy
Gauge: 20 sc x 16 rounds of pattern = 4 inches
Finished Size: Approximately 4.5 inches tall, 3.5 inches across
Yarn: Bernat Future™ Hope by Yarnspirations ® (333 yds/305 m; 170g/6 oz; 100% recycled polyester; (4) worsted weight). You will need approximately 120 yards per bear in one colour. Optional: Piece of scrap yarn in a contrasting colour for nose.
Hook: Size G/6 (4 mm) hook.
Notions: Yarn Needle, 2 5mm safety eyes (optional), keychain ring, handful of fibrefill (more or less to reach desired firmness.
Stitches and Abbreviations:
Bobble – Bobble Stitch ([Yo, insert your hook into the indicated st, yo and draw up a loop, yo and draw through 2 loops on your hook] 4 times, yo and draw through all the remaining loops on your hook. Bobble stitch made.
Ch – Chain
Rpt – Repeat
Sc – Single Crochet
Sc2tog – Single Crochet Two Stitches Together
Sk – Skip
Sl st – Slip stitch
Yo – Yarn over
Pattern Notes:
- Pattern is written in American English terms.
- Pattern is worked in rounds in pieces (Head, body, arms and legs, ears) that are sewn together once completed.
- Ch 1 at beginning of row does not count as stitch.
- Weave in ends as needed.
Free Crochet Pattern:
HEAD (Make 1):
Make a magic ring OR chain 2 and work into the 2nd ch from your hook (NOTE: If using the second method, you may notice a small hole that you will want to tie closed before completing any pieces).
Rnd 1: Ch 1, work 8 sc into the ring. Join with a sl st in the 1st st. Do not turn (here and throughout) (8 sts)
Rnd 2: Ch 1, 2 sc in each st around. Join with a sl st in the 1st st. (16 sts)
Rnd 3: Ch 1, sc in the same st as joining and in each st around. Join with a sl st in the 1st st. (16 sts)
Rnd 4: Ch 1, sc in the 1st st, 2 sc in the next st, *sc in the next st, 2 sc in the next st; Rpt from * around. Join with a sl st in the 1st st. (24 sts)
Rnd 5-7: Ch 1, sc in the same st as joining and in each st around. Join with a sl st in the 1st st. (24 sts)
Rnd 8: Ch 1, sc in the 1st st, sc2tog over the next 2 sts, *sc in the next st, sc2tog over the next 2 sts; Rpt from * around. Join with a sl st in the 1st st. (16 sts)
Rnd 9: Ch 1, sc2tog all the way around. Join with a sl st in the 1st st. (8 sts)
Fasten off leaving a long tail for sewing, set aside.
BODY (Make 1):
Make a magic ring OR chain 2 and work into the 2nd ch from your hook (NOTE: If using the second method, you may notice a small hole that you will want to tie closed before completing any pieces).
Rnd 1: Ch 1, work 8 sc into the ring. Join with a sl st in the 1st st. Do not turn (here and throughout) (8 sts)
Rnd 2: Ch 1, 2 sc in each st around. Join with a sl st in the 1st st. (16 sts)
Rnds 3-4: Ch 1, sc in the same st as joining and in each st around. Join with a sl st in the 1st st. (16 sts)
Rnd 5: Ch 1, sc in the 1st st, 2 sc in the next st, *sc in the next st, 2 sc in the next st; Rpt from * around. Join with a sl st in the 1st st. (24 sts)
Rnd 6: Ch 1, sc in the same st as joining and in each st around. Join with a sl st in the 1st st. TURN. (24 sts)
Rnd 7: Ch 1, sc in the same st as joining, bobble in the next st, sc in each of the remaining 22 sts. Join with a sl st in the 1st st. TURN.
Rnd 8: Ch 1, sc in the same st as joining and in each st around. Join with a sl st in the 1st st. TURN. (24 sts)
Rnd 9: Ch 1, sc in the 1st st, sc2tog over the next 2 sts, *sc in the next st, sc2tog over the next 2 sts; Rpt from * around. Join with a sl st in the 1st st. (16 sts)
Rnd 10: Ch 1, sc2tog all the way around. Join with a sl st in the 1st st. (8 sts)
Fasten off leaving a long tail for sewing, set aside.
ARMS AND LEGS (Make 4):
Make a magic ring OR chain 2 and work into the 2nd ch from your hook (NOTE: If using the second method, you may notice a small hole that you will want to tie closed before completing any pieces).
Rnd 1: Ch 1, work 8 sc into the ring. Join with a sl st in the 1st st. Do not turn (here and throughout) (8 sts)
Rnd 2: Ch 1, working in the blo around, sc in the same st as joining and in each st around. Join with a sl st in the 1st st. (8 sts)
Rnds 3-4: Ch 1, now working under both top loops, sc in the same st as joining and in each st around. Join with a sl st in the 1st st. (8 sts)
Rnd 5: Ch 1, sc2tog over the next 2 sts, sc in each of the next 2 sts, sc2tog over the next 2 sts, sc in each of the next 2 sts. Join with a sl st in the 1st st. (6 sts)
Fasten off leaving a long tail for sewing, set aside.
EARS (Make 2):
Make a magic ring OR chain 2 and work into the 2nd ch from your hook (NOTE: If using the second method, you may notice a small hole that you will want to tie closed before completing any pieces).
Rnd 1: Ch 1, work 6 sc into the ring. Join with a sl st in the 1st st. Do not turn (here and throughout) (6 sts)
Rnd 2: Ch 1, 2 sc in the 1st st, sc in each of next 2 sts, 2 sc in the next st, sc in each of the next 2 sts. Join with a sl st in the 1st. (8 sts)
Rnds 3-5: Ch 1, sc in the same st as joining and in each st around. Join with a sl st in the 1st st. (8 sts)
Rnd 6: Ch 1, sc2tog, sc in each of the next 2 sts, sc2tog, sc in each of the next 2 sts. Join with a sl st in the 1st st. (6 sts)
Rnd 7: Ch 1, sc2tog, sc in the next st, sc2tog, sc in the next st. Join with a sl st in the 1st st. (4 sts)
Fasten off leaving a long tail for sewing, set aside.
ASSEMBLY:
1. Beginning with the ears, place at the top of the head on either side and sew into place using the long tail. I positioned mine on either side at the start of round 2 of the bear head.
2. If desired, using colour B, embroider a small nose into the centre front of the bunny head.
3. Position safety eyes in desired position above the bear nose and secure into place.
4. Stuff the bear head with fibrefill.
5. Stuff the bear body with fibrefill and close the open end using the long tail.
6. Attach the completed bear’s head to the body. I sewed in place using round 2 of the bear body as a guide.
7. Add a small amount of fibrefill to the arms and legs. Position them in their desired locations and sew into place using the long tails.
8. Using a little bit of colour A, sew the keychain in place at the top of the head.
Video Tutorial:
The photographs and pattern contained in this document are the property of Rich Textures Crochet.
This pattern is for personal use only.
No unauthorized reproduction, in whole or in part, or distribution of this pattern or content is permitted. ALL FINISHED PRODUCTS from this pattern can be used for local sales and sold online.
Thank you so much for supporting Rich Textures Crochet! To stay in touch or see more great products, be sure to visit me on Facebook and Instagram (Rich Textures Crochet). Thanks again! Happy Crocheting!