This post contains affiliate links. This means that when you purchase through one of these links we will receive a small commission at no additional cost to you. Thank you for supporting Rich Texture Crochet!
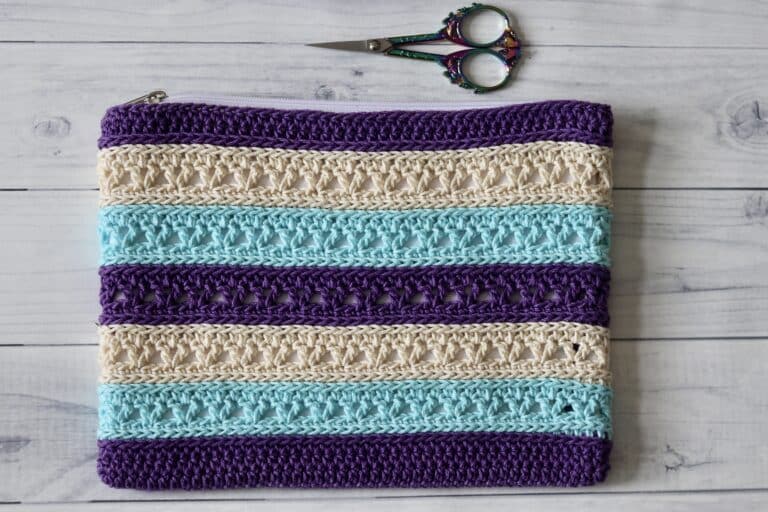
The Bay Window Zippered Bag crochet pattern is a beautiful and easy crochet bag that is worked around and secured to a canvas zippered pouch.
The result is a super easy lined zippered bag that is great for small accessories, make up, stationary, crochet hooks and notions and more! This Bay Window Zippered Bag crochet pattern is the companion to the Bay Window Market Bag. It continues a similar design of double and single crochet stripes, and double crochet mesh.
Love how easy this bag is to work! You are able to work it up in only a few hours. You can attach the crochet bag to the canvas pouch lining either by sewing or by glueing it around the top. The canvas pouches may be found at many craft stores or online.

PDF Copies are Available:
The Bay Window Zippered Bag Crochet pattern will be written out on full below followed by a video tutorial and they are free to follow here on my site and on YouTube. If you wish to add this crochet pattern to your library and purchase an ad free PDF, you may do so from my Etsy and Ravelry Shops linked below:
CLICK HERE FOR THE BAY WINDOW ZIPPERED BAG ON ETSY
CLICK HERE FOR THE BAY WINDOW ZIPPERED BAG ON RAVELRY
Thank you so much for stopping by! Be sure to sign up for my email newsletter so that you never miss a new free crochet pattern. Happy Crocheting!
Sarah

Bay Window Zippered Bag Crochet Pattern:
Skill Level: Easy
Gauge: 18 x 20 rows of sc = 4 inches
Finished Size: Approximately 7.5 x 10 inches excluding the handles
Yarn: 24/7 Cotton by Lion Brand® (186 yds/170 m; 100g/3.5 oz; 100% cotton; (4) worsted weight). You will need 1/2 ball Denim (Colour A), 1/2 ball White (Colour C), 1/2 ball Silver (Colour B)
Hook: Size G/6 (4 mm) hook.
Notions: Yarn Needle, 7.5 x 10 in. Canvas pouch with zipper, sewing needle and thread or fabric glue.
Stitches and Abbreviations:
Ch – Chain
Dc – Double Crochet
Hdc – Half Double Crochet
Rpt – Repeat
Sc – Single Crochet
Sk – Skip
Sl st – Slip stitch
Yo – Yarn over
Pattern Notes:
- Pattern is written in American English terms.
- Pattern is worked in rounds, as one piece, from the bottom up to the handles.
- Ch 1 at beginning of round does not count as stitch.
- Weave in ends as needed.
- Do not turn unless stated otherwise

Free Crochet Pattern:
With colour A, ch 47
Rnd 1: With colour A, hdc in the 2nd ch from your hook and in each st across to the final st, 3 hdc in the final st. Now working along the opposite side of your foundation ch, hdc in each st across to the final ch, 2 hdc in the final ch, join with a sl st in the 1st st. (94 sts) Do not turn.
Rnds 2-3: Ch 1, hdc in the same st as joining and in each st around, join with a sl st in the 1st st. (94 sts) Do not turn.
Rnd 4: Ch 1, sc in the 1st st and in each st around. Join with a sl st in the 1st st. Switch to colour B.
Rnd 5: With colour B, ch 3, dc in the next st and in each st around, join with a sl st in the 1st st. Switch to colour A.
Rnd 6: With colour A, sc in the 1st st and in each st around, join with a sl st in the 1st st. Switch to colour B.
Rnd 7: With colour B, ch 3, dc in the next st and in each st around, join with a sl st in the 1st st. Switch to colour A.
Rnd 8: With colour A, sc in the 1st st and in each st around, join with a sl st in the 1st st. Switch to colour C.
Rnd 9: With colour C, ch 1, sc in the 1st st and in each st around, join with a sl st in the 1st st.
Rnd 10: Ch 4 (counts as a dc, ch 1), sk the next st, *dc in the next st, ch 1, sk the next st; Rpt from * around, join with a sl st in the 3rd ch of the starting ch-4.
Rnds 11-15: Ch 4, sk the next ch-1 sp, *dc in the next st, ch 1, sk the next ch-1 sp; Rpt from * around, join with a sl st in the 3rd ch of the starting ch-4.
Rnd 16: Ch 1, sc in the same st as joining, sc in the next ch-1 sp, *sc in the next st, sc in the next ch-1 sp; Rpt from * around, join with a sl st in the 1st st. Switch to colour A.
Rnd 17: Ch 1, sc in the 1st st and in each st around. Join with a sl st in the 1st st. Switch to colour B.
Rnd 18: With colour B, ch 3, dc in the next st and in each st around, join with a sl st in the 1st st. Switch to colour A.
Rnd 19: With colour A, sc in the 1st st and in each st around, join with a sl st in the 1st st. Switch to colour B.
Rnd 20: With colour B, ch 3, dc in the next st and in each st around, join with a sl st in the 1st st. Switch to colour A.
Rnd 21: With colour A, sc in the 1st st and in each st around, join with a sl st in the 1st st.
Rnds 22-24: Ch 1, hdc in the 1st st and in each st around. Join with a sl st in the 1st st.
Fasten off, weave in your ends.
Slip the Bay Window bag over top of your canvas pouch with the zipper at the top. Using a small amount of thread (alternatively you may use some fabric glue), sew/secure the Bay Window bag to the canvas pouch through the final round of stitches.



Do you have a source for the bags you used? I’ve been looking through Amazon and not finding it easy to locate pouches thar are 7.5 x 10.
I purchased mine from Michaels in Canada 🙂
Wonderful ! Thank you!