
This post contains affiliate links. This means that when you purchase through one of these links we will receive a small commission at no additional cost to you. Thank you for supporting Rich Texture Crochet!
Welcome to Week Two of the Wedding CAL by Rich Textures Crochet! Today we will be crocheting the first of seven panels of the Wedding Throw.
Maybe it’s just the hopeless romantic in me, but I love weddings! And as I was designing and working on this crochet blanket, I couldn’t help but get excited about my brother’s upcoming wedding!
What colours will they choose? What will her dress look like? Both he and his fiancee are musically inclined so I guessing the music will be wonderful. Will they cry during their vows?
So exciting! So many times while working on this project I found myself with a goofy smile on my face.
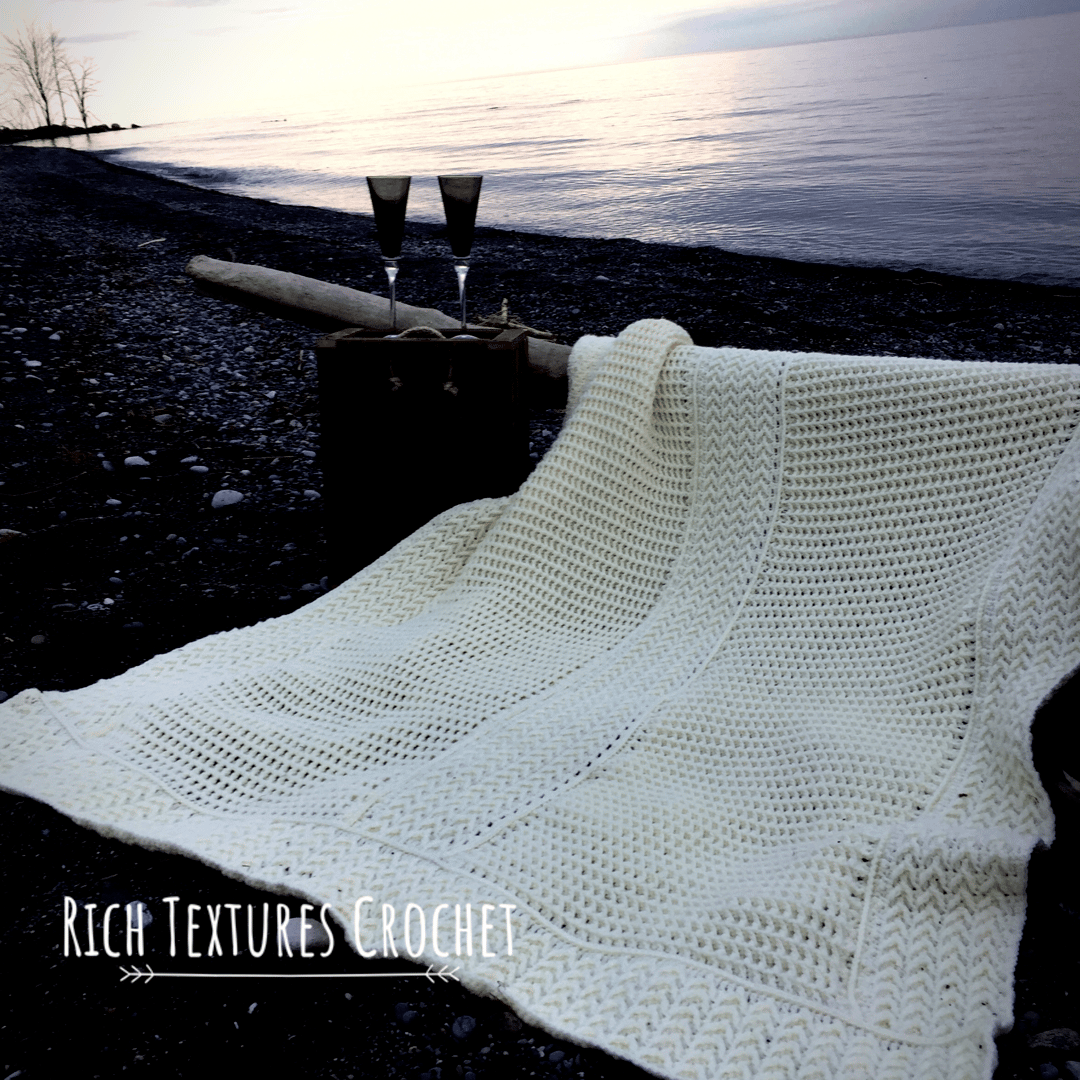
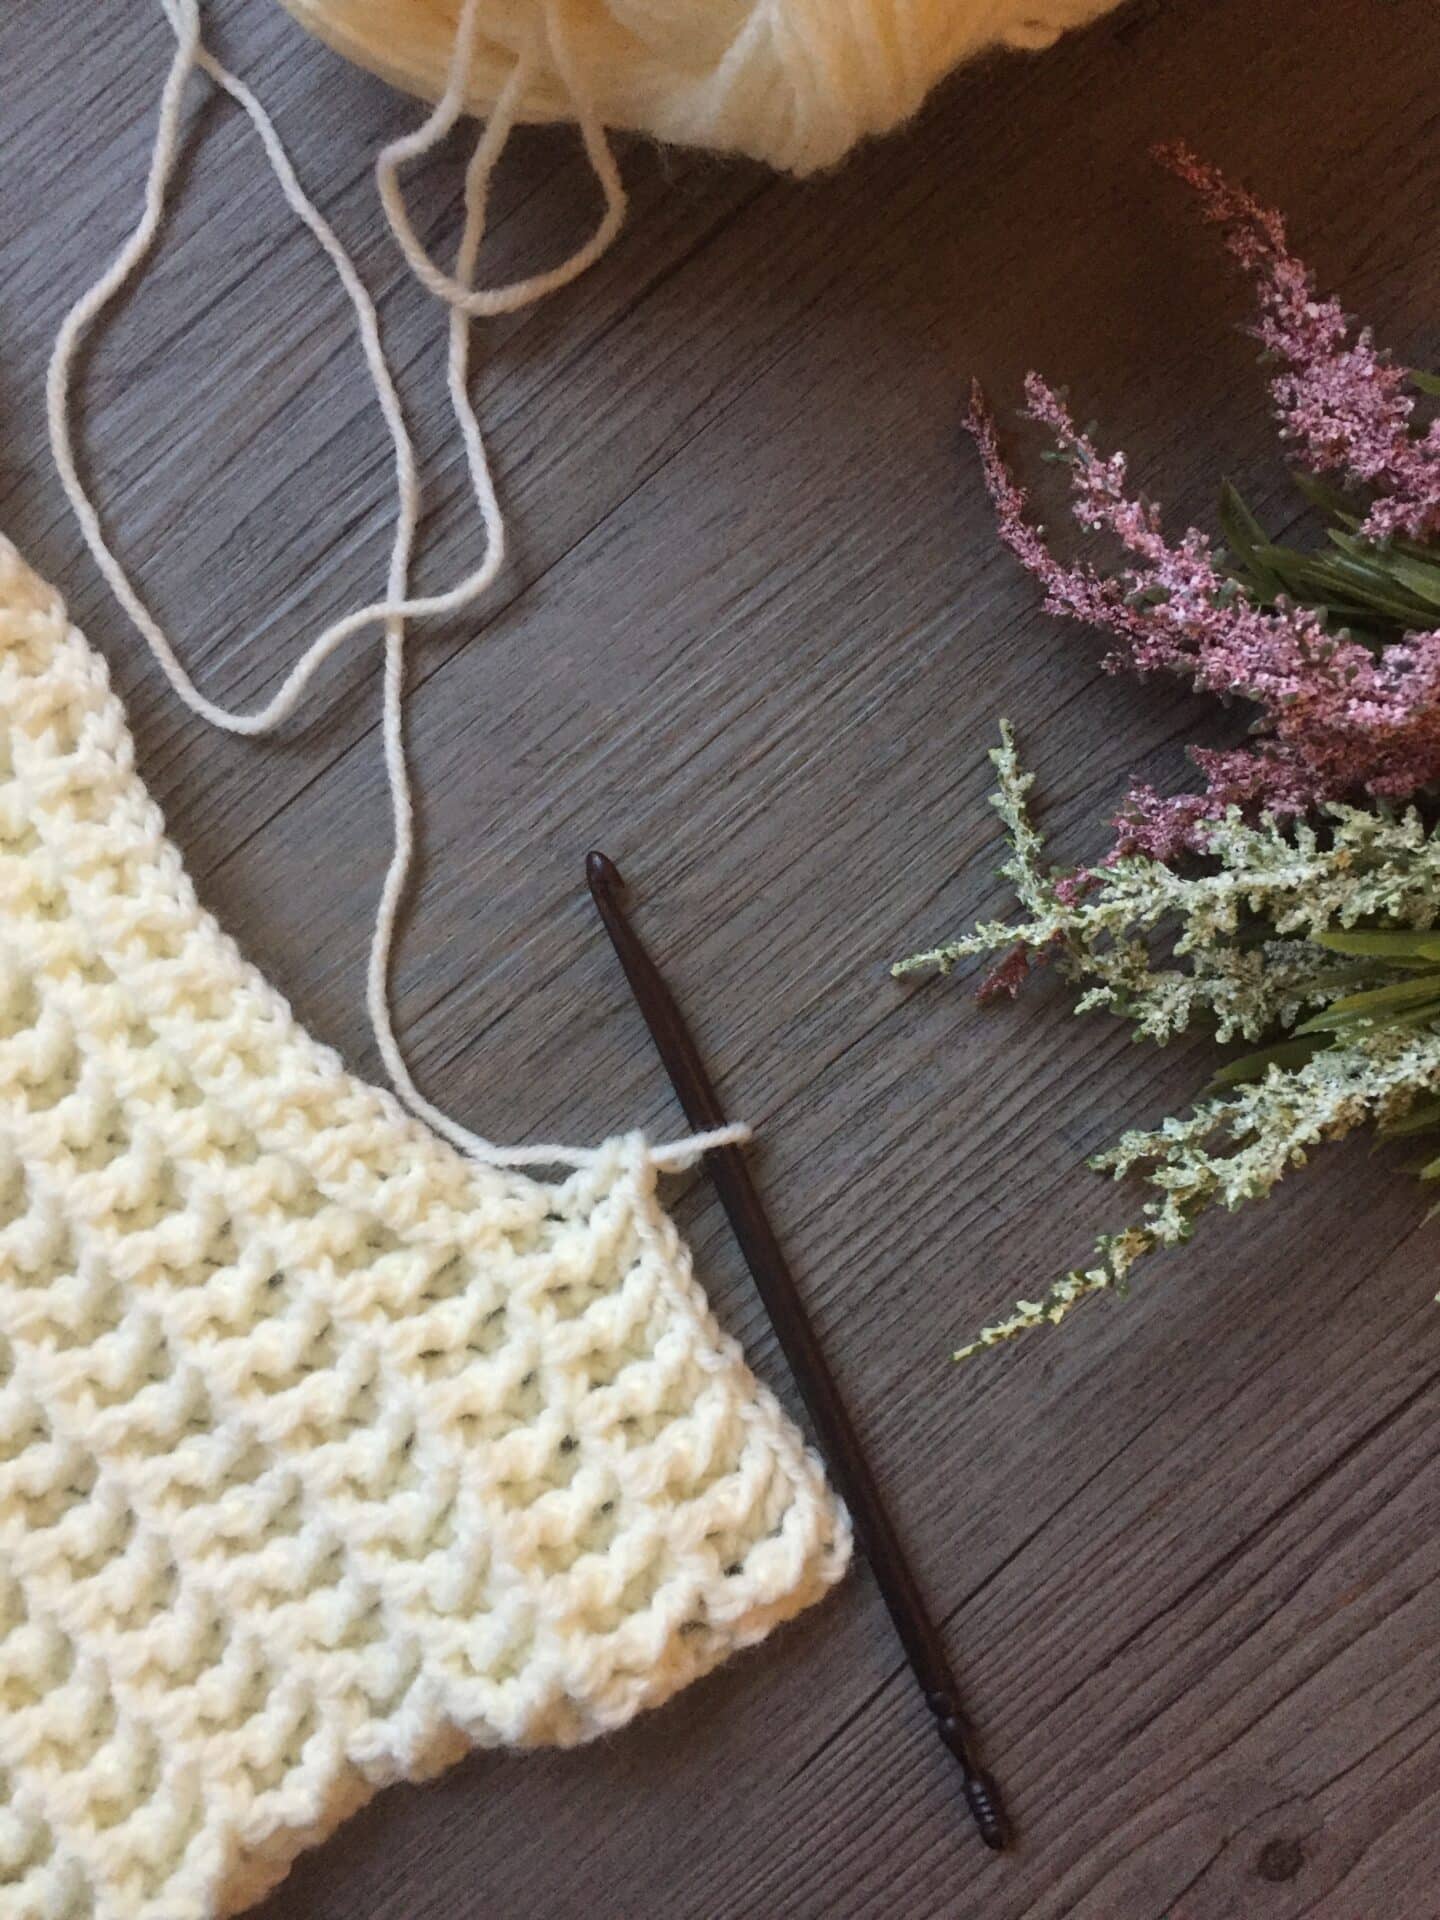
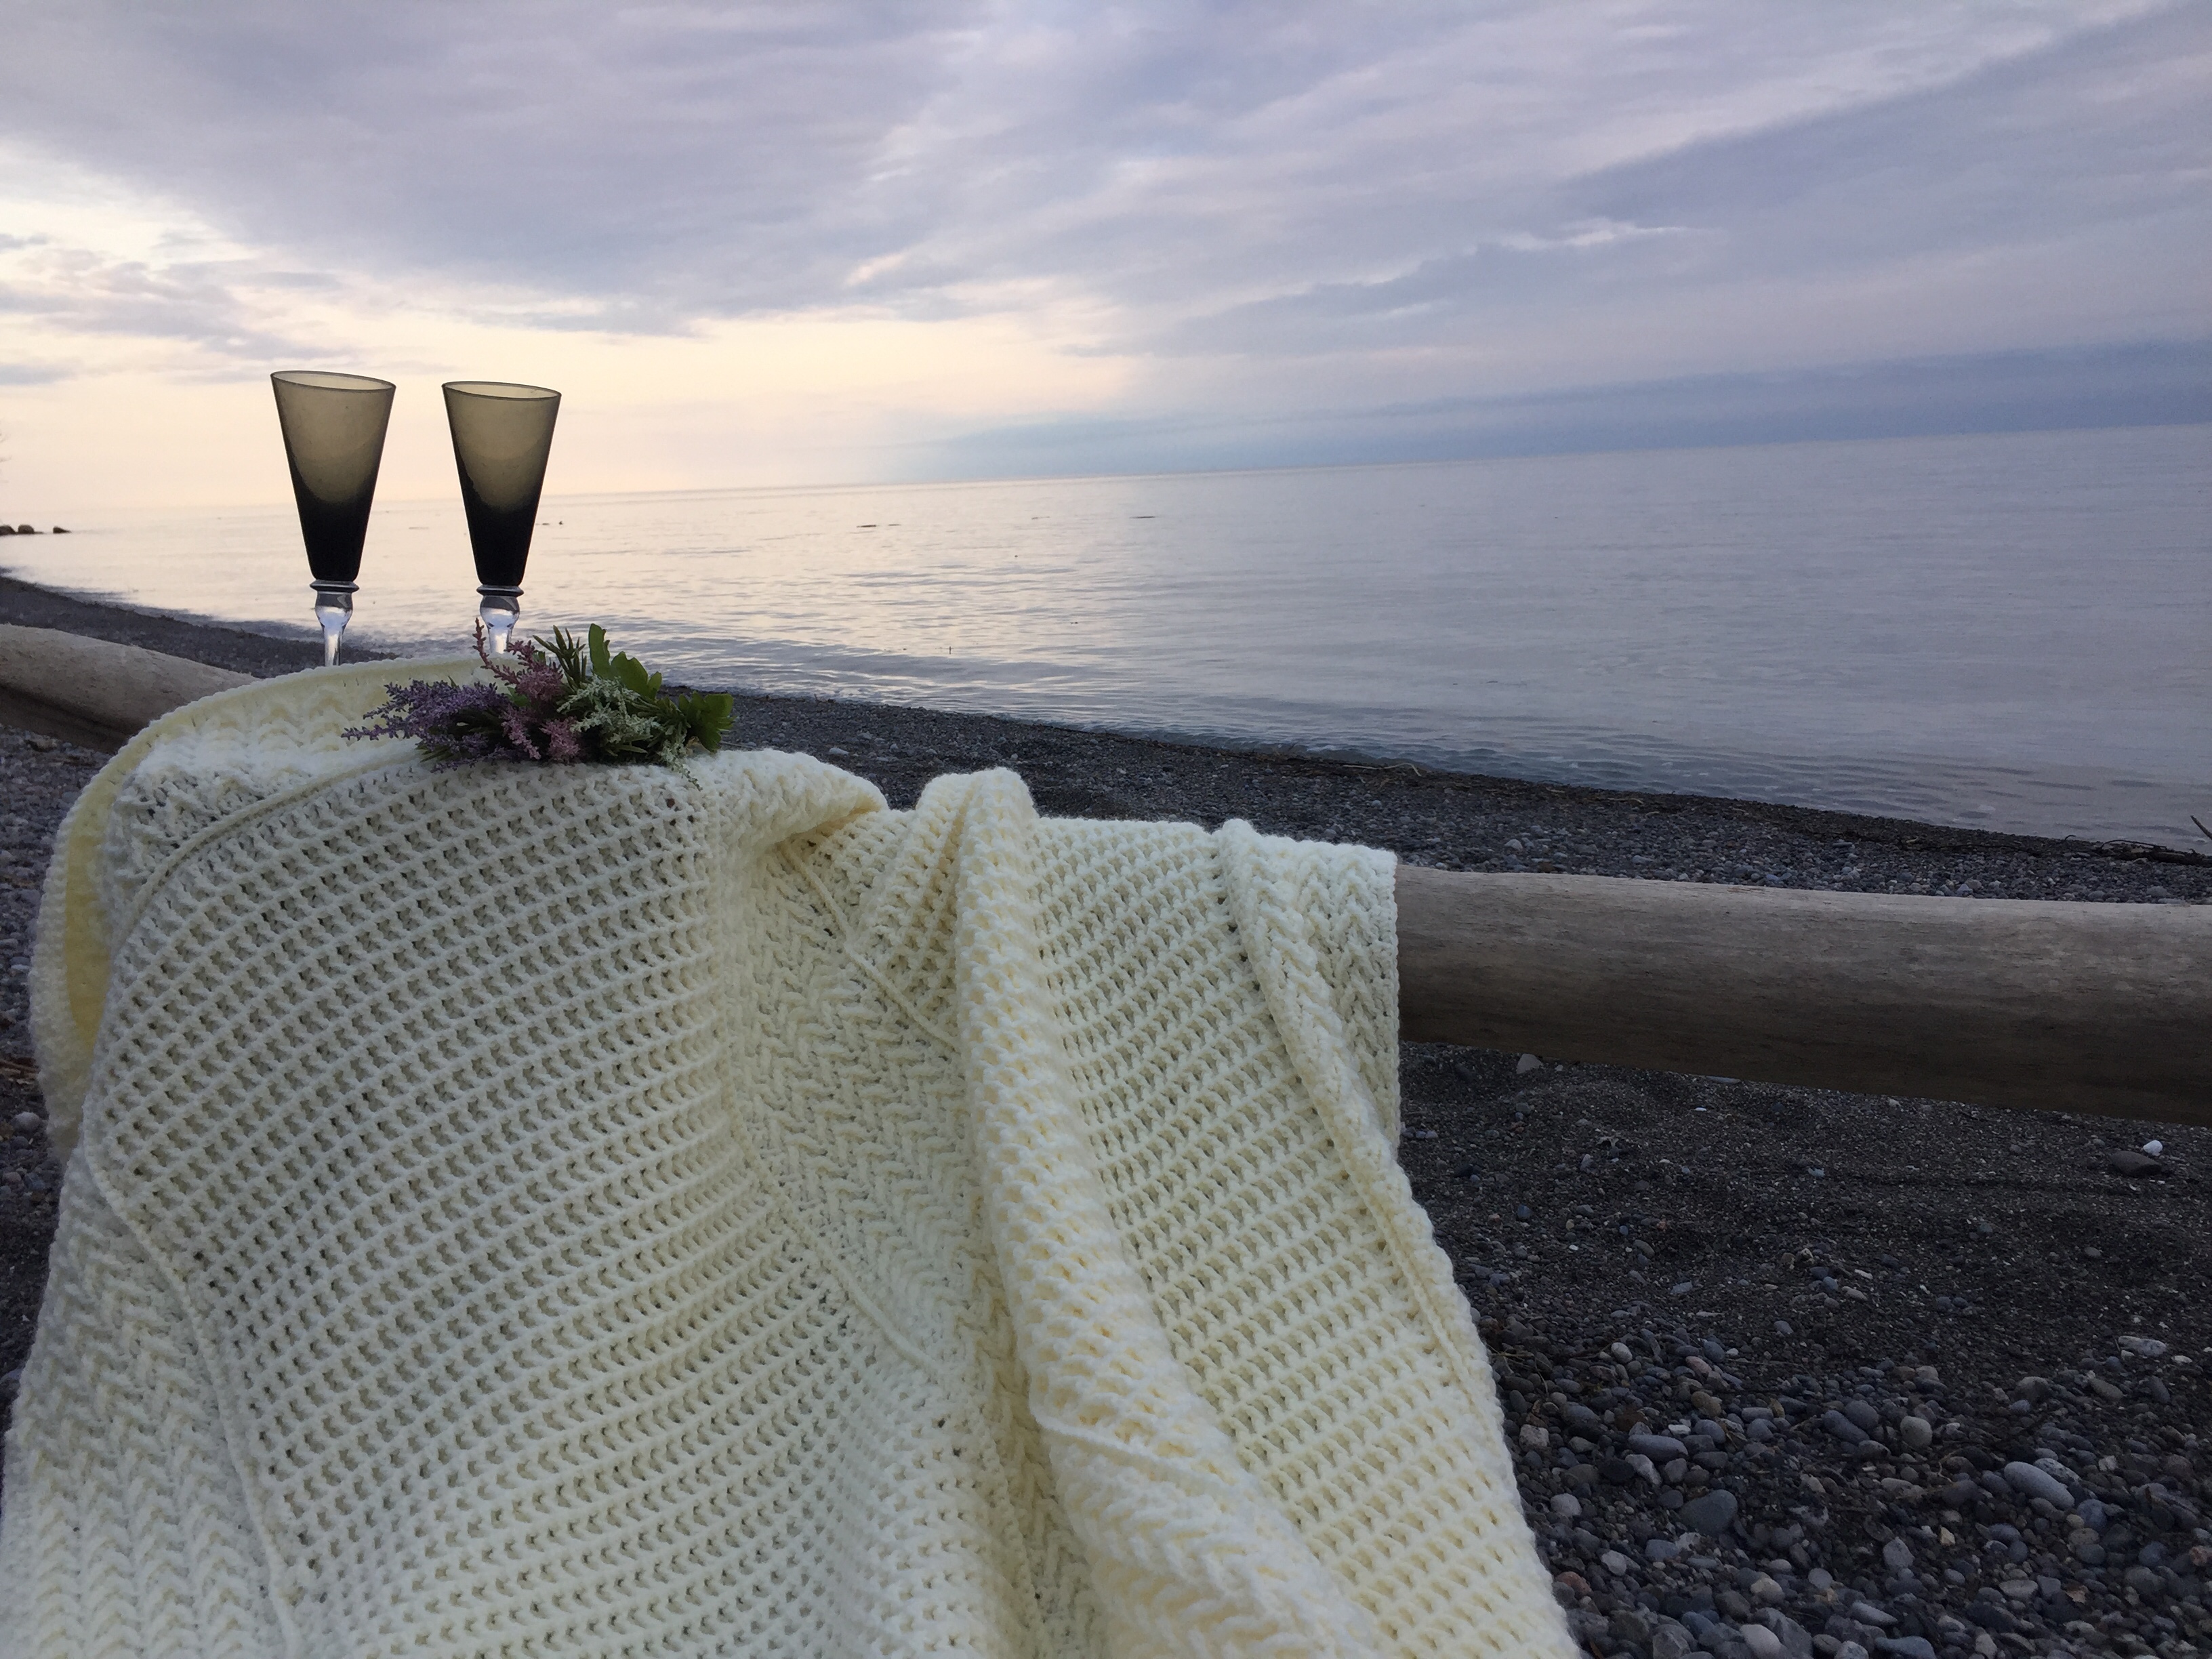
Today I’m smiling as I’m finally revealing this first panel in this wedding crochet along. The panel this week features a variation on the waffle stitch pattern. It shows off some great texture and is comprised of double crochet stitches and front post double crochet stitches.
Not quite sure about how to work a front post double crochet? Don’t worry, following the written pattern you will find a free video tutorial.
This panel is one of seven panels in total that you will work over the next four weeks. If you missed the introduction and materials for this CAL, you will find it here: The Wedding Throw – Free Crochet Along
Once the final week of the pattern has been released for free on my blog, I will create a downloadable PDF that will be available in my Ravelry and Etsy shops. Don’t worry, though, the pattern will remain also on my blog for free including the links to the free video tutorials.
The Wedding Throw: Panel #1
Skill Level: Intermediate
Gauge: 15 sts x 10 rows = 4 inches.
Finished Size of Panel: Approximately 17 x 55 inches.
Yarn: Approximately 1, 200 yards Pound of Love® by Lion Brand® (%100 Acrylic; 16 oz/454 g; 1, 020 yd/932 m; #4 Worsted Weight). Colour: Antique White
Hook: Size J/10 (6.0 mm). Adjust hook size if necessary to obtain correct gauge.
Notions: Yarn Needle.
Stitches and Abbreviations:
Ch – Chain
Dc – Double Crochet
Fpdc – Front Post Double Crochet (a double crochet worked around the post of the double below: Yarn over, insert hook from front to back to front around the post of the stitch indicated, yarn over and draw up a loop, (yarn over and draw through two loops on hook) twice.)
Lp – Loop
Lps – Loops
Rpt – Repeat
Sc – Single Crochet
Sk – Skip
Sl st – Slip stitch
Yo – Yarn over
Pattern Notes:
- This panel is the first of 7 separate panels. See Wedding Throw #2, 3, 4 for the rest of the pattern.
- Pattern is written in American English terms.
- Pattern is worked in rows.
- Ch 1 at the beginning of a row does not count as a stitch.
- Ch 3 at the beginning of a row counts as a dc
Free Crochet Pattern:
Ch 65.
Row 1: Dc in the 4th ch from hook and in each ch across; ch 3 (counts as a dc), turn. (63 dc)
Row 2: *Fpdc around the post of the next dc, dc in next dc; rpt from * across ending with a dc in the top of the turning ch; ch 3, turn.
Row 3: *Dc in the next st, fpdc around the post of the next st; rpt from * across ending with a dc in the top of the turning ch; ch 3, turn.
Repeat rows 2 and 3 until work from the beginning measures approximately 55 inches. Fasten off, weave in ends.
Edging:
With the right side facing, join yarn with a sl st in the top right corner.
Rnd 1: Sc in the same st as joining and in each st across, work 3 sc in the corner st. Working along the side of the square, evenly work 197 sc across, work 3 sc in the corner st, sc in each st across, 3 sc in the corner st, work 197 sc evenly across, work 2 sc in final corner. Join with a sl st in first sc. (NOTE: You may add more or less sts along the long edges, however make note of any changes. Going forward you will want to have the same number of stitch along the long edges of the panels to make for easier joining.)
Fasten off, weave in ends. Set Panel aside.
Video Tutorial:


Why it is so hard to find pattern?
Hello Bonnie, I’m not sure what you’re referring to? The pattern is written out in full above the comments section. Week three will be available shortly (1 day late because of sickness in my household.)
where do we find the instructions for part 2? written?
It will be available this evening – the stomach flu hit our house this week so it’s a day late. I apologize for the delay!
pk i am still only finding week 1 where is link to week 2?
Hello Wendy,
Here is the link for week one: https://richtexturescrochet.com/2019/04/04/the-wedding-throw-free-crochet-along/
Week Two (which is the post you are currently commenting on): https://richtexturescrochet.com/2019/04/11/the-wedding-cal-week-two/
Week Three: https://richtexturescrochet.com/2019/04/19/the-wedding-cal-week-three/
Hope that helps!