This post contains affiliate links. This means that when you purchase through one of these links we will receive a small commission at no additional cost to you. Thank you for supporting Rich Texture Crochet!
Hello and welcome to week thirteen of the Great Canadian Landscapes Crochet Along! Today we finish our journey across Canada as we find ourselves in the Northwest Territories and crochet our blanket panels together!
The Northwest Territories is the second largest territory of Canada situated between the Yukon and Nunavut. While the other two territories are quite cold in climate, the Northwest Territories feature a warmer climate and are home to both boreal forests and tundra. The Northwest territories is also home to the largest lake fully within Canada (Great Bear Lake) and also the deepest lake in all of North America (Great Slave Lake). Unfortunately I was not able to drum up any photos of the Northwest Territories, however a quick search of the internet will find some for you!
The Panel this Week:
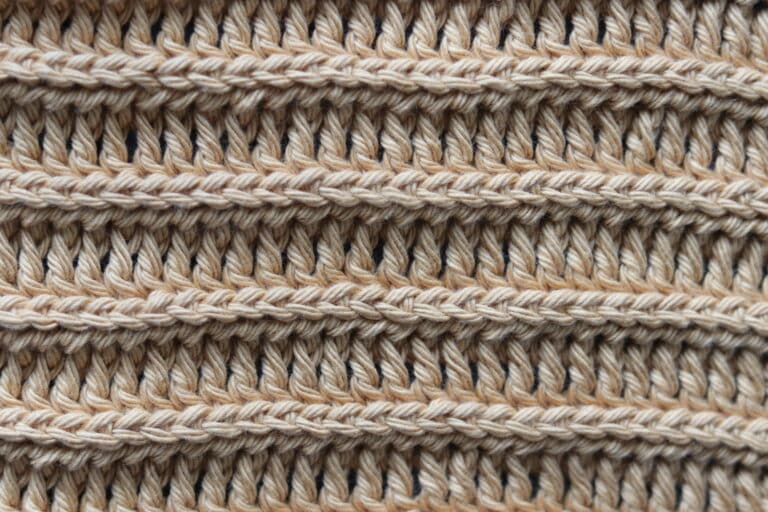
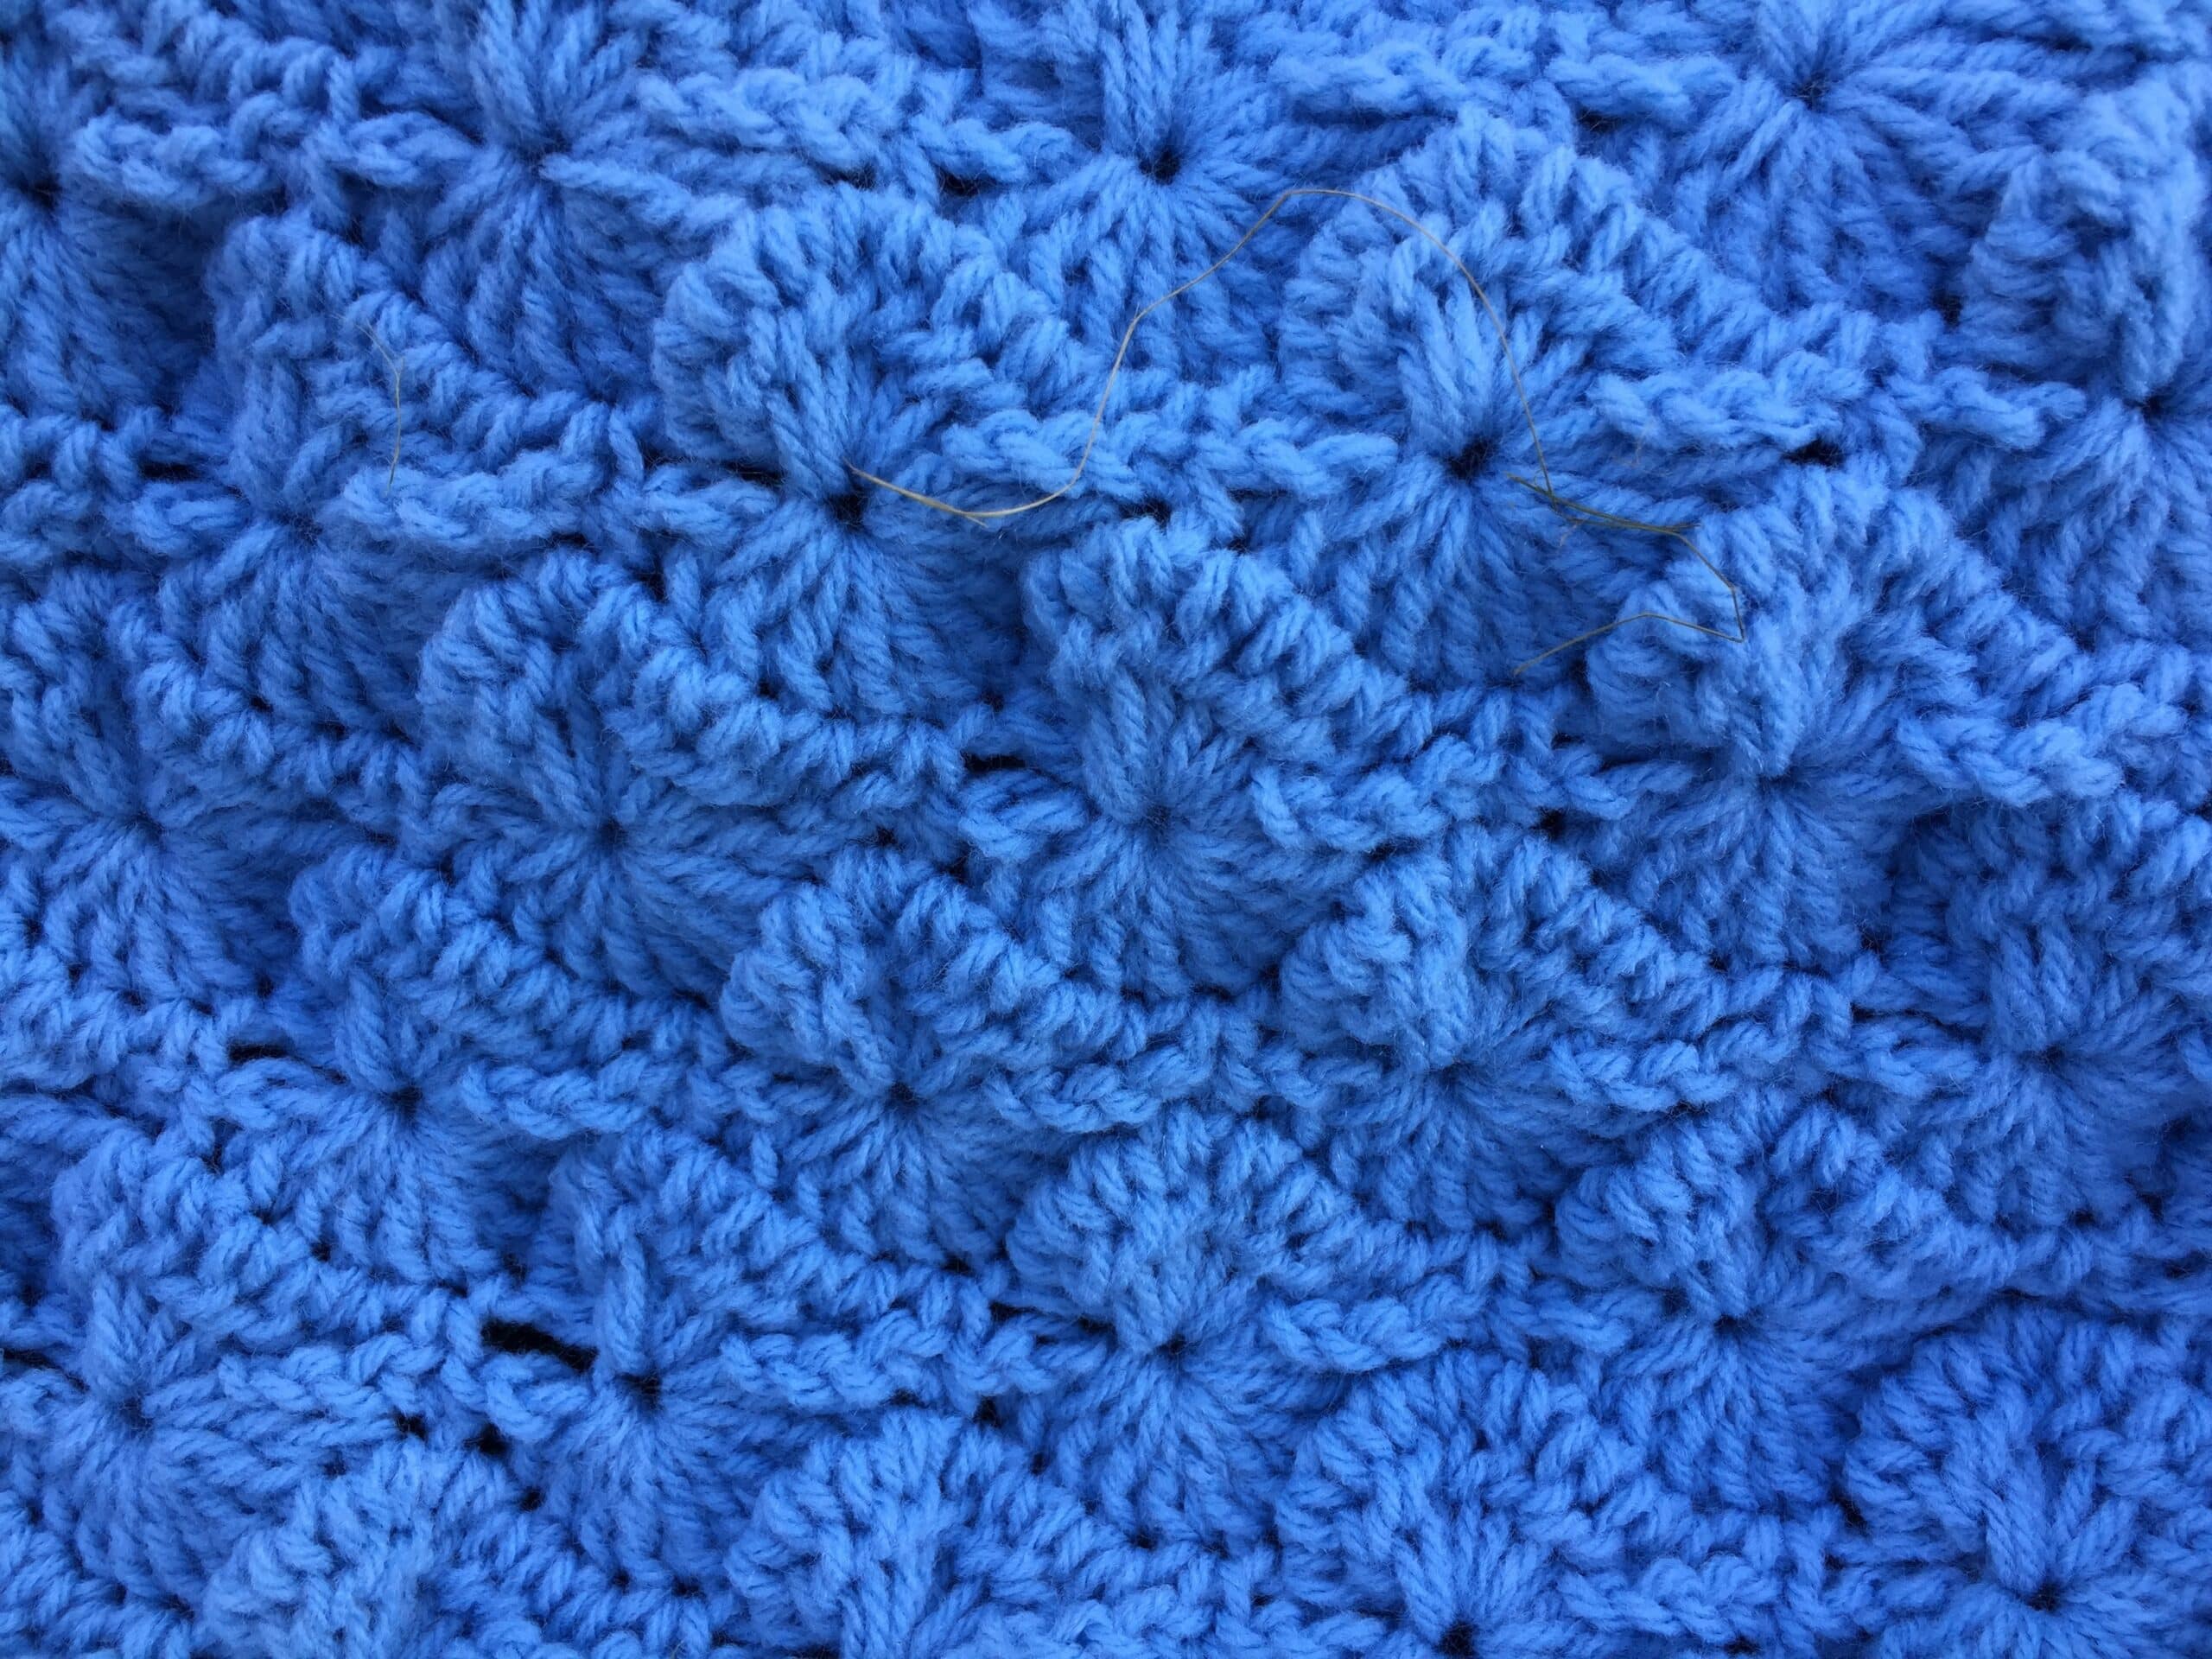
The panel this week is made up of a combinations of double crochet clusters and single crochet stitches. The pattern is known by many names including wheels and Catherine’s Wheels. It’s an easy one to catch on to and works up quickly. As always, I will have a free video tutorial below should you have any questions about the pattern as you go. While you’re watching, please don’t forget to subscribe to my YouTube channel (https://www.youtube.com/c/RichTexturesCrochet/) so you never miss a stitch!
The CAL: Intro to Week Twelve:
This is week Thirteen of this crochet along, if you missed the first several weeks of the CAL, you will find them through the links below. Again, each week also includes a video tutorial and a glimpse into the province that we explored!
Introduction: Canadian Landscapes Crochet Along: Introduction and Materials
Week One: Great Canadian Landscapes CAL Week One!
Week Two: Great Canadian Landscapes CAL Week Two!
Week Three: Great Canadian Landscapes CAL Week Three!
Week Four: Great Canadian Landscapes CAL: Week Four!
Week Five: Great Canadian Landscapes CAL: Week Five!
Week Six: Great Canadian Landscapes CAL: Week Six!
Week Seven: Great Canadian Landscapes CAL: Week Seven!
Week Eight: Great Canadian Landscapes CAL: Week Eight!
Week Nine: Great Canadian Landscapes CAL: Week Nine
Week Ten: Great Canadian Landscapes CAL: Week Ten
Week Eleven: Great Canadian Landscapes CAL: Week Eleven
Week Twelve: Great Canadian Landscapes CAL: Week Twelve
The Pattern:
This panel measures approximately 16 x 32 inches. Should you wish to change the size, you will need a starting chain with a multiple of 8 + 2 stitches.
For this project I used a worsted weight yarn by Mary Maxim in the colour light denim. You may use any worsted weight yarn! (For more details, see the “Introduction and Materials” for the CAL linked in this post above.)
Hook: 5.5 mm
This pattern is worked in rows.
Stitches and Abbreviations:
Ch – Chain
CL – Cluster – Over the number of stitches indicated, in each st work (YO, insert hook in st, YO and draw up a loop, YO and draw through 2 loops on hook), YO and draw through all loops on hook.
Dc – Double Crochet
Lp – Loop
Lps – Loops
Rpt – Repeat
Sc – Single Crochet
Sk – Skip
Sl st – Slip stitch
YO – Yarn over
Pattern Notes:
– Pattern is written in American English
– Ch 1 at the beginning of the row does not count as a stitch.
– Ch 3 at the beginning of the row counts as a dc.
– Weave in ends as needed.
Let’s Crochet:
Ch 58.
Row 1: Sc in the 2nd ch from hook, *sk the next 3 chs, 9 dc in the next ch, sk the next 3 chs, sc in the next ch; rpt from * across. Turn.
Row 2: Ch 3, CL over the next 4 sts, * loosely ch 3, sc in the next st, loosely ch 3, CL over the next 9 sts; rpt from * across, end last rpt with a CL over the last 5 sts. Turn.
Row 3: Ch 3, 4 dc in the base of ch-3, * sk the next 3 chs, sc in the next sc, sk the next 3 chs, 9 dc in the next lp that closed the next CL; rpt from * across, ending the last rpt with 5 dc in the top of the turning ch. Turn.
Row 4: Ch 1, sc in the 1st st, * loosely ch 3, CL over the next 9 sts, loosely ch 3, sc in the next st; rpt from * across, end last rpt with an sc in the top of the turning ch. Turn.
Row 5: Ch 1, sc in the 1st sc, * sk the next 3 chs, 9 dc in the loop that closed the next CL, sk the next 3 chs, sc in the next sc; rpt from * across. Turn.
Continue to repeat rows 2 -5 until work from the beginning measures approximately 32 inches or a little less. Fasten off and weave in ends.
Note: If you have changed the size of your blanket, you will want to take the panels that you have already made and lay them out in front of you. Measure the length of the blanket and then divide that number by 3. That will give you the length that you will want to work these three panels to so that, when placed along side the others they will come to the same length. To see the placement of these panels, please refer to the diagram on the Introduction and Materials for this CAL linked above.
Edging:
Note: If you have changed the size of your blanket your will have to adjust the edging stitch counts accordingly. To determine how many stitches I have in the edging for this panel, I divided the total number of stitches of all the lengths of the previous ten panels and divided that number by 3. That number determined the number of stitches I would have along the lengths of each of these three panels.
The edging for each panel is a simple round of sc stitches.
Proceed as follows:
With the right side facing, join yarn with a sl st in the top right corner.
Rnd 1: Ch 1, sc in the next 56 sts, 3sc in corner st, evenly work 97 sc across the long side of the panel, 3 sc in the corner st, sc in each of the next 55 sts, 3sc in the next corner st, evenly work 97 sc across the long side of the panel, 2 sc in remaining corner st; join with a sl st in the first sc.
Fasten off, weave in ends. Block if desired.
Video Tutorial:
Congratulations!
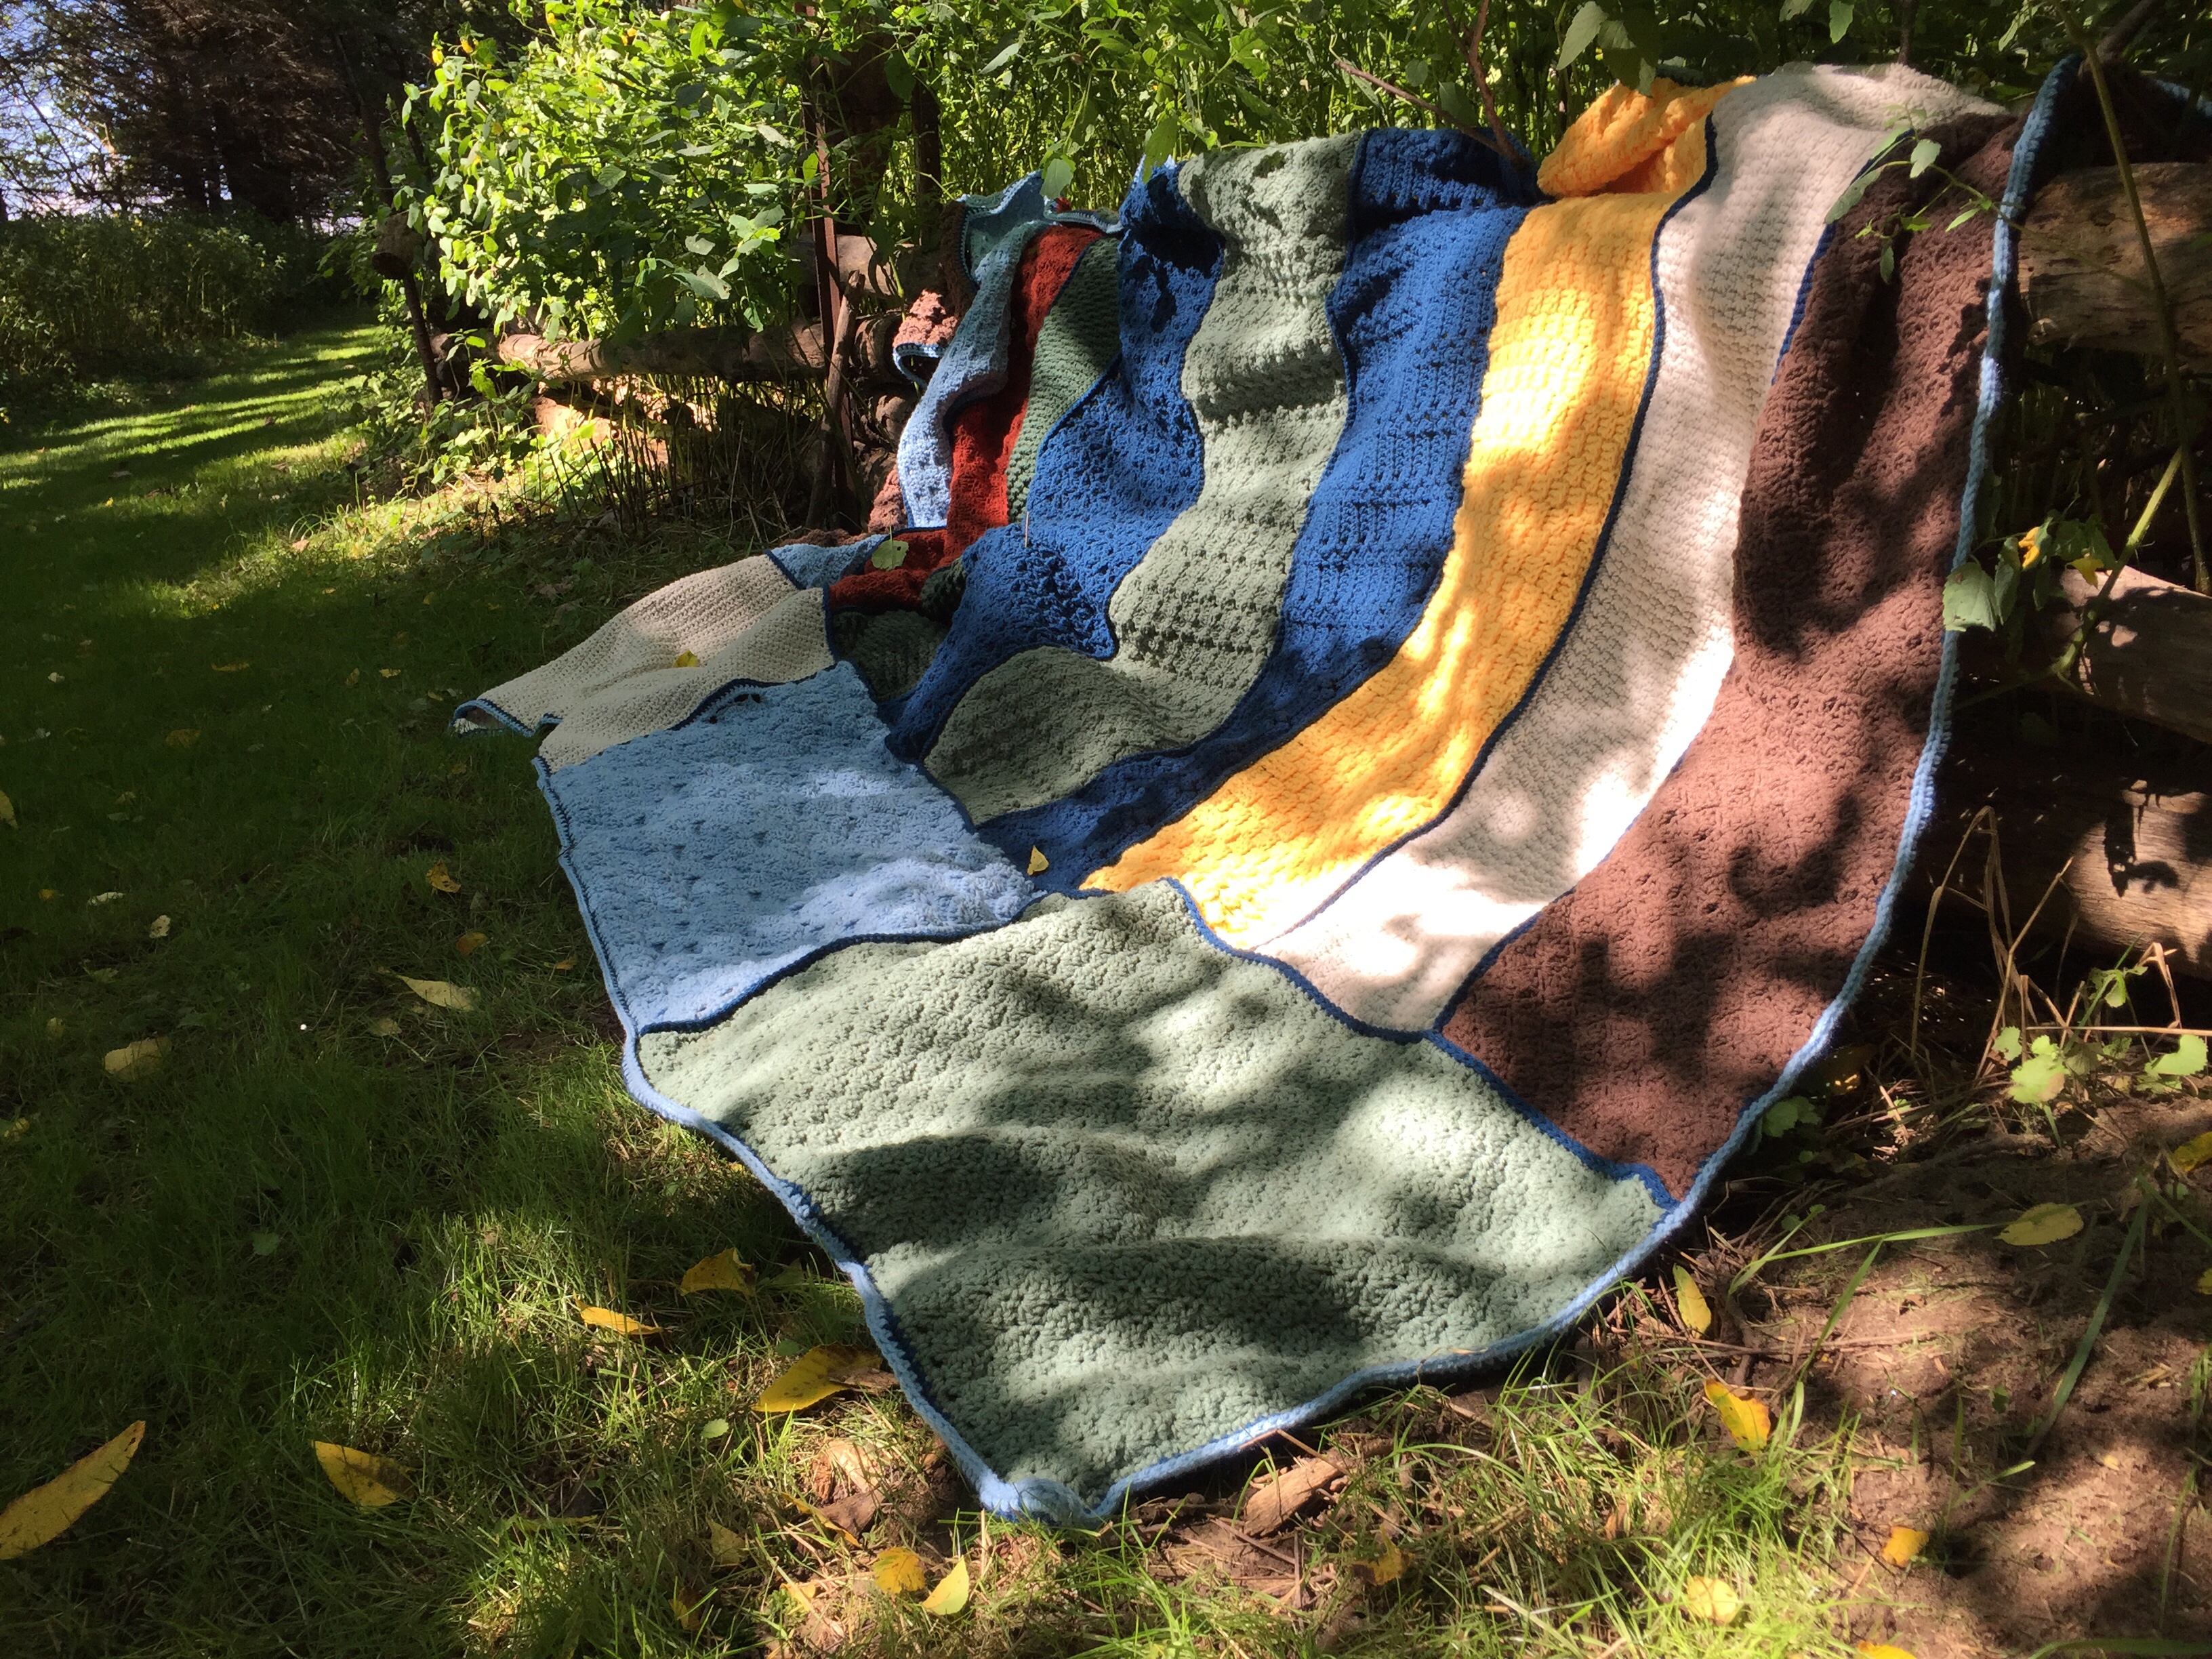
You have now completed all thirteen panels of the Great Canadian Landscapes Blanket! I will now show you how to join your blocks together and work a simple edging around the entire blanket.
To Join your blocks together:
Joining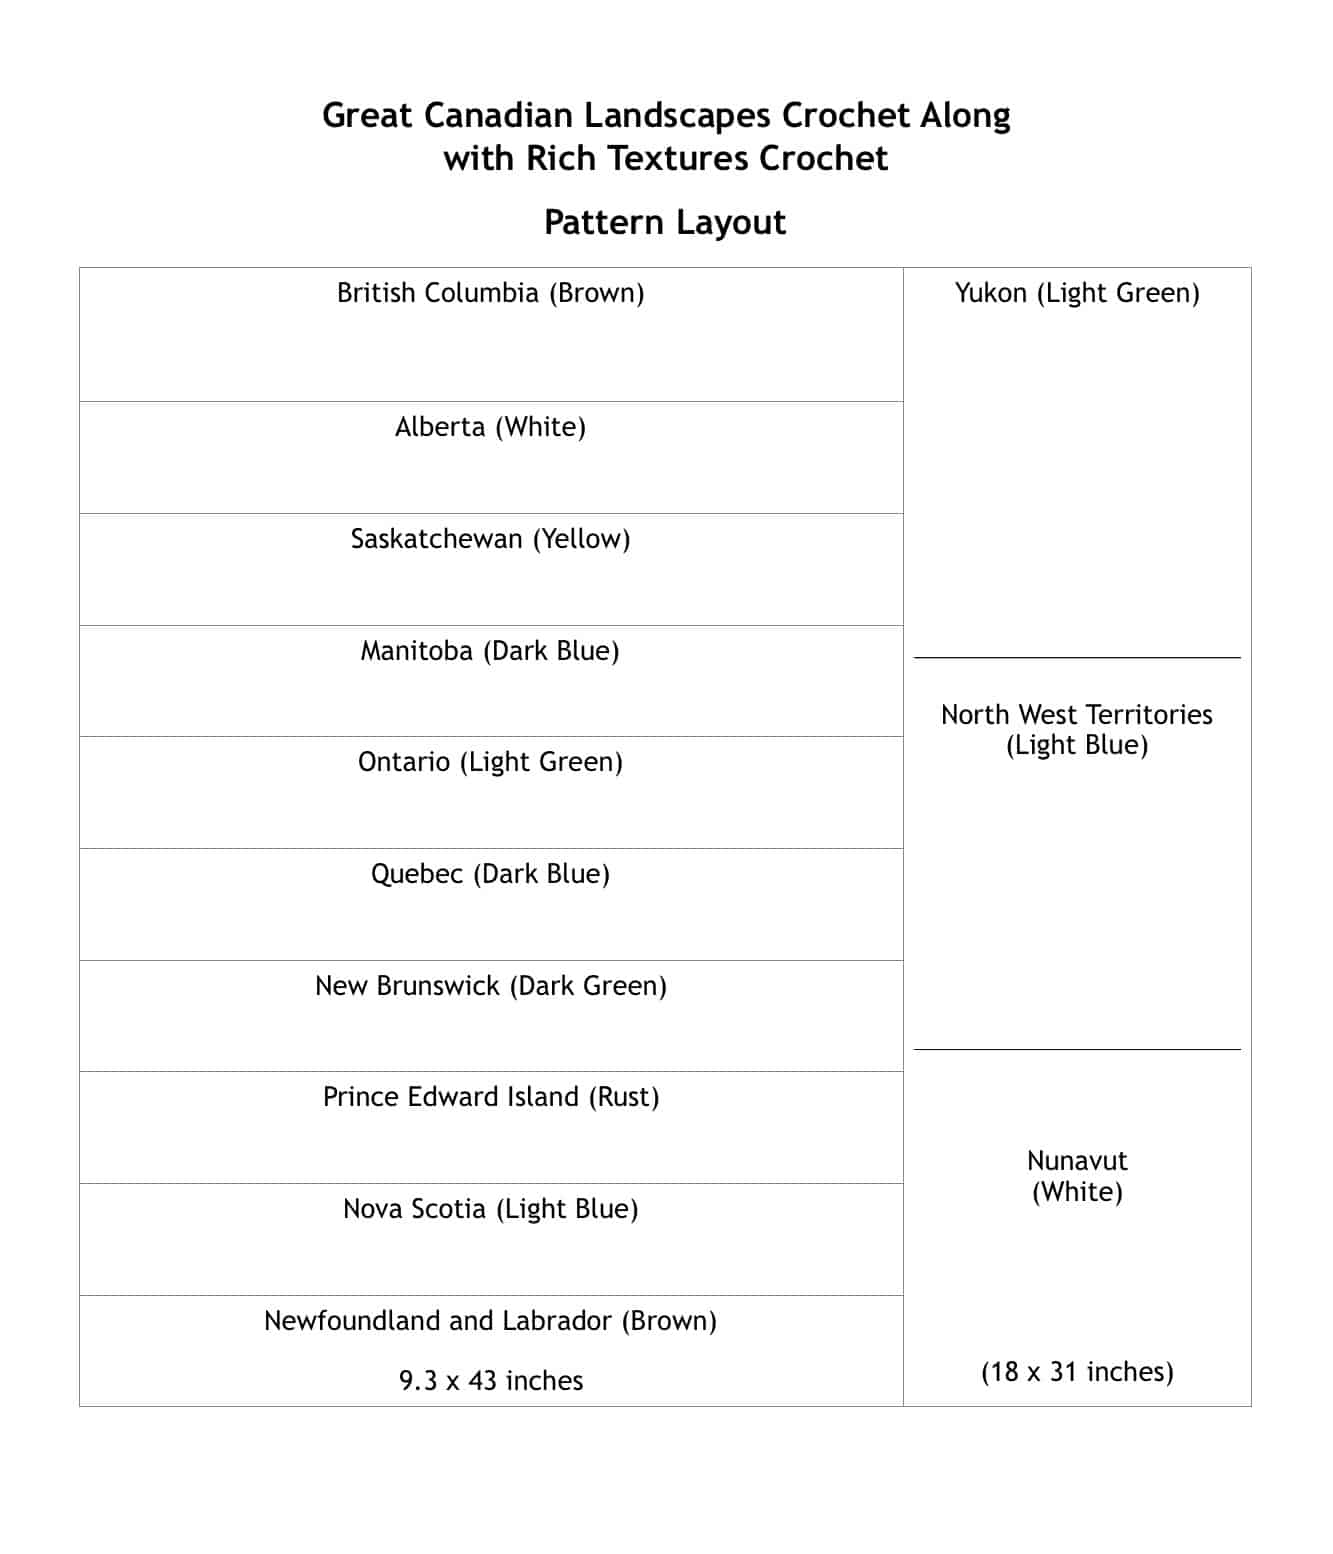
Before joining your panels together, lay them out in the design shown above (Or in the pattern of your choosing). When crocheting my panels together, I worked all of the horizontal rows first (including the horizonal row on the three territories). Once all of the horizonal rows were worked, I crocheted the one vertical row to join the territories to the provinces.
To crochet the panels together, I used my dark denim colour and begin with the Newfoundland and Nova Scotia Panels.
Working along the horizontal rows with the wrong side facing, join your yarn with a sl st in the top left corner of the Newfoundland panel.
Working through the front loop only of the Newfoundland panel and the front loop only of the bottom left corner of the Nova Scotia panel, begin to place one sc in each stitch across (you will always only work in the front loops though both thicknesses). Fasten off. Repeat this for each of the horizonal rows.
Once the horizontal rows have been crocheted together, it is time to move on to the vertical row and repeat the steps above.
Fasten off and weave in ends
Blanket Edging:
For my blanket edging, using the yarn I had left over I worked three rounds of hdc all the way around the blanket. Join yarn with a sl st in any corner of your blanket and work one hdc in each st across each edge, working 3 hdc in each of the corner sts. Join with a sl st in the 1st st. For the second and third rounds, ch 1 and then continue as you did for the first round.
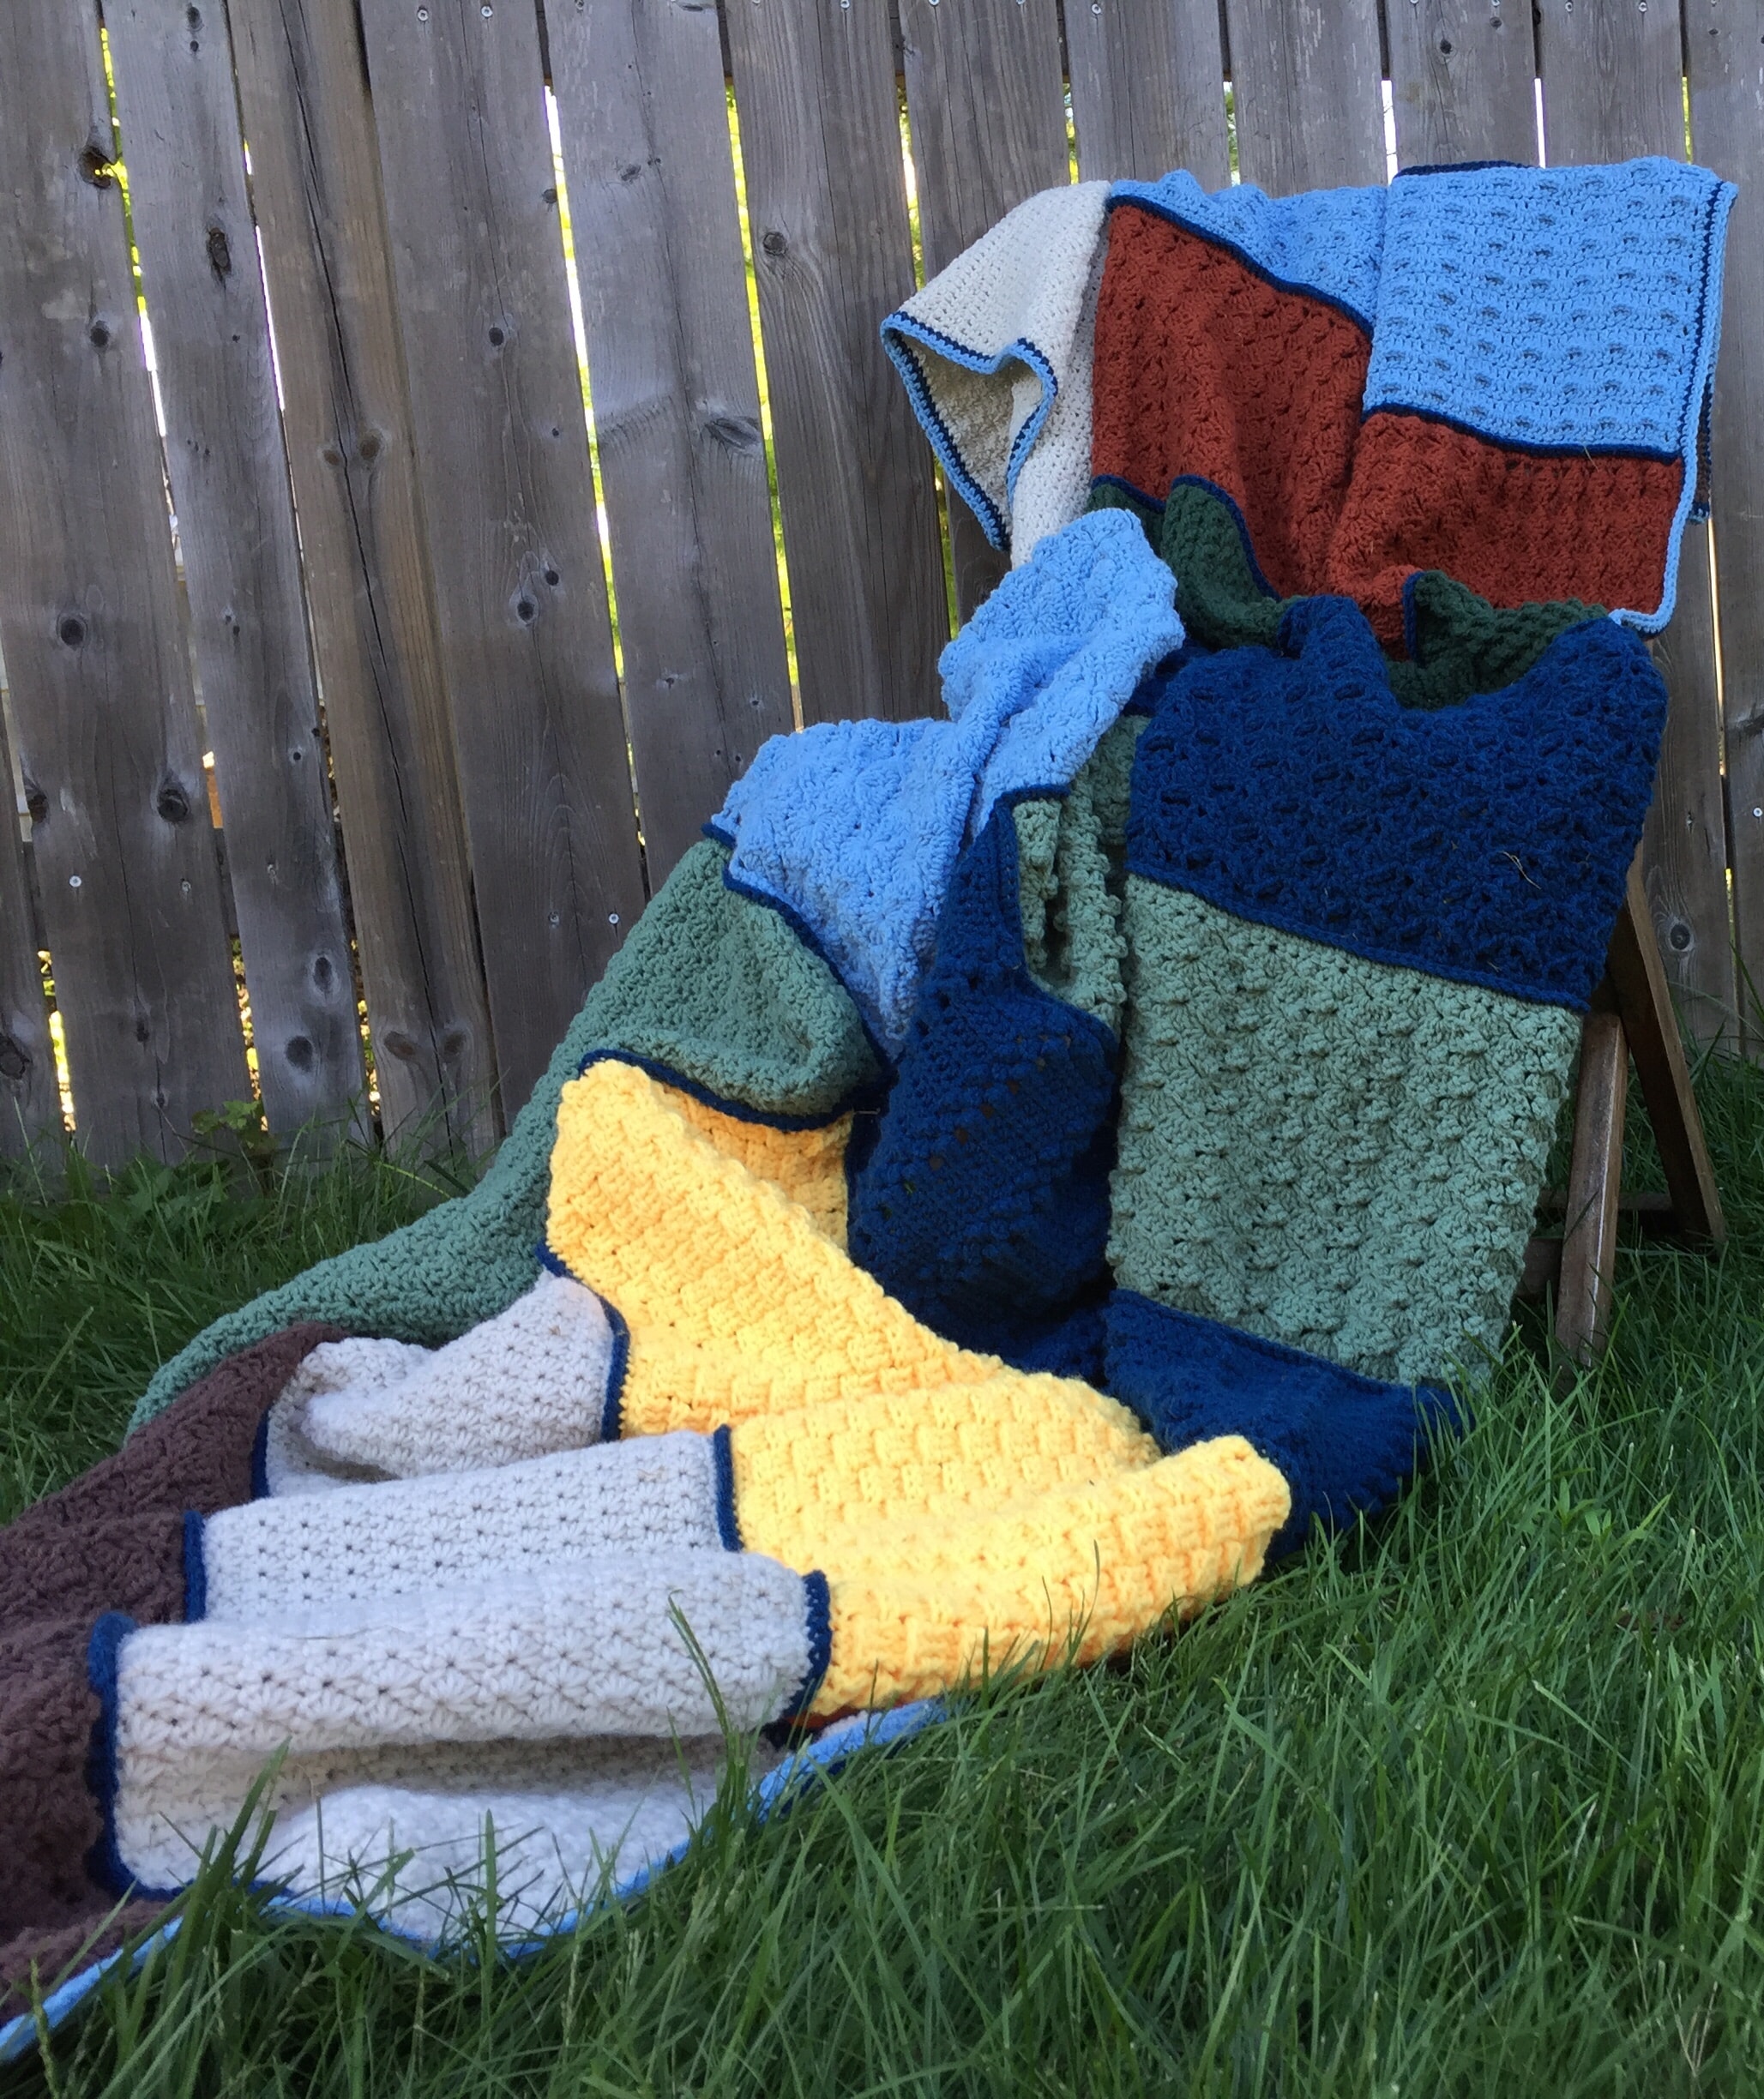
Congratulations!!! You did it! This has been so much fun!
Have you been taking photos of your Work In Progress? Feel free to join the Rich Textures Crochet Community on Facebook and share (it’s also a great place to meet new crochet friends, chat and be inspired)! You’ll find the Facebook Group here: https://www.facebook.com/groups/richtexturescrochetcommunity/
Don’t forget to like/follow the Rich Textures Crochet Facebook Page where you’ll see updates of new free crochet patterns! (http://www.facebook.com/richtextures/)
Thank you so much again for joining me on this crochet journey! I do hope you’ll come back soon!
Happy crocheting!
Sarah