
This post contains affiliate links. This means that when you purchase through one of these links we will receive a small commission at no additional cost to you. Thank you for supporting Rich Texture Crochet!
Hello Everyone and welcome to week one of the Great Canadian Landscapes Crochet Along! Today we start our crochet journey across Canada in Newfoundland and Labrador!
For our crochet journey we are going to be traveling from East to West and then head up North! We have thirteen provinces and territories to cover and there is so much to see! Along the way I look forward to crocheting a beautiful textured blanket along with you.
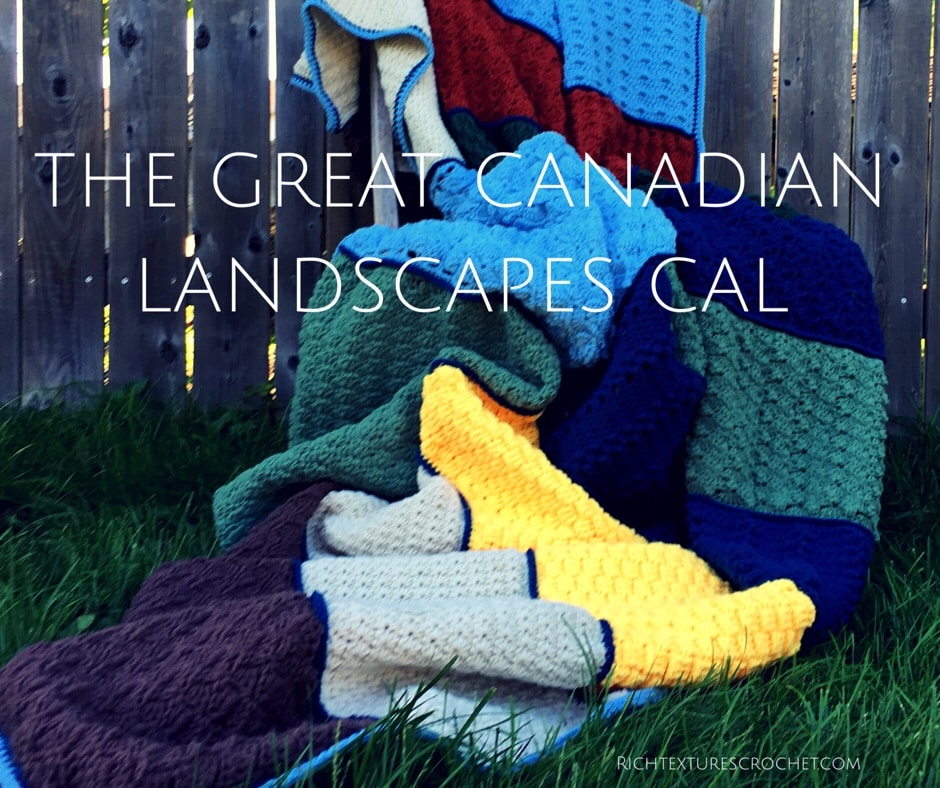
The blanket fits nicely over a twin size bed but if you would like to change the size of your own blanket, I will provide the starting chain multiples at the beginning of the pattern each week so that you can adjust the size. Other than that, all the information and an introduction for the crochet along can be found here: Canadian Landscapes Blanket – Crochet Along and be sure to subscribe to my YouTube Channel (https://www.youtube.com/c/RichTexturesCrochet/ where you will find a video tutorial for each panel of the blanket.
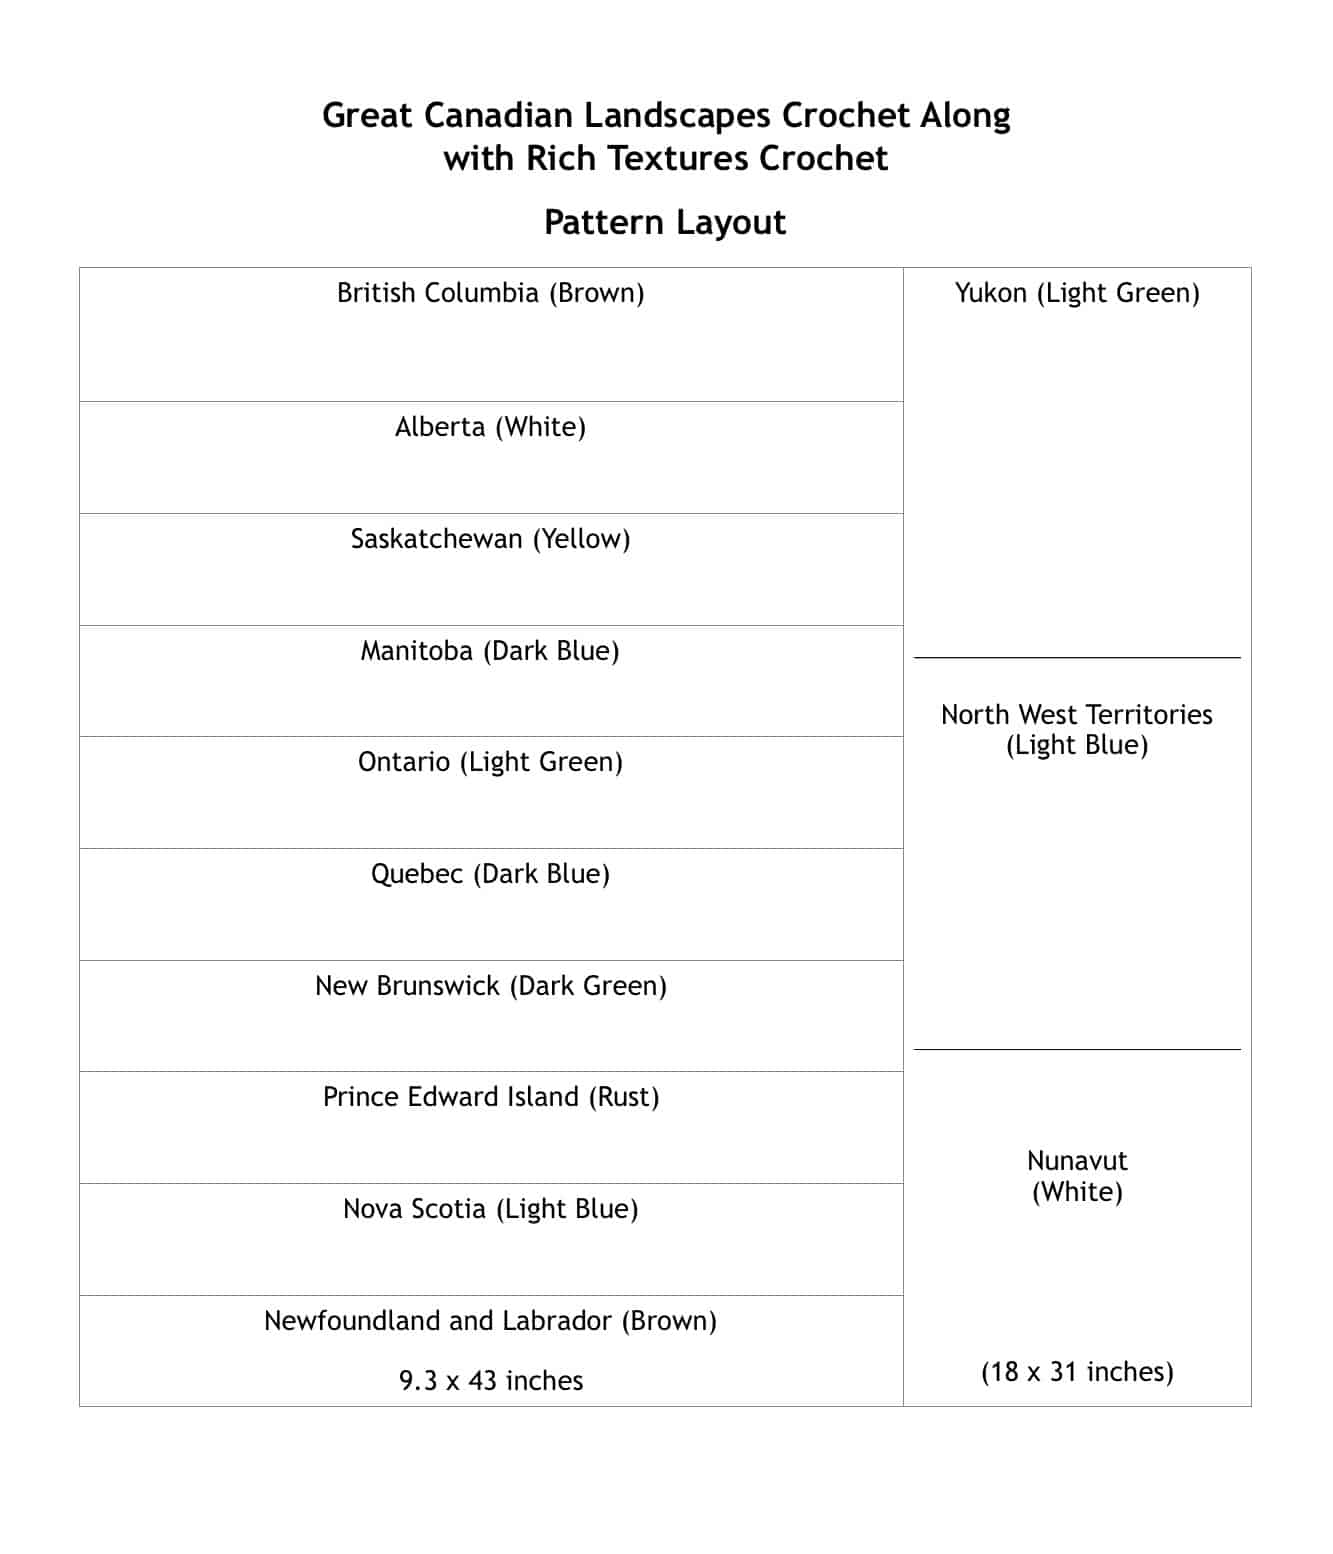
The final layout for the blanket panels is as follows:
Welcome to Newfoundland and Labrador!
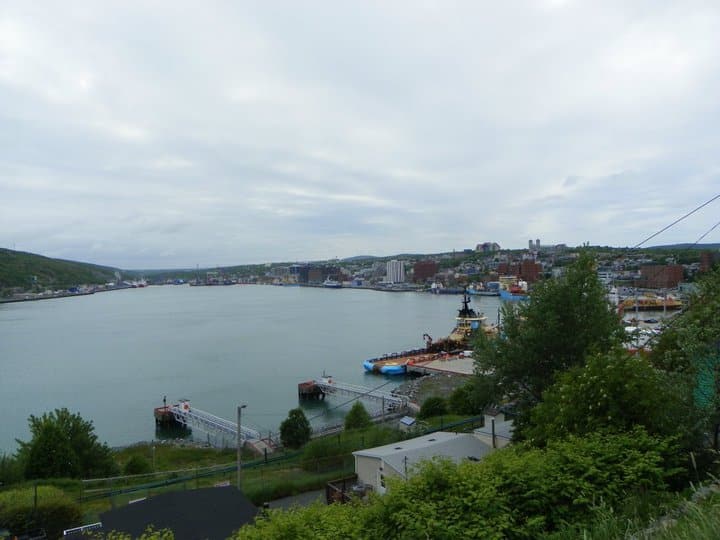
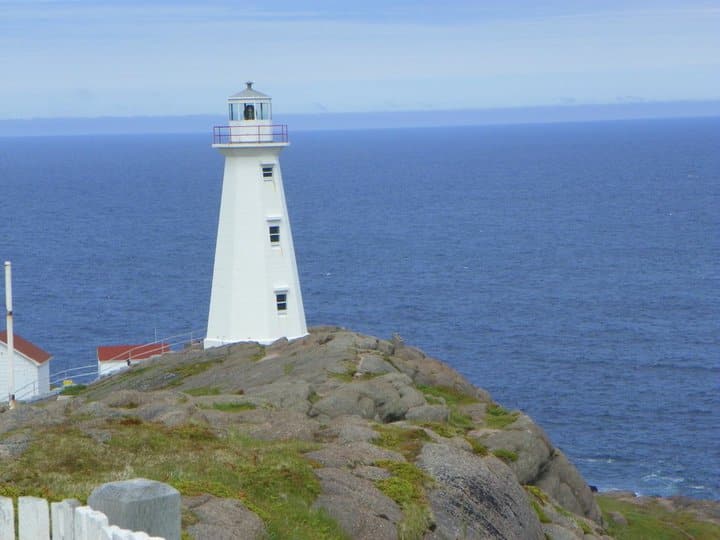
As a teenager I had the pleasure of visiting Newfoundland including the capital, St. John’s, and Gros Morne National Park. It is a visit I will never forget!
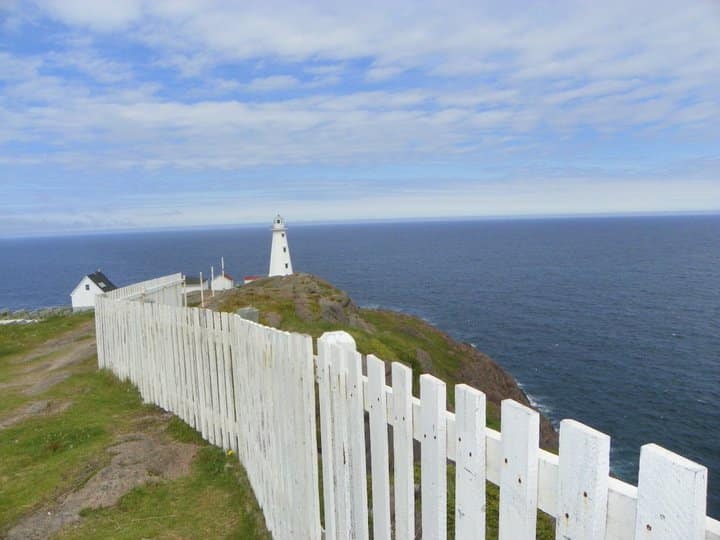
(Photo: Cape Spear, NFLD. All photos in this post are courtesy of my dad!)
We took the ferry across from Cape Breton, Nova Scotia and the first thing that struck me was the landscape – grassy hills laden with rock. It would only take a few moments of being on the island shore before you fully understood why Newfoundland is often called “The Rock.” It’s beautiful!
As mentioned, Newfoundland is an island (the 16th largest in the world) and it is the most Eastern point of North America. Labrador is actually the mainland portion of the province (separated from Newfoundland by the Strait of Belle Isle). It is ripe with it’s own culture and customs and home to a variety of unique plant and wildlife. It was on Newfoundland that I had my first (unintentional) up close encounter with a moose. Thankfully I was not travelling in a car at the time, but I came upon it while hiking with some friends through the forest. To a 5 foot tall teenager on foot, a full grown bull moose is quite the sight to behold. It was more interested in eating though than me and my friends.


The Blanket this week?
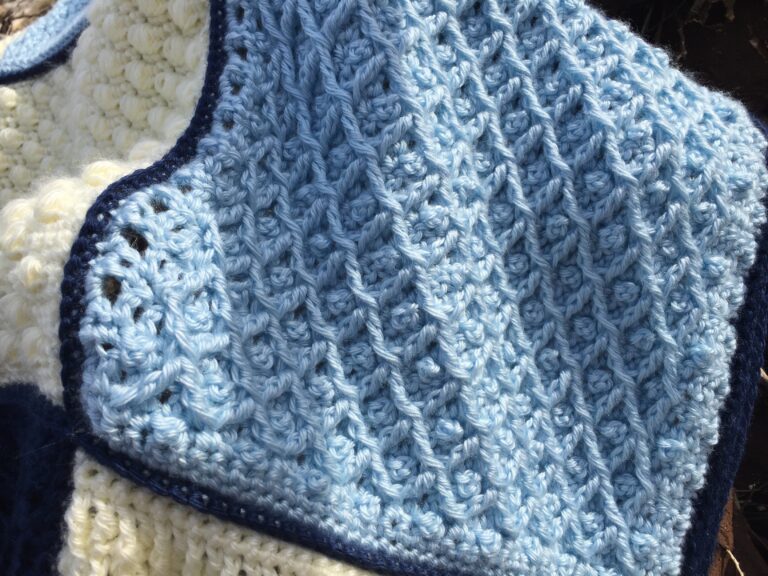
The blanket panel this week was inspired by this rocky shoreline. I chose a fast moving cluster stitch which has a varied but subtle texture when compared to some of the other panels. It’s a fun one to start with!
I will write out the instructions for the panel below, and then follow it up with a video tutorial. Head over to my Facebook Page (https://www.facebook.com/richtextures/) and from there you can join the community group where you will be able to share photos and see other’s progress!
Thank you so much again for joining this crochet along! I look forward to meeting up again soon!
The Pattern:
This panel measures approximately 43 x 9 inches. Should you wish to change the size, use a chain multiple of 5 + 2.
For this project I used a worsted weight yarn by Mary Maxim in the colour brown. You may use any worsted weight yarn! (For more details, see the “Introduction and Materials” for the CAL linked in this post above.)
Hook: 5.5 mm
This pattern is worked in rows.
Stitches and Abbreviations:
Ch – Chain
CL – Cluster – (*yo, insert the hook in the next chain or space and draw up a loop, yo and draw through 2 loops on hook) 4 times, yo and draw through all 5 loops on hook.
Dc – Double Crochet
Rpt – Repeat
Sc – Single Crochet
Sl St – Slip Stitch
St – Stitch
Yo – Yarn over

To begin:
Ch 167.
Row 1: Sc in the 2nd ch from hook, * ch 3, CL over the next 4 sts, ch 1, sc in the next ch; rpt from * across, ch 5. Turn.
Row 2: Sc in the next CL, * ch 3, CL in the next ch-3 sp, ch 1, sc in the next C:; rpt from * across, ending with a dc in the last sc, ch 1. Turn.
Row 3: Sc in the top of the first CL, * ch 3, CL in the next ch-3 sp, ch 1, sc in the next CL; rpt from * across, ending with a sc in the final ch, ch 5. Turn.
Repeat rows 2 and 3 until work from the beginning measures approximately 9 inches.
Edging:
Note: If you have changed the size of your blanket your will have to adjust the edging stitch counts accordingly. What matters most is that each of your panels has the same number of stitches along the edges. This will make it much easier to join them in the end!
The edging for each panel is a simple round of sc stitches. Proceed as follows:
With the right side facing, join yarn with a sl st in the top right corner.
Rnd 1: Ch 1, evenly work 144 sc across the top of the panel, 3 sc in the corner st, evenly work 29 sc along the short edge, 3 sc in the corner st, evenly work 143 sc across the bottom of the panel, 3 sc in the corner st, evenly work 29 sc along the next short edge, 2 sc in the final corner st; join with a sl st in the first sc. (356 sc)
Fasten off, weave in ends. Block if desired.
Set this panel aside and get ready for next week! We will join them all together the final week.
Check out this video tutorial for the panel below:
Happy Crocheting!
Sarah


. sorry I can’t fine week 5 could you please help me.
Hello Judy, due to family things happening I had to post phone week five a day 🙂 it will be up tonight! Sorry for the delay!
Just found this pattern and fell in love. Struggling though with the difference in number of starting chains for each panel. As I begin panel 2, it is considerably shorter in length. Help please, am I supposed to stretch it to match.
Thank you