
This post contains affiliate links. This means that when you purchase through one of these links we will receive a small commission at no additional cost to you. Thank you for supporting Rich Texture Crochet!
Well, the Winter Olympics are well underway, and there is no secret to what team I’m cheering for – Team Canada!!
But I think Canadians are proud to be Canadian not just during the Olympics or other special events, but they are proud to be Canadian all year round!
So whether you make this hat as a gift or for yourself, spread some Canadian cheer!
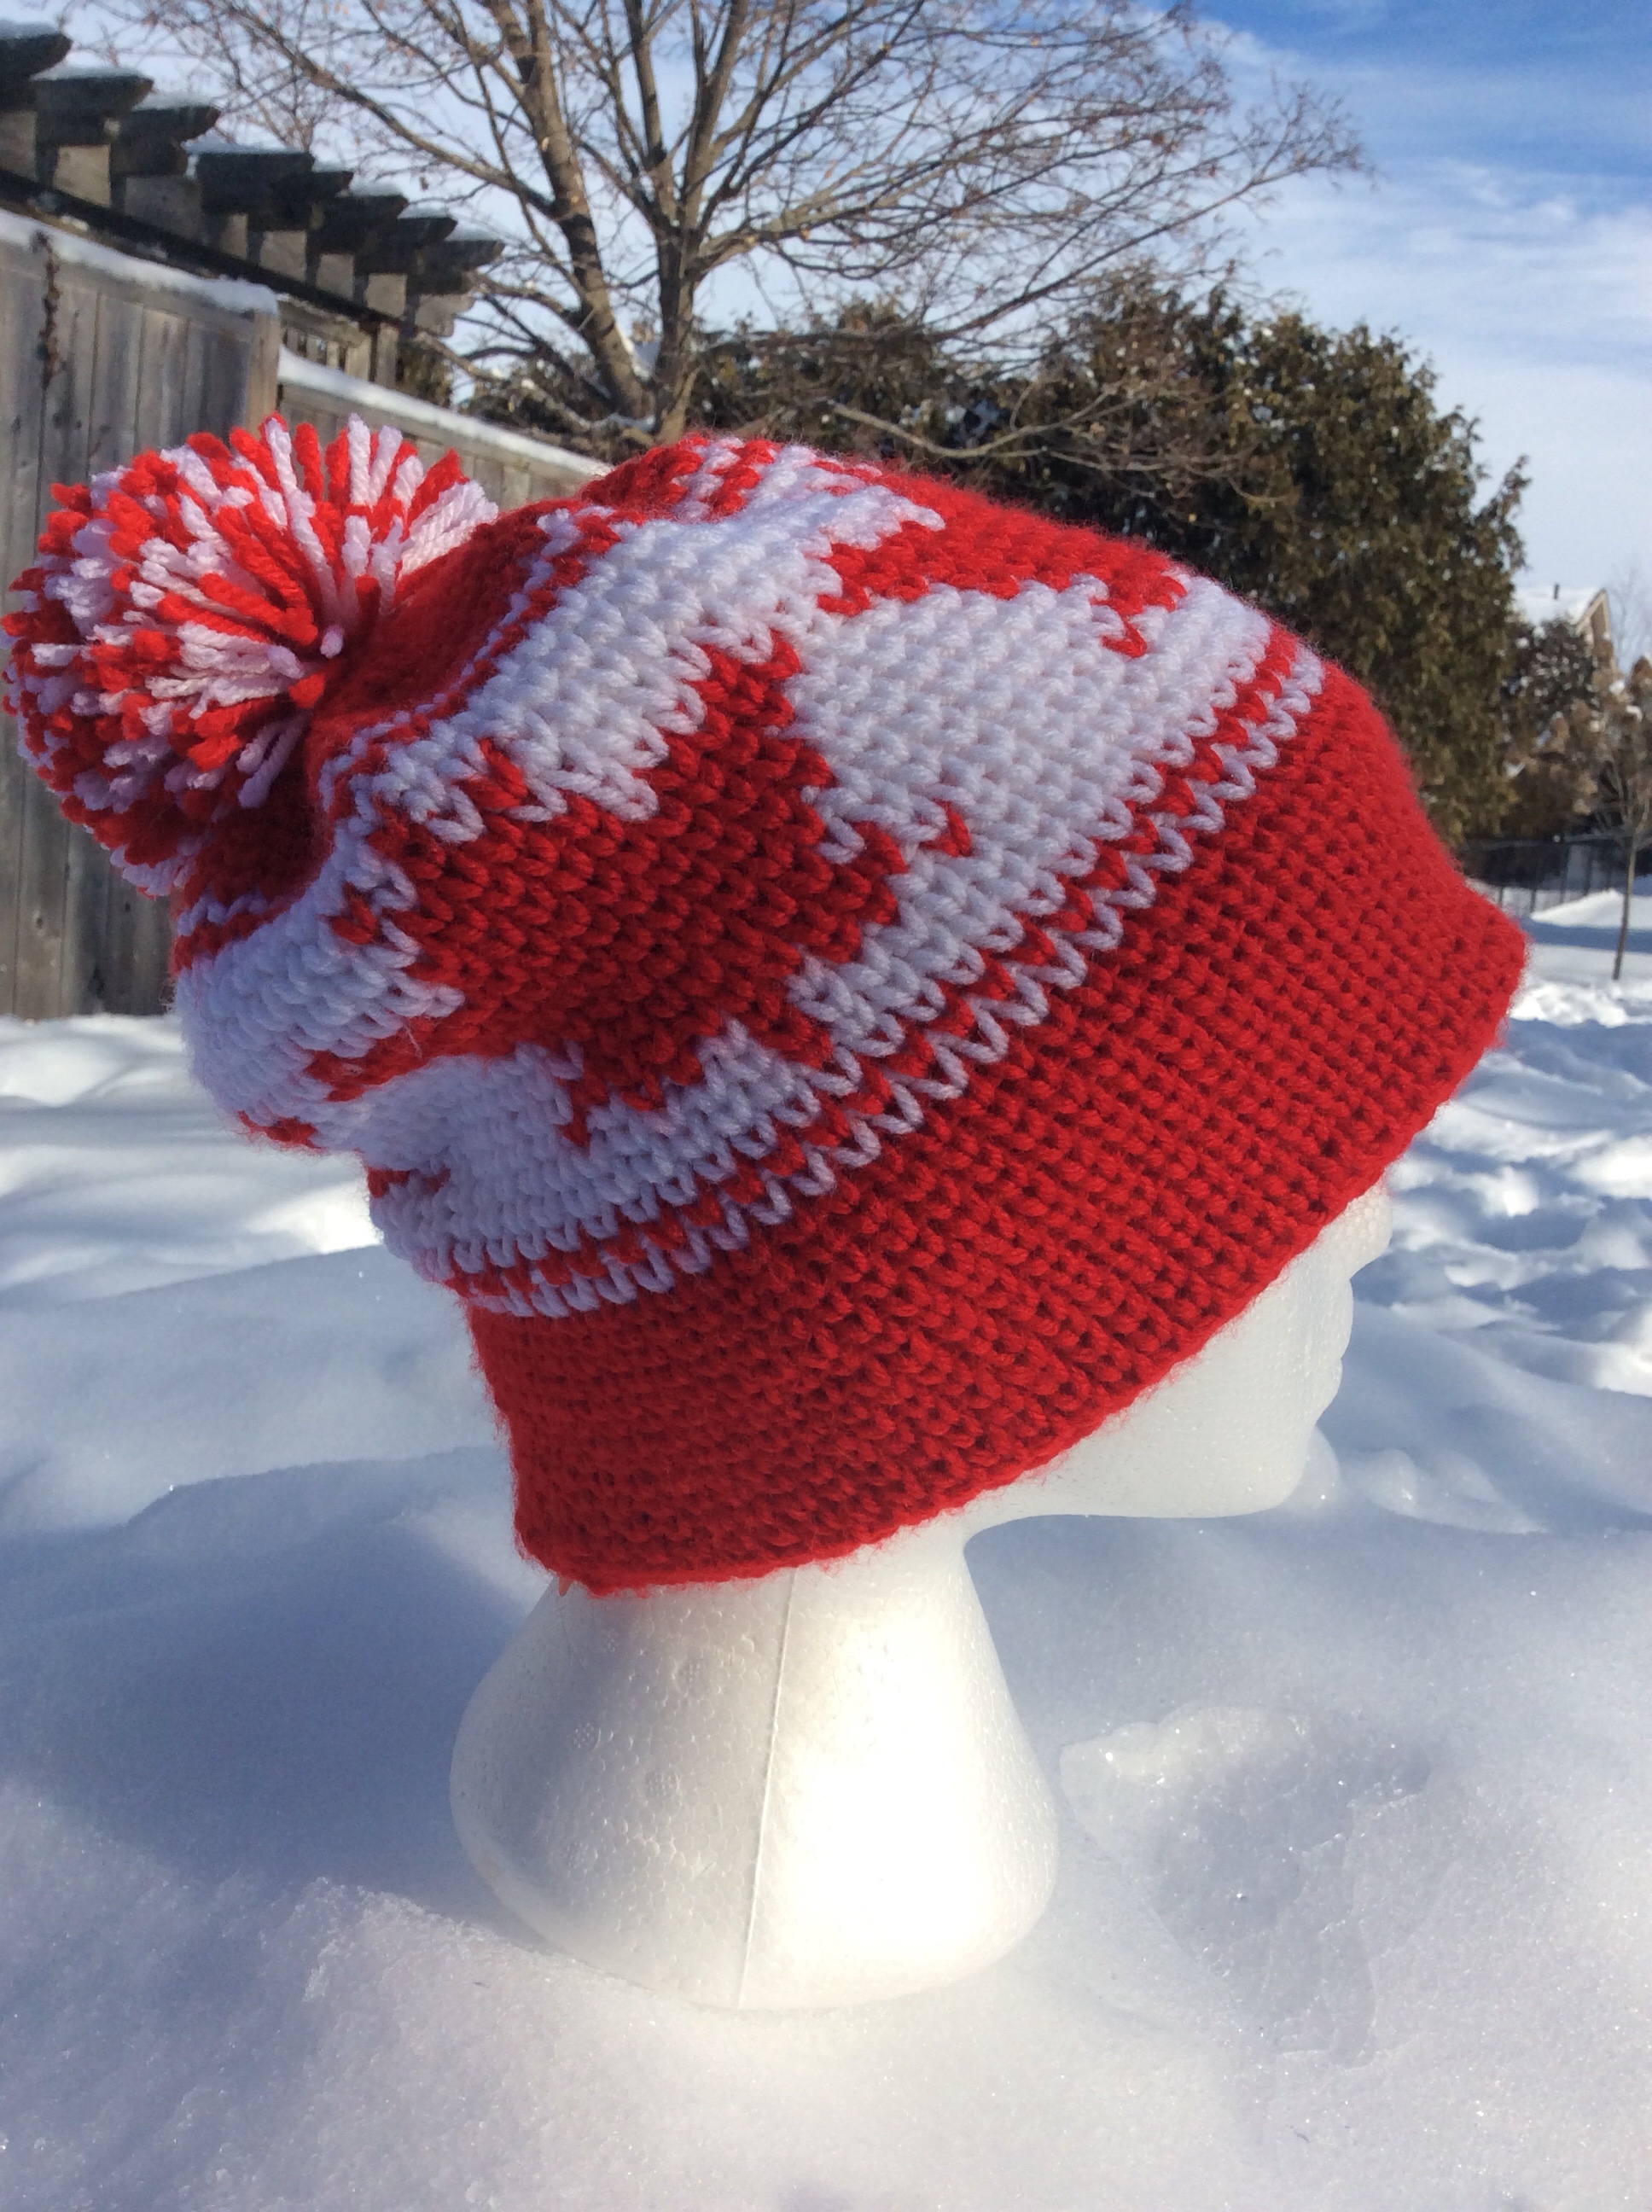
The hat is made using the knit stitch (also known as the Waistcoat stitch) which is why it has a knit look about it. The stitch may be tricky to get the hang of at first, but don’t give up! One thing that really helps is keeping your tension really loose, especially that beginning row of Single crochet stitches. The other tip I have is that when working the stitch, instead of trying inserting your hook straight through from front to back, insert your hook on a bit of an angle (from right to left).
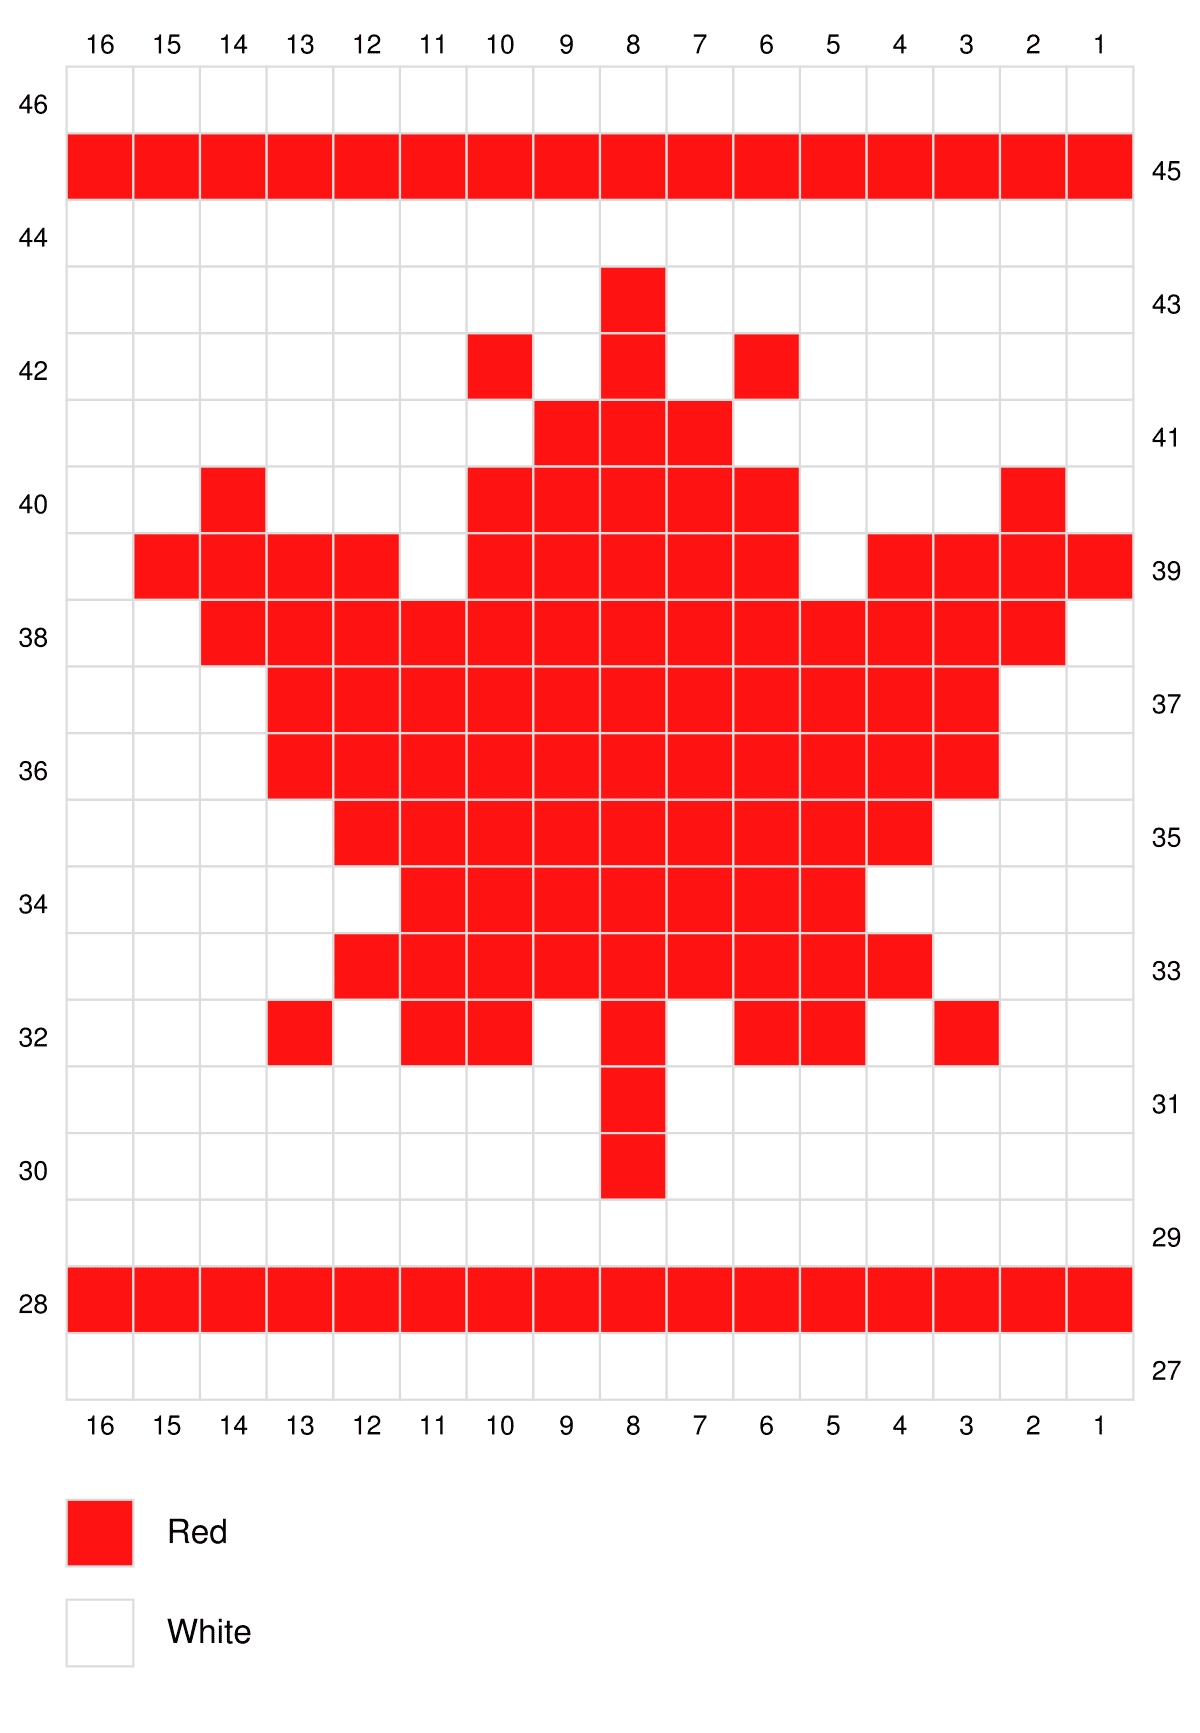
The hat features four maple leaves. And in order to simplify the colour changes, I have drawn up the instructions for this part of the hat using a graph. In the graph each square equals one stitch, and the stitch is worked in the colour shown. To change colours, when completing the stitch prior to the colour change simply draw the new colour through to finish the stitch. You may choose to crochet over the yarn that is not in use, or carry it behind your work. Under the pattern notes below I have included the formula for adjusting the size of your hat.
If you would like to save this pattern to your library in Ravelry, you may do so by CLICKING HERE. To add it to your Etsy favourites, you may do so by CLICKING HERE. Through those links you may also purchase an ad free PDF version.
Thank you and Happy Crocheting!
(And go, Canada, go!!!)
Sarah

Pattern:
Skill Level: Easy
Gauge: 13 sts x 18 rows = 4 inches
Finished Size: Approximately 10 inches tall (excluding Pom-Pom), 23 inches circumference
Yarn: Main Colour (Colour A): 1 ball, colour red (100% Acrylic; 198g, 329 meters / 360 yards; weight: 4 – Medium – Worsted)
Contrasting colour (Colour B): 1 ball, colour white (100% Acrylic; 198g, 329 meters / 360 yards; weight: 4 – Medium – Worsted)
Hook: 6 mm (10/J)
Notions: Yarn Needle, stitch marker.
Stitches and Abbreviations:
Blo – Back Loop Only
Ch – Chain
Ks – Knit Stitch (Also called the Waistcoat Stitch)
Ks2tog – knit stitch two together
Lp – loop
Lps – loops
Rpt – Repeat
Sc – Single Crochet
Sk – Skip
Sl st – Slip stitch
Yo – Yarn over
Pattern Notes:
– Pattern is written in American English terms.
– Pattern is worked in rounds.
– Join not join at the end of a round unless otherwise stated. Instead use a stitch marker to mark the first stitch and move it up as your work progresses.
– Weave in ends as needed.
– All rounds are worked with the right side facing.
– For the hat brim, when working through both thickness, at the front of the hat you will work as you would through the knit stitch, then pick up the corresponding stitch of the foundation row now on the inside of the hat, working through the top loops you would normally work through for an sc.
– While working the graph, you may crochet over the non working yarn, or carry it behind your work.
– To Adjust Size: The knit stitch does not have a lot of stretch. If you would like a larger brim for your hat, increase your starting chain by multiples of 4. Then for each multiple of 4 you will increase the stitch count space of colour B between the maple leaves by one. For example, with a chain of 64 the colour B between the leaves is one stitch. If you increase the starting chain to 68, the colour B between the leaves will increase to 2 sts. The rest of the pattern will remain the same.
Pattern:
With colour A, ch 64. Being careful not to twist chain, join with a sl st in the first chain.
Rnd 1: Working in the back bumps of chain, ch 1, loosely sc in each ch around. Do not join. (64 sts)
Rnd 2: Ks in the first st (mark this st), ks in each st around. Do not join. (64 sts)
Rnds 3-13: Ks in each st around (moving stitch marker as work progresses). Do not Join until last round at which time you will join with a sl st. (64 sts)
Rnd 14: Working blo, ch 1, sc in each st around. Do not join. (64 sts)
Rnds 15-26: Ks in each st around. Do not join (moving stitch marker as work progresses). Join colour B in last st. (64 sts)
Where you worked in the blo, fold fabric under to the inside of the hat. This will become your double thick brim.
Rnd 27: With colour B, and working through both thickness (this includes the foundation row that has now been turned under for the hat brim – see pattern notes), ks in each st around. Join colour A in the last st. Do not join. (64 sts)
Rnd 28: With Colour A, ks in each st around. Join colour B in the last st. Do not Join. (64 sts)
Rnd 29: With Colour B, ks in each st around. Join colour A in the last st. Do not Join. (64 sts)
Begin working the graph below. You will start on row 30 on the bottom right hand side. Work the horizontal rows (working right to left), each colour block representing one knit stitch in the colour shown. The pattern will be repeated four (4) times. When you reach the end of the row on the graph, simply begin again on the right side of the graph. Remember to move your stitch marker up each row as your work progresses.
Once you have finished working the chart, you will proceed as follows with your decrease rows:
Rnd 47: With colour A, * Ks in the next 6 sts, ks2tog. Rpt from * around. Do not join. (56 sts)
Rnd 48: * Ks in the next 5 sts, ks2tog. Rpt from * around. Do not join. (48 sts)
Rnd 49: * Ks in the next 4 sts, ks2tog. Rpt from * around. Do not join. (40 sts)
Rnd 50: * Ks in the next 3 sts, ks2tog. Rpt from * around. Do not join. (32 sts)
Rnd 51: * Ks in the next 2 sts, ks2tog. Rpt from * around. Do not join. (24 sts)
Rnd 52: * Ks in the next st, ks2tog. Rpt from * around. Join with a sl st in the first st. (16 sts)
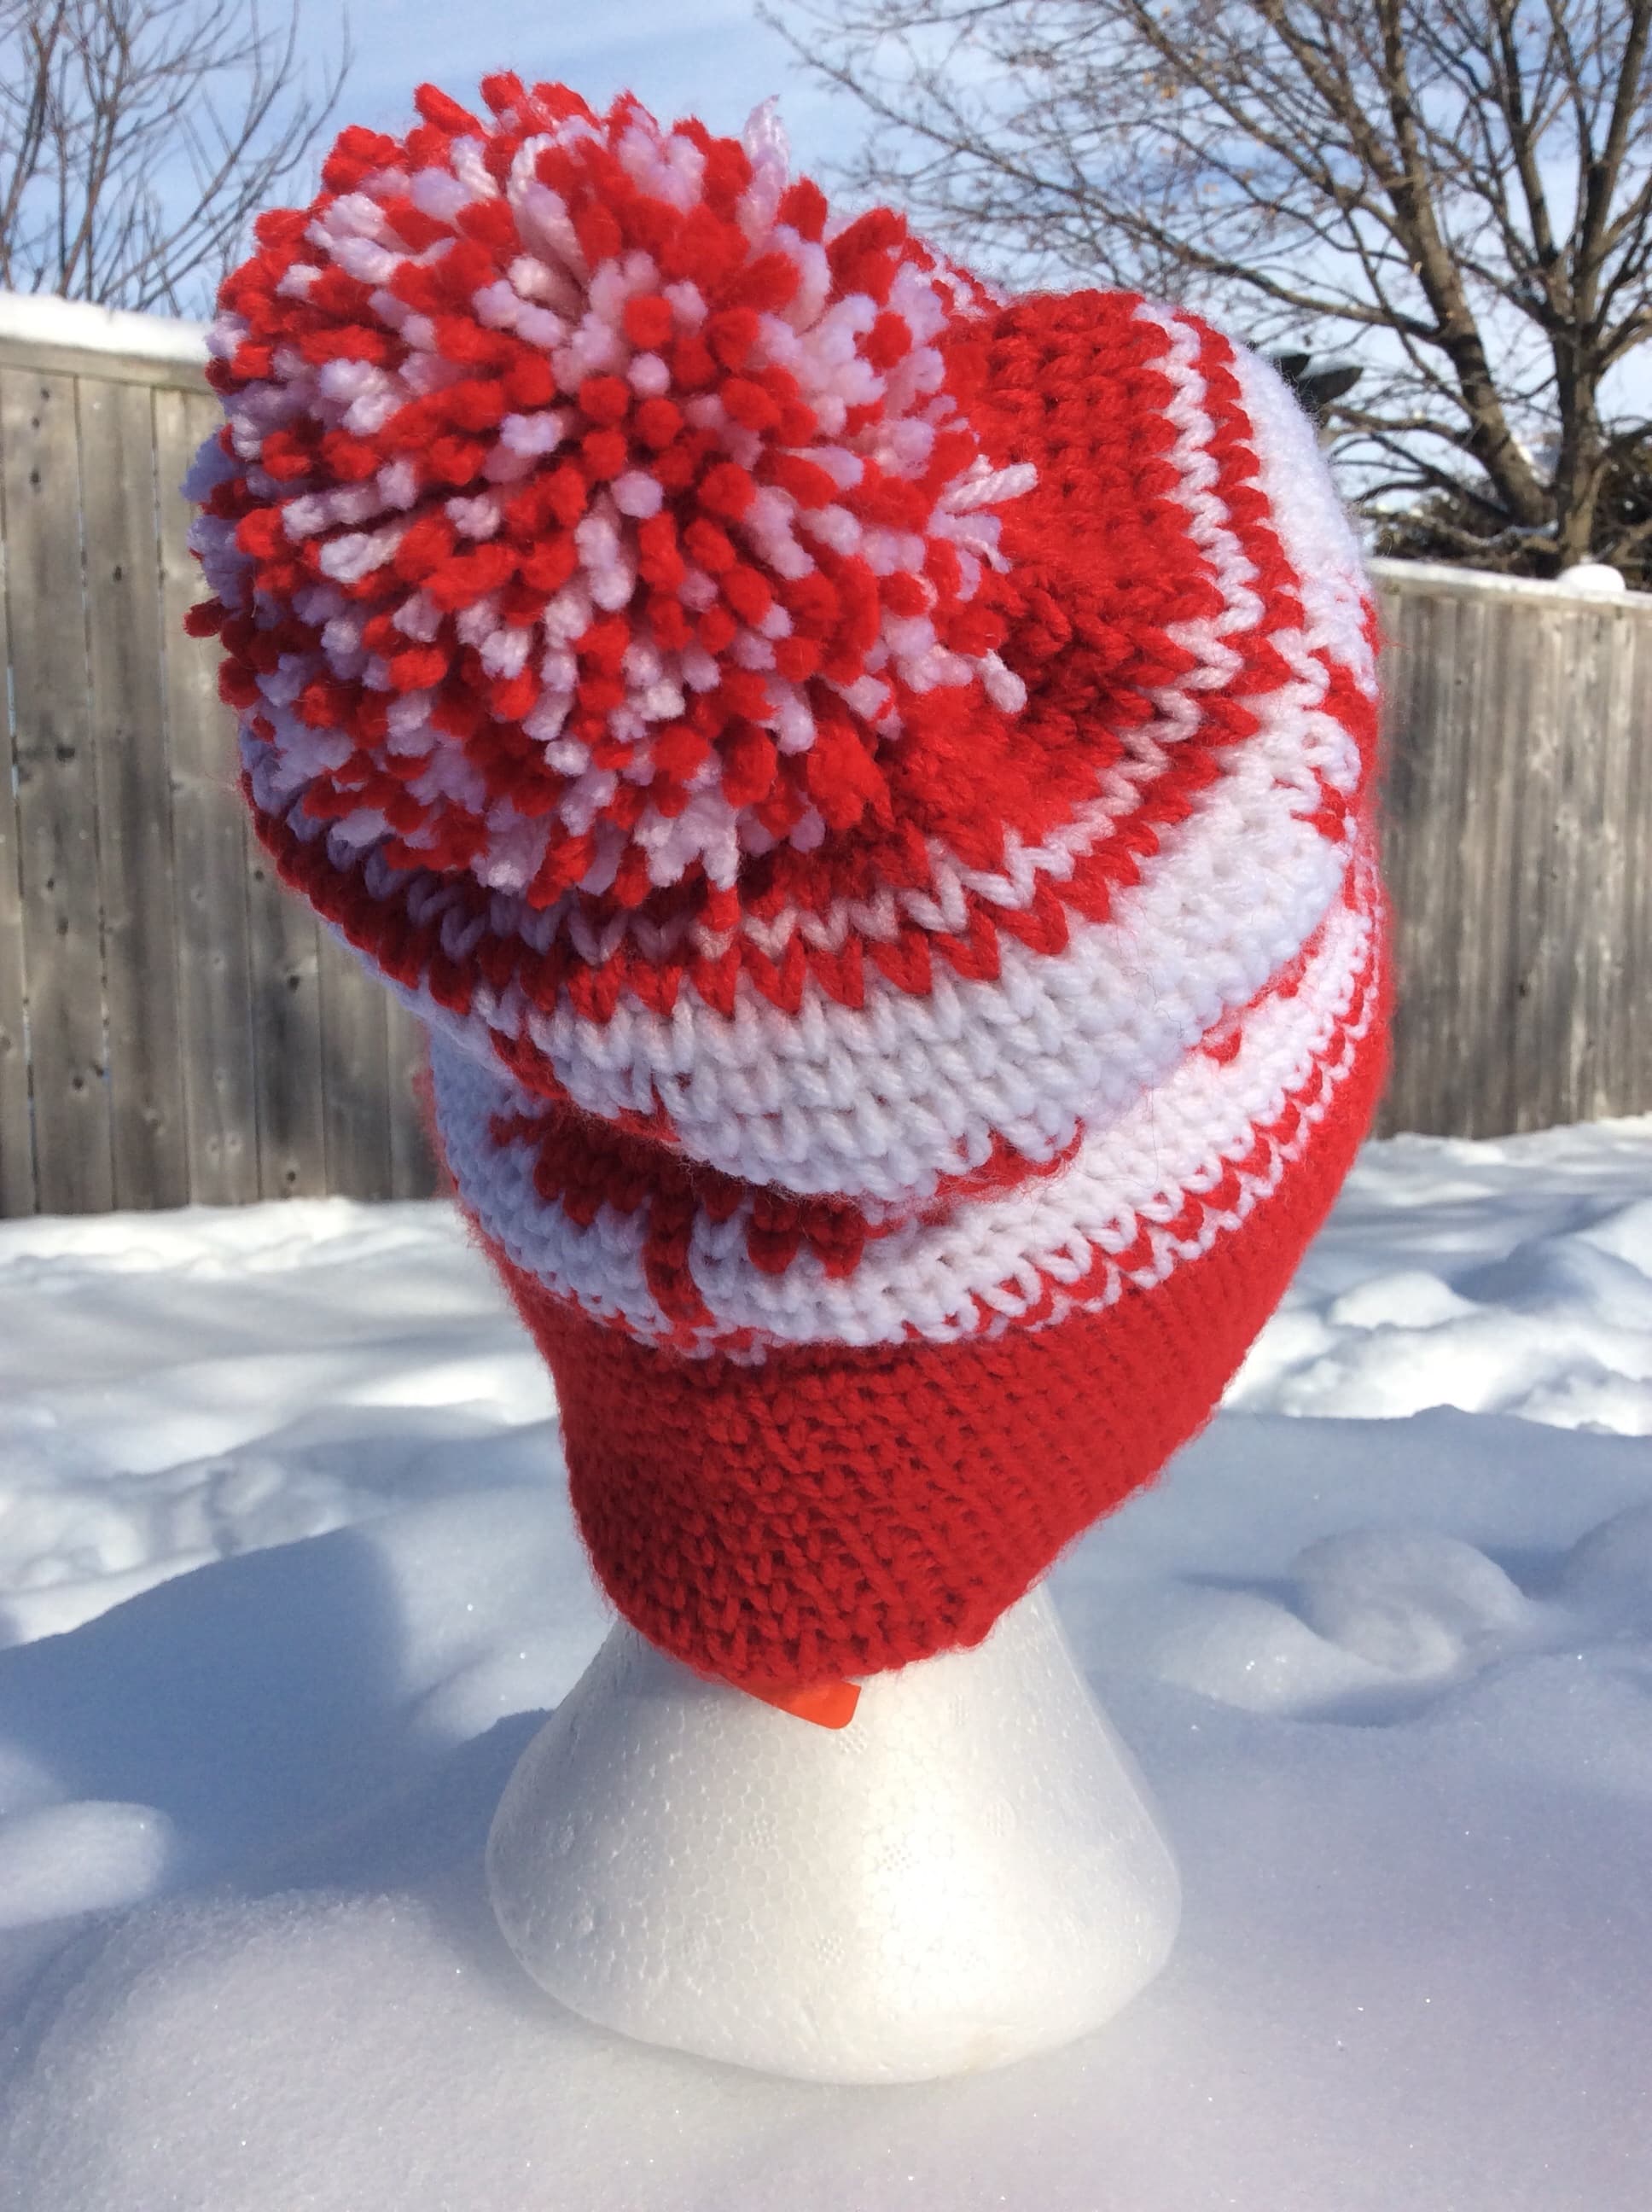
Fasten off leaving a long tail. Use this tail to sew the top of the hat closed. Optional: Using the colours used in the hat, make a Pom Pom and attach it to the top.
The photographs and pattern contained in this document are the property of Rich Textures Crochet.
This pattern is for personal use only.
No unauthorized reproduction, in whole or in part, or distribution of this pattern or content is permitted. ALL FINISHED PRODUCTS from this pattern can be used for local sales and sold online.
Thank you so much for supporting Rich Textures Crochet! To stay in touch or see more great products, be sure to visit me on Facebook and Instagram (Rich Textures Crochet) or at www.richtexturescrochet.com. Thanks again! Happy Crocheting!


Gorgeous! Thanks so much for creating and sharing.
You’re very welcome!
I love this hat!
So glad!!
I just want to tell you that I made this hat for a friend and it turned out great. I used a smaller hook size to make the size smaller since it was for her child