This post contains affiliate links. This means that when you purchase through one of these links we will receive a small commission at no additional cost to you. Thank you for supporting Rich Texture Crochet!
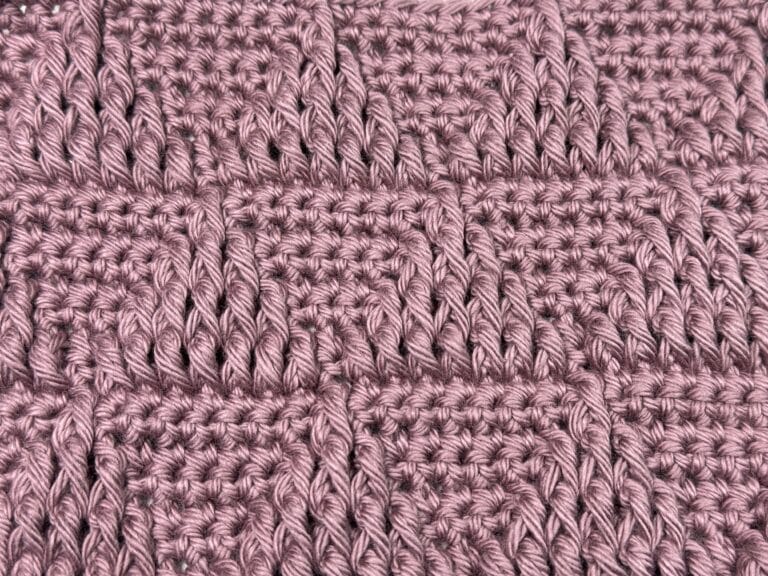
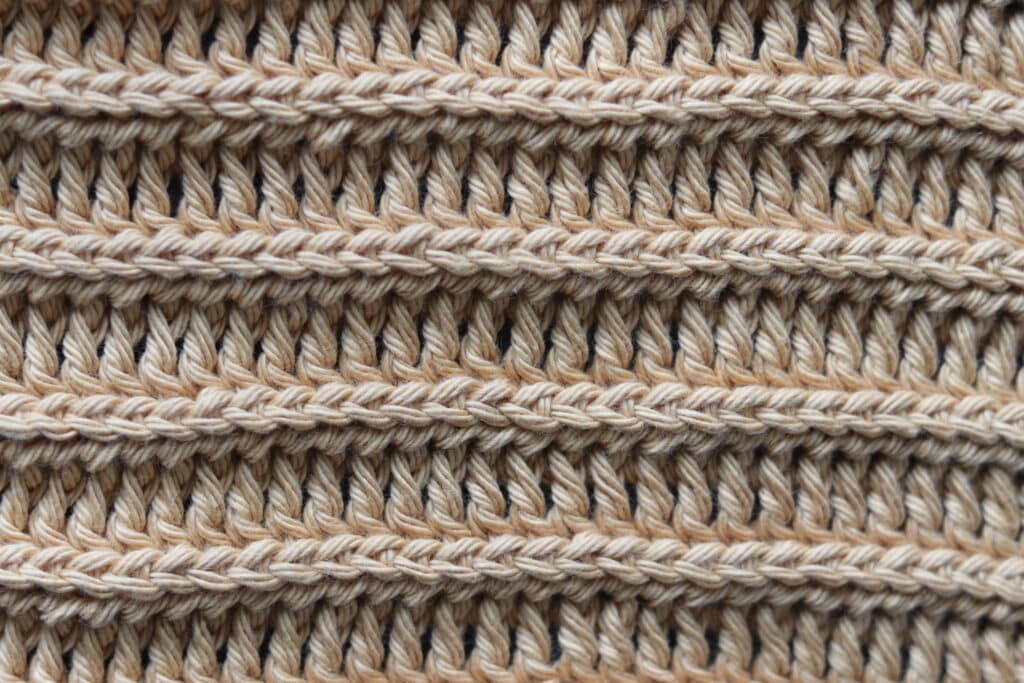
You are going to love the reversible texture in this Raised Ridges Stitch and, best of all, it’s worked using a combination of basic stitches, with a slight variation.
This is a very versatile stitch! The texture of the pattern is present on both sides, however, because of the way the stitches are placed, the back side looks a little more plain than the front.
At the start I mentioned that although this stitch is worked using basic stitches including double crochet, half double crochet and front post double crochet. It is how the front post double crochet is worked that makes it a little more unique than other ridge stitches like the Royal Ridge Stitch.
For the Raised Ridges Stitch, for the front post double crochet you will work it just under the top loops of the stitch below around the “post” between them. For example, working under the top loops, you will bring your hook in front of your work, insert your hook from front to back through the first stitch, around back and then insert your hook from back to front under the top loops of the second stitch. You can see this all in action in the free video tutorial below.
Materials for this Tutorial:
For this tutorial today I will be using a small amount of Pima Cotton Yarn by Lion Brand Yarn. It is a worsted weight yarn. I will also be working with a 5 mm Clover crochet hook. However you may use any hook and yarn combination you choose.
Thank you so much for stopping by! If you enjoy the tutorial below, be sure to also check out some of the many other crochet stitch tutorials on my site and pin this for later! You may wish to start with the beautiful Almond Stitch | How to Crochet.
Raised Ridges Crochet Stitch Pattern:
Stitches and Abbreviations:
Ch – Chain Stitch
Dc – Double Crochet
Fphdc – Front Post Half Double Crochet (Yarn over, working under the top loops, bring your hook in front of your work, insert your hook from front to back through the first stitch, around back and then insert your hook from back to front under the top loops of the second stitch, yarn over and draw up a loop, yarn over and draw through all the loops on your hook. Front post half double crochet made.)
Fpdc – Front Post Double Crochet (Yarn over, working under the top loops, bring your hook in front of your work, insert your hook from front to back through the first stitch, around back and then insert your hook from back to front under the top loops of the second stitch, yarn over and draw up a loop, yarn over and draw through two loops twice. Front post double crochet made.)
Rpt – Repeat
Sc – Single Crochet Stitch
Sl St – Slip Stitch
Yo – Yarn Over
Pattern Notes:
This stitch is worked in rows in this tutorial and it may be worked in one colour or many. I will be working this pattern in a solid colour.
To begin make a slip knot and make a foundation chain. For this stitch you may use any multiple of chain stitches for your foundation chain.
To begin, you will work your foundation chain. For example, work 30 chains.
Row One:
Dc in the 4th ch from your hook and in each st across. Ch 2, turn.
Row Two:
Fphdc through the top loops of the next 2 sts (see “stitches and abbreviations”), *fphdc beginning in the same st as the previous st; Rpt from * across, hdc in the top of the turning ch. Ch 3, turn.
Row Three:
Fpdc through the top loops of the next 2 sts (see “stitches and abbreviations”), *fpdc beginning in the same st as the previous st; Rpt from * across, hdc in the top of the turning ch. Ch 2, turn.
And that’s it!
For the rest of the pattern simply repeat rows two and three for as long as you would like. Fasten off, weave in your ends.
