
This post contains affiliate links. This means that when you purchase through one of these links we will receive a small commission at no additional cost to you. Thank you for supporting Rich Texture Crochet!
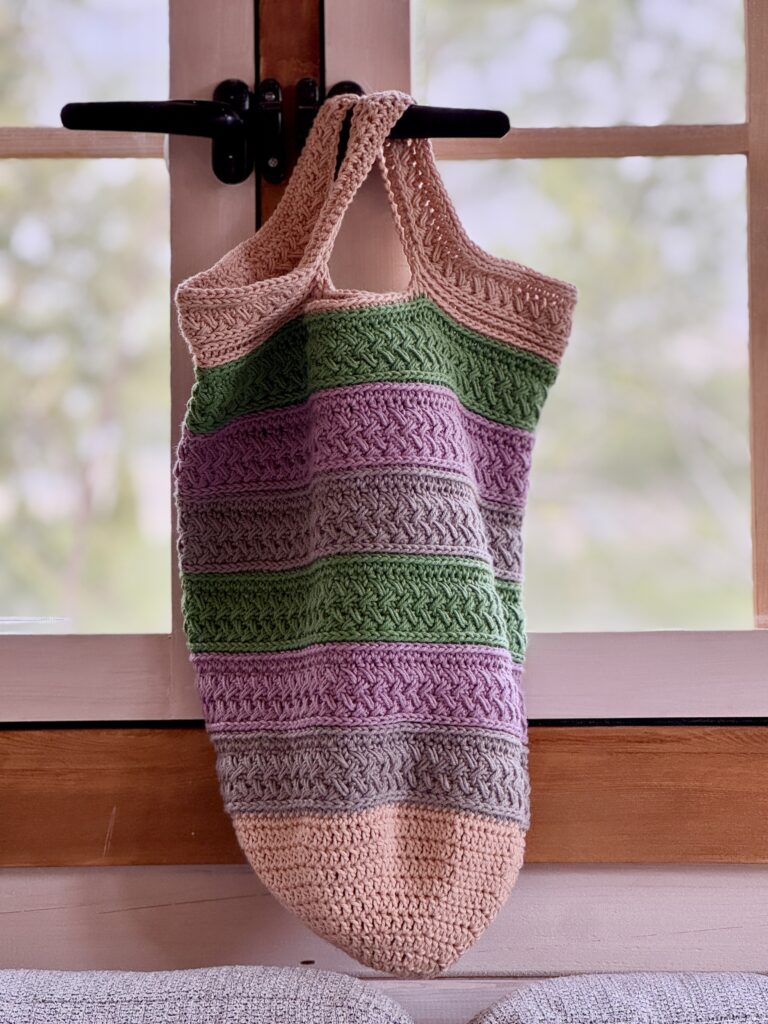
Welcome to the final week of the 2026 Marvellous Market Bag Crochet Along. Today we will learn to make the Market Day Market Bag crochet pattern.
It’s hard to believe how fast these four weeks have passed! It seems only a week ago that I was only announcing the event. I want to thank everyone who has been participating. I have absolutely loved seeing your finished market bags in the Rich Textures Crochet Community group on Facebook.
The Marvellous Market Bag Crochet Along:
Welcome to the fourth week of the Marvellous Market Bag Crochet Along. If this is your first time hearing about the event, this is the event where we spend the month of May learning and making four new crochet market bag patterns! They are so much fun, quick to make and a great way to experiment with colour.
If you have not checked it out already, you can learn more about the crochet along event here: 2026 Marvellous Market Bag CAL Introduction.If you missed the first crochet market bag in the collection, you can see the free crochet pattern here: The Trellis Market Bag Crochet Pattern. The second bag in the event was the easy Beach Vibes Market Bag and last week we learned to make the beautifully textured Garden Party Market Bag.
Don’t worry if you haven’t completed or even had the chance to begin the other market bag crochet patterns, they will always remain free here on Rich Textures Crochet.
How to Crochet a Market Bag:
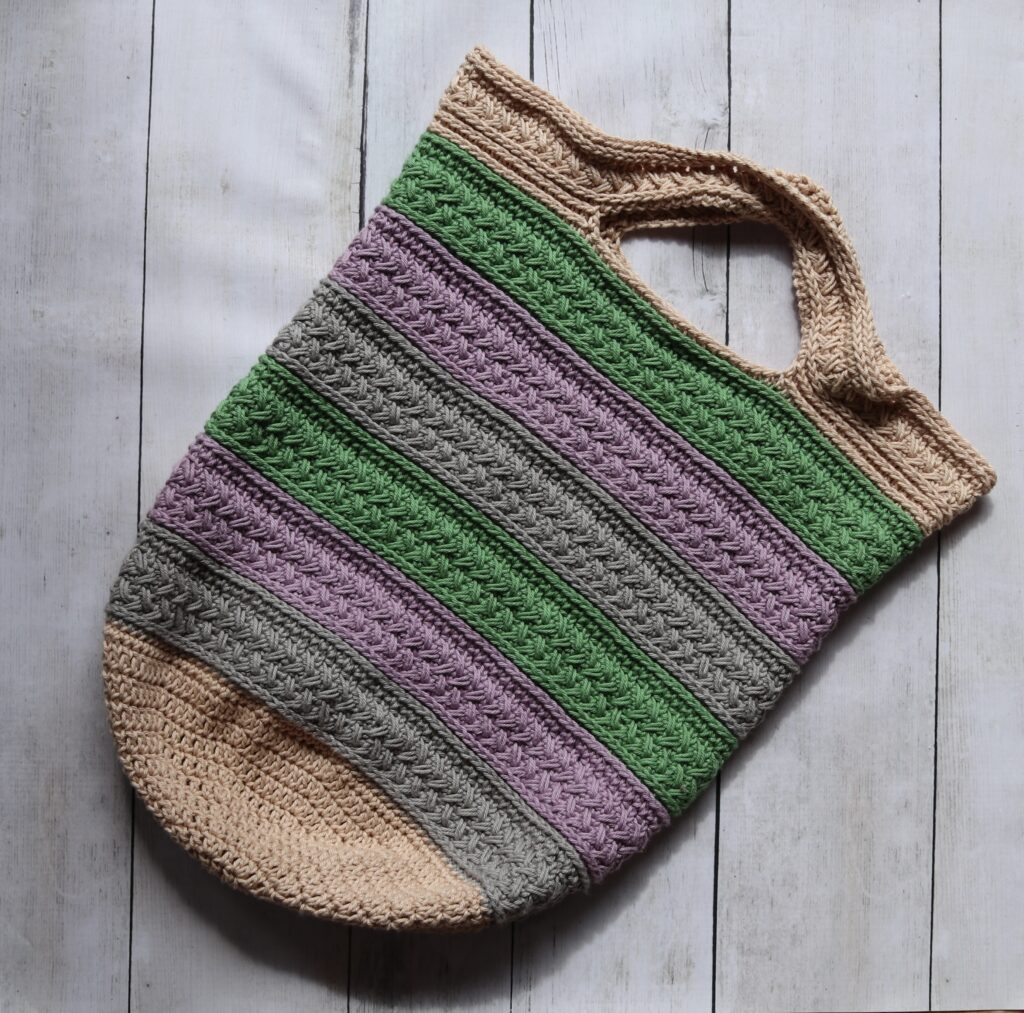
The Market Day Market Bag crochet pattern is worked from the bottom up and as a solid piece from the bottom through to the continuous handles.
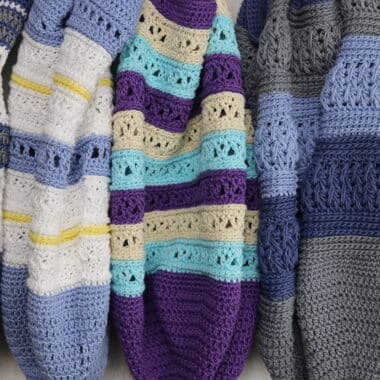
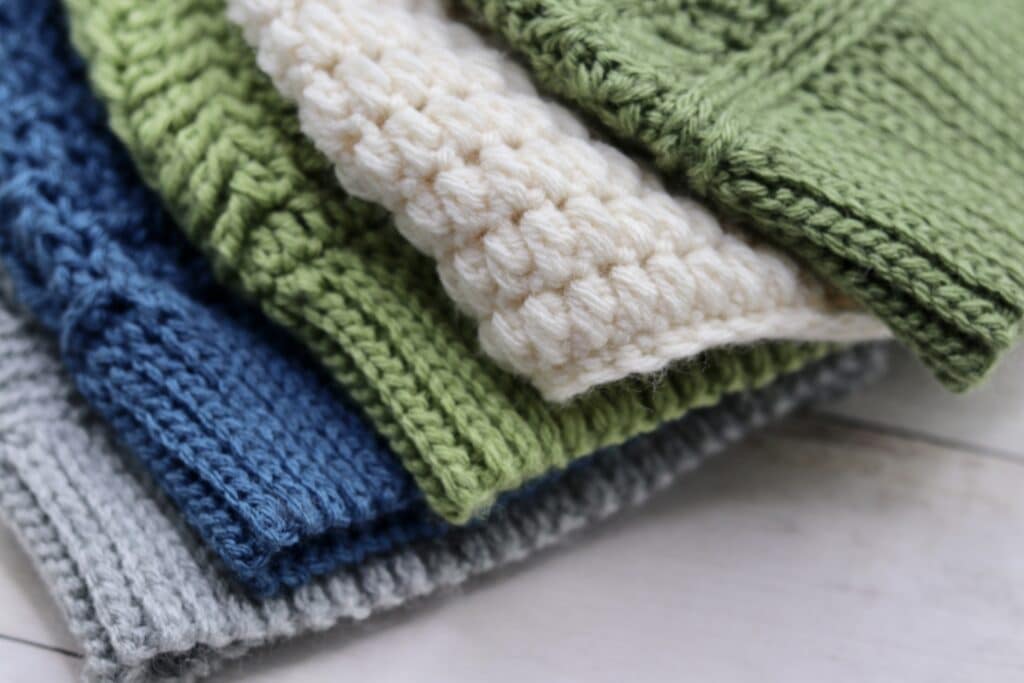
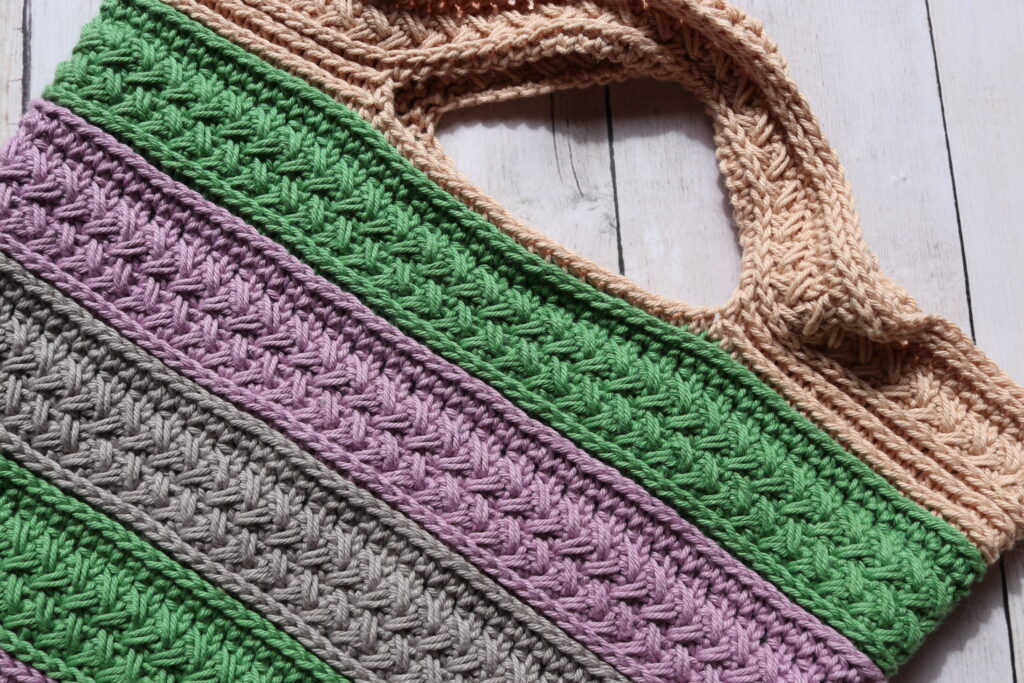
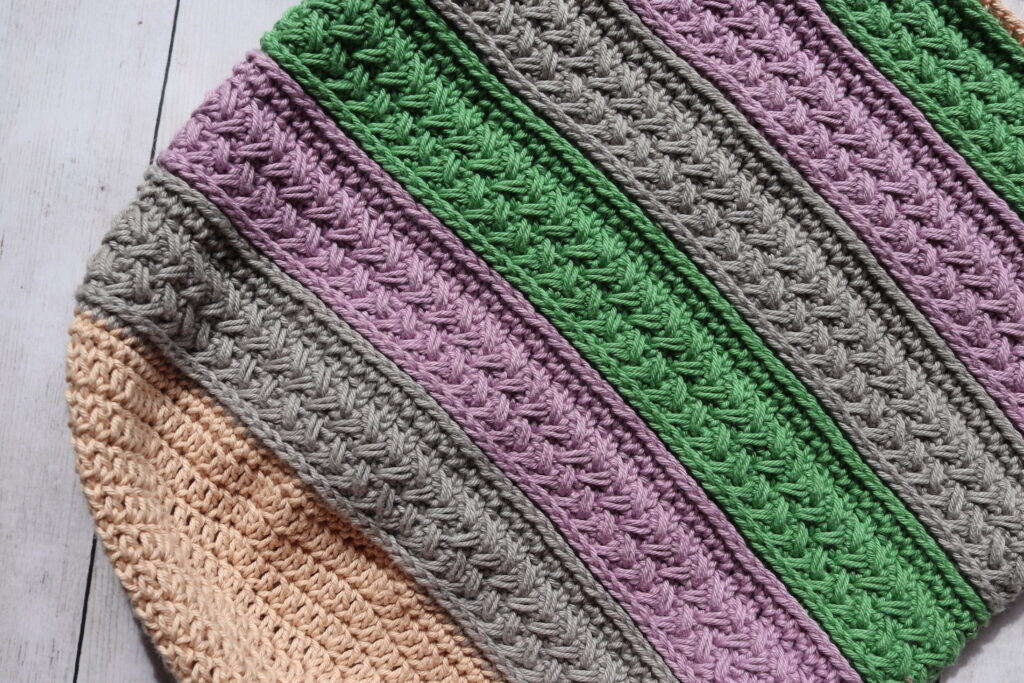
I love the texture in this bag! Similar to the Garden Party Bag last week, our bag today will be worked in four colours (you can of course mix it up!) and it features rounds of spiked weave stitch that are broken up with rounds of half double crochet in the third loop. It is such a great solid textured bag!
Another difference between this bag and the others is found in the handles. This time around we will continue the Spiked Weave texture into the handles and it really helps to set them off.
The Market Day Market Bag crochet pattern is one of my new favourite bags. I have even made a couple to give as gifts to my children’s teachers!
Materials Needed:
For this crochet market bag I used a worsted weight 100% cotton yarn called Dishie by KnitPicks and WeCrochet. I really love using cotton for market bags. Not only is it available in a wide range of colours, but it is also durable and holds its shape well, even when under a lot of stress!
The colours of yarn shown in the photos include: Colour A: About 240 yards, colour Linen, Colour B: About 150 yards, colour Silver, Colour C: About 150 yards colour Lilac Mist, Colour D: About 150 yards, colour Jade.
PDF Copies are also Available:
The crochet pattern for this market bag will be written out in full below and will forever remain free when viewed here on Rich Textures Crochet, and the written instruction will be followed by a free video tutorial. However if you would like to add this pattern to your library or purchase an ad free PDF, you may do so from either my Etsy or Ravelry Shop linked below:
CLICK HERE FOR THE MARKET DAY MARKET BAG ON ETSY
CLICK HERE FOR THE MARKET DAY MARKET BAG ON RAVELRY
Thank you for stopping by and I look forward to seeing you again soon! If you have not already, I invite you to sign up for my e-newsletter so that you will be notified each time I release a new free crochet pattern or stitch tutorial.
Looking for NEW crochet pattern books? I have three crochet books now available on Amazon in ebook and paperback format. These books include two books of blanket crochet patterns and one of my favourite crochet stitches. You can see them all by clicking HERE. Enjoy!
Market Day Market Bag Crochet Pattern:
Skill Level: Easy
Gauge: 16 stitches x 6 rows of dc = 4 inches
Finished Size: Approximately 17.5 x 13 inches laid flat
Yarn: Dishie Worsted Weight by KnitPicks/WeCrochet® (190 yds; 100g/3.5 oz; 100% cotton; (4) worsted weight). You will need about 690 yards of a worsted weight cotton. I will work it in four different colours: Colour A: About 240 yards, colour Linen, Colour B: About 150 yards, colour Silver, Colour C: About 150 yards colour Lilac Mist, Colour D: About 150 yards, colour Jade.
Hook: Size H/8 (5 mm) hook.
Notions: Yarn Needle
Stitches and Abbreviations:
3rd Lp – 3rd Loop (To work in the 3rd loop, look at the back of your half double crochet stitch. You will see a loop running along under the back loop only. This loop under the back loop is called the “3rd Loop.”
Ch – Chain
Dc – Double Crochet
Hdc – Half Double Crochet
Rpt – Repeat
Sc – Single Crochet
Sk – Skip
Sl st – Slip stitch
Yo – Yarn over
Pattern Notes:
- Pattern is written in American English terms.
- Pattern is worked in rounds, as one piece, from the bottom up to the handles.
- Ch 1 at the beginning of the row does not count as a stitch.
- Weave in ends as needed.
- Turn your work as indicated.
- To change the size of your bag you may choose to work more or less rounds to make it larger or smaller. You will need a multiple of 2 stitches. Then simply work the repeats of the market bag sides until the bag has reached the desired height and then finish with the top and handles. When changing the size in this way, note that you will need to recalculate and adjust the number of stitches worked between the bag handles.
- You may also choose to adjust the length of your bag straps. When it comes time to work the foundation chains for the bag handles, simply work more or less chains. Be sure to make note of any adjustments!
Free Crochet Pattern:
Bottom:
With colour A, ch 4
Rnd 1: 11 dc in the 4th ch from hook (ch 3 counts as a st), join with a sl st in the 1st st. (12 sts)
Rnd 2: Ch 3, dc in the same st as joining, 2 dc in each st all the way around, join with a sl st in the 1st st. (24 sts)
Rnd 3: Ch 3, 2 dc in the next st, * dc in the next, 2 dc in the next st; Rpt from * around, join with a sl st in the 1st st. (36 sts)
Rnd 4: Ch 3, dc in the next st, 2 dc in the next st, * dc in each of the next 2 sts, 2 dc in the next st; Rpt from * around, join with a sl st in the 1st st. (48 sts)
Rnd 5: Ch 3, dc in each of the next 2 sts, 2 dc in the next st, * dc in each of the next 3 sts, 2 dc in the next st; Rpt from * around, join with a sl st in the 1st st. (60 sts)
Rnd 6: Ch 3, dc in each of the next 3 sts, 2 dc in the next st, * dc in each of the next 4 sts, 2 dc in the next st; Rpt from * around, join with a sl st in the 1st st. (72 sts)
Rnd 7: Ch 3, dc in each of the next 4 sts, 2 dc in the next st, * dc in each of the next 5 sts, 2 dc in the next st; Rpt from * around, join with a sl st in the 1st st. (84 sts)
Rnd 8: Ch 3, dc in each of the next 5 sts, 2 dc in the next st, * dc in each of the next 6 sts, 2 dc in the next st; Rpt from * around, join with a sl st in the 1st st. (96 sts)
Rnd 9: Ch 3, dc in each of the next 6 sts, 2 dc in the next st, * dc in each of the next 7 sts, 2 dc in the next st; Rpt from * around, join with a sl st in the 1st st. (108 sts)
Rnd 10: Ch 3, dc in each of the next 7 sts, 2 dc in the next st, * dc in each of the next 8 sts, 2 dc in the next st; Rpt from * around, join with a sl st in the 1st st. (120 sts)
Rnd 11: Ch 1, sc in each st all the way around, join with a sl st in the 1st st. (120 sts). Switch to colour B. Fasten off colour A.
Sides:
Rnd 1: With colour B, ch 1, hdc in the same st as joining, hdc in each st around. Join with a sl st in the top of the 1st st. Ch 1, do not turn.
Rnd 2: Working in the 3rd lp around, sc in the same st as joining, sc in each st around. Join with a sl st in the top of the 1st st. Ch 1, TURN.
Rnd 3: Sc in the 1st st, hdc under the st immediately before the sl st join, *sk the next st (NOTE: This is the stitch that will lie directly under the hdc), sc in the next st, hdc under the previous skipped st; Rpt from * around. Join with a sl st in the 1st st. Ch 1, TURN.
Rnds 4-6: Sc in the 1st hdc, hdc under the sc immediately before the sl st join, *sk the next st (NOTE: This is the stitch that will lie directly under the hdc), sc in the next hdc, hdc under the previous skipped sc; Rpt from * around. Join with a sl st in the 1st st. Ch 1, TURN. (NOTE: At the end of rnd 6 only, do not turn.)
Rnd 7: Hdc in the same st as joining, hdc in each st around. Join with a sl st in the top of the 1st st. Switch to colour C. Fasten off colour B. Ch 1, do not turn.
Rnd 8: With colour C, working in the 3rd lp around, hdc in the same st as joining, hdc in each st around. Join with a sl st in the top of the 1st st. Ch 1, do not turn.
Rnds 9-15: Repeat rnds 2-8 switching to colour D in the repeat of rnd 7. Fasten off colour C at the end of rpt rnd 7.
Rnds 16-22: With colour D, repeat rnds 2-8 switching to colour B in the repeat of rnd 7. Fasten off colour D at the end of rpt rnd 7.
Rnds 23-42: Repeat rnds 2-21 once more. Switch to colour A. Fasten off colour D.
Rnd 43: With colour A, working in the 3rd loop all the way around, hdc in the same st as joining, hdc in each st around. Join with a sl st in the top of the 1st st. Ch 1, do not turn.
Handles:
Rnd 1: Ch 1, working under both lps hdc in the 1st st, working in the 3rd lp hdc in each of the next 38 sts, working under both loops hdc in the next st, ch 30, sk the next 20 sts, working under both lps hdc in the 1st st, working in the 3rd lp hdc in each of the next 38 sts, working under both loops hdc in the next st, ch 30, sk the next 20 sts. Join with a sl st in the top of the 1st st.
Rnd 2: Ch 1, working in the 3rd loop where able, hdc in the same st as joining and in each st and ch-st around. Join with a sl st in the 1st st. (140 sts) (Note that when working into your chain sts, you will not be working into the 3rd loop)
Rnd 3: Working in the 3rd lp around, sc in the same st as joining, sc in each st around. Join with a sl st in the top of the 1st st. Ch 1, TURN.
Rnd 4: Sc in the 1st st, hdc under the st immediately before the sl st join, *sk the next st (NOTE: This is the stitch that will lie directly under the hdc), sc in the next st, hdc under the previous skipped st; Rpt from * around. Join with a sl st in the 1st st. Ch 1, TURN.
Rnd 5: Sc in the 1st hdc, hdc under the sc immediately before the sl st join, *sk the next st (NOTE: This is the stitch that will lie directly under the hdc), sc in the next hdc, hdc under the previous skipped sc; Rpt from * around. Join with a sl st in the 1st st. Ch 1, do not turn.
Rnd 6: Hdc in the same st as joining, hdc in each st around. Join with a sl st in the top of the 1st st. Ch 1, do not turn.
Rnd 7: Working in the 3rd lp around, sc in the same st as joining, sc in each st around. Join with a sl st in the top of the 1st st. Ch 1, do not turn.
Fasten off, weave in your ends.