This post contains affiliate links. This means that when you purchase through one of these links we will receive a small commission at no additional cost to you. Thank you for supporting Rich Texture Crochet!
Welcome to week one of the 2026 Marvellous Market Bag Crochet Along! Today we will learn to work the easy Trellis Market Bag crochet pattern.
It is market bag season! It’s a wonderful time of year when you can pull out some of your favourite cotton yarn, make a beautiful bag and take it out with you as you go out shopping and show it off!
I use mine for shopping and even for heading out to the park with a good book, or to the beach. They are such a practical item to crochet.
If you love to crochet market bags as I do and you have not heard about the Marvellous Market Bag Crochet Along, you may wish to check out this post here: Introduction: The Marvellous Market Bag Crochet Along. It will have all the details you need to get started! If you would like to check out the crochet along from last year, you can also check it out here: The 2025 Marvellous Market Bag Crochet Along.
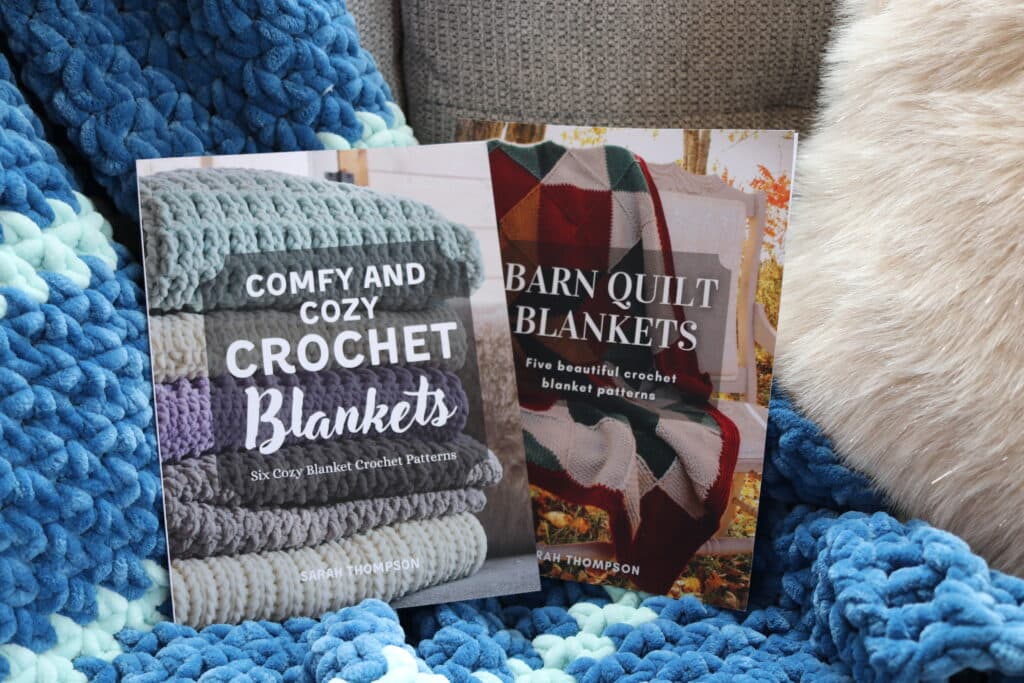
Check out my new books! I have three crochet books now available on Amazon in ebook and paperback format. These books include two books of blanket crochet patterns and one of my favourite crochet stitches. You can see them all by clicking HERE. Enjoy!
Our First Crochet Market Bag
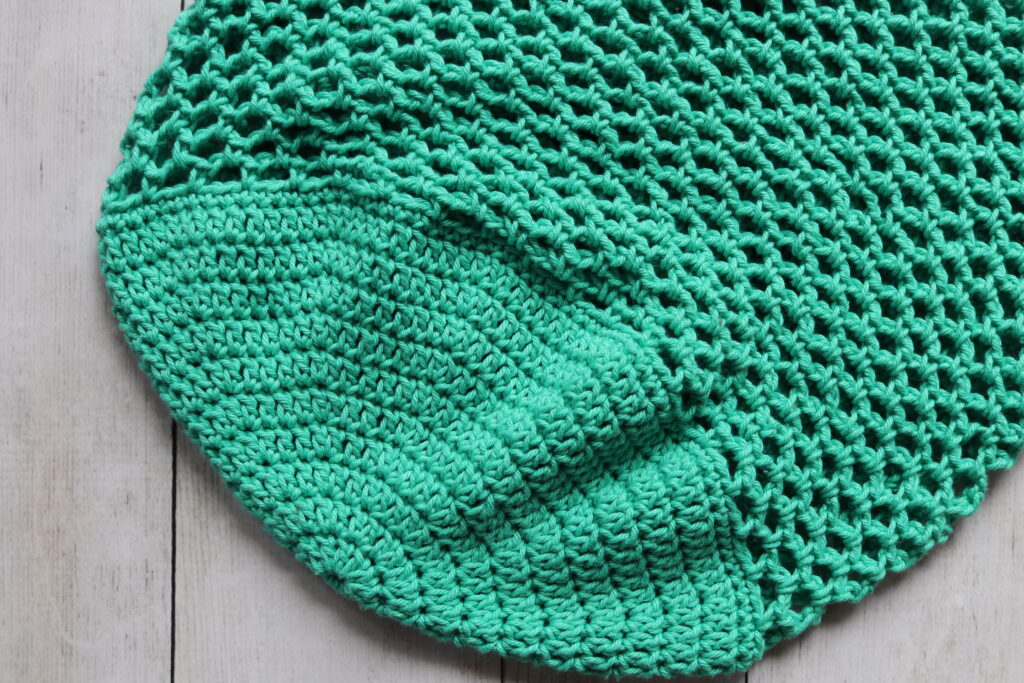
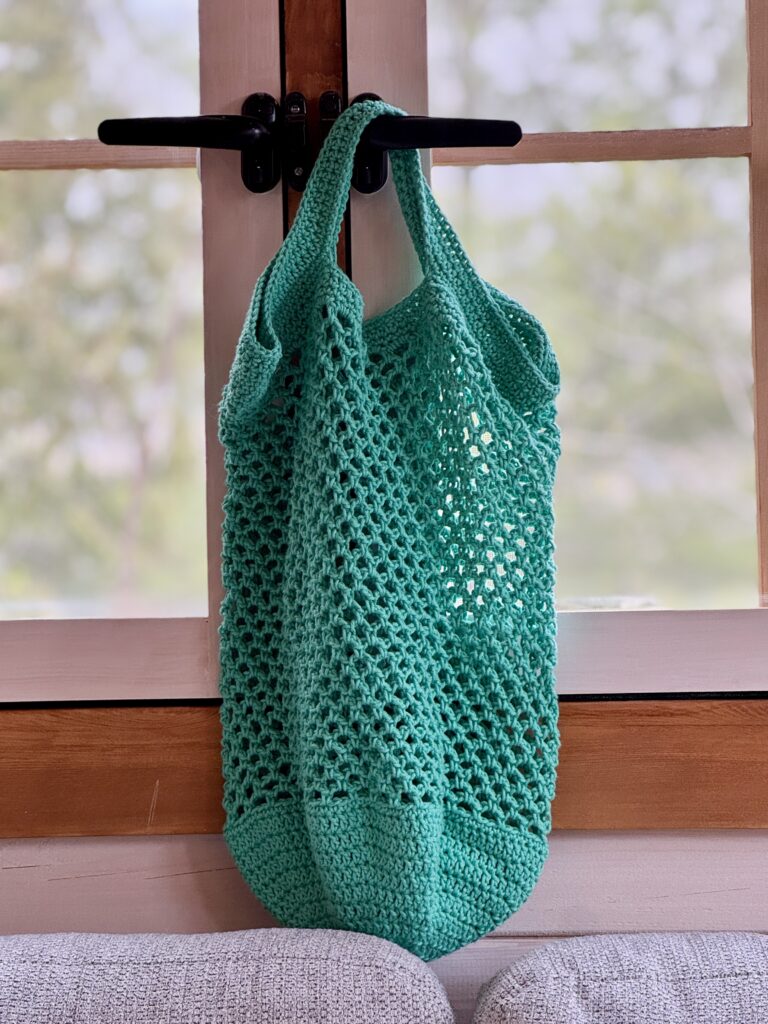
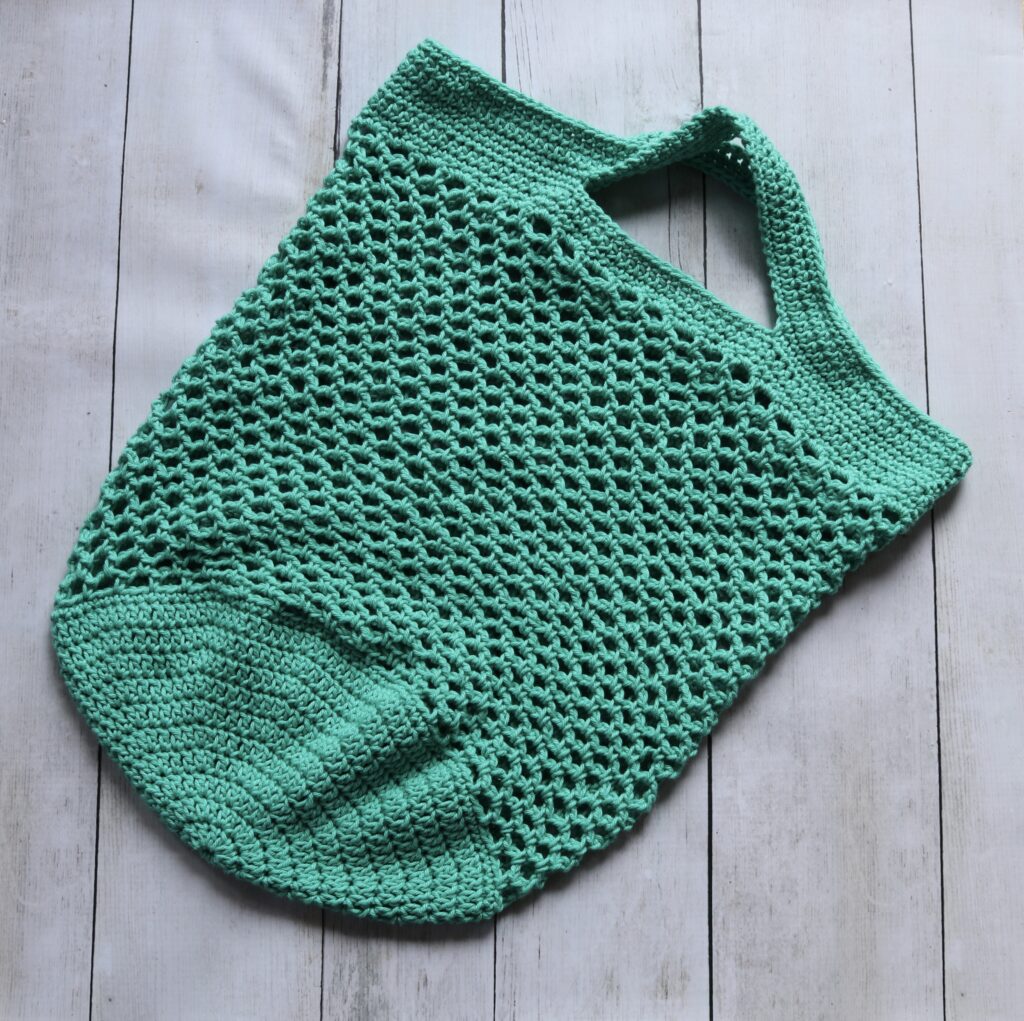
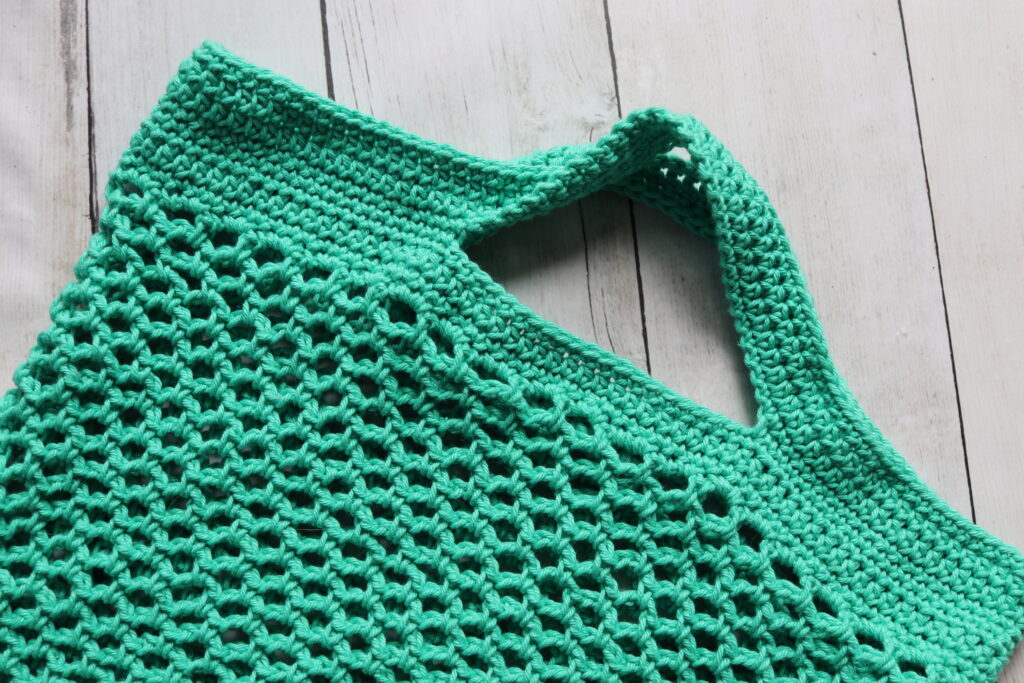
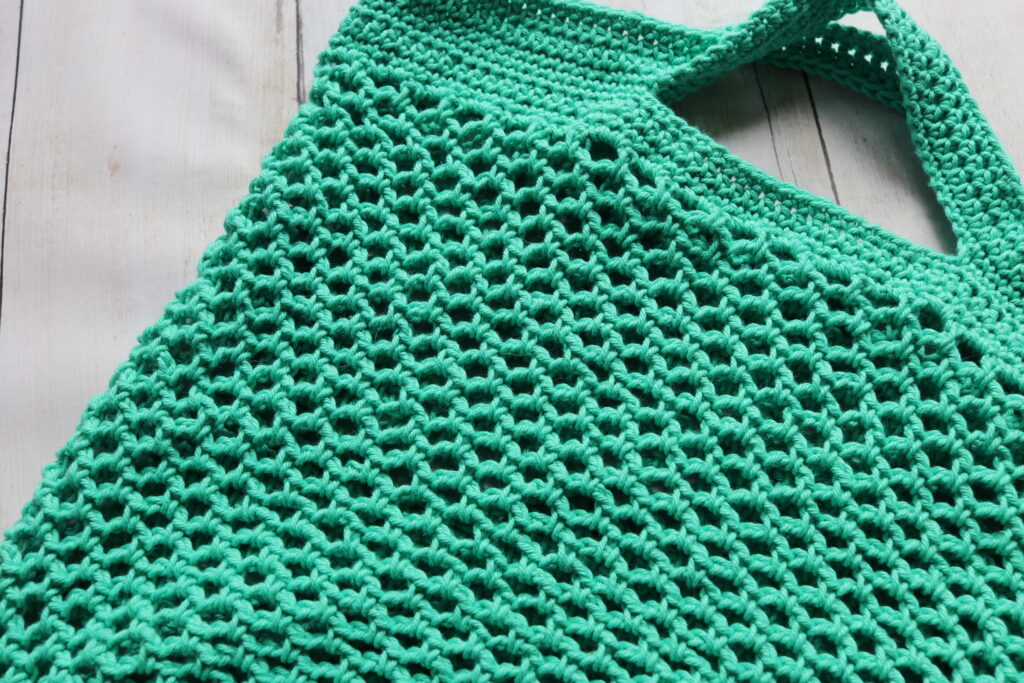
Our bag for this first week of the crochet along is the Trellis Market Bag. Every year I am asked for a mesh crochet bag that is easy and quick to work and this is it! This bag is made using only three crochet stitches: chain stitches, single crochet and double crochet stitches. It is so easy! As is the case with all the market bags in this crochet along, this bag is worked from the bottom up and all as one piece.
Materials Needed:
For this crochet market bag I used a worsted weight 100% cotton yarn called Dishie by KnitPicks and WeCrochet. I really love using cotton for market bags. Not only is it available in a wide range of colours, but it is also durable and holds its shape well, even when under a lot of stress!
The colour of yarn shown in the photos is called Verdigris and you are going to need approximately two and a half balls of yarn to complete it. You will also need a 5.00 mm (H/8) crochet hook.
PDF Copies are also Available:
The crochet pattern for this market bag will be written out in full below and will forever remain free when viewed here on Rich Textures Crochet, and the written instruction will be followed by a free video tutorial. However if you would like to add this pattern to your library or purchase an ad free PDF, you may do so from either my Etsy or Ravelry Shop linked below:
CLICK HERE FOR THE TRELLIS MARKET BAG ON ETSY
CLICK HERE FOR THE TRELLIS MARKET BAG ON RAVELRY
Thank you for stopping by and I look forward to seeing you again soon! If you have not already, I invite you to sign up for my e-newsletter so that you will be notified each time I release a new free crochet pattern or stitch tutorial.
Trellis Market Bag Crochet Pattern:
Skill Level: Easy
Gauge: 16 stitches x 6 rows of dc = 4 inches
Finished Size: Approximately 13 x 16.5 inches laid flat
Yarn: Dishie Worsted Weight by KnitPicks/WeCrochet® (190 yds; 100g/3.5 oz; 100% cotton; (4) worsted weight). You will need 2.5 balls, colour shown: Verdigris
Hook: Size H/8 (5 mm) hook.
Notions: Yarn Needle
Stitches and Abbreviations:
Ch – Chain
Dc – Double Crochet
Hdc – Half Double Crochet
Rpt – Repeat
Sc – Single Crochet
Sk – Skip
Sl st – Slip stitch
Yo – Yarn over
Pattern Notes:
- Pattern is written in American English terms.
- Pattern is worked in rounds, as one piece, from the bottom up to the handles.
- Ch 1 at the beginning of the row does not count as a stitch.
- Weave in ends as needed.
- Turn your work as indicated.
- To change the size of your bag you may choose to work more or less rounds to make it larger or smaller. Then simply work the repeats of the market bag sides until the bag has reached the desired height and then finish with the top and handles. When changing the size in this way, note that you will need to recalculate and adjust the number of stitches worked between the bag handles.
- You may also choose to adjust the length of your bag straps. When it comes time to work the foundation chains for the bag handles, simply work more or less chains. Be sure to make note of any adjustments!
Pattern Notes:
Bottom:
Ch 4
Rnd 1: 11 dc in the 4th ch from hook (ch 3 counts as a st), join with a sl st in the 1st st. (12 Sts)
Rnd 2: Ch 3, dc in the same st as joining, 2 dc in each st all the way around, join with a sl st in the 1st st. (24 sts)
Rnd 3: Ch 3, 2 dc in the next st, * dc in the next, 2 dc in the next st; Rpt from * around, join with a sl st in the 1st st. (36 sts)
Rnd 4: Ch 3, dc in the next st, 2 dc in the next st, * dc in each of the next 2 sts, 2 dc in the next st; Rpt from * around, join with a sl st in the 1st st. (48 sts)
Rnd 5: Ch 3, dc in each of the next 2 sts, 2 dc in the next st, * dc in each of the next 3 sts, 2 dc in the next st; Rpt from * around, join with a sl st in the 1st st. (60 sts)
Rnd 6: Ch 3, dc in each of the next 3 sts, 2 dc in the next st, * dc in each of the next 4 sts, 2 dc in the next st; Rpt from * around, join with a sl st in the 1st st. (72 sts)
Rnd 7: Ch 3, dc in each of the next 4 sts, 2 dc in the next st, * dc in each of the next 5 sts, 2 dc in the next st; Rpt from * around, join with a sl st in the 1st st. (84 sts)
Rnd 8: Ch 3, dc in each of the next 5 sts, 2 dc in the next st, * dc in each of the next 6 sts, 2 dc in the next st; Rpt from * around, join with a sl st in the 1st st. (96 sts)
Rnd 9: Ch 3, dc in each of the next 6 sts, 2 dc in the next st, * dc in each of the next 7 sts, 2 dc in the next st; Rpt from * around, join with a sl st in the 1st st. (108 sts)
Rnd 10: Ch 3, dc in each of the next 7 sts, 2 dc in the next st, * dc in each of the next 8 sts, 2 dc in the next st; Rpt from * around, join with a sl st in the 1st st. (120 sts)
Rnd 11: Ch 1, sc in each st all the way around, join with a sl st in the 1st st. (120 sts).
Sides:
Rnd 1: Ch 1, sc in the same st as joining, ch 3 , sk the next 2 sts, *sc in the next st, ch 3, sk the next 2 sts; Rpt from * around. Join with a sl st in the top of the 1st st. Do not turn (here and throughout).
Rnd 2: Sl st into each of the next 2 ch sts, ch 1, sc into the same ch-3 sp, ch 3, *sc in the next ch-3 sp, ch 3; Rpt from * around. Join with a sl st in the top of the 1st st.
Rnds 3-30: Repeat rnd 2.
Rnd 31: Ch 1, * 3 sc in the next ch-3 sp; Rpt from * around. Join with a sl st in the top of the 1st st,
Top and Handles:
Rnd 1: Ch 1, sc in the same st as joining, sc in each st around. Join with a sl st in the top of the 1st st.
Rnd 2: Ch 1, hdc in the same st as joining, hdc in each st around. Join with a sl st in the top of the 1st st.
Rnd 3: Ch 1, sc in the same st as joining, sc in each st around. Join with a sl st in the top of the 1st st.
Rnd 4: Ch 1, sc in each of the 1st 40 sts, ch 30, sk the next 20 sts, sc in each of the next 40 sts, ch 30, sk the next 20 sts. Join with a sl st in the top of the 1st st.
Rnd 5: Ch 1, sc in the same st as joining and in each sc and ch-st around. Join with a sl st in the 1st st. (140 sts)
Rnds 6-8: Ch 1, sc in the same st as joining and in each st around. Join with a sl st in the 1st st.
Fasten off, weave in your ends.
Video Tutorial:
The photographs and pattern contained in this document are the property of Rich Textures Crochet.
This pattern is for personal use only.
No unauthorized reproduction, in whole or in part, or distribution of this pattern or content is permitted. ALL FINISHED PRODUCTS from this pattern can be used for local sales and sold online.
Thank you for supporting Rich Textures Crochet! To stay in touch, be sure to visit me on Facebook and Instagram. Thanks again! Happy Crocheting!