This post contains affiliate links. This means that when you purchase through one of these links we will receive a small commission at no additional cost to you. Thank you for supporting Rich Texture Crochet!
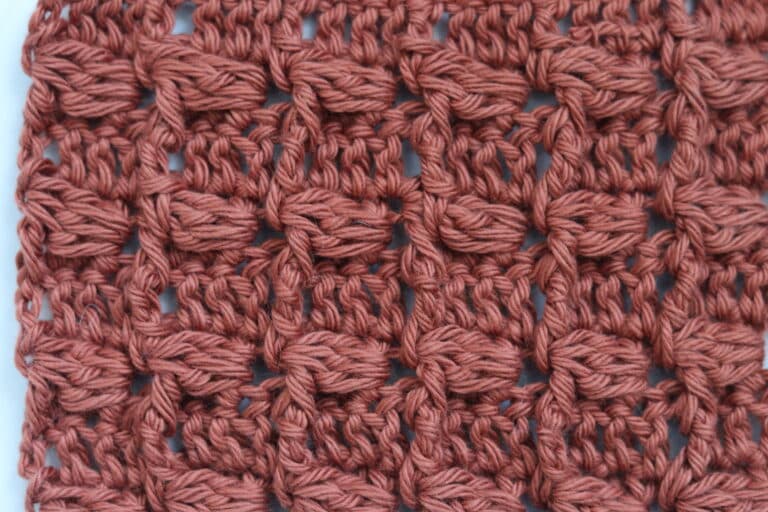
This Layered Smock Stitch crochet pattern creates such a fun texture! And it looks way more complicated than it is!
Smock stitches are not new to the crochet world. A little while ago I shared a tutorial for the Honeycomb Smock Stitch. The Layered Smock Stitch is created in a similar way however instead of creating textured diamonds, you will be working layers of textured v-stitches.

The pattern is created fairly simply as a two row repeat. For one row you will be working a combination of single crochet and spiked single crochet. The spiked single crochet are simply stitches that are worked UNDER the next stitch instead of into the top.
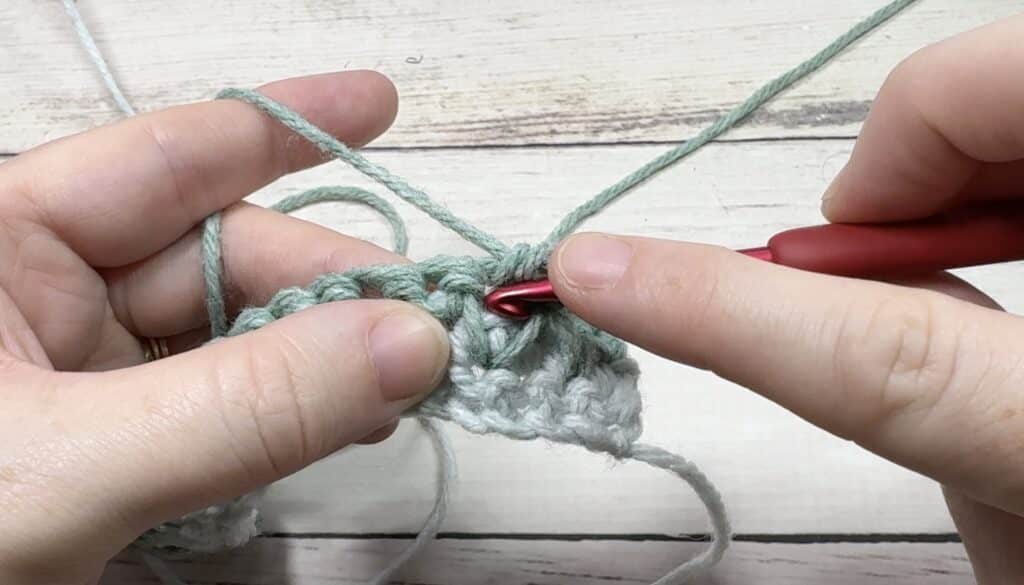
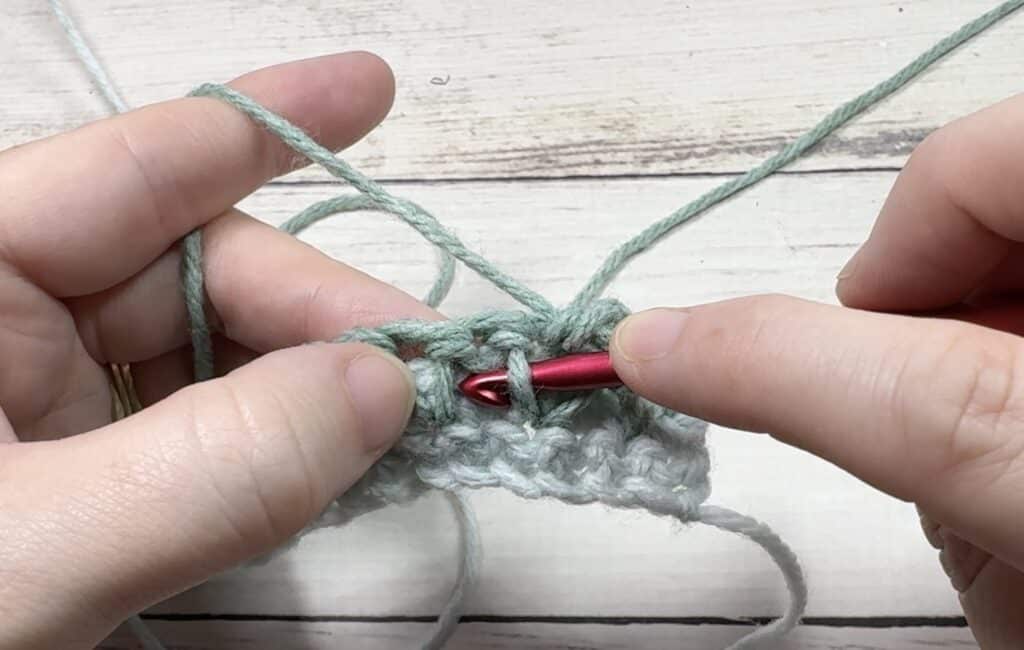
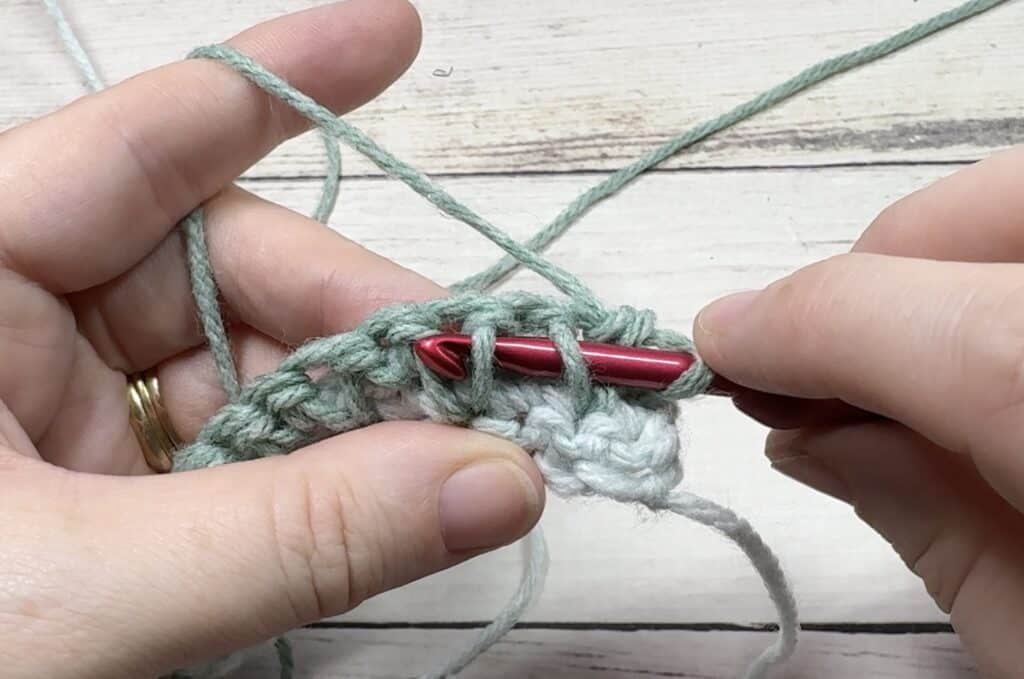
The second row in the repeat is a combination of single crochet stitches that are worked into the tops of the stitches, and single crochet stitches that are worked through the posts of the two single crochet stitches below. You will see in the video tutorial that when you work the spike stitch, on the opposite side you will have a long “V” shape for the post. When working the single crochet stitches through the post, you will pick up one “leg” of the post on the previous spiked single crochet and then the “leg” on the second spike stitch. You will then gather them together as you work the single crochet. Take a look at the photo below and check out the video tutorial below to see this motion in action.
The Materials:
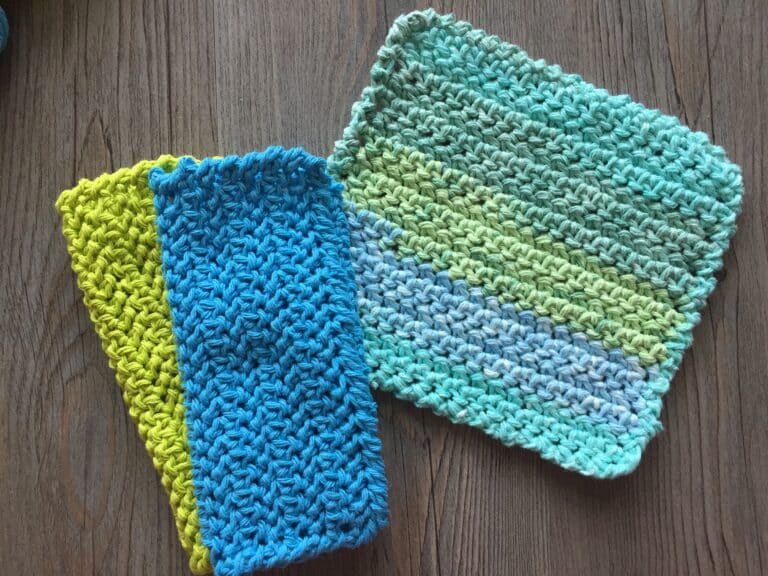
For this tutorial today, I will be using a small amount of Heatherly by KnitPicks and WeCrochet in two different colours: marked A and B. You are also able to work this stitch in a single colour or more. The Heatherly yarn is a medium/worsted weight yarn that is a wool blend. Along with my worsted weight yarn, I will also be working with a 5 mm (H/8) crochet hook.
Layered Smock Stitch Crochet Pattern:
Stitches and Abbreviations:
Ch – Chain
Rpt – Repeat
Sc – Single Crochet
Sk – Skip
Sl st – Slip stitch
Sp – Space
Yo – Yarn over
Pattern Notes:
This stitch is worked in rows in this tutorial and it may be worked in one colour or many. I will be working this pattern in two colours: A and B.
This pattern is written in American crochet terms.
The turning ch-1 does not count as a stitch.
The turning ch-3 counts as a double crochet stitch.
To begin, make a slip knot and make a foundation chain. For this stitch pattern, you will need a foundation chain with a multiple of 2 stitches.
For example, with colour A, ch 30.
Row One:
With colour A, sc in the 2nd ch from your hook and in each st across. Ch 1, turn.
Row Two:
Sc in the 1st st and in each st across. Switch to colour B in the final stitch. Ch 1, turn.
Row Three:
With colour B, sc in the 1st st, *sc inserting your hook UNDER the next st (this is your “spike stitch”, sc in the top of the next st; Rpt from * across ending with and sc in the top of the final st. Ch 1, turn.
Row Four:
Sc in the tops of each of the 1st 2 sts, *sc inserting your hook under the second front loop of the post of the previous spiked sc and under the 1st loop at the front of the post in the next spiked sc and then complete the stitch as you would a sc, sc in the top of the next st; Rpt from * across until 2 sts remain, sc in each of the final 2 sts. Switch back to colour A. Ch 1, turn.
And that’s it!
For the rest of the pattern, repeat rows three and four alternating between your colours A and B every two rows. Fasten off, weave in your ends.