This post contains affiliate links. This means that when you purchase through one of these links we will receive a small commission at no additional cost to you. Thank you for supporting Rich Texture Crochet!
Make being on the go and staying hydrated a little easier with this On the Go Water Bottle Holder Crochet Pattern!
On my recent trip to Europe, I knew I would need to bring my water bottle with me wherever I went, but I also knew I wanted to have my hands free as much as possible to take photos. This is how my On the Go Water Bottle Holder came to be!
Whether you are simply out walking, biking or travelling abroad, a water bottle holder can make things a little easier.

How to adjust the size of your water bottle holder:
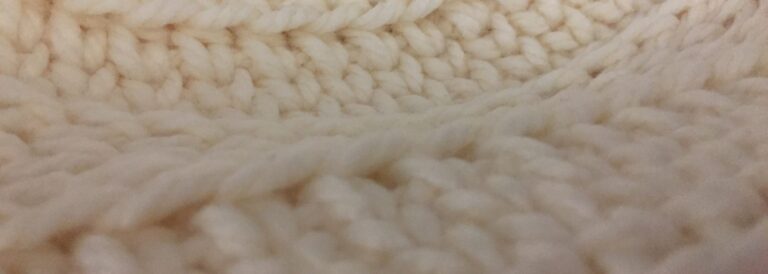
This particular water bottle holder was designed to fit a 24 oz water bottle. The bottom measures about 3.75 inches in diameter and is easily adjustable. To adjust the size of the water bottle holder, you will simply work the bottom to the desired size by adding more rounds or working less. Then, working with a multiple of two stitches for the side, you will crochet the sides to the desired height. I do explain this a little more in the video tutorial below.
Reinforcing the water bottle holder strap:
The stap for my water bottle holder is about 50 inches long. This is so that I can wear the holder cross body style. Again you may work it longer or shorter if you like. The strap is reinforced using a surface slip stitch technique. It limits the stretch in the strap a little more and makes it extra strong for holding the weight of the water bottle once filled with water.

What materials do you need to make your water bottle holder:
For this project I recommend that you use a 100% worsted/medium weight cotton yarn. It is durable and comes in a wide variety of colours. Not only does it make it easily washable, but cotton yarn tends not to stretch as much as other fibres do.
To complete the holder you will need approximately 350-380 yards of your medium/worsted weight yarn as well as a 5mm (H/8) crochet hook.


HAVE YOU HEARD? I have a new book out including 102 crochet stitches focused on texture and colour! If you love learning new crochet stitches, this book is for you! It is available on Amazon in ebook, paperback and hardcover formats. Learn more about it here: Intermediate Crochet Stitches
PDF Copies of this crochet pattern:
The crochet pattern for the On the Go Water Bottle Holder will be written out in full below. However, if you would like to add this pattern to your library or purchase an ad-free PDF, you can do so from my Etsy and Ravelry shops linked below:
CLICK HERE TO PURCHASE THE CROCHET PATTERN ON ETSY
CLICK HERE TO PURCHASE THE CROCHET PATTERN ON RAVELRY
Thank you so much for stopping by! While here, you may also want to check out the Traditions Dishcloth Crochet Pattern, another great crochet pattern made with a cotton yarn. Don’t forget to sign up for my email newsletter below so that you never miss a new free crochet pattern.
Happy Crocheting!
Sarah

If you have a moment, I invite you to check out my book, Barn Quilt Blankets! It is a collection of five beautiful crochet blankets, each featuring a geometric design! It’s now available for sale in both paperback and ebook format on Amazon! Click on the photo to learn more.

On the Go Water Bottle Holder Crochet Pattern:
Skill Level: Intermediate
Gauge: 15 sts x 22 rows of pattern = 4 inches
Finished Size: Approximately 8.5 inches tall, 3.75 inch diameter. 50 inch strap length
Yarn: Dishie Worsted Weight by KnitPicks/WeCrochet ® (190 yds; 100g; 100% cotton; (4) worsted weight). You will need approximately 2 balls.
Hook: Size H/8 (5 mm) hook. Notions: Yarn Needle, 1 stitch marker (optional)
Stitches and Abbreviations:
Ch – Chain
Hdc – Half Double Crochet
Rpt – Repeat
Sc – Single Crochet
Sk – Skip
Sl st – Slip stitch
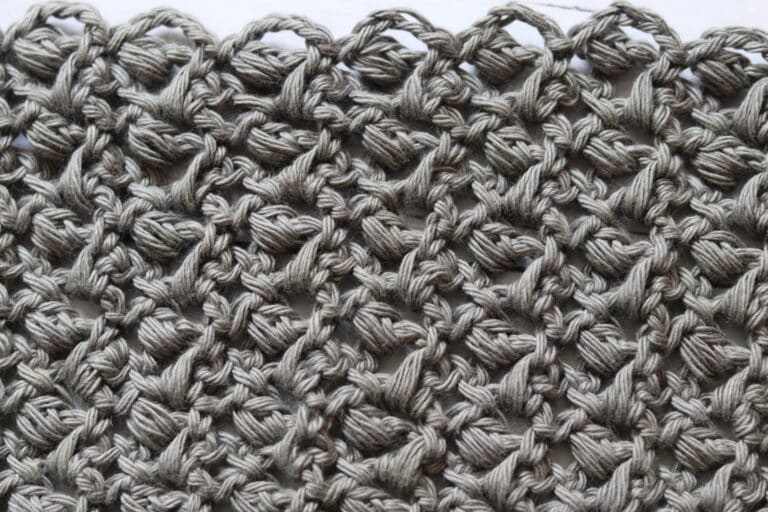
Spiked Hdc – Spiked Half Double Crochet (Work a hdc st inserting your hook in the space under the next st)
Yo – Yarn over
Pattern Notes:
- Pattern is written in American English terms.
- Pattern is worked in rounds. Strap only is worked in rows.
- Ch 1 at beginning of row does not count as stitch.
- Weave in ends as needed.
- To change the size of your bottle holder, work more or less rounds for the bottom increasing the stitch count accordingly. Then work more or less rounds of the holder sides. To adjust the length of your strap simply work more or less rows.
Free Crochet Pattern:
Bottom (make 2):
Make a magic ring OR ch 2 and work rnd 1 into the 2nd ch from your hook.
Rnd 1: Ch 1, work 8 hdc into the centre of your magic ring. Join with a sl st in the top of the 1st st. Do not turn. (8 sts)
Rnd 2: Ch 1, work 2 hdc in each st around. Join with a sl st in the 1st st. Do not turn. (16 sts)
Rnd 3: Ch 1, hdc in the same st as joining, 2 hdc in the next st, *hdc in the next st, 2 hdc in the next st; Rpt from * around, join with a sl st in the top of the 1st st. Do not turn. (24 sts)
Rnd 4: Ch 1, hdc in the same st as joining, hdc in the next st, 2 hdc in the next st, *hdc in each of the next 2 sts, 2 hdc in the next st; Rpt from * around, join with a sl st in the top of the 1st st. Do not turn. (32 sts)
Rnd 5: Ch 1, hdc in the same st as joining, hdc in each of the next 2 sts, 2 hdc in the next st, *hdc in each of the next 3 sts, 2 hdc in the next st; Rpt from * around, join with a sl st in the top of the 1st st. Do not turn. (40 sts)
Repeat Rnds 1-5 for second bottom.
Place one over top of the other, working through both thickness, join yarn with a sl st. Working through both thicknesses around, sl st in each st around. Join with a sl st in the first st.
Bottle Sides:
Rnd 1: With the right side of your work facing, ch 1, sc in the 1st sl st and in each sl st around. Join with a sl st in the 1st st. Do not turn.
Rnd 2: Ch 1,spiked hdc under the 1st st, *ch 1, sk the next st, spiked hdc under the next st; Rpt from * around until you come to the final st, ch 1, sk the next st, join with a sl st in the top of the 1st st. Ch 1, turn.
Rnd 3: Sc in the next ch-1 sp, sc working in front of the next st inserting your hook under the top two loops on the post of the 1st spiked hdc, *sc in the next ch-1 sp, sc working in front of the next st inserting your hook under the top two loops of the post of the next spiked hdc; Rpt from * around ending with an sc in the final ch-1 sp, join with a sl st in the top of the 1st st. Ch 1, turn.
Rnd 4: *Spiked hdc in the next ch-1 sp 3 rounds below (for the first st you will be working over the same st as joining), ch 1, sk the next st; Rpt from * around ending with a ch-1 and join with a sl st in the top of the 1st st. Ch 1, turn.
Rnd 5: Sc in the 1st ch-1 sp, *sc working in front of the next st insert your hook under the top two loops of the post of the next spiked hdc, sc in the next ch-1 sp; Rpt from * around to the final st. Ch 1, turn.
Rnds 6-41: Repeat rnds 4-5 eighteen more times.
Rnd 42: *Spiked hdc in the next ch-1 sp 3 rounds below (for the first st you will be working over the same st as joining), sc the next st; Rpt from * around ending with a ch-1 and join with a sl st in the top of the 1st st. Ch 1, do not turn.
Rnds 43-45: Sl St in each st around, do not join at the end of each round but if needed use a stitch marker to mark the 1st st and move it as your work progresses. At the end of rnd 45, join with a sl st in the 1st st.
Do not finish off, but continue for bag handle:
Bag Handle (Worked in Rows):
Row 1: Ch 1, sc in the same st as joining and in each of the next 8 sts. Ch 1, turn leaving the remainging stitches unworked. (9 sts)
Row 2 onward: Sc in the 1st st and in each st across. Ch 1, turn.
Continue to repeat row 2 until your bag strap is the desired length. I worked mind until it reached 50 inches for a cross-body holder.
To join the strap to the opposite side. On your holder, skip the next 11 sts, join in the next st on the holder and working through both thickness, sl st across each of the next 9 sts.
Edging (Worked in rounds and around the bag strap only):
With right side of strap facing, work 2 rounds of surface slip stitches side by side around the length of your shoulder strap. To work your surface slip stitches, from the top of your fabric, insert your hook into the space either above or below one stitch in from the edge. Yo and draw up a loop drawing it through the one on your hook. Move to the next space in the row and repeat. Work one round of surface slip stitches and then move in one stitch from the edge and work one more round.
Fasten off and weave in your ends.
Video Tutorial:
This pattern is for personal use only.
No unauthorized reproduction, in whole or in part, or distribution of this pattern or content is permitted. ALL FINISHED PRODUCTS from this pattern can be used for local sales and sold online.
Thank you so much for supporting Rich Textures Crochet! To stay in touch or see more great products, be sure to visit me on Facebook and Instagram (Rich Textures Crochet). Thanks again! Happy Crocheting!