This post contains affiliate links. This means that when you purchase through one of these links we will receive a small commission at no additional cost to you. Thank you for supporting Rich Texture Crochet!
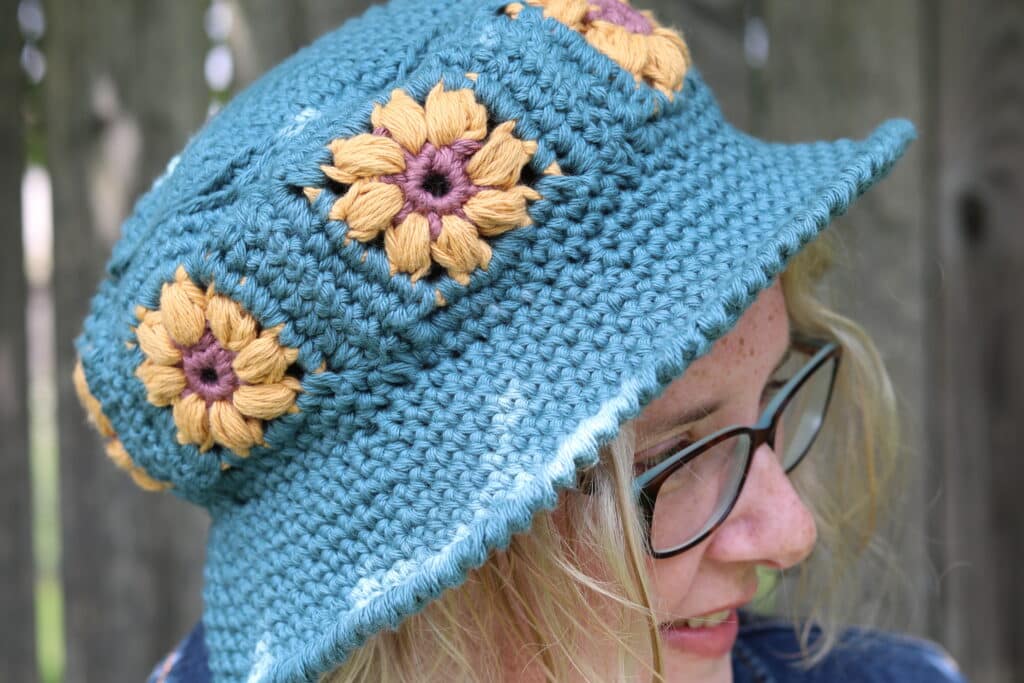
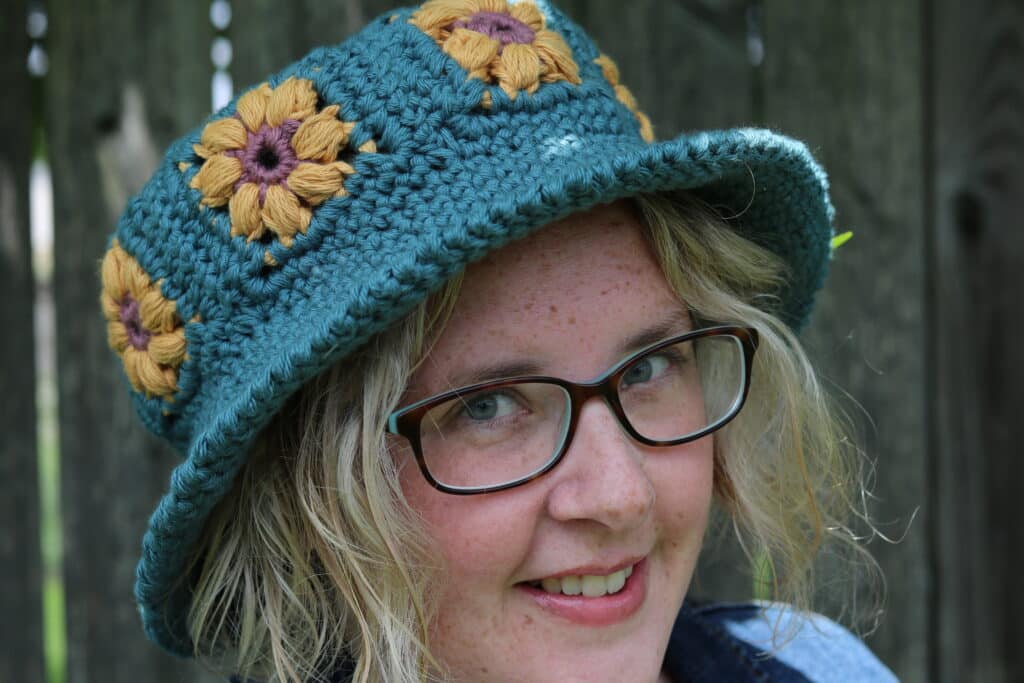
The Garden Bucket hat is the perfect summer accessory while you are out at the park, the beach or wandering around your own gardens!
I love working out in our gardens during the summer months which were really the inspiration for this crochet bucket hat. The hat is a simple design. The body is made of seen flower motifs that are joined to a simple top and crocheted brim. It’s stylish and perfect for your travels. And I hope you enjoy it as much as I do!
This post contains affiliate links. This means that when you make a purchase through one of these links, Rich Textures Crochet will earn a small commission at no additional cost to yourself. Thank you for supporting Rich Textures Crochet!
The Construction:
This crochet bucket hat pattern is worked using a worsted weight 100% cotton yarn. To give it its thickness I worked holding two strands of the worsted weight cotton together. There are a few ways of doing this, I opted for simply buying two balls of each colour so that I didn’t have to worry about cutting the yarn until necessary.
You will work the seven flower motifs first and then sew them together. After that you will work and attach the top of the hat before proceeding with the brim.
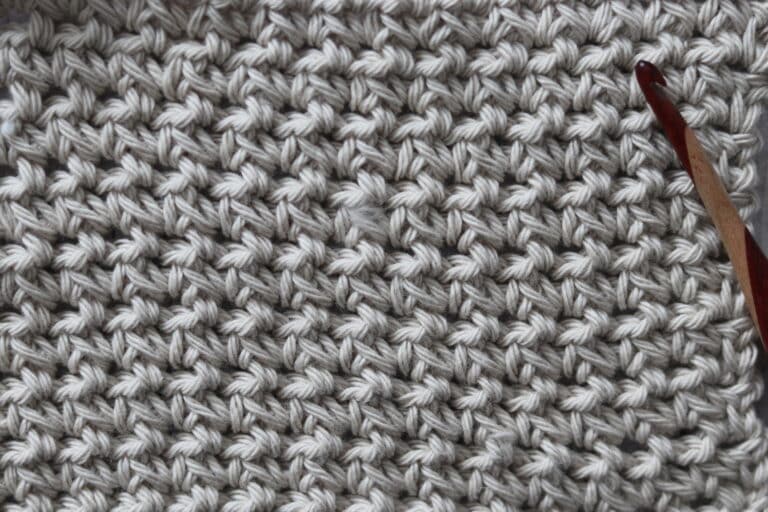
I used a 6 mm crochet hook. You will want your stitches to be tight. The tighter they are, the more firm of a hat you will have. If you feel like your hat is turning out to be a bit too floppy, don’t hesitate to go down to a smaller (maybe 5.5 mm) crochet hook.
PDF Copies are also available:
The pattern will be written out in full below and will forever remain free when viewed here on Rich Textures Crochet, and the written instruction will be followed by a video tutorial. However if you would like to add this pattern to your library or purchase an ad free PDF, you may do so from either my Etsy or Ravelry Shop linked below:
Click here for the Garden Bucket Hat on Etsy
Click Here for the Garden Bucket Hat on Ravelry
Thank you so much for stopping by! Don’t forget to sign up for my email newsletter so that you never miss a free pattern. Be sure to check out some of my other summer designs such as the Rivers Shawl Free Crochet Pattern.
The Garden Bucket Hat Crochet Pattern:
Skill Level: Easy
Gauge: 14 sc x 16 rows = 4 inches
Finished Size: Diameter at bottom of hat: Approximately 11.5 inches across, circumference of bucket opening: 23 inches to fit an adult head.
Yarn: Pima Cotton by Lion Brand® (186 yds/170 m; 100g/3.5 oz; 100% cotton; (4) worsted weight). You will need 2 balls Dragonfly (Colour C), 1 ball rose taupe (Colour A) – you will use about 100 yards, 1 ball Mineral Yellow (Colour B) – you will use about 100 yards – Note: you will be working with two strands of the same colour yarn held together.
Hook: Size J/10 (6 mm) hook.
Notions: Yarn Needle
Stitches and Abbreviations:
Ch – Chain
Puff – Puff Stitch ([Yo, insert your hook in the indicated st, yo and draw up a loop] 4 times, yo and draw through all the loops on your hook. Puff Stitch made)
Rpt – Repeat
Rsc – Reverse Single Crochet
Sc – Single Crochet
Sc2tog – Single Crochet Two Stitches Together
Sk – Skip
Sl st – Slip stitch
Yo – Yarn over
Pattern Notes:
- Pattern is written in American English terms.
- Pattern is worked holding 2 strands of yarn together and working with them at the same time.
- Pattern is worked in rounds.
- Bucket of the hat is worked as seven motifs that are then sewn together.
- Ch 1 at beginning of row does not count as stitch.
- Weave in ends as needed.
- Do not turn unless stated otherwise.
Free Crochet Pattern:
Hat Bucket Motifs (Make 7):
Holding two strands of yarn of the same colour together:
With Colour A, ch 2.
Rnd 1: In the 2nd ch from your hook, work 8 sc switching to colour B in the final st, join with a sl st in the 1st st. Do not turn. (8 sc)
Rnd 2: With Colour B, ch 1, puff in the same st as joining, *ch 2, puff in the next st; Rpt from * around, ch 2, join colour C with a sl st in the top of the 1st puff st. (8 puff sts)
Rnd 3: With Colour C, ch 1, *sc in the top of the puff, [sc, ch 2, sc] in the next ch-2 sp, sc in the top of the next puff, 3 sc in the next ch-2 sp; rpt from * around, join with a sl st in the 1st st.
Rnd 4: Ch 1, sc in each of the first 2 sts, *3 sc in the next corner sp, sc in each of the next 7 sts; rpt from * around to the final 5 sts, sc in each of the next 5 sts, join with a sl st in the final st.
Fasten off, weave in your ends. Repeat the above steps until you have 7 motifs in total.
Join the motifs together:
Using one strand of colour C and your yarn needle, sew the 7 motifs together to make a ring.
With the right side facing:
Once again using two strands of yarn held together, with colour C, join yarn with a sl st along the top edge of the motifs. Work one round of 72 sc and sc2tog stitches in each st all the way round the top of the motifs sewn together. When you come to a seam, in that seam work a sc2tog over the two motif corner stitches. Join with a sl st in the 1st st. Faten off, weave in your ends and repeat for the bottom side of the motifs.
Set Aside.
Top:
With Colour C, ch 2.
Rnd 1: In the 2nd ch from your hook, work 8 sc, join with a sl st in the first st. Do not turn. (8 sts)
Rnd 2: Ch 1, work 2 sc in each st around, join with a sl st in the 1st st. (16 sts)
Rnd 3: Ch 1, sc in the same st as joining, 2 sc in the next st, *sc in the next st, 2 sc in the next st; Rpt from * around, join with a sl st in the 1st st. (24 sts)
Rnd 4: Ch 1, sc in the same st as joining, sc in the next st, 2 sc in the next st, *sc in each of the next 2 sts, 2 sc in the next st; Rpt from * around, join with a sl st in the 1st st. (32 sts)
Rnd 5: Ch 1, sc in the same st as joining, sc in each of the next 2 sts, 2 sc in the next st, *sc in each of the next 3 sts, 2 sc in the next st; Rpt from * around, join with a sl st in the 1st st. (40 sts)
Rnd 6: Ch 1, sc in the same st as joining, sc in each of the next 3 sts, 2 sc in the next st, *sc in each of the next 4 sts, 2 sc in the next st; Rpt from * around, join with a sl st in the 1st st. (48 sts)
Rnd 7: Ch 1, sc in the same st as joining, sc in each of the next 4 sts, 2 sc in the next st, *sc in each of the next 5 sts, 2 sc in the next st; Rpt from * around, join with a sl st in the 1st st. (56 sts)
Rnd 8: Ch 1, sc in the same st as joining, sc in each of the next 5 sts, 2 sc in the next st, *sc in each of the next 6 sts, 2 sc in the next st; Rpt from * around, join with a sl st in the 1st st. (64 sts)
Rnd 9: Ch 1, sc in the same st as joining, sc in each of the next 6 sts, 2 sc in the next st, *sc in each of the next 7 sts, 2 sc in the next st; Rpt from * around, join with a sl st in the 1st st. (72 sts)
Join the top to the bucket side:
Turn the bucket motifs and top so that they are inside out with the right sides facing one another. Working in the front loop only through the bucket motifs and the back loop only of the top of the hat, sl st in each st around. Join with a sl st in the first st. Fasten off and weave in your ends.
Turn hat right side out.
Hat Brim:
With the right side facing Holding two strands of yarn together, with colour C, join yarn with a sl st in any stitch of the bottom side of the bucket motifs.
Rnd 1: Working in the front loop only, *sc in each of the next 8 sts, 2 sc in the next st; Rpt from * around. Join with a sl st in the first st. Do not turn. (80 sc)
Rnd 2: Working under both loops, ch 1, Sc in each st around, join with a sl st in the 1st st. Do not turn. (80 sc)
Rnd 3: Ch 1, *sc in each of the next 9 sts, 2 sc in the next st; Rpt from * around. Join with a sl st in the first st. Do not turn. (88 sc)
Rnd 4: Ch 1, Sc in each st around, join with a sl st in the 1st st. Do not turn. (88 sc)
Rnd 5: Ch 1, *sc in each of the next 10 sts, 2 sc in the next st; Rpt from * around. Join with a sl st in the first st. Do not turn. (96 sc)
Rnd 6: Ch 1, Sc in each st around, join with a sl st in the 1st st. Do not turn. (96 sc)
Rnd 7: Ch 1, *sc in each of the next 11 sts, 2 sc in the next st; Rpt from * around. Join with a sl st in the first st. Do not turn. (104 sc)
Rnd 8: Ch 1, Sc in each st around, join with a sl st in the 1st st. Do not turn. (104 sc)
Rnd 9: Ch 1, rsc in each st around. Join with a sl st in the first st.
Fasten off, weave in your ends.
Video Tutorial:
The photographs and pattern contained in this document are the property of Rich Textures Crochet.
This pattern is for personal use only.
No unauthorized reproduction, in whole or in part, or distribution of this pattern or content is permitted. ALL FINISHED PRODUCTS from this pattern can be used for local sales and sold online.
Thank you so much for supporting Rich Textures Crochet! To stay in touch or see more great products, be sure to visit me on Facebook and Instagram (Rich Textures Crochet). Thanks again! Happy Crocheting!



This hat is adorable on you.
Thank you 🙂
This hat design is so cute perfect for Summer time start with yours and . Let’s see one in a pink base, white petals yellow center daisy, dark blue or purple base n0right rose pink petals and yellow center zinnia. The beach, farmers market or the family vacation perfect..
That sounds pretty!