
This post contains affiliate links. This means that when you purchase through one of these links we will receive a small commission at no additional cost to you. Thank you for supporting Rich Texture Crochet!
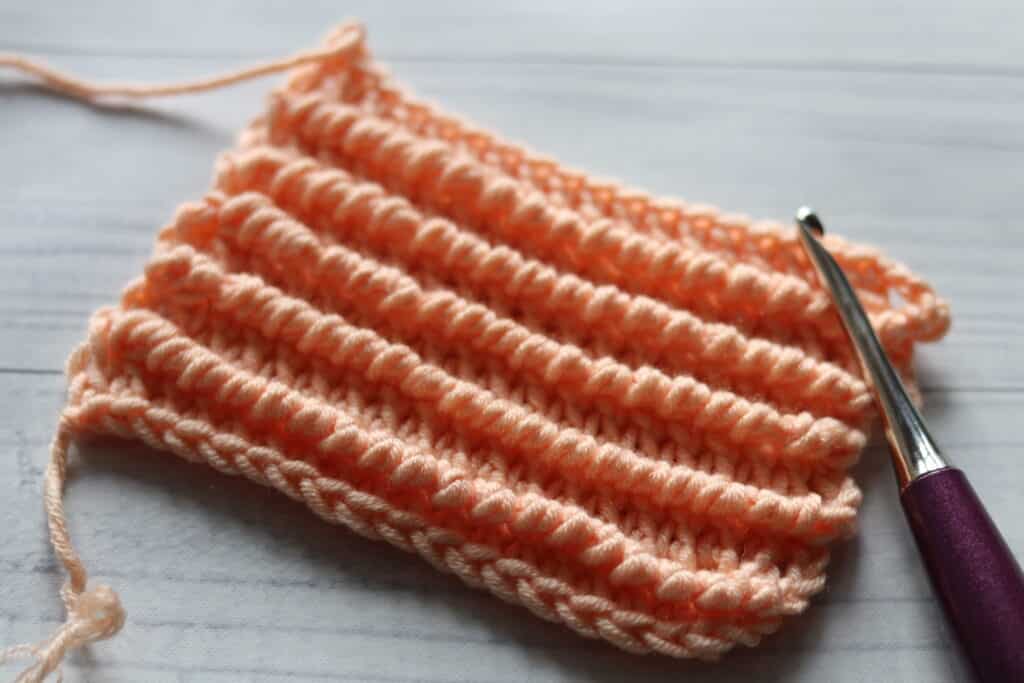
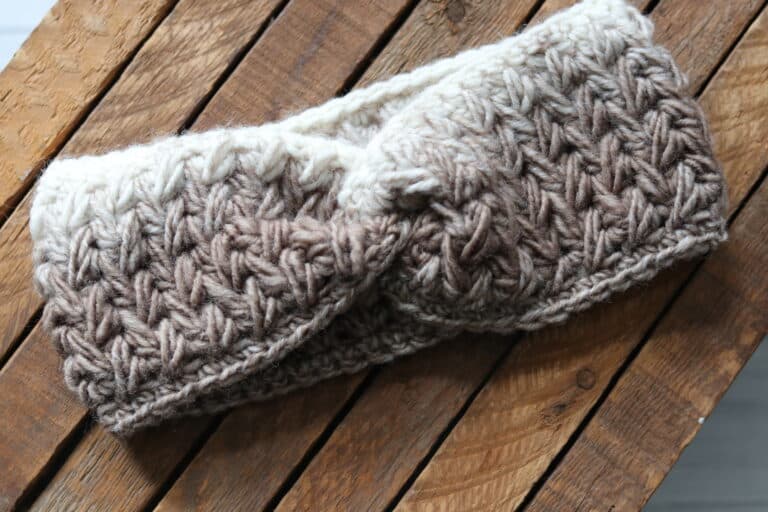
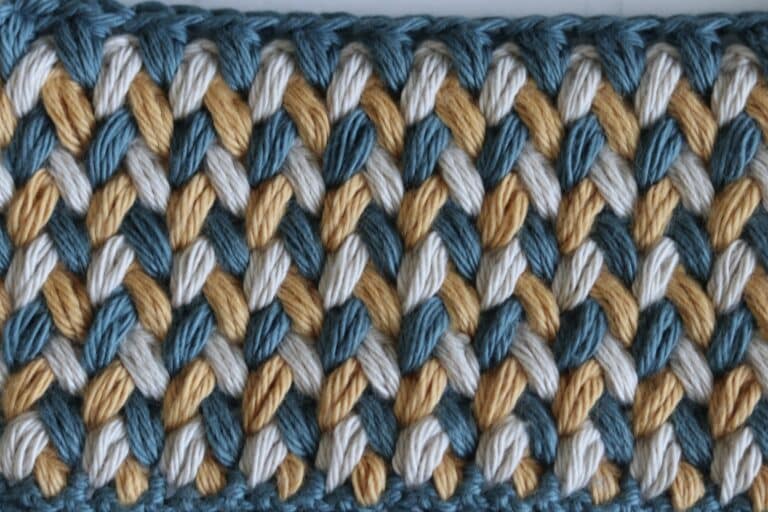
The Corded Ridge Stitch is a highly textured stitch. When you run your hand over it, it feels like a cord has be laid over your crochet fabric.
This corded ridge stitch is a versatile stitch. It can be worked using any multiple of stitches.
This post contains affiliate links. This means that when you make a purchase through one of these links, Rich Textures Crochet will earn a small commission at no additional cost to yourself. Thank you for supporting Rich Textures Crochet!
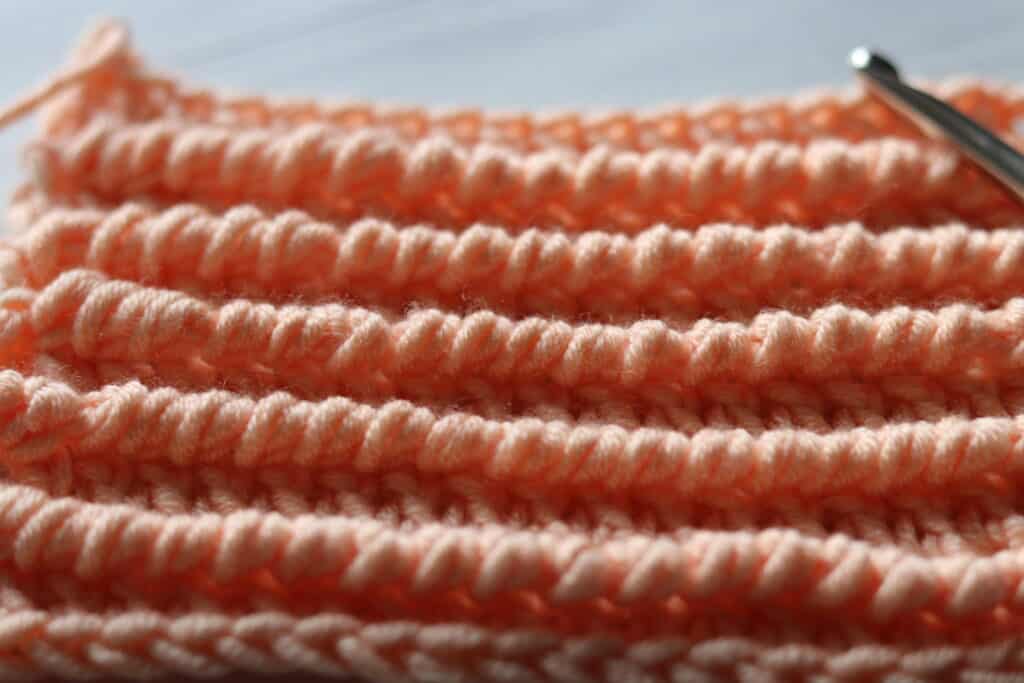
The ridge in the fabric will run over top of your fabric and run lengthwise. It would add a fun pop of texture to your crochet garments and accessories.
If you have used this stitch in a project, or hope to soon, I’d love you to tell me about it! You can leave a comment below, or connect on social!

About the Corded Ridge Stitch:
The corded ridge stitch is made up of double crochet stitches as well as reverse single crochet stitches. You may also know the reverse single crochet stitch as the crab stitch.
Because of the reverse single crochet stitches, although your piece will be worked in rows, there will be no turning at the ends. You will simply change the direct you are working.
Sounds neat? Check out the video tutorial of the stitch in action below!
Materials:
For this tutorial I will be using the Caron x Pantone yarn by Yarnspirations along with a 5.5 mm crochet hook. The hook shown here and in the video below is an Odyssey hook by Furls Crochet. However you may use any hook and yarn combination you choose.
Corded Ridge Stitch:
This stitch is worked in rows in this tutorial. At the end of each row you will need to chain 3 or chain 1. As mentioned above, you will not turn your work at the end of each row.
Don’t forget to check out the free video tutorial linked below!
To begin, make a slip knot and then chain your desired number of chains. For this stitch pattern you will need any multiple of stitches plus 2 for your foundation chain.
For my swatch I will be making a foundation chain of 20 chain stitches.
Row One:
Skip the first 3 chains (this counts as a double crochet stitch). Double crochet into the next stitch and each stitch across. Do not turn.
Row Two:
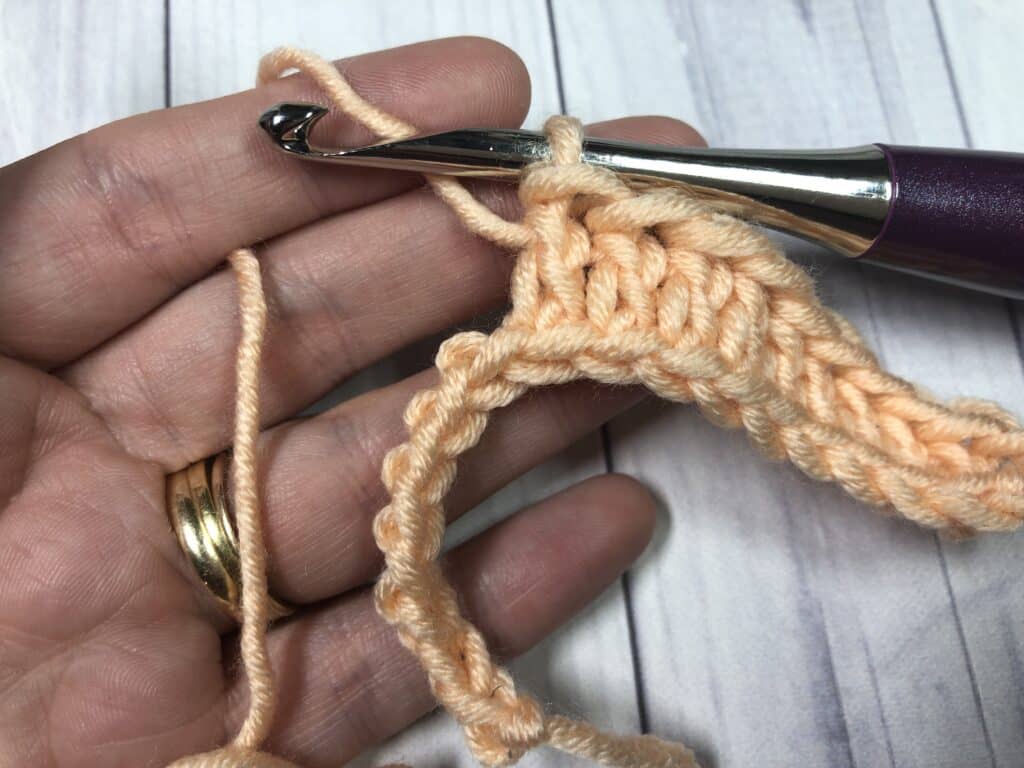
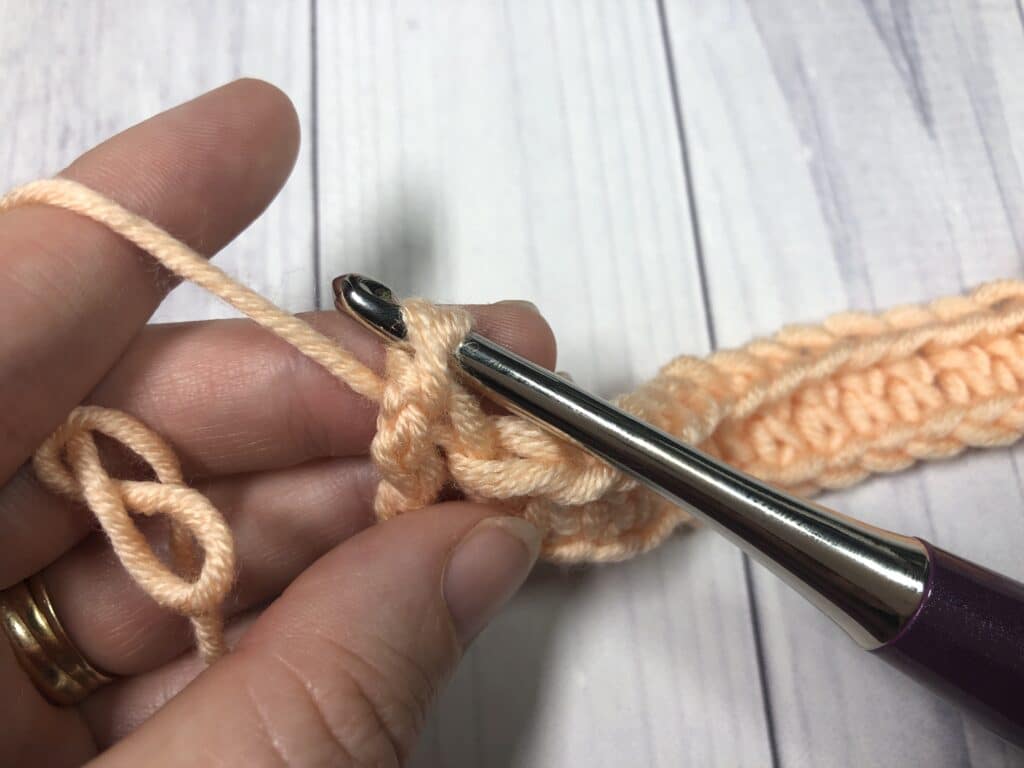
Chain 1. Without turning your work, work one single crochet stitch into the front loop only of the last double crochet stitch made. Single crochet into the front loop only of next previous double crochet stitch made and into each all the way back across. End with a slip stitch into the top of the chain 3. Do not turn.

Insert your hook in the previous stitch yarn over and draw up a loop yarn over and draw through 2 loops

Row Three:
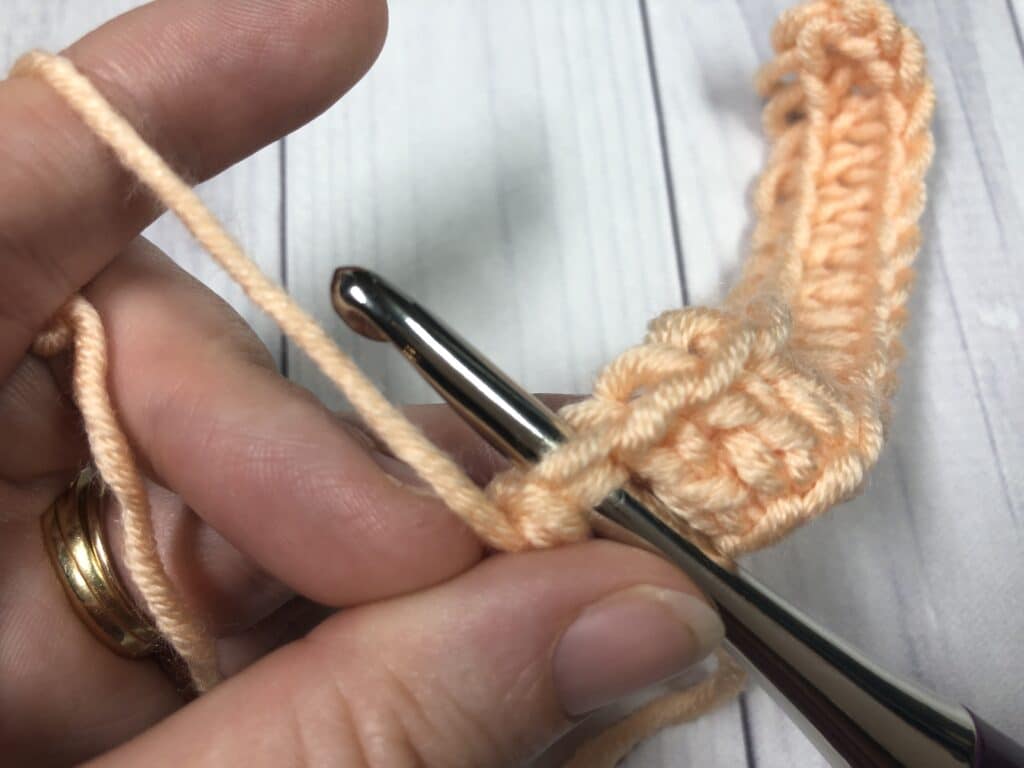
Chain 3, skip the first stitch and double crochet into the back loop only of the next double crochet stitch and into each all the way across. Do not turn.
And that’s it!
For the rest of the pattern, repeat rows two and three. Fasten off and weave in your ends.
Video Tutorial:
Thank you for stopping by! If you enjoyed this tutorial, you may want to check out the tutorial for the Linked Double Crochet Stitch | How to Crochet next.
See you next week and happy crocheting!
Sarah


This is such a unique stitch. I’ve never seen it before. I’d love to see it used in a pattern. Do you have any that use this?