
This post contains affiliate links. This means that when you purchase through one of these links we will receive a small commission at no additional cost to you. Thank you for supporting Rich Texture Crochet!
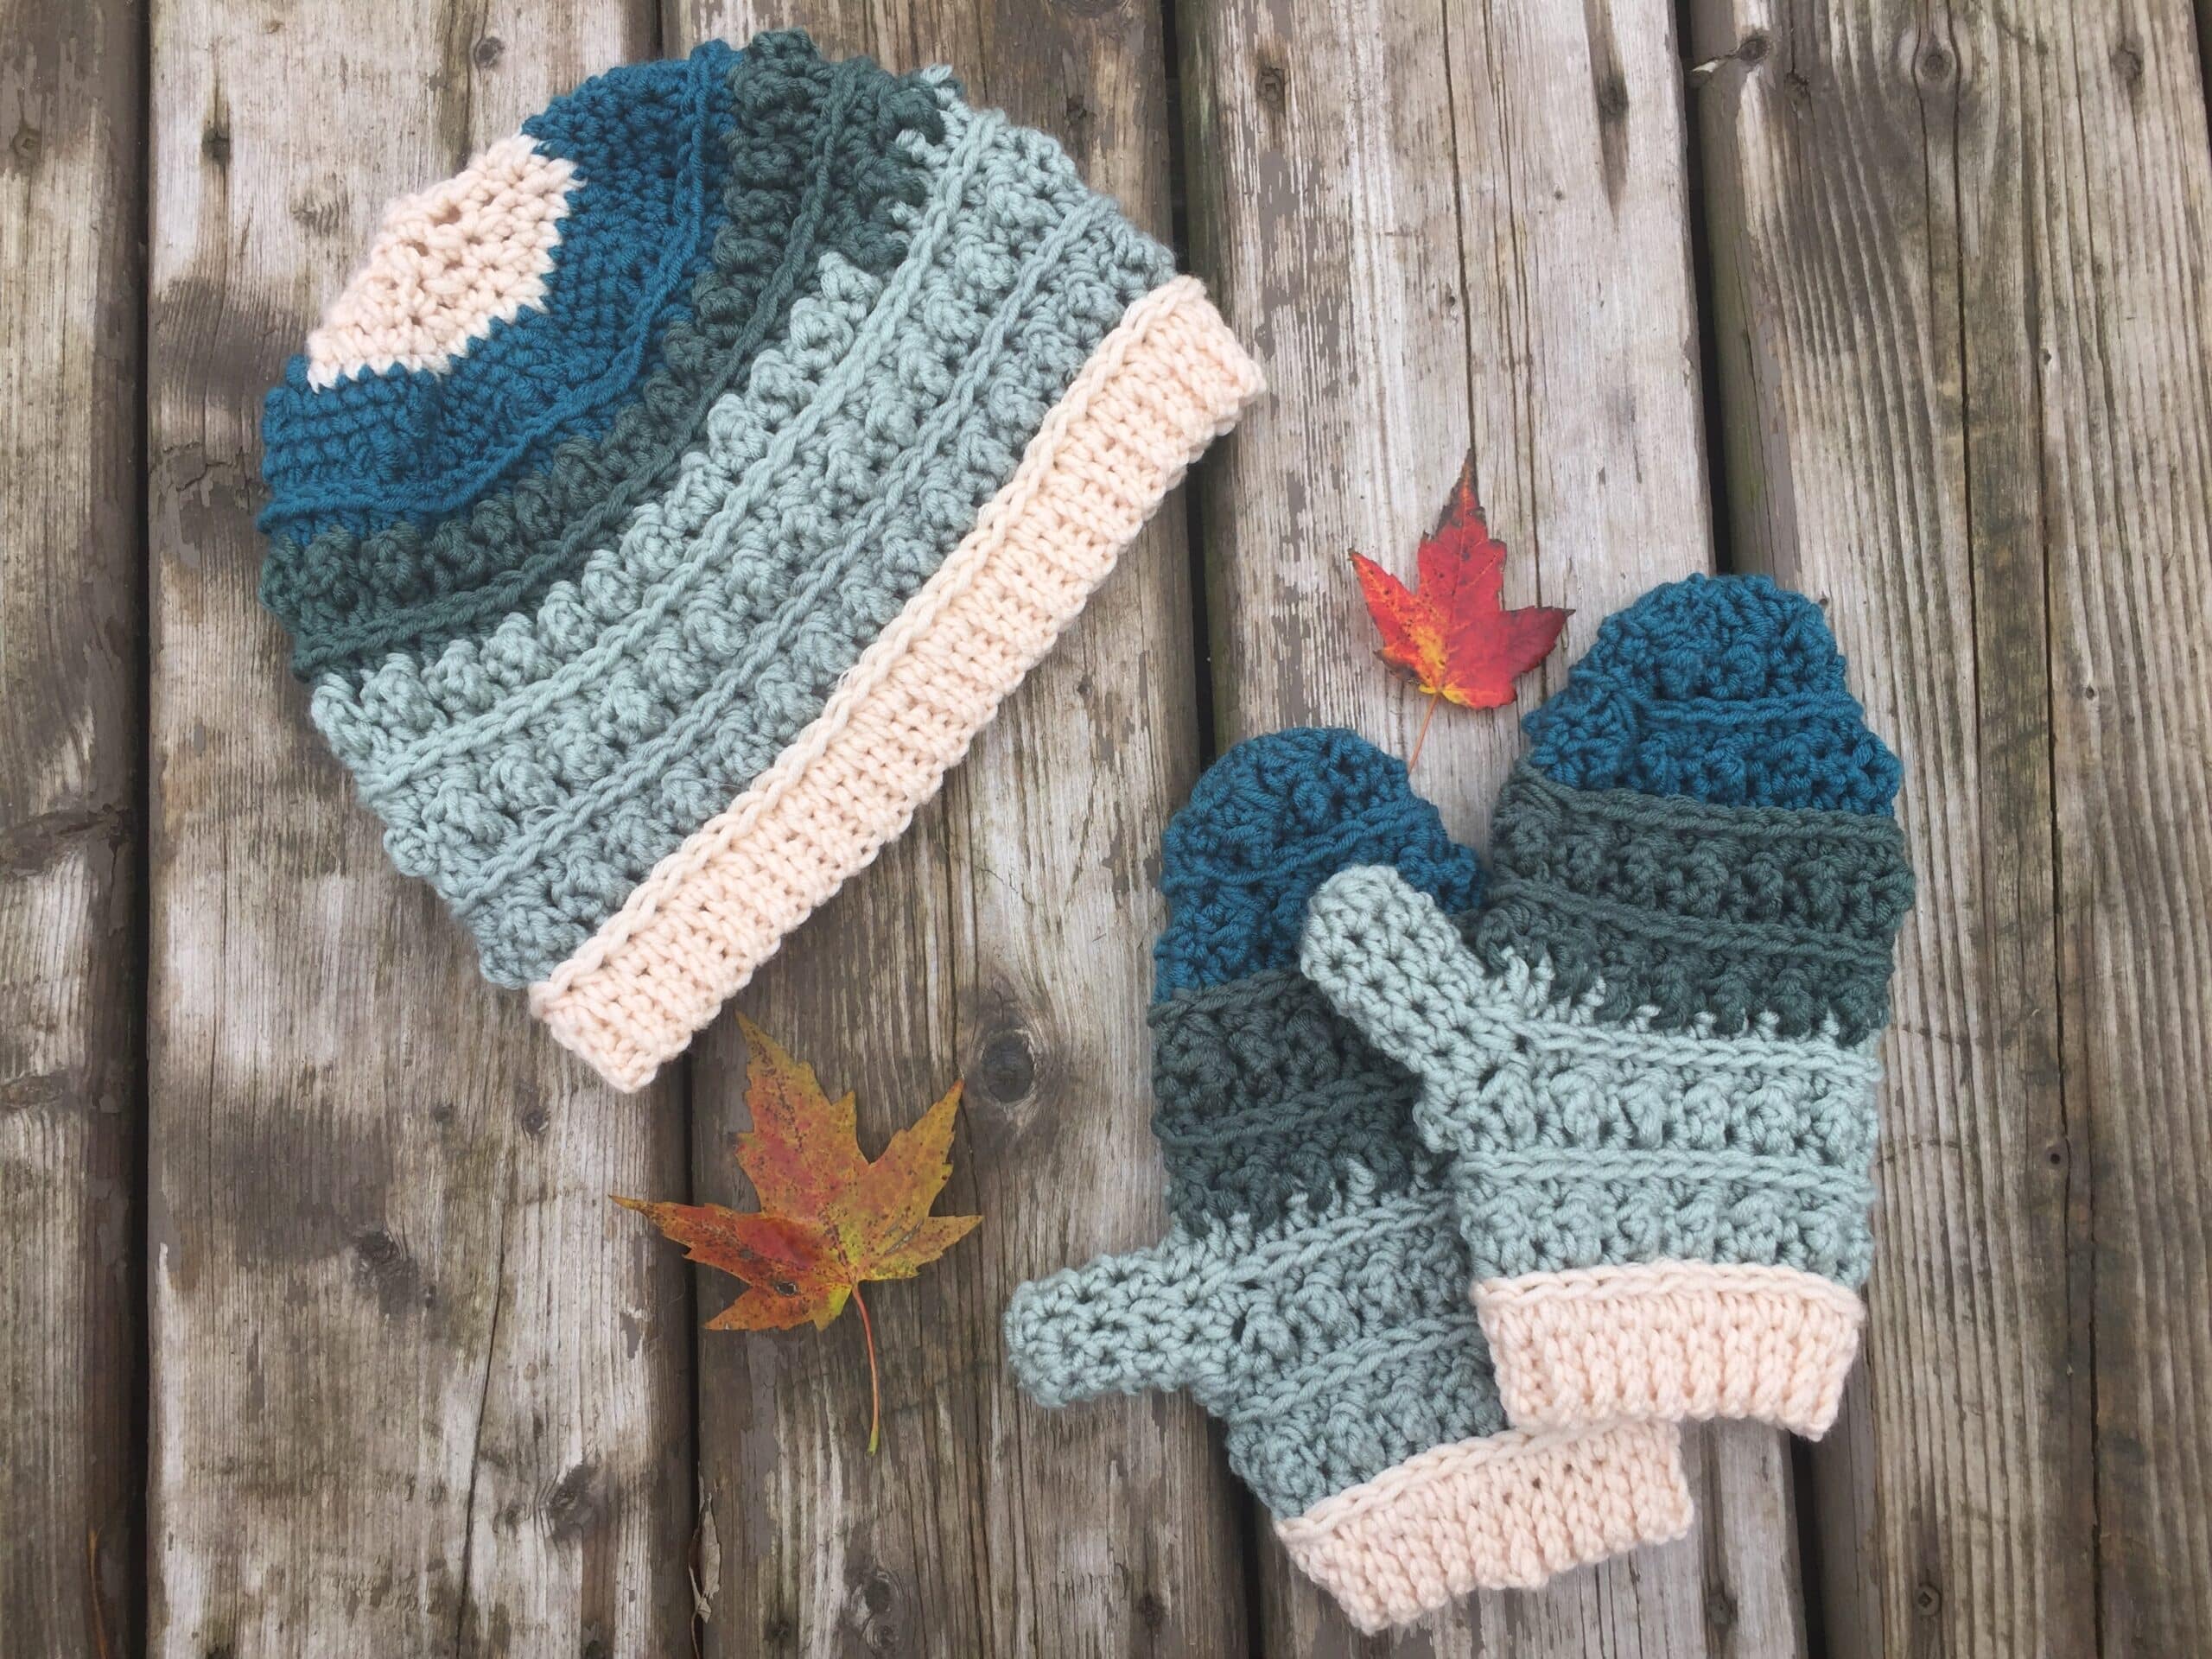
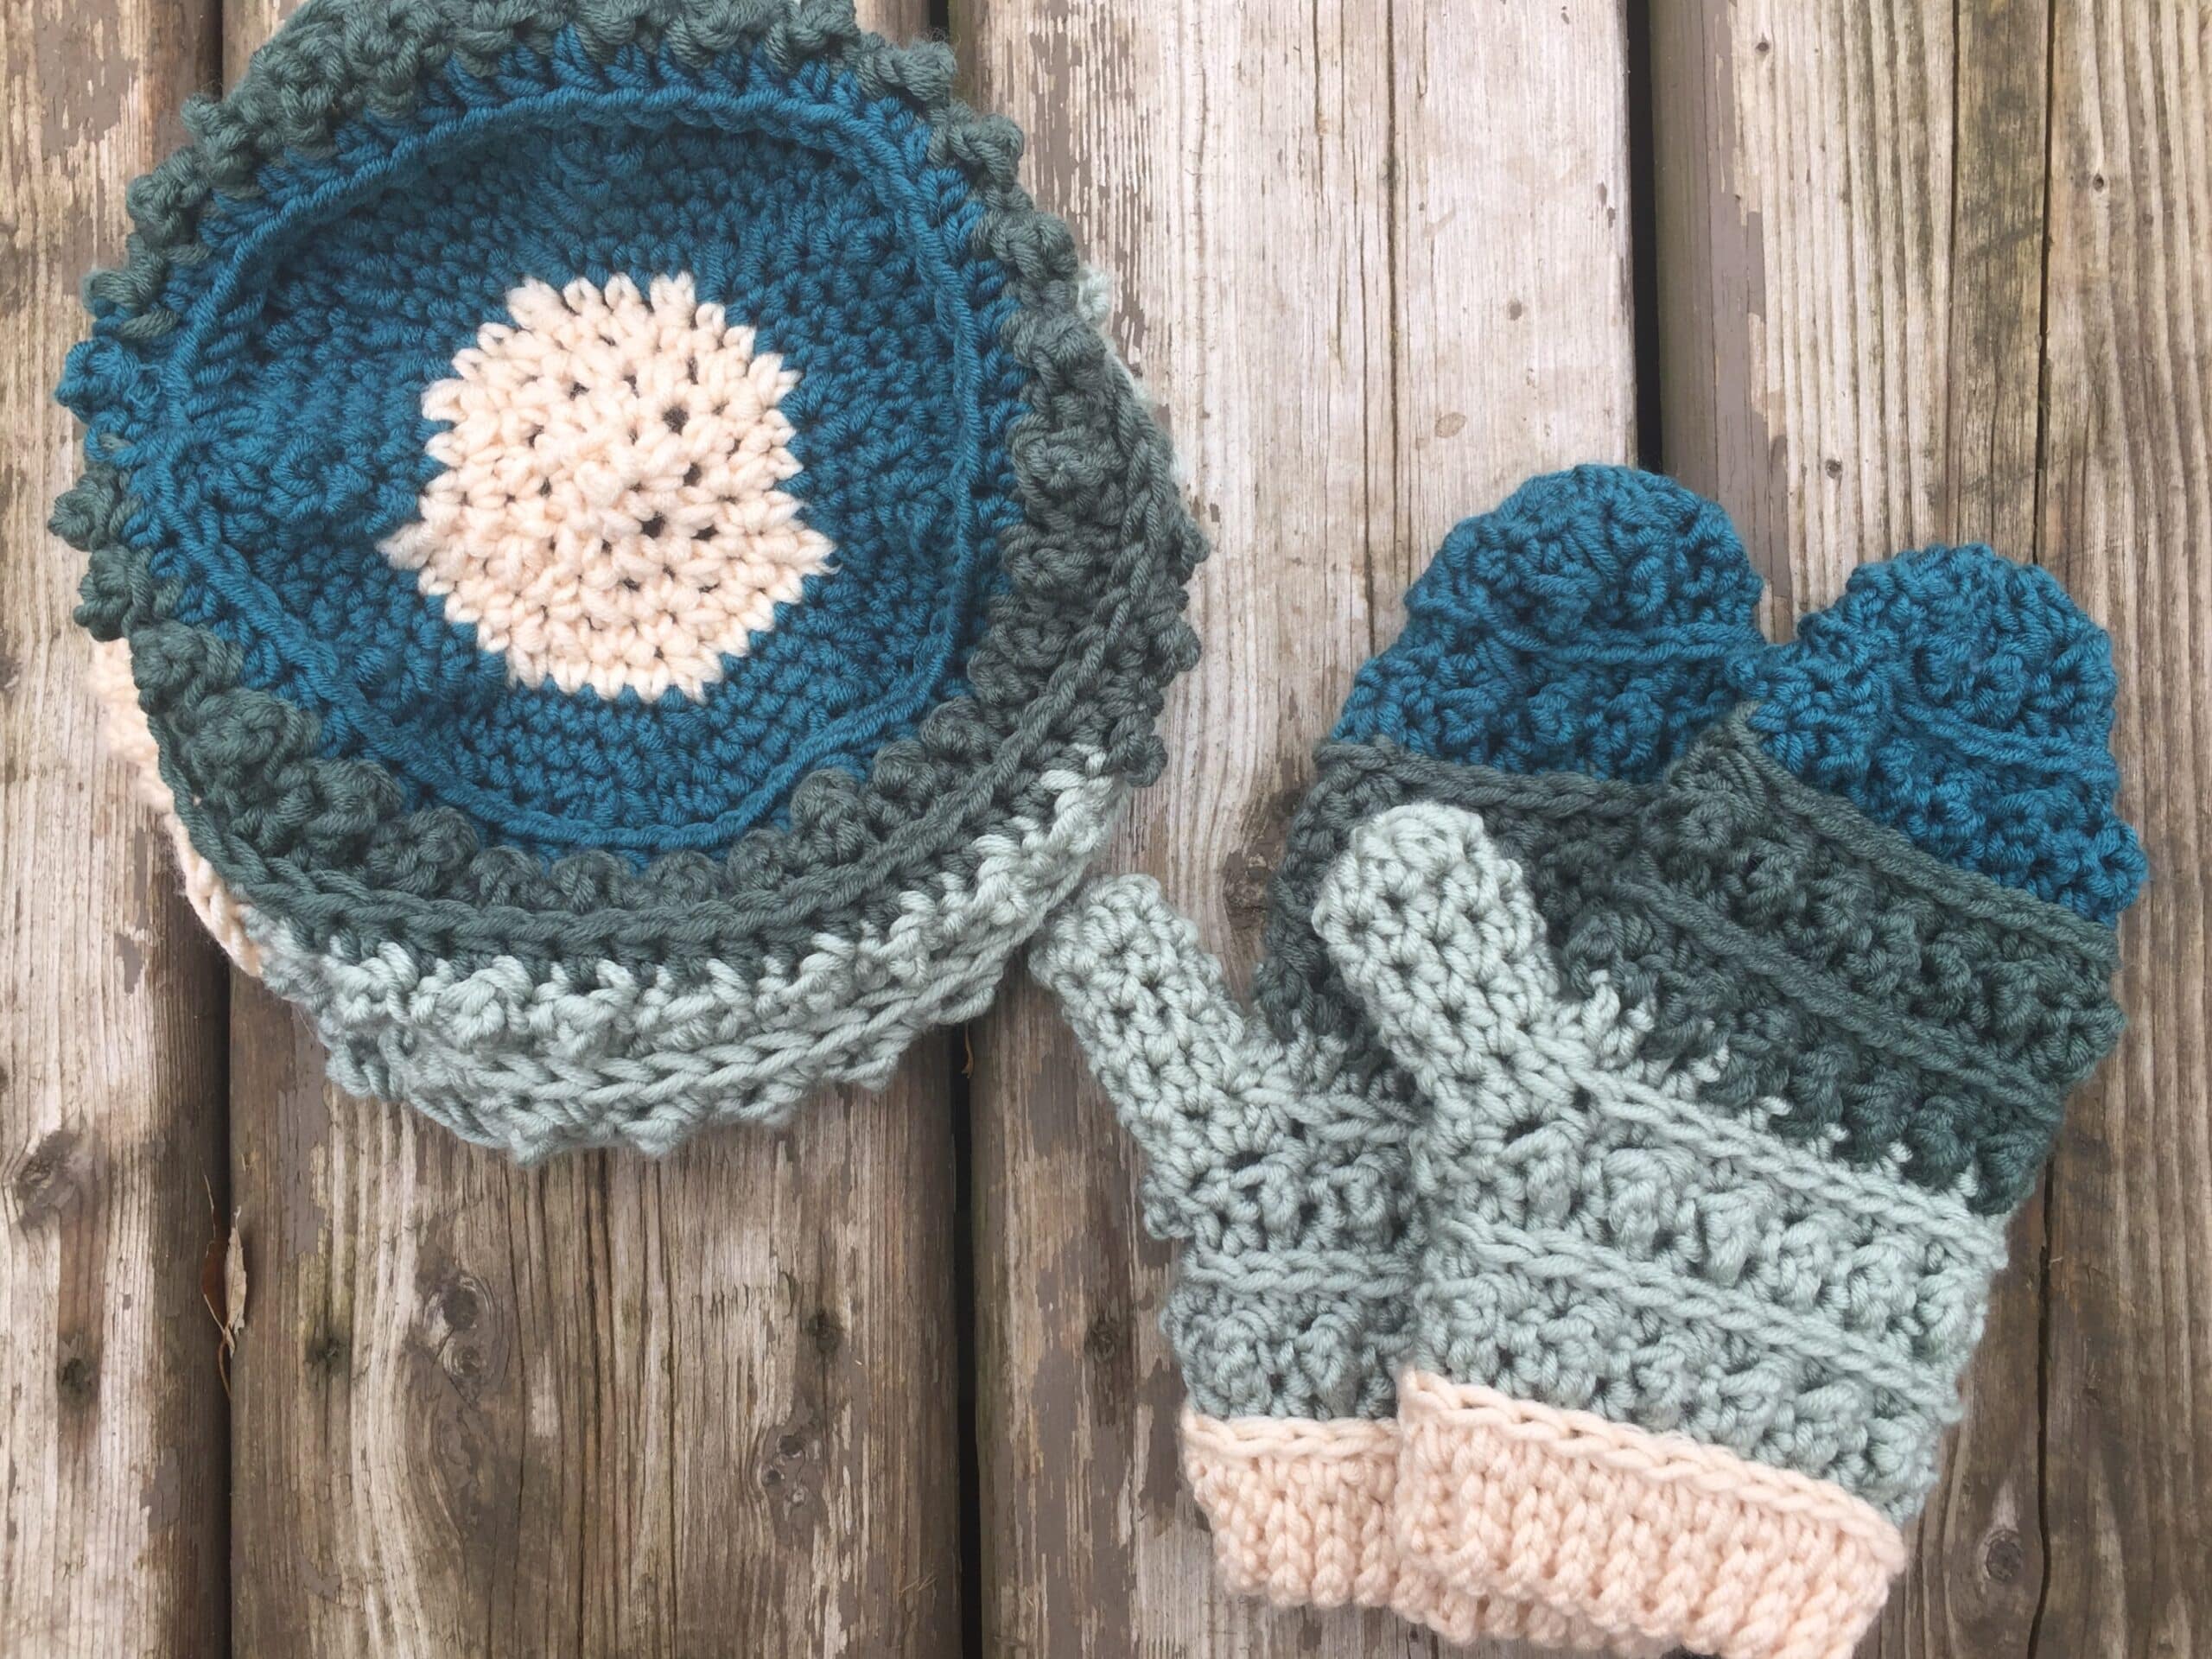
You are going to love the slouch in this free crochet pattern and video tutorial for a textured slouch hat!
Every year I can tell when the temperatures in the summer are going to change to cooler ones because the direction of the wind changes. Not only do I hear this shift as one of the vents on the outside of our house starts banging on windy days, but you can almost feel it in the pines and other trees in the forest where my family and I like to explore.
The smell of pine and fir trees always remind me that winter is on it’s way. When I first picked up this colour way in the new Caron x Pantone yarn, my first thought was pine trees! So how fitting it was when I envisioned a new fall and winter hat for myself in it!
This yarn is so soft and smooth. It really is a pleasure to wear. I do find that it splits easily when working with it, but once you are used to the texture, it is fun to work with.
The first thing you’ll notice about these skeins is that they are made up of five smaller balls of yarn. Each of these balls contains about 23 yards. While in the pattern I have called for two skeins, you will only use one skein, plus one small ball of the next. So if you are substituting this yarn for another, you will need approximately 150 yards.
The pattern below is for the slouch hat only. The Mitten pattern for the mittens also seen in the photos can be found here: Windy Pines Mittens – Free Crochet Pattern 🙂

Below the written pattern you will also find a complete video tutorial for the hat. In the tutorial I will not only show you how to work the hat, but also how to change colours and join a new ball of yarn without knots!
While you are checking out that video tutorial, please remember to subscribe to my YouTube Channel: https://www.youtube.com/c/RichTexturesCrochet/
A Blog Hop!
The pattern for the hat this week is part of a blog hop that has been organized to include many other great crochet bloggers! You can see the rest of the itinerary below. There are so many other great designers on the list. Last week A crocheted Simplicity brought us a beautiful children’s cabled hat (https://www.acrochetedsimplicity.com/textured-twist-cabled-beanie-slouch-kids-sizes-free-crochet-pattern/) and I can’t wait to see what Winding Road Crochet unveils next week!

The pattern this week will be written out in full, but if you would like to add this pattern to your library or purchase a convenient pdf you can do so though either my Ravelry or Etsy shops:
CLICK HERE FOR ETSY
And as always, feel free to connect with Rich Textures Crochet on Instagram and Facebook (you’ll see the buttons above), that way you’ll be sure to be notified when the mitten pattern is available!
Happy Crocheting!
Sarah
The Pattern:
Skill Level: Easy
Gauge: 12 sts of pattern x 4 rows = 4 inches
Finished Size: Approximately 11 inches across x 8 inches tall laid flat (20-21 inch circumference at opening; size teen/Adult).
Yarn: 2 skeins of Caron x Pantone ® by Yarnspirations ™ (you will only need one of the colours from the second skein) (60% Acrylic, 20% Nylon, 20% Merino Wool; 100g/3.5 oz, 116 meters / 127 yards (20g/0.7 oz, 25.4 meters / 23.2 yards per small ball)). Bulky Weight (5). Colour: Terrarium Green.
Hook: Size L/11 (8.00 mm) hook.
Notions: Yarn Needle, Measuring tape, optional: pompom.
Stitches and Abbreviations:
Ch – Chain
Hdc – Half Double Crochet
Rpt – Repeat
Sc – Single Crochet
Sc2tog – Single Crochet Two Stitches Together
Sk – Skip
Sl st – Slip stitch
Tr – Triple Crochet
Yo – Yarn over
Notes:
Pattern is written in American English terms.
– Brim of hat is worked in rows, the rest is worked in rounds.
– Ch 1 at beginning does not count as stitch.
– Ch 3 at beginning does count as a dc unless stated otherwise.
– When working the body of the hat do not turn unless stated otherwise
– Weave in ends as needed.
Let’s Crochet:
Brim (worked in rows):
Ch 5
Row 1: Sl st in the 2nd ch from hook and in each across. Turn. (4 sts)
Row 2: Ch 1, working in the blo, sl st in the first st and in each st across. Turn. (4 sts)
Repeat row 2 until work from the beginning measures approximately 18 inches.
Do not fasten off, but fold brim of hat so that two shorter ends meet. Now working through both thicknesses, sl st across working through the blo on each side. Do not fasten off, turn work right side out (so that the right side is facing you).
Now working around the edge of the brim, continue working in rounds as follows:
Hat (worked in rounds):
Rnd 1: Ch 1, evenly work 64 hdc all the way around; join with a sl st in the 1st hdc, join with a sl st in the first st. Do not turn. (64 sts)
Rnd 2: Ch 1, working in the 3rd loop, hdc in each st around, join with a sl st in the first st.
Rnd 3: Ch 1, Sc in the 1st st, * tr in the next st, sc in the next st; rpt from * all the way around. Join with a sl st in the first st.
Rnd 4: Ch 1, hdc in each st all the way around, join with a sl st in the first st.
Rnd 5: Ch 1, working in the 3rd loop, hdc in each st around, join with a sl st in the first st.
Rnds 6-14: Repeat rounds 3-5 three times more.
Rnd 15: Ch 1, * sc in each of the next 6 sts, sc2tog; rpt from * around, join with a sl st in the first st.
Rnd 16: Ch 1, * sc in each of the next 5 sts, sc2tog; rpt from * around, join with a sl st in the first st.
Rnd 17: Ch 1, * sc in each of the next 4 sts, sc2tog; rpt from * around, join with a sl st in the first st.
Rnd 18: Ch 1, * sc in each of the next 3 sts, sc2tog; rpt from * around, join with a sl st in the first st.
Rnd 19: Ch 1, * sc in each of the next 2 sts, sc2tog; rpt from * around, join with a sl st in the first st.
Rnd 20: Ch 1, * sc in the next st, sc2tog; rpt from * around, join with a sl st in the first st.
Rnd 21: Ch 1, sc2tog in each st all the way around, join with a sl st in the first st.
Rnd 22: Ch 1, sc2tog in each st all the way around, join with a sl st in the first st.
Fasten of leaving a long tail. Using the long tail remaining, sew top of hat closed by weaving yarn in and out of the top round of stitches. Pull yarn tight to close the top, fasten off and weave in ends.
Optional: Attach pompom to the top.
Video Tutorial:
For a free video tutorial for this project, see below:


I’m loving the colors and textures. 🙂 Thank you so much for sharing your pattern for free. <3
You’re very welcome!