
This post contains affiliate links. This means that when you purchase through one of these links we will receive a small commission at no additional cost to you. Thank you for supporting Rich Texture Crochet!
The Summertime Accessory Pouch crochet pattern has so much fun texture and complements the Summertime Market Bag perfectly!
There are some great textures in this little crochet zippered bag! The stitches include some open mesh, bobble stitches and fur stitches. If you have never tried the fur stitches before, they are fun once you get the hang of them! I will show them in the video tutorial below, but they are essentially created, by creating a loop around your finger, before yarning over and drawing up your loop and completing the stitch. After all the loops are worked you can cut their ends to give them a more fur or fringe like appearance. They add a lot of interest to a project!

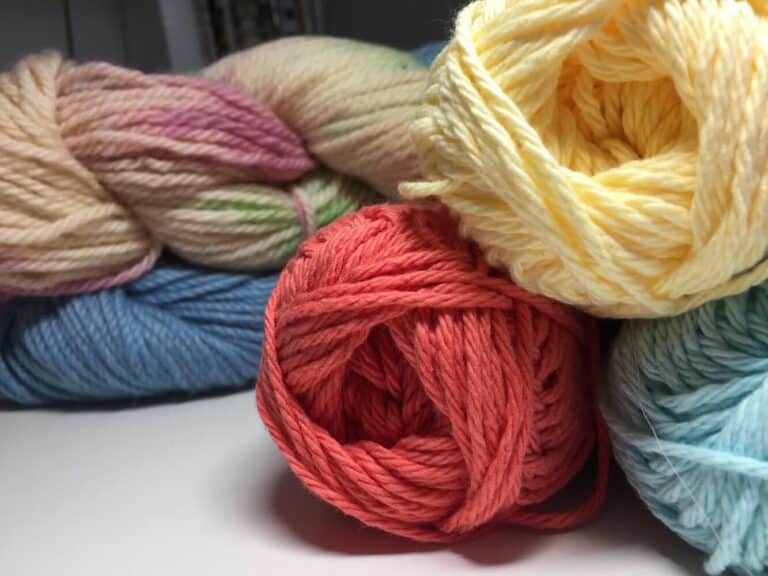
This Summertime Accessory Pouch crochet pattern is fairly easy to work. You will need some cotton yarn and feel free to use yarn scraps! One of the wonderful things about the bag is how it is lined! All you need is a small canvas zippered pouch (I purchased mine from a local craft store). Once the crochet pouch is complete, you will slide the canvas zippered pouch into it and then sew or glue it around the top to hold it in place. It makes lining the bag so easy! Enjoy!

PDF Copies are also available:
The Summertime Accessory Pouch crochet pattern will be written out in full below and will forever remain free when viewed here on Rich Textures Crochet, and the written instruction will be followed by a video tutorial. However if you would like to add this pattern to your library or purchase an ad free PDF, you may do so from either my Etsy or Ravelry Shop linked below:
CLICK HERE FOR THE SUMMERTIME ACCESSORY POUCH ON ETSY
CLICK HERE FOR THE SUMMERTIME ACCESSORY POUCH ON RAVELRY
Thank you for stopping by and I look forward to seeing you again soon! If you have not already, I invite you to sign up for my e-newsletter so that you will be notified each time I release a new free crochet pattern or stitch tutorial and don’t forget to check out the free crochet pattern for the matching Summertime Market Bag.
Happy Crocheting!
Sarah

Summertime Accessory Pouch Crochet Pattern:
Skill Level: Intermediate
Gauge: 18 x 20 rows of sc = 4 inches
Finished Size: Approximately 7.5 x 10 inches
Yarn: 24/7 Cotton by Lion Brand® (186 yds/170 m; 100g/3.5 oz; 100% cotton; (4) worsted weight). You will need 1/2 ball Aqua (Colour A), 1/2 ball Ecru (Colour B), 1/2 ball White (Colour C)
Hook: Size G/6 (4 mm) hook.
Notions: Yarn Needle, 7.5 x 10 in. Canvas pouch with zipper, sewing needle and thread or fabric glue.
Stitches and Abbreviations:
Bobble St – Bobble Stitch ([Yo, insert your hook into the stitch indicated, yo and draw up a lp] five times. Yo and draw through all the loops on your hook. Bobble Stitch Made.)
Ch – Chain
Dc – Double Crochet
Hdc – Half Double Crochet
Lp St – Loop Stitch (Insert your hook into the next st, wrap the yarn around your index finger and yarn over holding back the loop on your finger and draw a loop through (this will be the two ends of the of the loop on your finger), yarn over and draw through the loops on your hook. Loop Stitch made)
Rpt – Repeat
Sc – Single Crochet
Sk – Skip
Sl st – Slip stitch
Yo – Yarn over
Pattern Notes:
- Pattern is written in American English terms.
- Pattern is worked in rounds, as one piece, from the bottom up.
- Ch 1 at beginning of round does not count as stitch.
- Weave in ends as needed.
- Do not turn unless stated otherwise.
- To change the size of your bag you will need an odd number of stitches for your foundation chain.
Free Crochet Pattern:
With colour A, ch 47.
Rnd 1: With colour A, hdc in the 2nd ch from your hook and in each st across to the final st, 3 hdc in the final st. Now working along the opposite side of your foundation ch, hdc in each st across to the final ch, 2 hdc in the final ch, join with a sl st in the 1st st. (94 sts) Do not turn.
Rnds 2-3: Ch 1, hdc in the same st as joining and in each st around, join with a sl st in the 1st st. Switch to colour B in the final st of rnd 3. (94 sts) Do not turn.
Rnd 4: With colour B, ch 1, hdc in the 1st st and in each st around. Join with a sl st in the 1st st. TURN.
Rnds 5-7: Ch 1, lp st in the 1st st and in each st around. Join with a sl st in the 1st st. TURN at the END OF RND 7.
Rnd 8: Ch 1, sc in the 1st st and in each st around. Join with a sl st in the 1st st. Join colour C.
Rnd 9: With colour C, hdc in the 1st st and each st around. Join with a sl st in the 1st st. Ch 1.
Rnd 10: Working in the 3rd lp all the way around, sc in the 1st st and each st around. Join with a sl st in the 1st st. Ch 4 (Counts as a dc, ch-1).
Rnd 11: Sk the next st, *dc in the next st, ch 1, sk the next st; Rpt from * around, join with a sl st in the 3rd ch of the starting ch-4. Ch 1.
Rnd 12: Hdc in the 1st st and each st and ch-1 sp all the way around. Join with a sl st in the 1st st.
Rnd 13: Ch 1, working in the 3rd lp all the way around, sc in the 1st st and each st around. Join with a sl st in the 1st st. Switch to colour A.
Rnd 14: With colour A, ch 1, sc in the 1st st and in each st around. Join with a st st in the 1st st. TURN.
Rnd 15: Ch 1, *sc in each of the next 3 sts, bobble in the next st; Rpt from * around. Join with a sl st in the 1st st. TURN.
Rnd 16: Sc in the 1st st and in each st around. Join with a sl st in the 1st st. Switch to colour C.
Rnd 17: With colour C, hdc in the 1st st and each st around. Join with a sl st in the 1st st. Ch 1.
Rnd 18: Working in the 3rd lp all the way around, sc in the 1st st and each st around. Join with a sl st in the 1st st. Ch 4 (Counts as a dc, ch-1).
Rnd 19: Sk the next st, *dc in the next st, ch 1, sk the next st; Rpt from * around, join with a sl st in the 1st st. Ch 1.
Rnd 20: Hdc in the 1st st and each st and ch-1 sp all the way around. Join with a sl st in the 1st st.
Rnd 21: Ch 1, working in the 3rd lp all the way around, sc in the 1st st and each st around. Join with a sl st in the 1st st. Switch to colour B.
Rnds 22 – 32: Repeat rounds 4-14 once more.
Slip the Summertime pouch over top of your canvas pouch with the zipper at the top. Using a small amount of thread (alternatively you may use some fabric glue), sew/secure the Summertime pouch to the canvas pouch through the final round of stitches.
Fasten off, weave in your ends.


Hi Sarah!
Where do you buy your canvas zipper bags?
Hello! I found mine at my local Michaels craft store. I have also seen them on Amazon.
Hi Sarah,
I love this pattern, thank you! Do I only begin new round in same stitch as joining when pattern says or every new round? I have been confused on this.