This post contains affiliate links. This means that when you purchase through one of these links we will receive a small commission at no additional cost to you. Thank you for supporting Rich Texture Crochet!
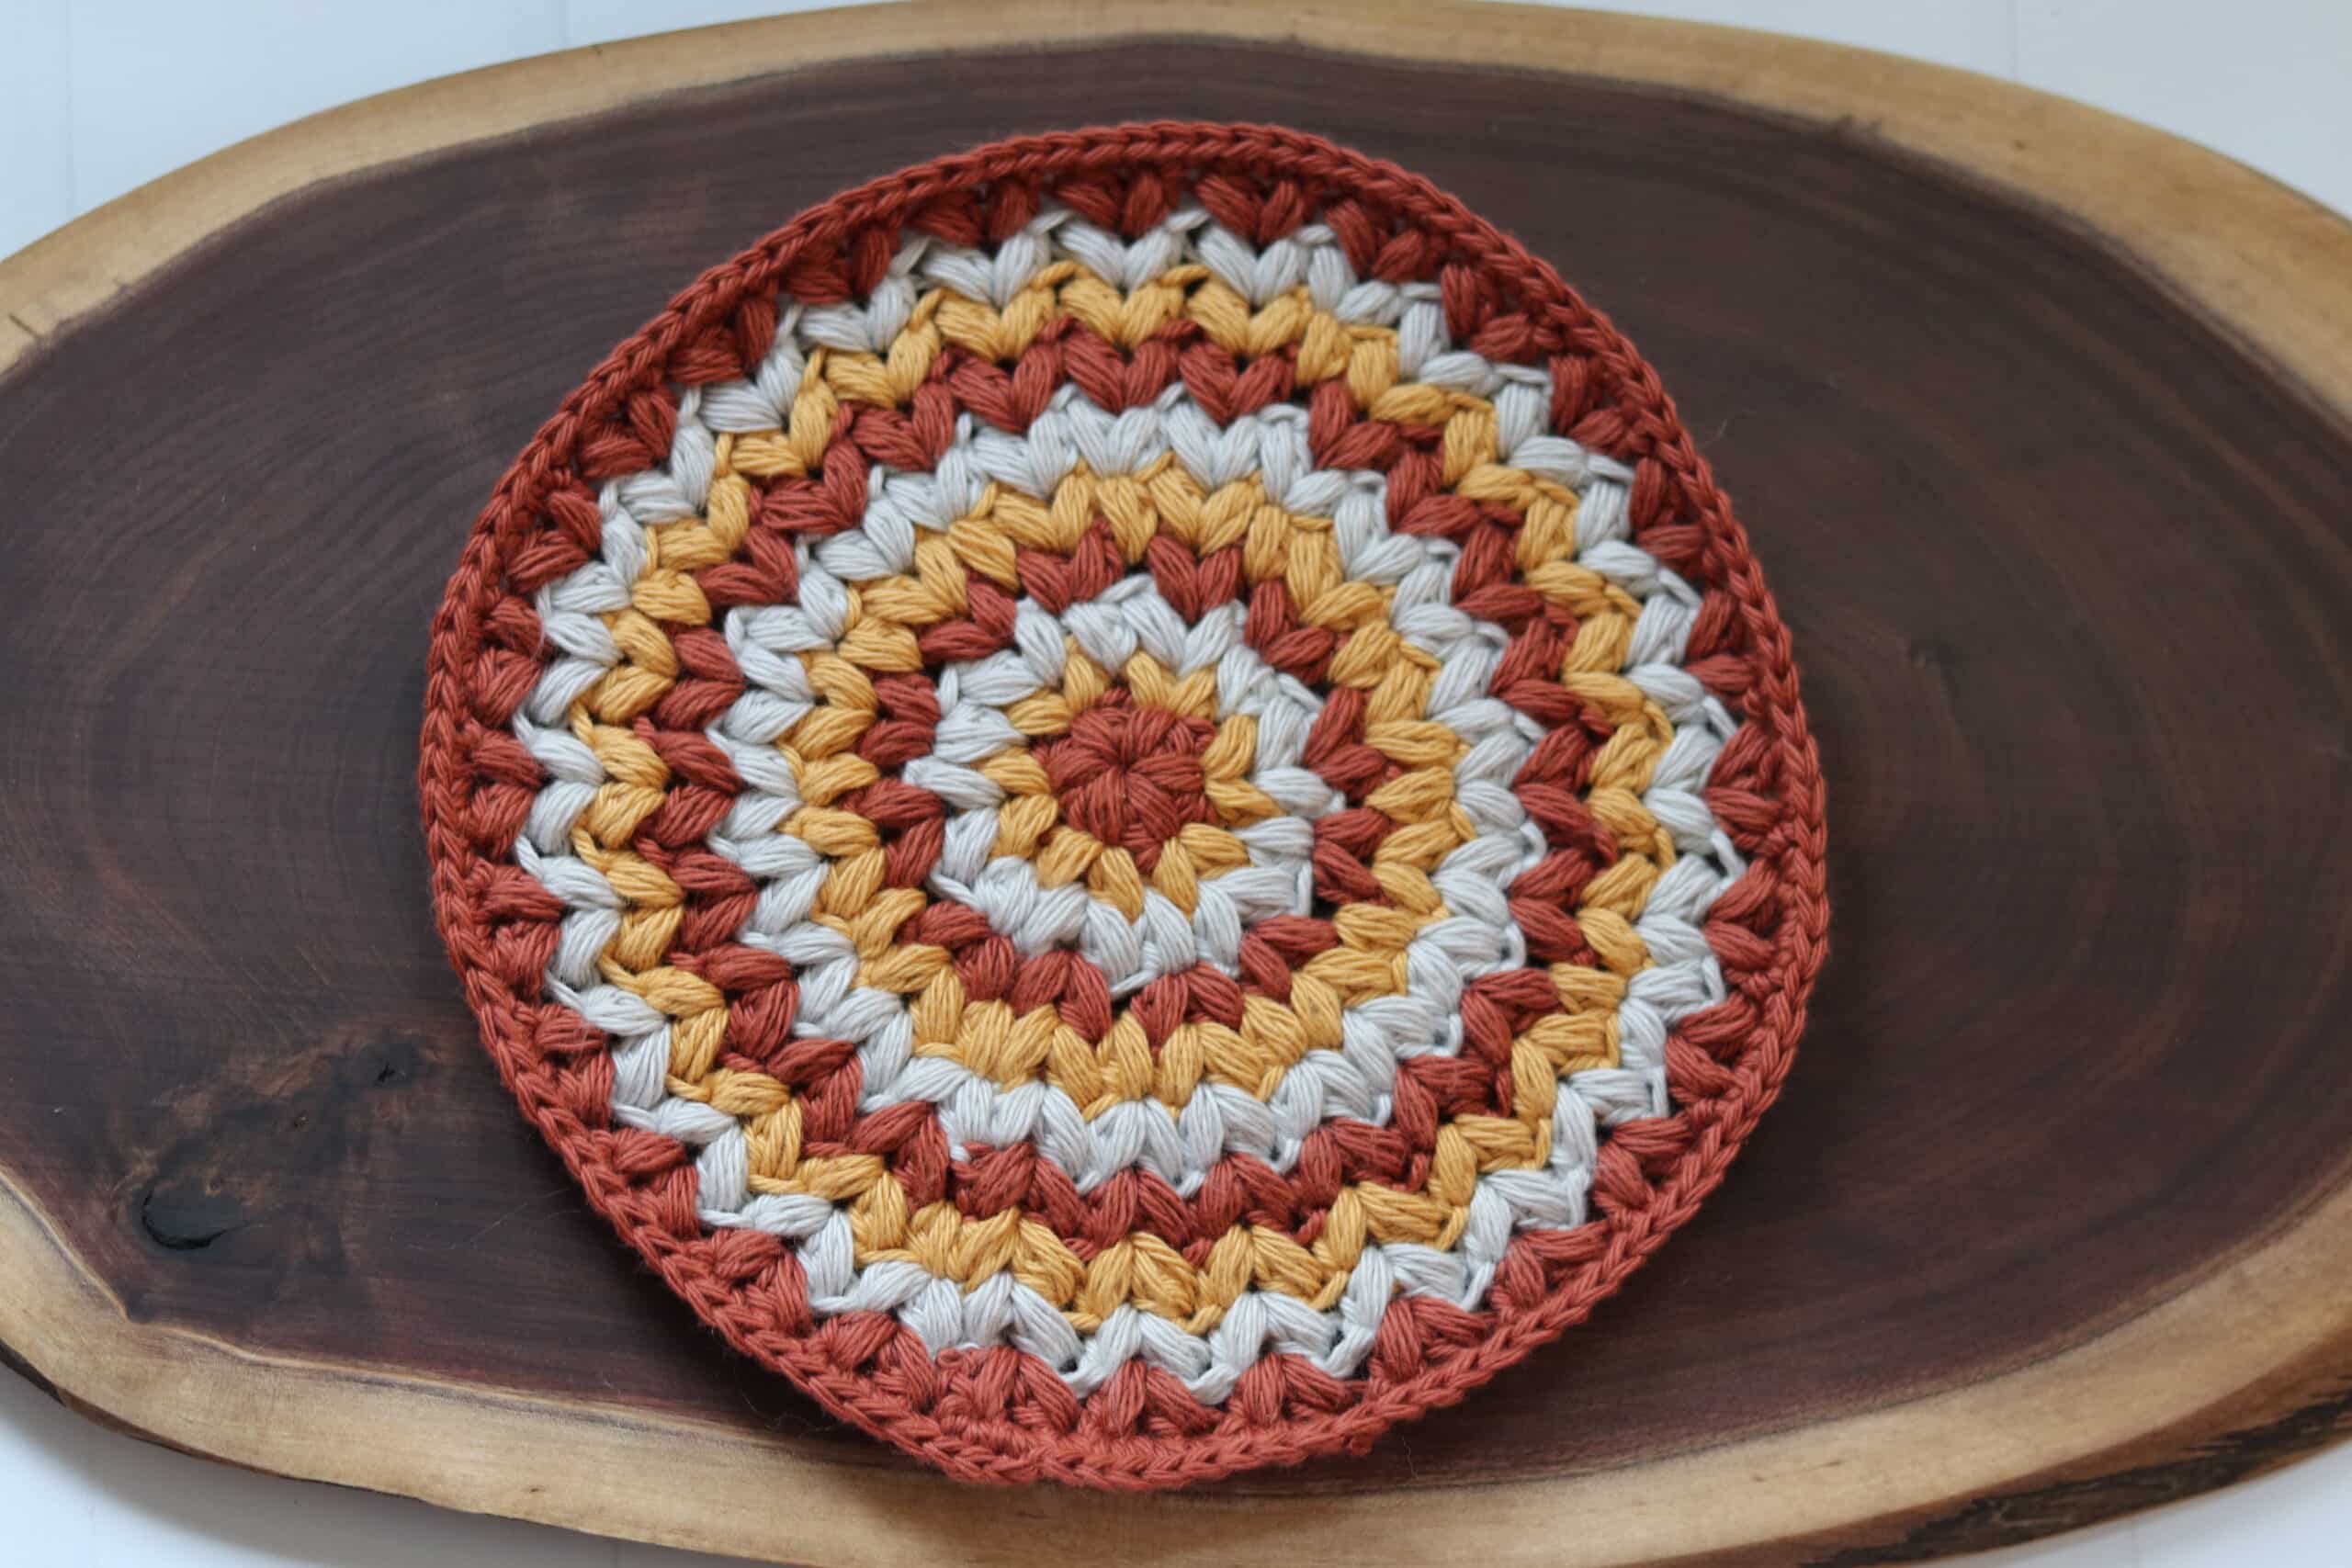
The Not so Vintage Washcloth crochet pattern is a unique circle design featuring rounds of gorgeous puff stitches!
I love using crochet washcloths around my own home! I also love to give them as gifts! Occasionally, when I am given a pie or savoury dish, I like to tuck a crochet washcloth into the empty dish when I return it. My mother always reminded me, “Never return a dish empty!” Crochet washcloths are a great way for me to show my appreciation for a lovely meal or dessert.
Crochet washcloths, like the Not so Vintage Washcloth also make a great gift for special occasions, perhaps a housewarming or holiday stocking stuffer and Christmas gift. This washcloth pairs beautifully with the free Not so Vintage Hot Pad Crochet Pattern and would make a lovely gift set. Make it in a variety of colours on in a solid!
This post contains affiliate links. This means that when you make a purchase through one of these links, Rich Textures Crochet will earn a small commission at no additional cost to yourself. Thank you for supporting Rich Textures Crochet!
How it’s Made:
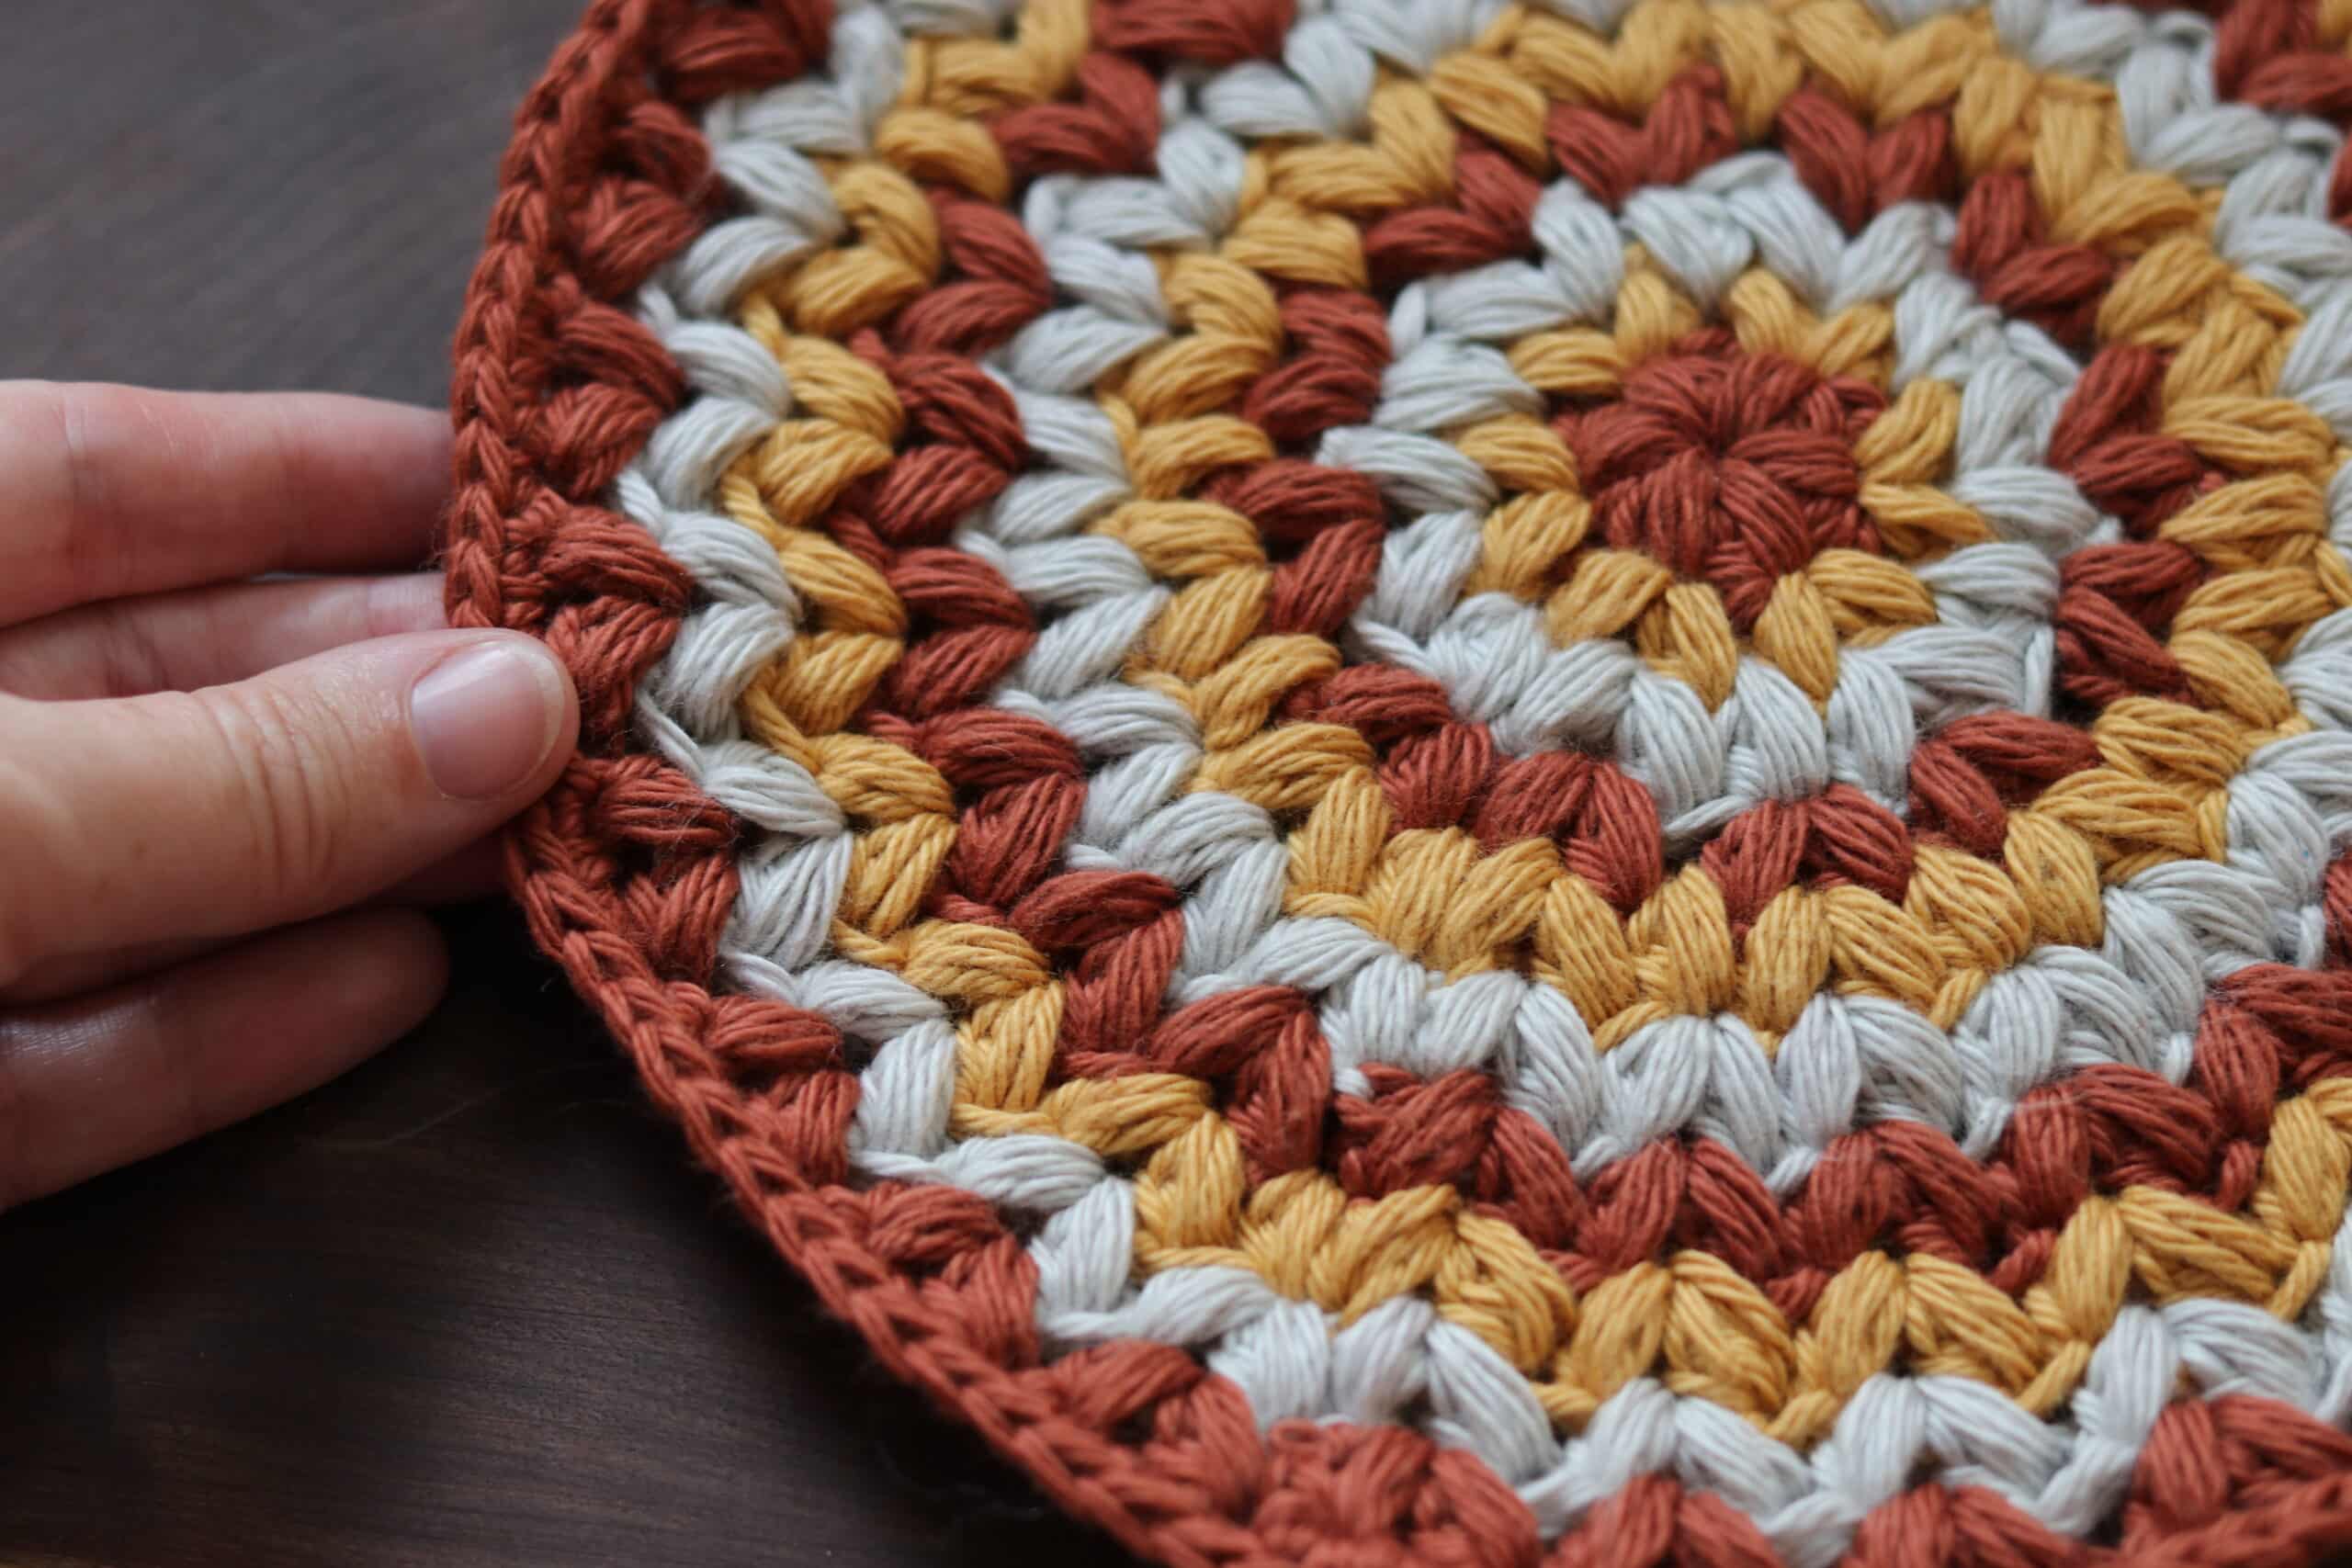
This crochet washcloth pattern is worked in rounds starting from the centre. This is a great scrap yarn project as after each round you will fasten off and weave in your ends. You may even use those smaller scraps of cotton yarn! Mix and match your colours, you can even coordinate them for the season. There are so many options.
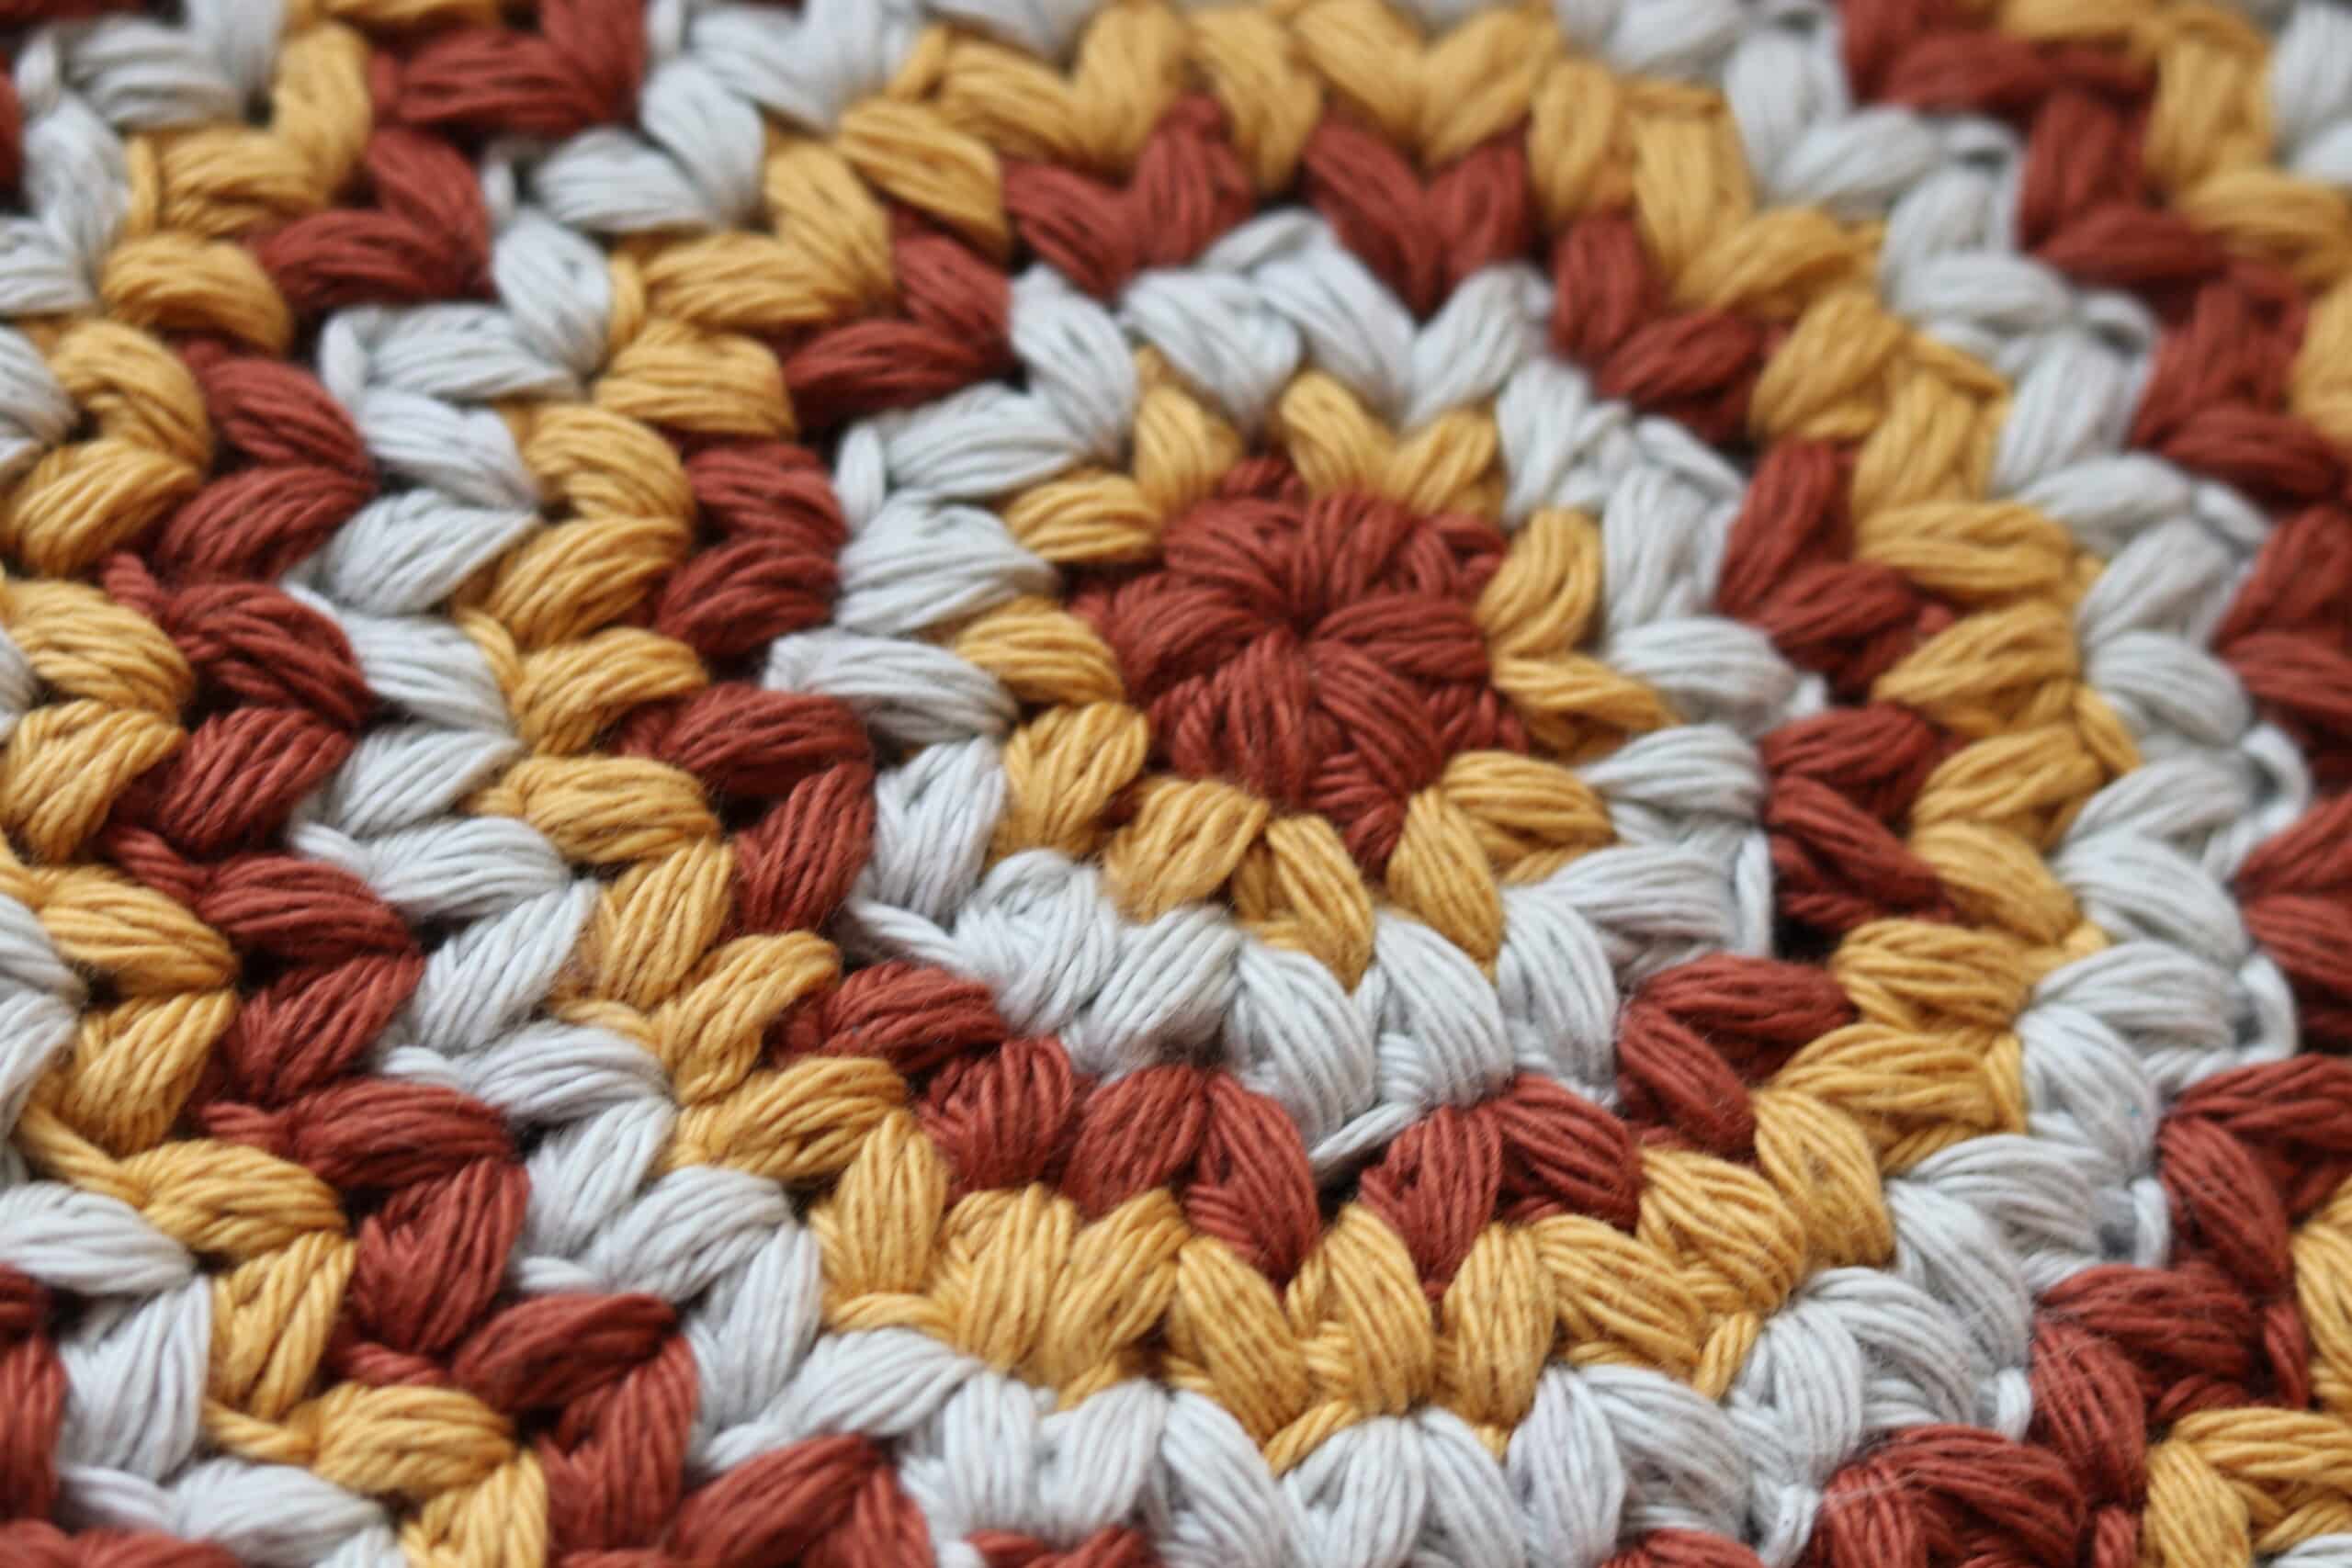
The round washcloth is worked primarily in crochet puff stitches. This gives the washcloth a wonderful thick texture that is absorbent and can be used on a variety of surfaces.
Materials:
For the Not so Vintage Hot Pad, I will be working with three colours of a worsted weight 100% cotton yarn. In the photos and in the video tutorial I am using the Pima Cotton Yarn by Lion Brand Yarn. It is super soft and 100% cotton. You will only need one partial ball of each to complete this pattern.
For this pattern you will also need a 5 mm crochet hook. In the video tutorial below I will be using a Birchwood Hook by Rowan Yarns.
PDF Copies:
This pattern will be written out in full below followed by a free video tutorial. The pattern is free to follow on my site and will always be free! If, however, you would like a printable copy, you may purchase one from my Etsy and Ravelry Shops linked below:
Click Here for the Not so Vintage Washcloth on Etsy
Click Here for the Not so Vintage Washcloth on Ravelry
Thank you so much for stopping by! I look forward to seeing your finished hats! If you haven’t already, I invite you to sign up for my email newsletter at the bottom of this page so that you never miss a stitch! If you like this crochet pattern, you may also wish to try the Rustic Farmhouse Washcloth Crochet Pattern.
Thank you for stopping by! Enjoy the free pattern below!
Sarah
Not so Vintage Washcloth Crochet Pattern:
Skill Level: Intermediate
Gauge: 15 stitches x 18 rows of puff stitch = 4 inches
Finished Size: Approximately 9 inches diameter
Yarn: Pima Cotton by Lion Brand® (186 yds/170 m; 100g/3.5 oz; 100% cotton; (4) worsted weight). You will need 3 colours: 1 balls Spice (Colour A), 1 ball mineral yellow (Colour B), 1 ball Stone (Colour C)
Hook: Size H/8 (5 mm) hook.
Notions: Yarn Needle
Stitches and Abbreviations:
Ch – Chain
Dc – Double Crochet
Hdc – Half Double Crochet
Puff – Puff Stitch ([yo, insert your hook in the indicated st, yo and draw up a loop] 3 times. Yo and draw through all the loops on your hook. Puff St made)
Rpt – Repeat
Sc – Single Crochet
Sk – Skip
Sl st – Slip stitch
Yo – Yarn over
Pattern Notes:
- Pattern is written in American English terms.
- Pattern is worked in rounds
- Ch 1 at beginning of row does not count as stitch.
- Weave in ends as needed.
- Do not turn unless stated otherwise.
Free Crochet Pattern:
With Colour A, make a magic ring (OR ch 2 and work into the 2nd ch from your hook).
Rnd 1: Ch 1, [puff, ch 1] 6 times into the centre of the magic ring. Join with a sl st in the top of the first puff st. Dot not turn (here and throughout). Fasten off colour A. Join colour B in any ch-1 sp.
Rnd 2: With colour B, ch 1, [puff, ch 1, puff] in the same ch-1 sp as joining, [puff, ch 1, puff] in the next ch 1 sp 5 times. Join with a sl st in the 1st st. Fasten off colour B. Join colour C in any ch-1 sp.
Rnd 3: With colour C, ch 1, [puff, ch 1, puff] in the same ch-1 sp as joining, *puff in the sp between the next 2 puff sts, [puff, ch 1, puff in the next ch-1 sp]; Rpt from * around to the final 2 puff sts, puff in the sp between the next 2 puff sts. Join with a sl st in the 1st st. Fasten off colour C. Join colour A in any ch-1 sp.
Rnd 4: With colour A, ch 1, [puff, ch 1, puff] in the same ch-1 sp as joining, sk the next puff st, *[puff, ch 1, puff] in the top of the next puff st, [puff, ch 1, puff in the next ch-1 sp]; Rpt from * around to the final puff st, [puff, ch 1, puff] in the top of the final puff st. Join with a sl st in the 1st st. Fasten off colour A. Join colour B in any ch-1 sp.
Rnd 5: With colour B, ch 1, [puff, ch 1, puff] in the same ch-1 sp as joining, *puff in the sp between the next 2 puff sts, [puff, ch 1, puff in the next ch-1 sp]; Rpt from * around to the final 2 puff sts, puff in the sp between the next 2 puff sts. Join with a sl st in the 1st st. Fasten off colour B. Join colour C in any ch-1 sp.
Rnd 6: With colour C, ch 1, [puff, ch 1, puff] in the same ch-1 sp as joining, sk the next puff st, *[puff, ch 1, puff] in the top of the next puff st, [puff, ch 1, puff in the next ch-1 sp]; Rpt from * around to the final puff st, [puff, ch 1, puff] in the top of the final puff st. Join with a sl st in the 1st st. Fasten off colour C. Join colour A in any ch-1 sp.
Rnd 7: With colour A, ch 1, [puff, ch 1, puff] in the same ch-1 sp as joining, [puff, ch 1, puff] in each ch-1 sp all the way around. Join with a sl st in the 1st st. Fasten off colour A. Join colour B in any ch-1 sp.
Rnd 8: With colour B, ch 1, [puff, ch 1, puff] in the same ch-1 sp as joining, ([puff, ch 1, puff] in the next ch-1 sp) 5 times, *puff in the sp between the next 2 puff sts, [puff, ch 1, puff in the next ch-1 sp] 6 times, puff in the sp between the next 2 puff sts; Rpt from * around. Join with a sl st in the 1st st. Fasten off colour B. Join colour C in any ch-1 sp.
Rnd 9: With colour C, ch 1, [puff, ch 1, puff] in the same ch-1 sp as joining, ([puff, ch 1 puff] in the next ch-1 sp) 5 times, sk the next puff st, [puff, ch 1, puff] in the top of the next puff st, *([puff, ch 1, puff in the next ch-1 sp]) 6 times, sk the next, puff st, [puff, ch 1, puff] in the top of the next puff st; Rpt from * around. Join with a sl st in the 1st st. Fasten off colour C. Join colour A in any ch-1 sp.
Rnd 10: With colour A, ch 1, [puff, ch 1, puff] in the same ch-1 sp as joining, *ch 1, [puff, ch 1, puff] in the next ch 1 sp; Rpt from * around. Join with a sl st in the 1st st.
Rnd 11: Ch 1, sc in the top of each puff st and in each ch-1 sp around. Join with a sl st in the 1st st.
Fasten off, weave in your ends.
Video Tutorial: