This post contains affiliate links. This means that when you purchase through one of these links we will receive a small commission at no additional cost to you. Thank you for supporting Rich Texture Crochet!
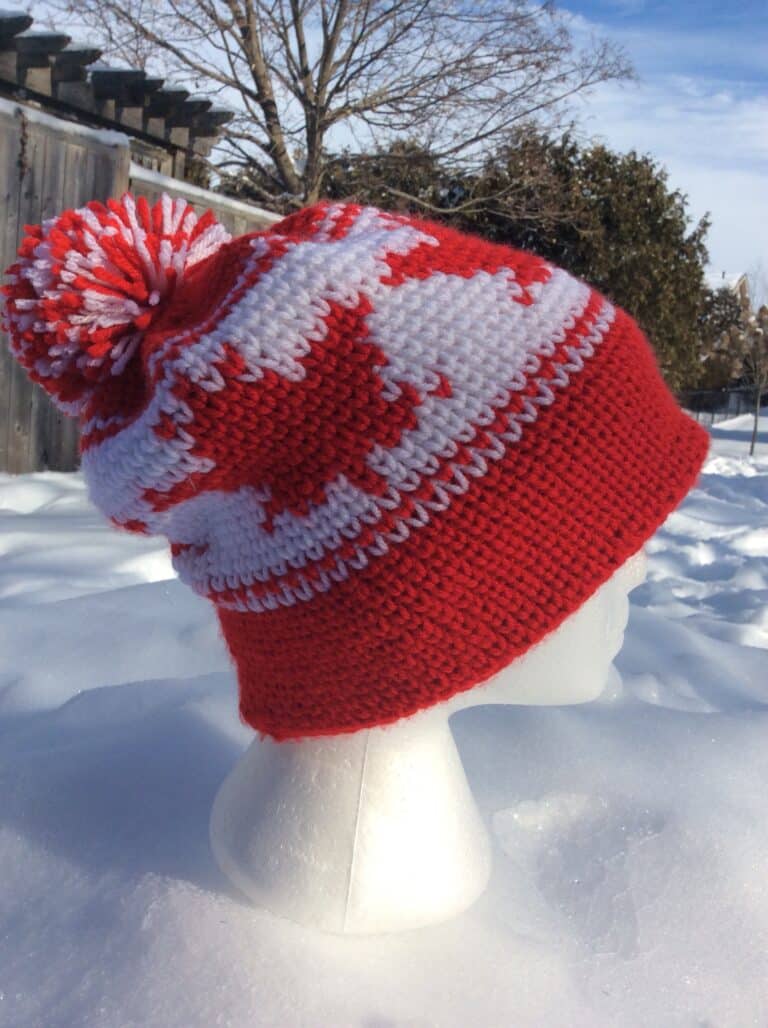
This knit look men’s classic beanie is a variation of the ever popular crochet beanie pattern I designed a little less than a year ago!
Over the past year I have received many requests on how this pattern can be adapted to include a stripe of colour.

This Post contains affiliate links which means I will earn a small commission from each purchase made through the link. Thank you so much!
I have included a stripe of colour at the end of the hat around the brim, but following the same technique, you can add a stripe of colour at any point in the hat. The important thing is to be consistent!

Men’s Crochet Beanie:
I love this men’s beanie! It has a great knit look and the stretch to go with it. It is comfortable to wear and the slip stitch rows mean that it will not lose its shape.
The Construction:
The hat is worked as one piece and it is worked lengthwise. You will see that the pattern begins by making a magic circle (or a ch 8 that is joined to make a ring if you prefer). From the magic circle, you work a long foundation chain to begin the length of the hat.
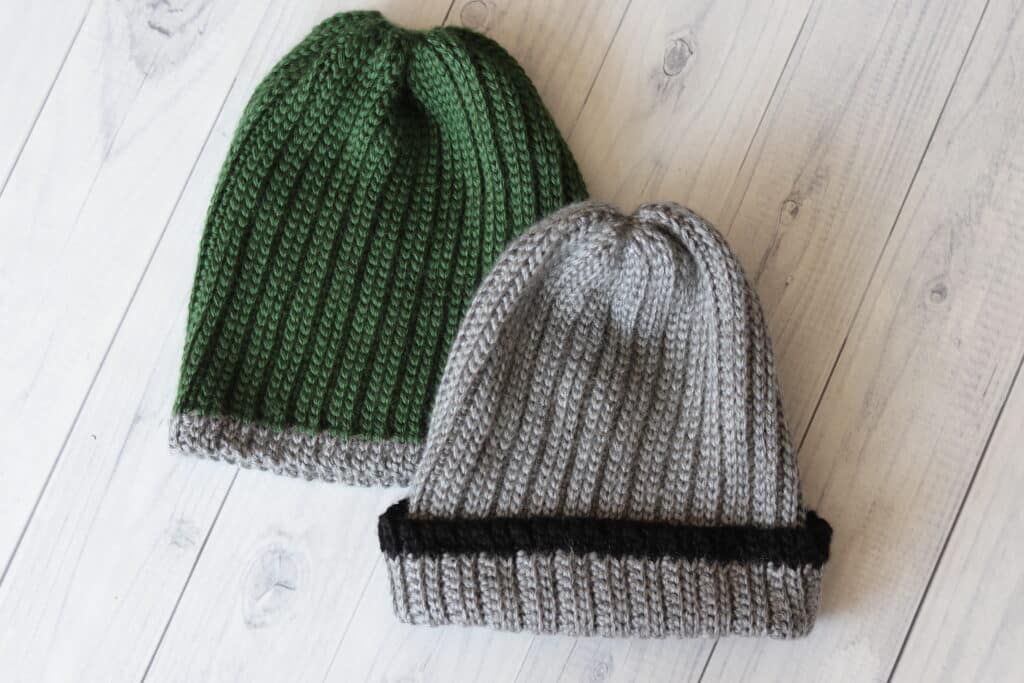
Once you have worked the width of the hat, you will seam it together and then draw the magic ring, which is at the top, closed. Sew the top closed and you are finished.
How to change colours:
For joining the new colour at the bottom, I like to add the colour to the final stitch before the colour change. To add the colour, you simply begin the stitch with the first colour, and then complete the stitch in the new.

Take a look at the free video tutorial below where I will show you how to make this colour transition.
You can find the original Men’s Classic Beanie crochet pattern here: Men’s Classic Beanie – Free Crochet Pattern.
One final change I’ve made in this updated version is that I use an acrylic yarn called Caron Simply Soft by Yarnspirations. I will also be using a 6 mm crochet hook by Furls Crochet.
PDF Copies Available:
The pattern will be written out in full below. You can add this pattern or purchase an ad free PDF from my Etsy or Ravelry Shop linked below:
Click Here for the Men’s Classic Beanie with Colour on Etsy
Click here for the Men’s Classic Beanie with Colour on Ravelry
Thank you so much for stopping by! If you happen to be also looking for a scarf to make a set, check out the Men’s Classic Crochet Scarf – Free Crochet Pattern!
Until next time, happy crocheting!
Sarah

Men’s Classic Beanie with Colour:
Skill Level: Easy
Gauge: 20 sts x 27 rows of pattern = 4 inches.
Finished Size: No Brim: Approx. 8 x 9 inches laid flat, 20-21 inch circumference when stretched.
With Brim: Approx. 8 x 10.5 inches flat, 20-21 inch circumference when stretched.
Hook: Size J/10 (6.0 mm). Adjust hook size if necessary to obtain correct gauge.
Notions: Yarn Needle
Stitches and Abbreviations:
Blo – Back Loop Only
Ch – Chain
Rpt – Repeat
Sc – Single Crochet
Sk – Skip
Sl St – Slip Stitch
Yo – Yarn Over
Pattern Notes:
- This pattern contains the instructions for 2 styles, one with a folded brim and one without.
- Pattern is written in American English terms.
- Pattern is worked in rows lengthwise.
- Ch 1 at beg of row does not count as stitch.
- After row 1, the rest of the pattern will be worked in the BLO.
- Each time you return to your starting loop after working the row, sl st into the centre of the loop before turning – this does not count as a stitch.
- Weave in ends as needed.

Free Crochet Pattern:
Start by making a magic circle, then working from that circle (OR you may ch 8 and join with a sl st in the first st to make a ring):
For hat with folded brim ch 47, for hat without brim ch 41 with colour A, change to colour B and ch 4.
Row 1:
With Colour B, sc in the 2nd ch from hook and in each of the next 2 sts, change to colour A and sc across; at the end of the chain, when you reach your beginning loop, sl st into the centre of the loop (this does not count as a stitch). Turn. (50/44 sc)
Row 2:
Ch 1, working in the blo sl st in each sc all the way across to the last 3 sts, switch to colour B, sl st in the final 3 sts; turn.
Row 3:
Ch 1, with colour B, working in the blo sl st in each of the first 3 sts, switch to colour A, sl st in each of the remaining sts all the way across; at the end of the row, when you reach your beginning loop, sl st into the centre of the loop (this does not count as a stitch). Turn
Row 4:
Ch 1, working in the blo sl st in each sc all the way across to the last 3 sts, switch to colour B, sl st in the final 3 sts; turn.
Row 5:
Ch 1, with colour B, working in the blo sc in each of the first 3 sts, switch to colour A, sc in each of the remaining sts all the way across; at the end of the row, when you reach your beginning loop, sl st into the centre of the loop (this does not count as a stitch). Turn
Row 6:
Ch 1, working in the blo sl st in each sc all the way across to the last 3 sts, switch to colour B, sl st in the final 3 sts; turn.
Row 7:
Ch 1, with colour B, working in the blo sl st in each of the first 3 sts, switch to colour A, sl st in each of the remaining sts all the way across; at the end of the row, when you reach your beginning loop, sl st into the centre of the loop (this does not count as a stitch). Turn
Row 8:
Ch 1, working in the blo sl st in each sc all the way across to the last 3 sts, switch to colour B, sl st in the final 3 sts; turn.
Repeat rows 5-8 until work from the beginning measures approximately 18 inches.
Turn hat inside out so that wrong side is facing. Working through both thickness and the blo of both sides, sl st in each st across crocheting the two ends together. Fasten off leaving a long tail.
Using the long tail, sew the top of the hat closed. Fasten off and weave in your ends.
Video Tutorial:



This is such a pretty hat. Am I correct in reading this as only single-crocheting every 4th (after row 1) row, and otherwise it is only slip-stitched?
Yes 🙂