
This post contains affiliate links. This means that when you purchase through one of these links we will receive a small commission at no additional cost to you. Thank you for supporting Rich Texture Crochet!
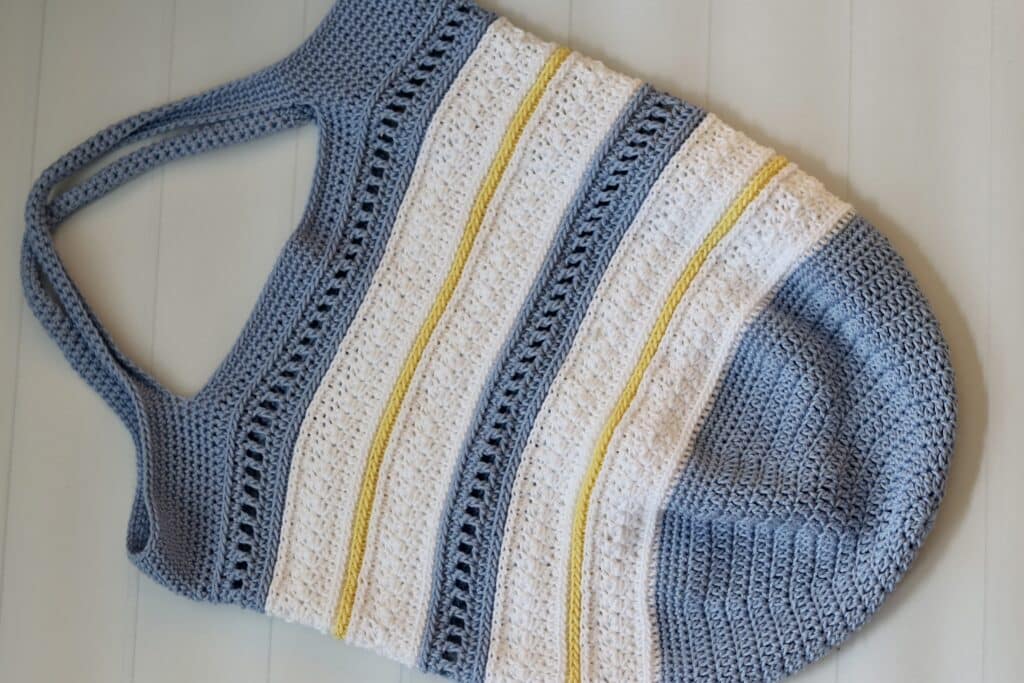
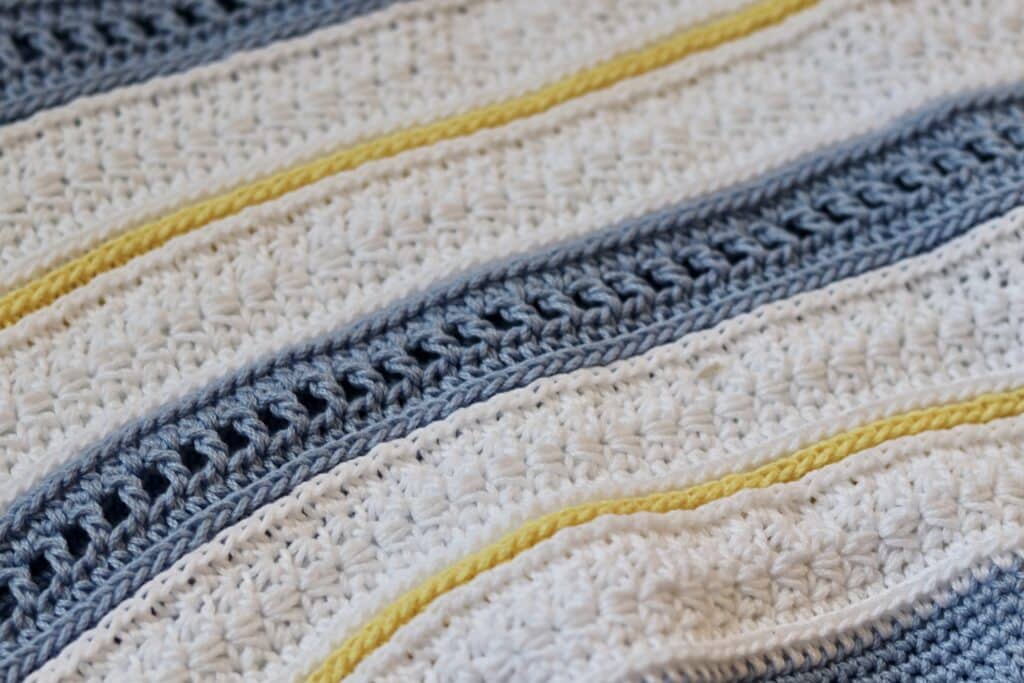
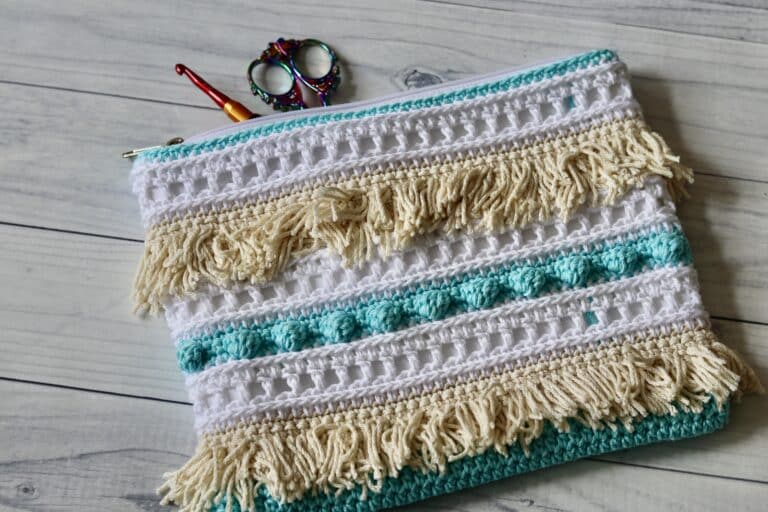
The Daisy Market Bag Crochet Pattern shouts “Spring” with its variety of textured stitches including the small daisy stitch.
Welcome week one of the 2023 Marvellous Market Bag Crochet Along! I love hosting this crochet along each year. This is the third year hosting the event and it is always a fun event where you can meet new friends, learn new stitches and use up some of the cotton yarn that you have around the house.
Market bags are a great crochet project, they are not only practical and great for the environment, but are smaller, quicker projects that are easily completed in a few days. You can make them for yourself, family members, friends or to sell at a craft fair. They a simply an all around great project to make.
This post contains affiliate links. This means that when you make a purchase through one of these links, Rich Textures Crochet will earn a small commission at no additional cost to yourself. Thank you for supporting Rich Textures Crochet!
As mentioned above, this is the first market bag design in the 2023 Marvellous Market Bag crochet along. If this is your first time hearing about this crochet along, be sure to checkout the introduction post here: 2023 Marvellous Market Bag Crochet Along.
The Construction:
Our crochet market bag today is worked in rounds from the bottom up. It is worked as one piece even into the continuous handles. I have worked the bag in a 100% cotton yarn called 24/7 Cotton by Lion Brand in three different colours which you can read about below. As I find even the worsted/medium weight yarn is on the lighter side, I paired it with a 4 mm crochet hook. In the video tutorial below I will be using a 4mm crochet how with a handmade handle that was crafted by a friend from college!
PDF Copies are also Available:
The pattern will be written out in full below and will forever remain free when viewed here on Rich Textures Crochet, and the written instruction will be followed by a video tutorial. However if you would like to add this pattern to your library or purchase an ad free PDF, you may do so from either my Etsy or Ravelry Shop linked below:
Click Here for the Daisy Market Bag on Etsy
Click Here for the Daisy Market Bag on Ravelry
Thank you for stopping by and I look forward to seeing you again soon! If you have not already, I invite you to sign up for my e-newsletter so that you will be notified each time I release a new free crochet pattern or stitch tutorial. You may also wish to check out the Jasmine Market Bag Crochet Pattern – a flower themed market bag from one of my previous crochet alongs!
Happy Crocheting!
Sarah
Daisy Market Bag Crochet Pattern:
Skill Level: Intermediate
Gauge: 18 x 5 rows of sc = 4 inches
Finished Size: Approximately 14 x 18 inches excluding the handles
Yarn: 24/7 Cotton by Lion Brand® (186 yds/170 m; 100g/3.5 oz; 100% cotton; (4) worsted weight). You will need 2 balls Sky (Colour A), 2 balls white (Colour B), about 40 yards Lemon (Colour C)
Hook: Size G/6 (4 mm) hook.
Notions: Yarn Needle
Stitches and Abbreviations:
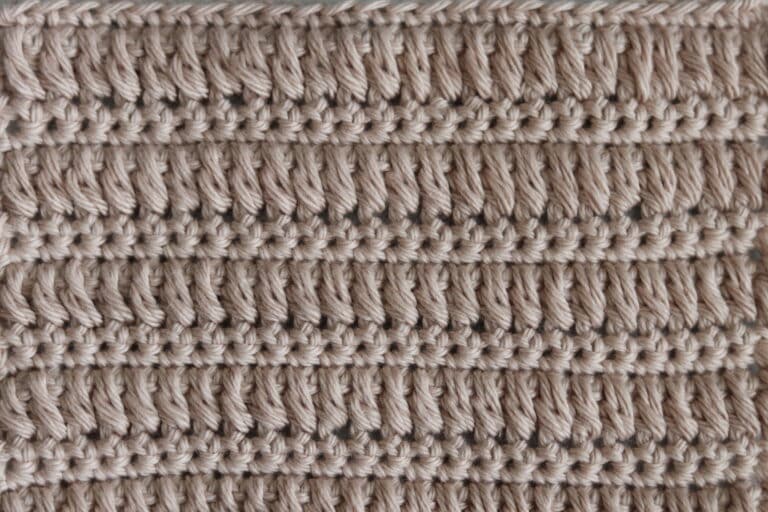
3rd lp – Third Loop (At the back of the hdc st, the loop that runs below the top back loop).
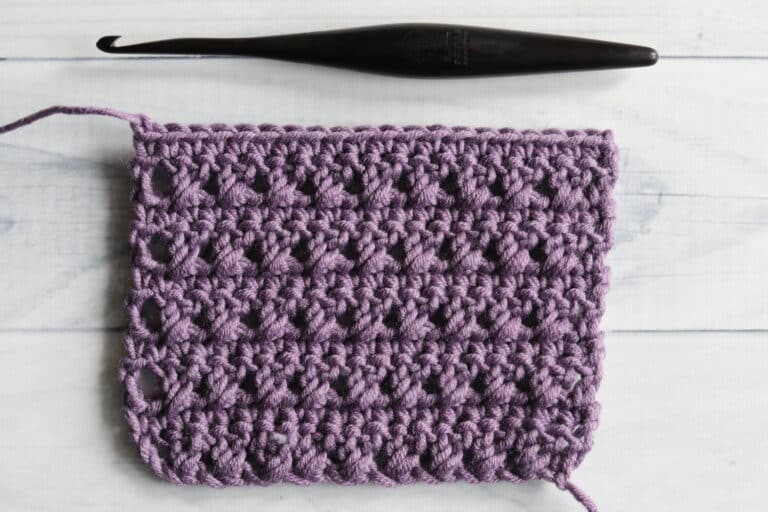
Beg Daisy St – Beginning Daisy Stitch (insert your hook in the 2nd ch from your hook, yarn over and draw up a loop. Insert your hook into the stitch at the base of the chain, yarn over and draw up a loop. Skip the next stitch. Insert your hook in the next stitch, yarn over and draw up a loop. Yarn over and draw through 4 loops on your hook. Ch 1. Beginning Daisy Stitch Made).
Ch – Chain
Daisy St – Daisy Stitch (Insert your hook in the chain stitch, yarn over and draw up a loop. Insert your hook into the stitch at the base of the previous daisy stitch, yarn over and draw up a loop. Skip the next stitch. Insert your hook in the next stitch, yarn over and draw up a loop. Yarn over and draw through 4 loops on your hook. Ch 1. Daisy Stitch Made).
Dc – Double Crochet
Hdc – Half Double Crochet
Rpt – Repeat
Sc – Single Crochet
Sk – Skip
Sl st – Slip stitch
Yo – Yarn over
Pattern Notes:
- Pattern is written in American English terms.
- Pattern is worked in rounds, as one piece, from the bottom up to the handles.
- Ch 1 at beginning of round does not count as stitch.
- Weave in ends as needed.
- Do not turn unless stated otherwise.
Free Crochet Pattern:
Bottom:
With Colour A, Ch 4
Rnd 1: 11 dc in the 4th ch from hook (ch 3 counts as a st), join with a sl st in the 1st st. (12 Sts)
Rnd 2: Ch 3, dc in the same st as joining, 2 dc in each st all the way around, join with a sl st in the 1st st. (24 sts)
Rnd 3: Ch 3, 2 dc in the next st, * dc in the next, 2 dc in the next st; Rpt from * around, join with a sl st in the 1st st. (36 sts)
Rnd 4: Ch 3, dc in the next st, 2 dc in the next st, * dc in each of the next 2 sts, 2 dc in the next st; Rpt from * around, join with a sl st in the 1st st. (48 sts)
Rnd 5: Ch 3, dc in each of the next 2 sts, 2 dc in the next st, * dc in each of the next 3 sts, 2 dc in the next st; Rpt from * around, join with a sl st in the 1st st. (60 sts)
Rnd 6: Ch 3, dc in each of the next 3 sts, 2 dc in the next st, * dc in each of the next 4 sts, 2 dc in the next st; Rpt from * around, join with a sl st in the 1st st. (72 sts)
Rnd 7: Ch 3, dc in each of the next 4 sts, 2 dc in the next st, * dc in each of the next 5 sts, 2 dc in the next st; Rpt from * around, join with a sl st in the 1st st. (84 sts)
Rnd 8: Ch 3, dc in each of the next 5 sts, 2 dc in the next st, * dc in each of the next 6 sts, 2 dc in the next st; Rpt from * around, join with a sl st in the 1st st. (96 sts)
Rnd 9: Ch 3, dc in each of the next 6 sts, 2 dc in the next st, * dc in each of the next 7 sts, 2 dc in the next st; Rpt from * around, join with a sl st in the 1st st. (108 sts)
Rnd 10: Ch 3, dc in each of the next 7 sts, 2 dc in the next st, * dc in each of the next 8 sts, 2 dc in the next st; Rpt from * around, join with a sl st in the 1st st. (120 sts)
Rnd 11: Ch 3, dc in each of the next 8 sts, 2 dc in the next st, * dc in each of the next 9 sts, 2 dc in the next st; Rpt from * around, join with a sl st in the 1st st. (132 sts)
Rnd 12: Ch 3, dc in each of the next 9 sts, 2 dc in the next st, * dc in each of the next 10 sts, 2 dc in the next st; Rpt from * around, join with a sl st in the 1st st. (144 sts)
Rnds 13-15: Ch 1, sc in each st all the way around, join with a sl st in the 1st st. (144 sts) Switch to colour B.
Sides:
Rnd 1: With colour B, ch 1, hdc in the 1st st and in each st around. Join with a sl st in the 1st st.
Rnd 2: Ch 1, working in the 3rd lp all the way around, hdc in the 1st st and each st around. Join with a sl st in the 1st st.
Rnd 3: Ch 3, beg daisy st (See “Stitches and Abbreviations”, daisy st (See “Stitches and Abbreviations) in each st all the way around, working your final daisy st into the same st as joining, do not work the final ch-st. Join with a sl st in the 1st st. Ch 3, TURN.
Rnd 4: Ch 3, beg daisy st, daisy st in each st all the way around, working your final daisy st into the same st as joining, do not work the final ch-st. Join with a sl st in the 1st st. Ch 1, TURN.
Rnd 5: Hdc in each st all the way around. Join with a sl st in the 1st st. Ch 1, do Not Turn. Switch to colour C.
Rnd 6: With colour C, working in the 3rd lp all the way around, hdc in the 1st st and each st around. Join with a sl st in the 1st st. Switch to colour B. Ch 1.
Rnd 7: With colour B, working in the 3rd lp all the way around, hdc in the 1st st and each st around. Join with a sl st in the 1st st. Ch 1.
Rnd 8: Working in the 3rd lp all the way around, hdc in the 1st st and each st around. Join with a sl st in the 1st st.
Rnd 9 Ch 3, beg daisy st, daisy st in each st all the way around. Join with a sl st in the 1st st. Ch 3, TURN.
Rnd 10: Ch 3, beg daisy st (See “Stitches and Abbreviations”, daisy st (See “Stitches and Abbreviations) in each st all the way around. Join with a sl st in the 1st st. Ch 1, TURN.
Rnd 11: Hdc in each st all the way around. Join with a sl st in the 1st st. Ch 1, do Not Turn. Switch to colour A.
Rnd 12: With colour A, working in the 3rd lp all the way around, hdc in the 1st st and each st around. Join with a sl st in the 1st st. Ch 1.
Rnd 13: Working in the 3rd lp all the way around, hdc in the 1st st and each st around. Join with a sl st in the 1st st. Ch 4 (Counts as a dc, ch-1).
Rnd 14: Sk the next st, *dc in the next st, ch 1, sk the next st; Rpt from * around, join with a sl st in the 3rd ch of the starting ch-4. Ch 1.
Rnd 15: Hdc in the 1st st and each st and ch-1 sp all the way around. Join with a sl st in the 1st st. Switch to colour B.
Rnd 16: With colour B, working in the 3rd lp all the way around, hdc in the 1st st and each st around. Join with a sl st in the 1st st. Ch 1.
Rnds 17 – 30: Repeat rnds 2-15 once more. Do not switch to colour B at the end of the repeat rnd 14 but continue to work in colour A.
Top and Handles:
Rnd 1: With Colour A, working in the 3rd lp all the way around, hdc in the 1st st and each st around. Join with a sl st in the 1st st. Ch 1.
Rnds 2-4: Ch 1, sc in each st around. Join with a sl st in the 1st st.
Rnd 5: Ch 1, sc in the same st as joining, sc in each of the next 37 sts, ch 50, sk the next 34 sts, sc in each of the next 38 sts, ch 50, sk the next 34 sts, join with a sl st in the 1st st.
Rnds 6-10: Ch 1, sc in each st (including each ch st) around. Join with a sl st in the 1st st. (144 sts)
Fasten off, weave in your ends.
Video Tutorial:
The photographs and pattern contained in this document are the property of Rich Textures Crochet.
This pattern is for personal use only.
No unauthorized reproduction, in whole or in part, or distribution of this pattern or content is permitted. ALL FINISHED PRODUCTS from this pattern can be used for local sales and sold online.
Thank you so much for supporting Rich Textures Crochet! To stay in touch or see more great products, be sure to visit me on Facebook and Instagram (Rich Textures Crochet). Thanks again! Happy Crocheting!


your site is horrible. first you say the patterns are free but you ask for a cc. then when I am finally able to get into your site it is filled with dozens of ads all through the pattern out of the 3 patterns I wanted was only able to get into 1 and was directed to etsy or eBay to buy the bag.
Hello Lois, no where on my site do I ask for a credit card. All of my patterns are free to follow here on my website. Yes there are ads, however this is how I receive compensation for the pattern that I am offering for free (an ad company pays me so that you don’t have to). I do offer an ad free PDF which may be purchased however it is not necessary to make the design. My PDFs are only available in my Etsy and Ravelry shops. Not on ebay – if you happen to find them there please let me know as they are being sold without permission! Thank you!