
This post contains affiliate links. This means that when you purchase through one of these links we will receive a small commission at no additional cost to you. Thank you for supporting Rich Texture Crochet!
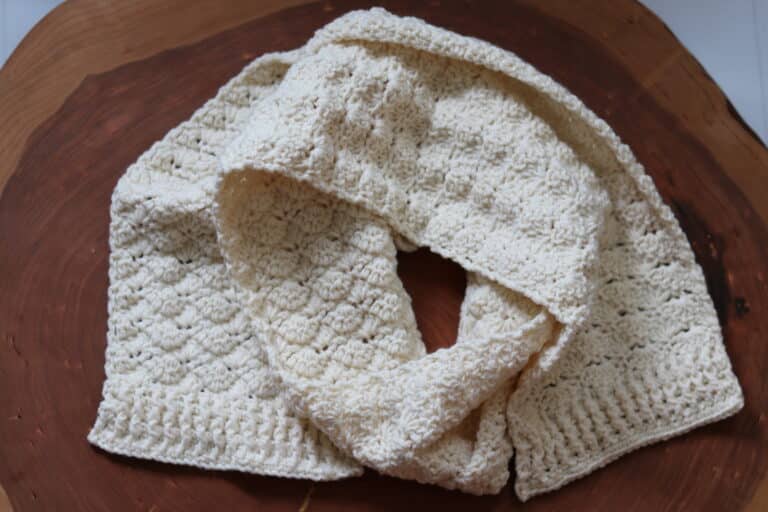
Don’t you just love to cozy up under a warm throw after a long, cold day? This free crochet throw pattern won’t disappoint!
This past summer I had been asked to participate in a mystery crochet along where we were creating a blanket. This block pattern today is a modified version of that square which can be found here: The Rip Tides Square – Free Crochet Pattern.
I loved the way the colours fell in the square so much that I just knew I wanted to make an entire blanket with the same concept. The square today has a few modifications.

The Design:
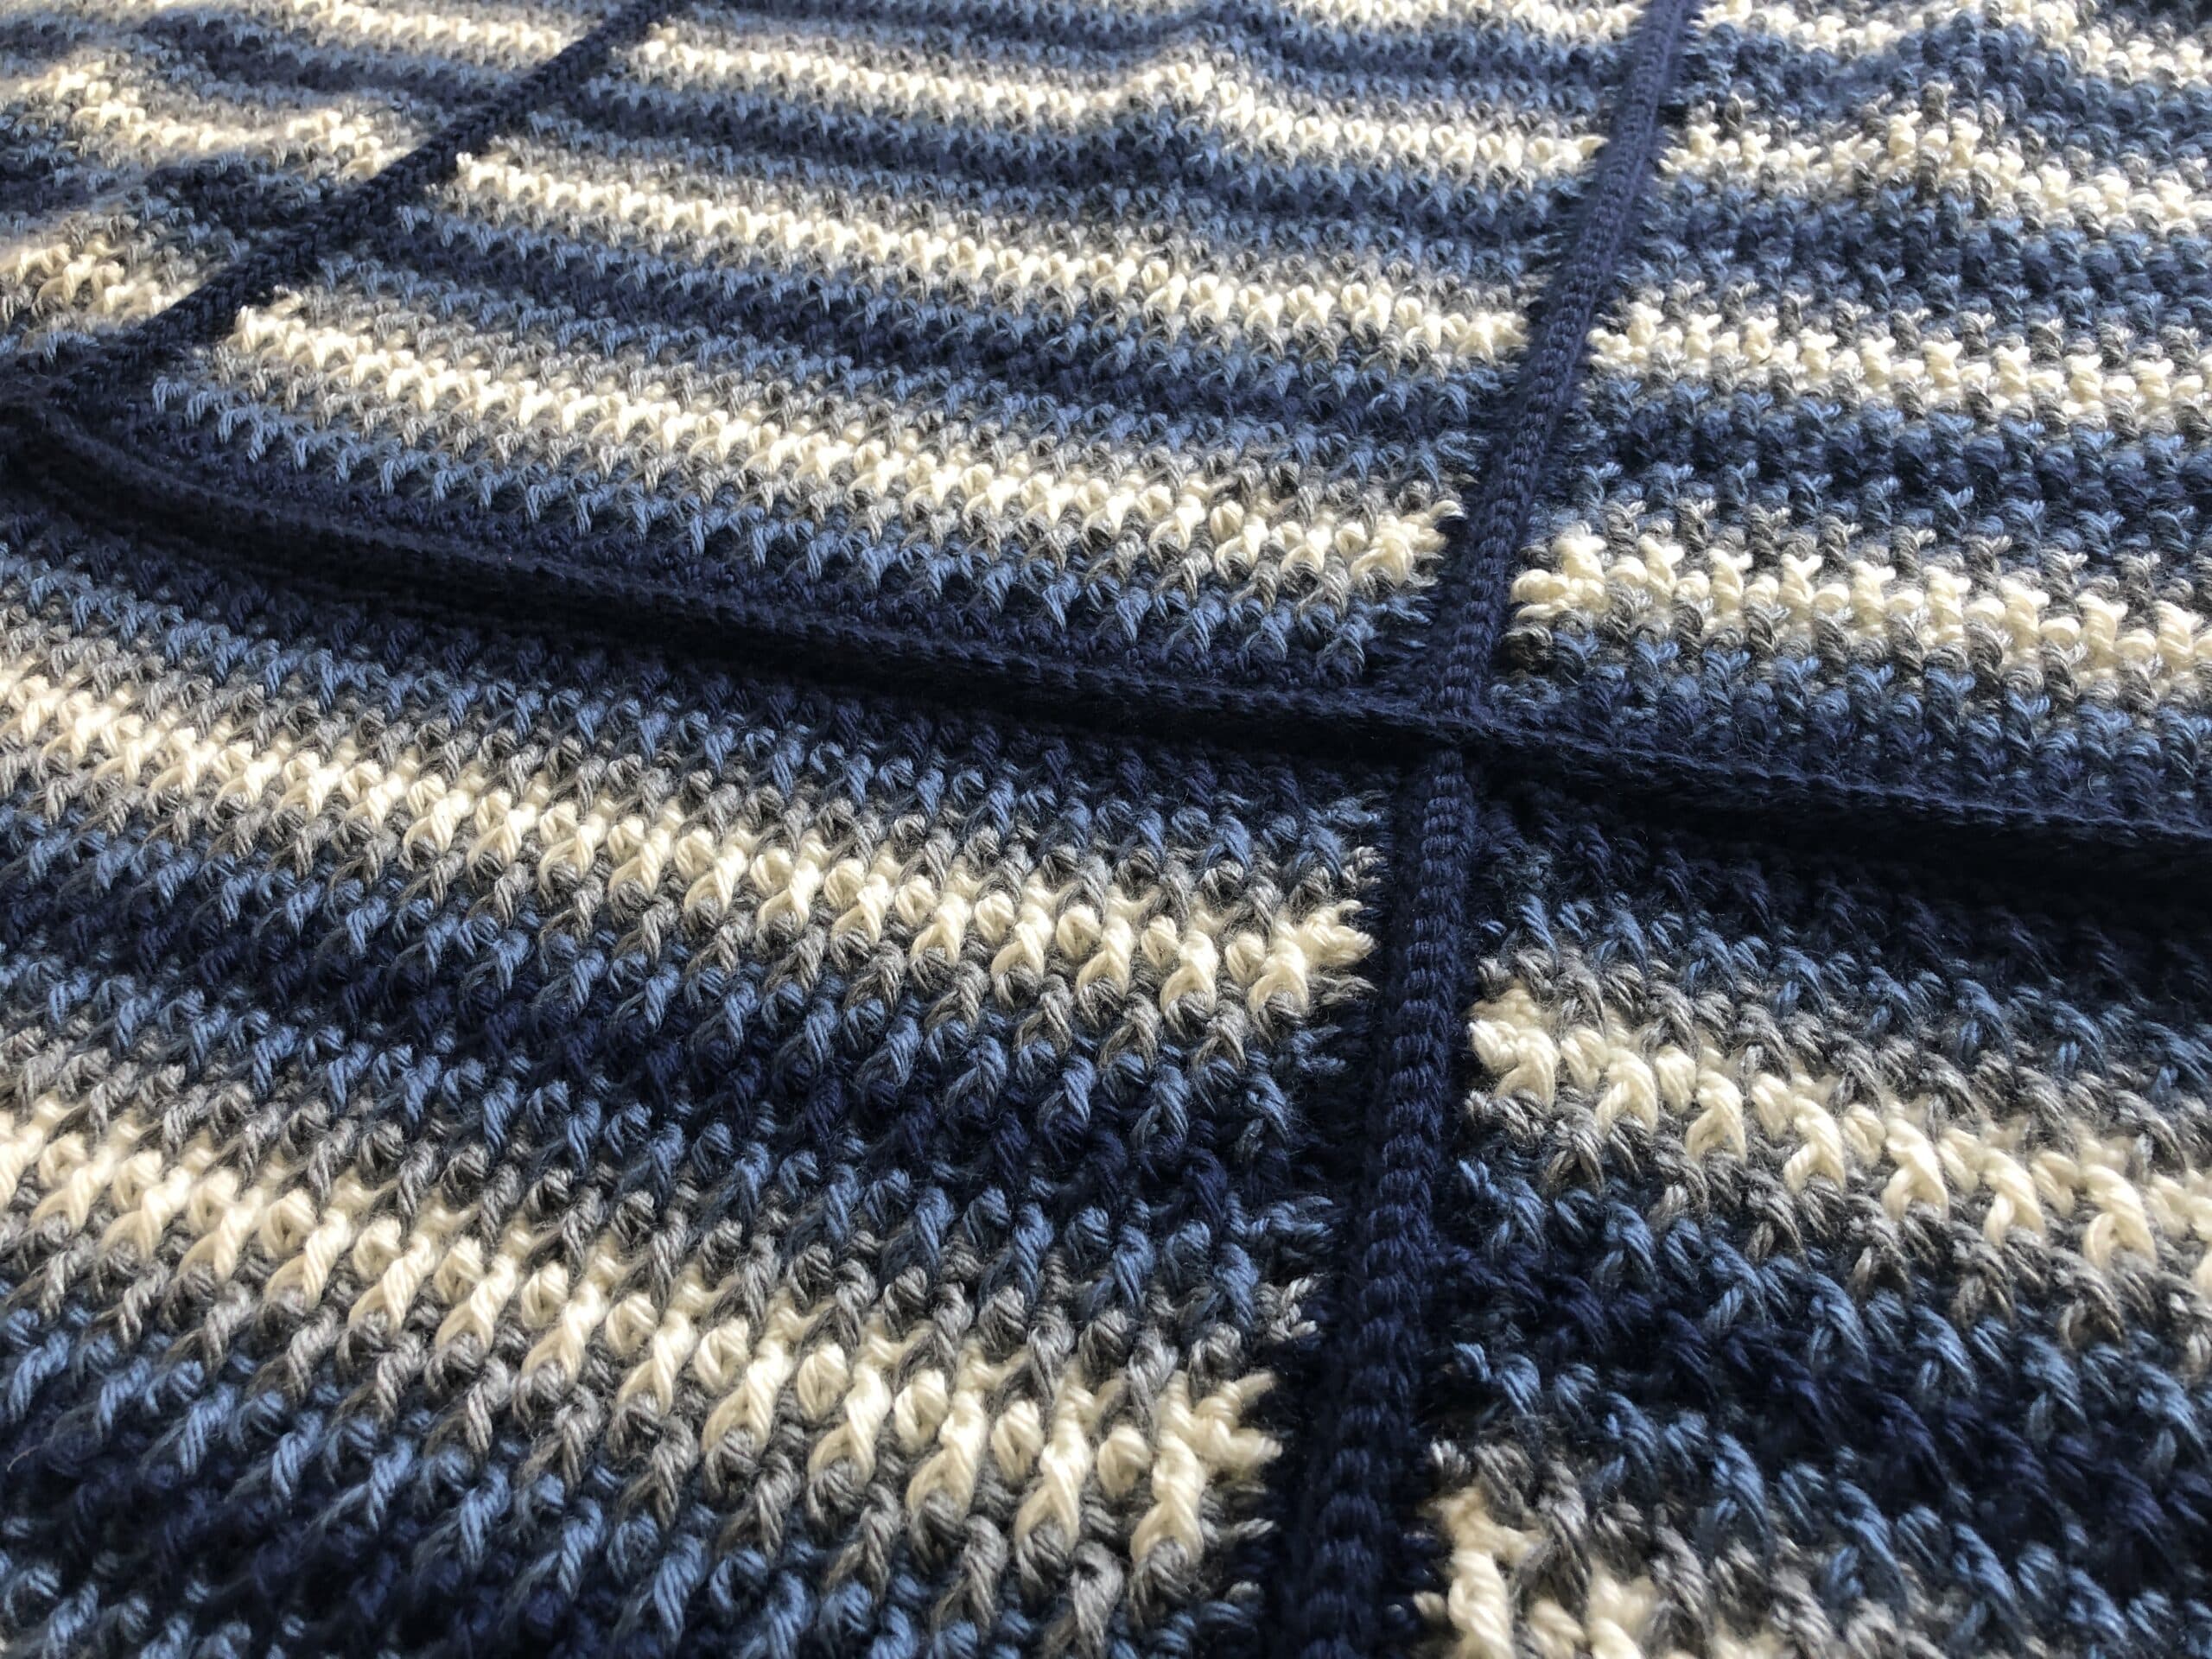
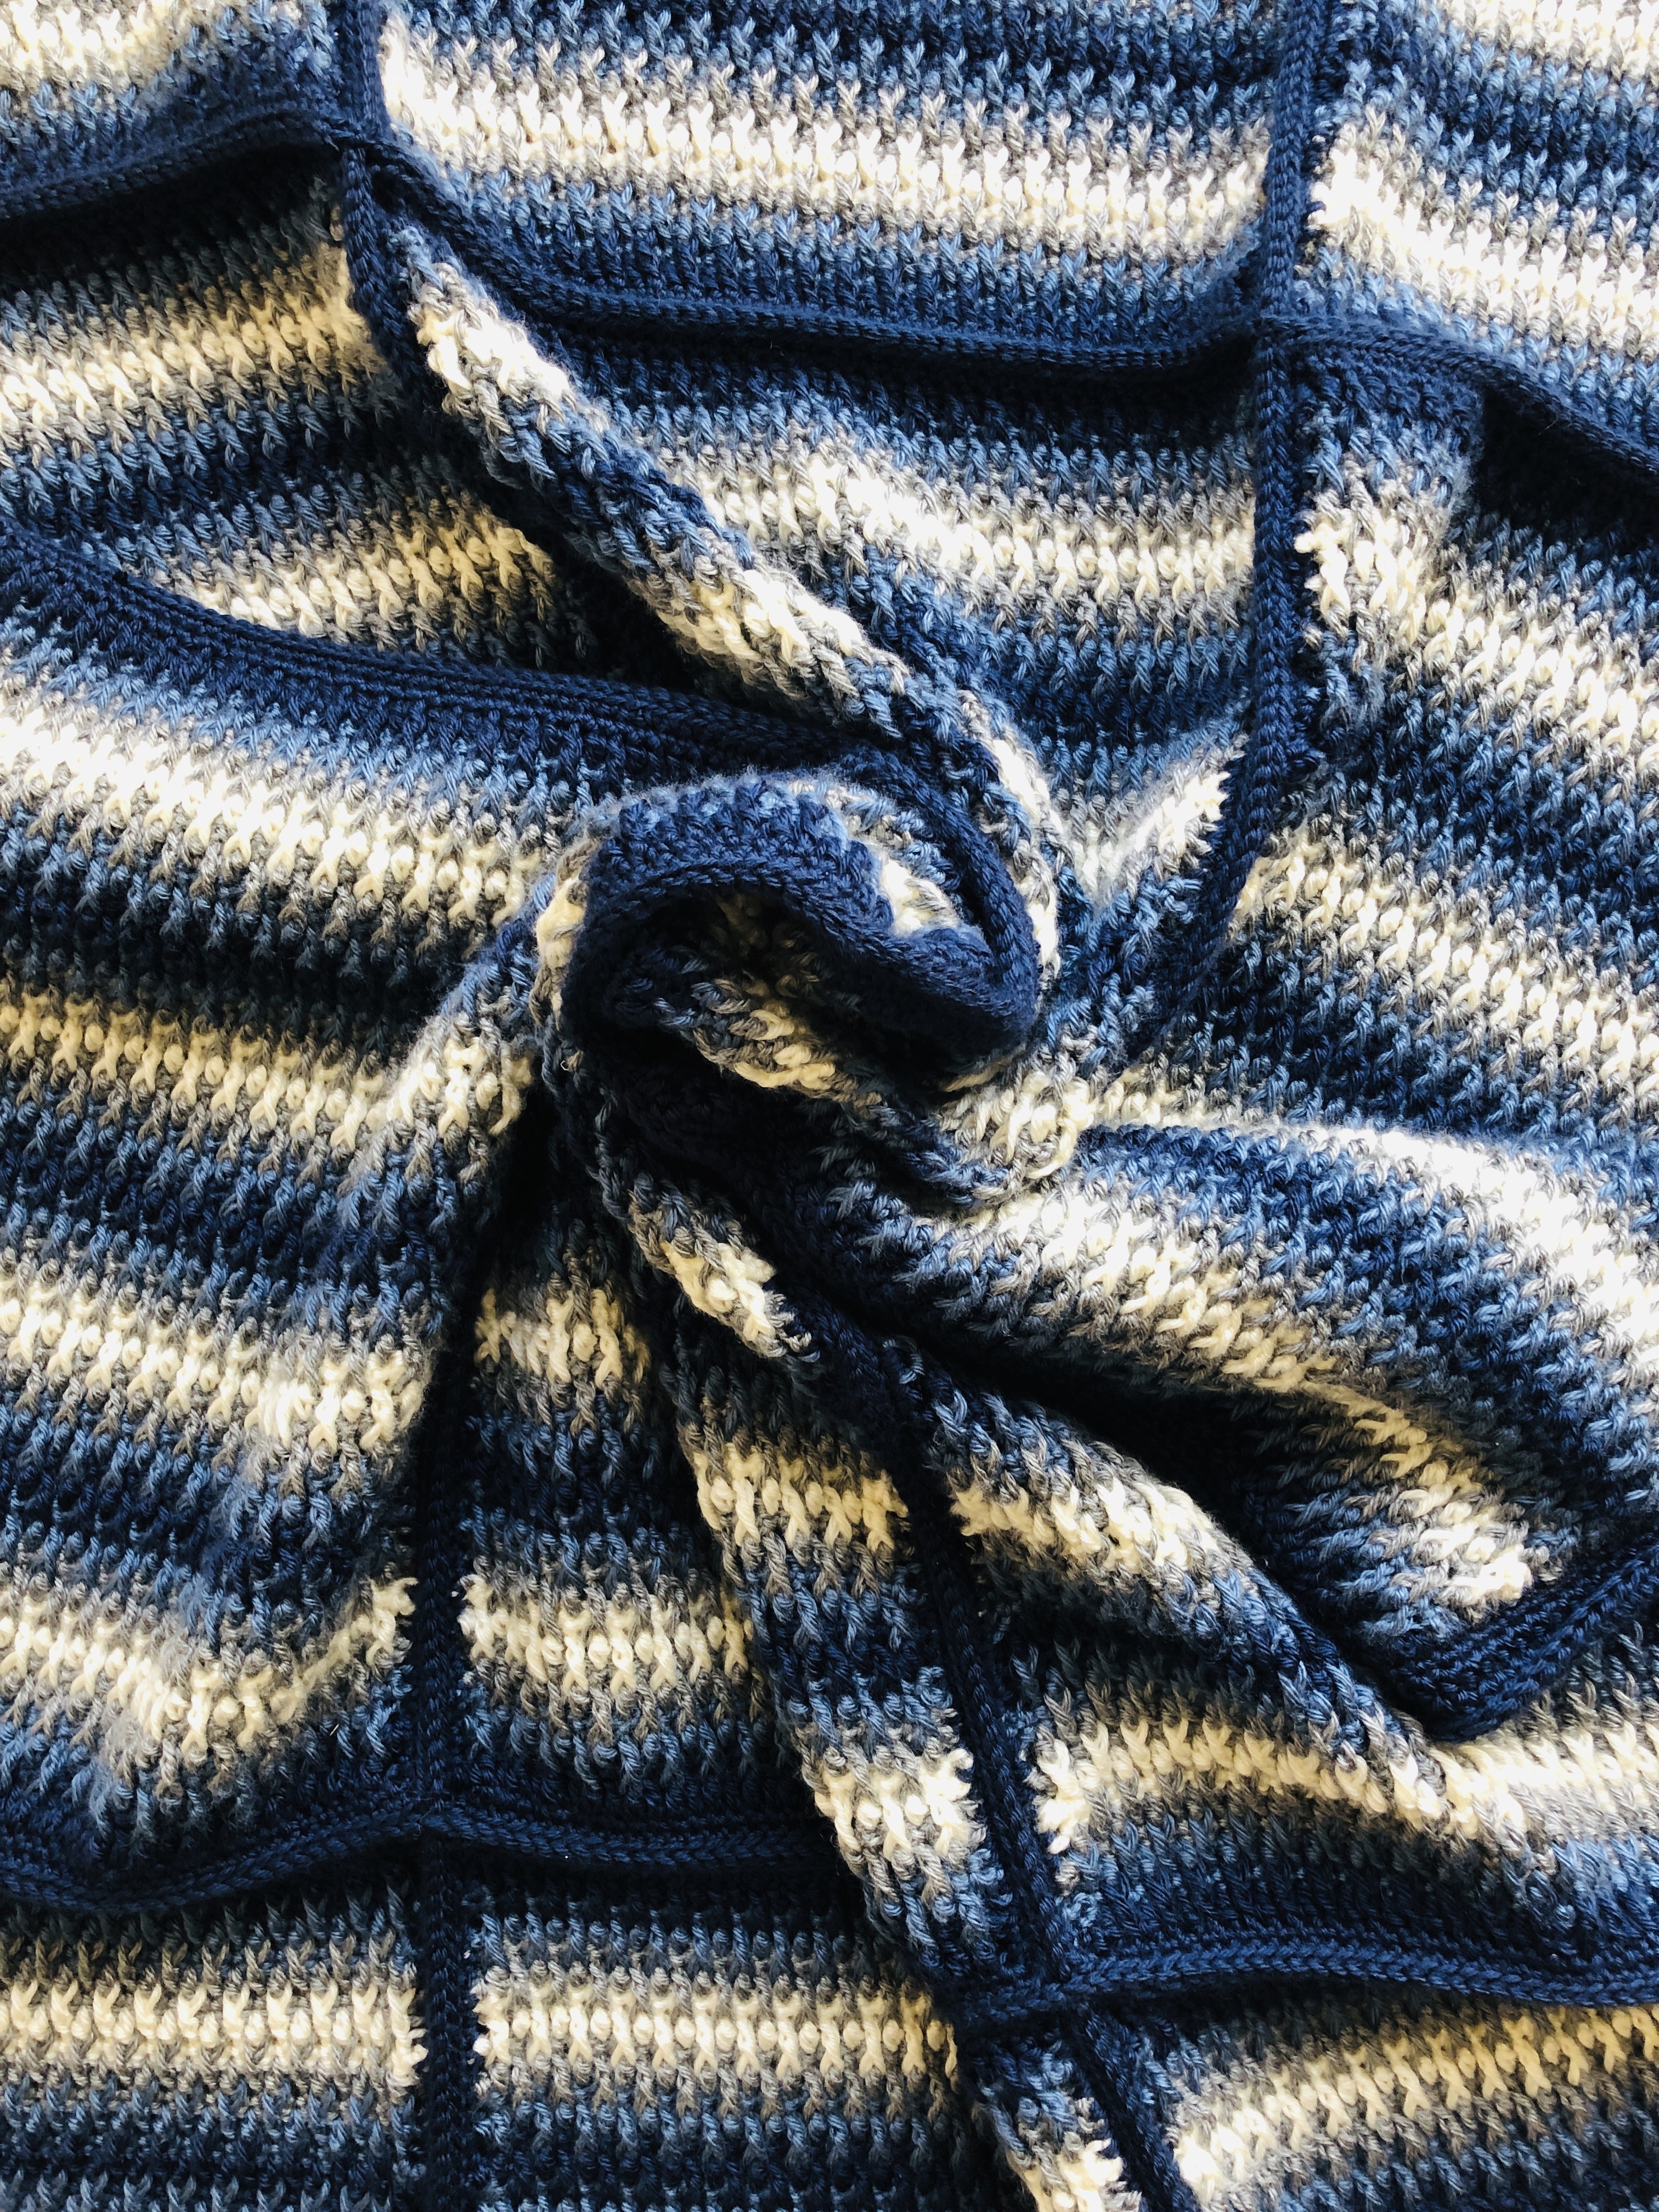
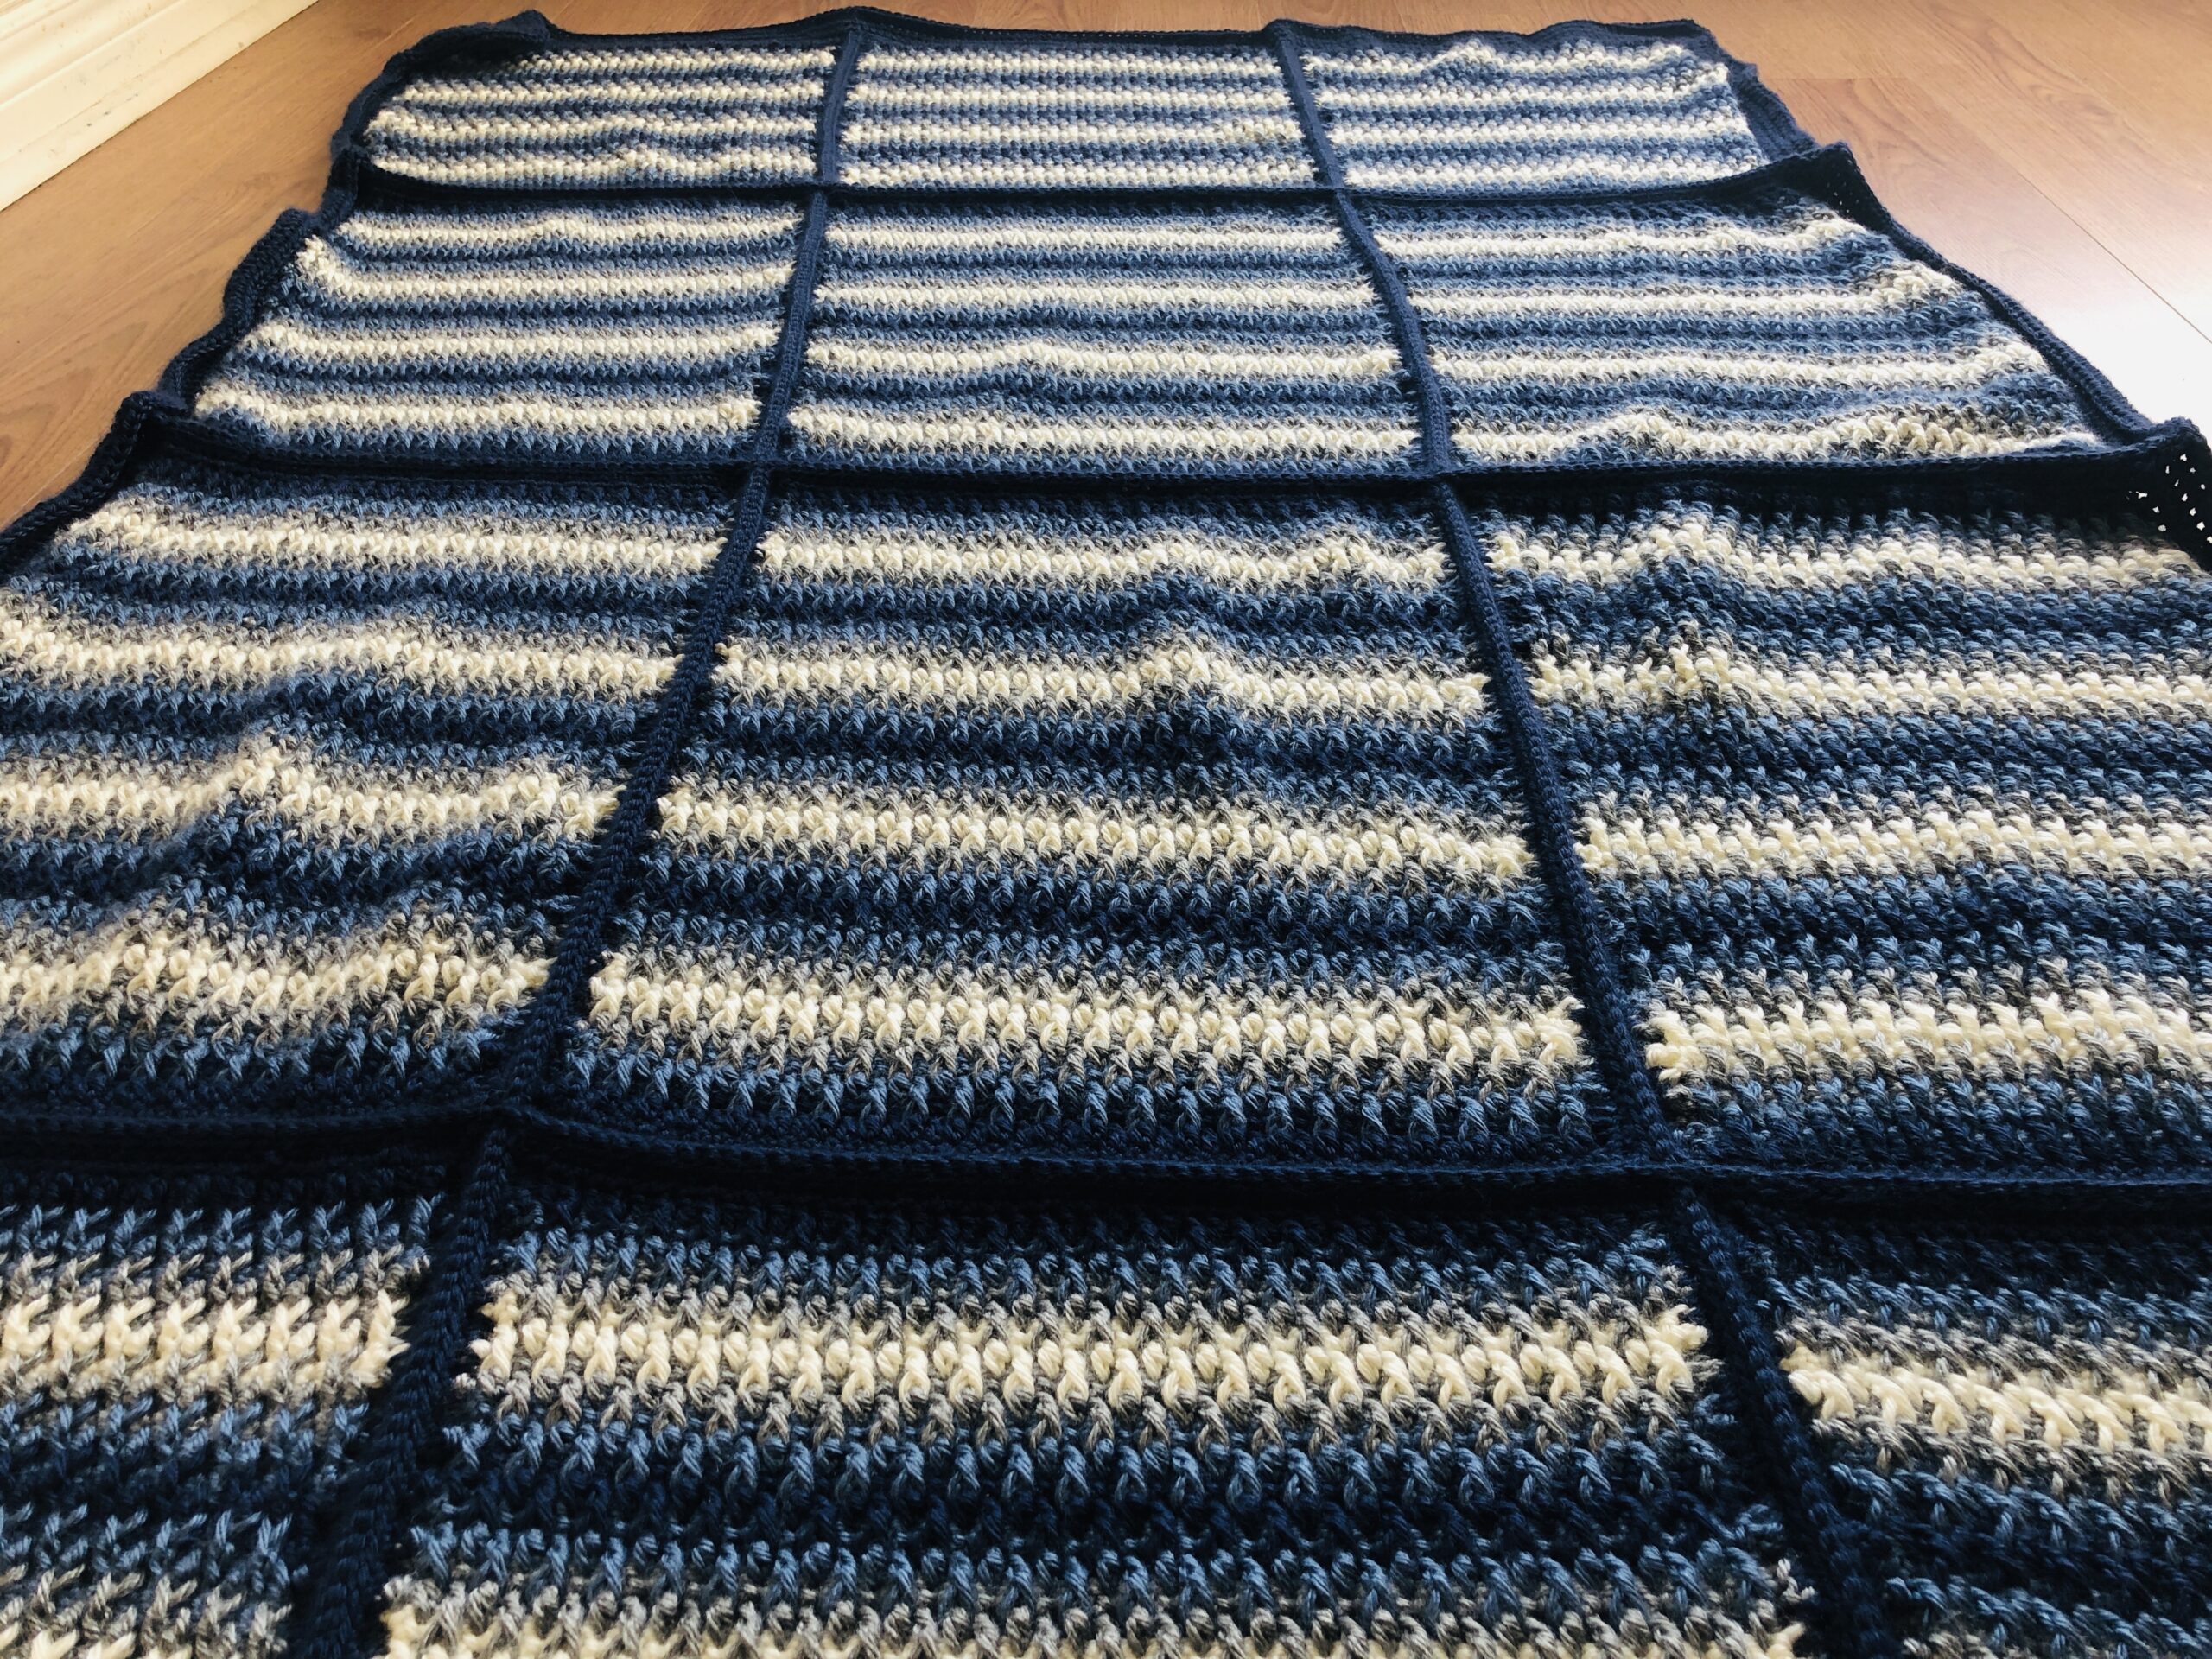
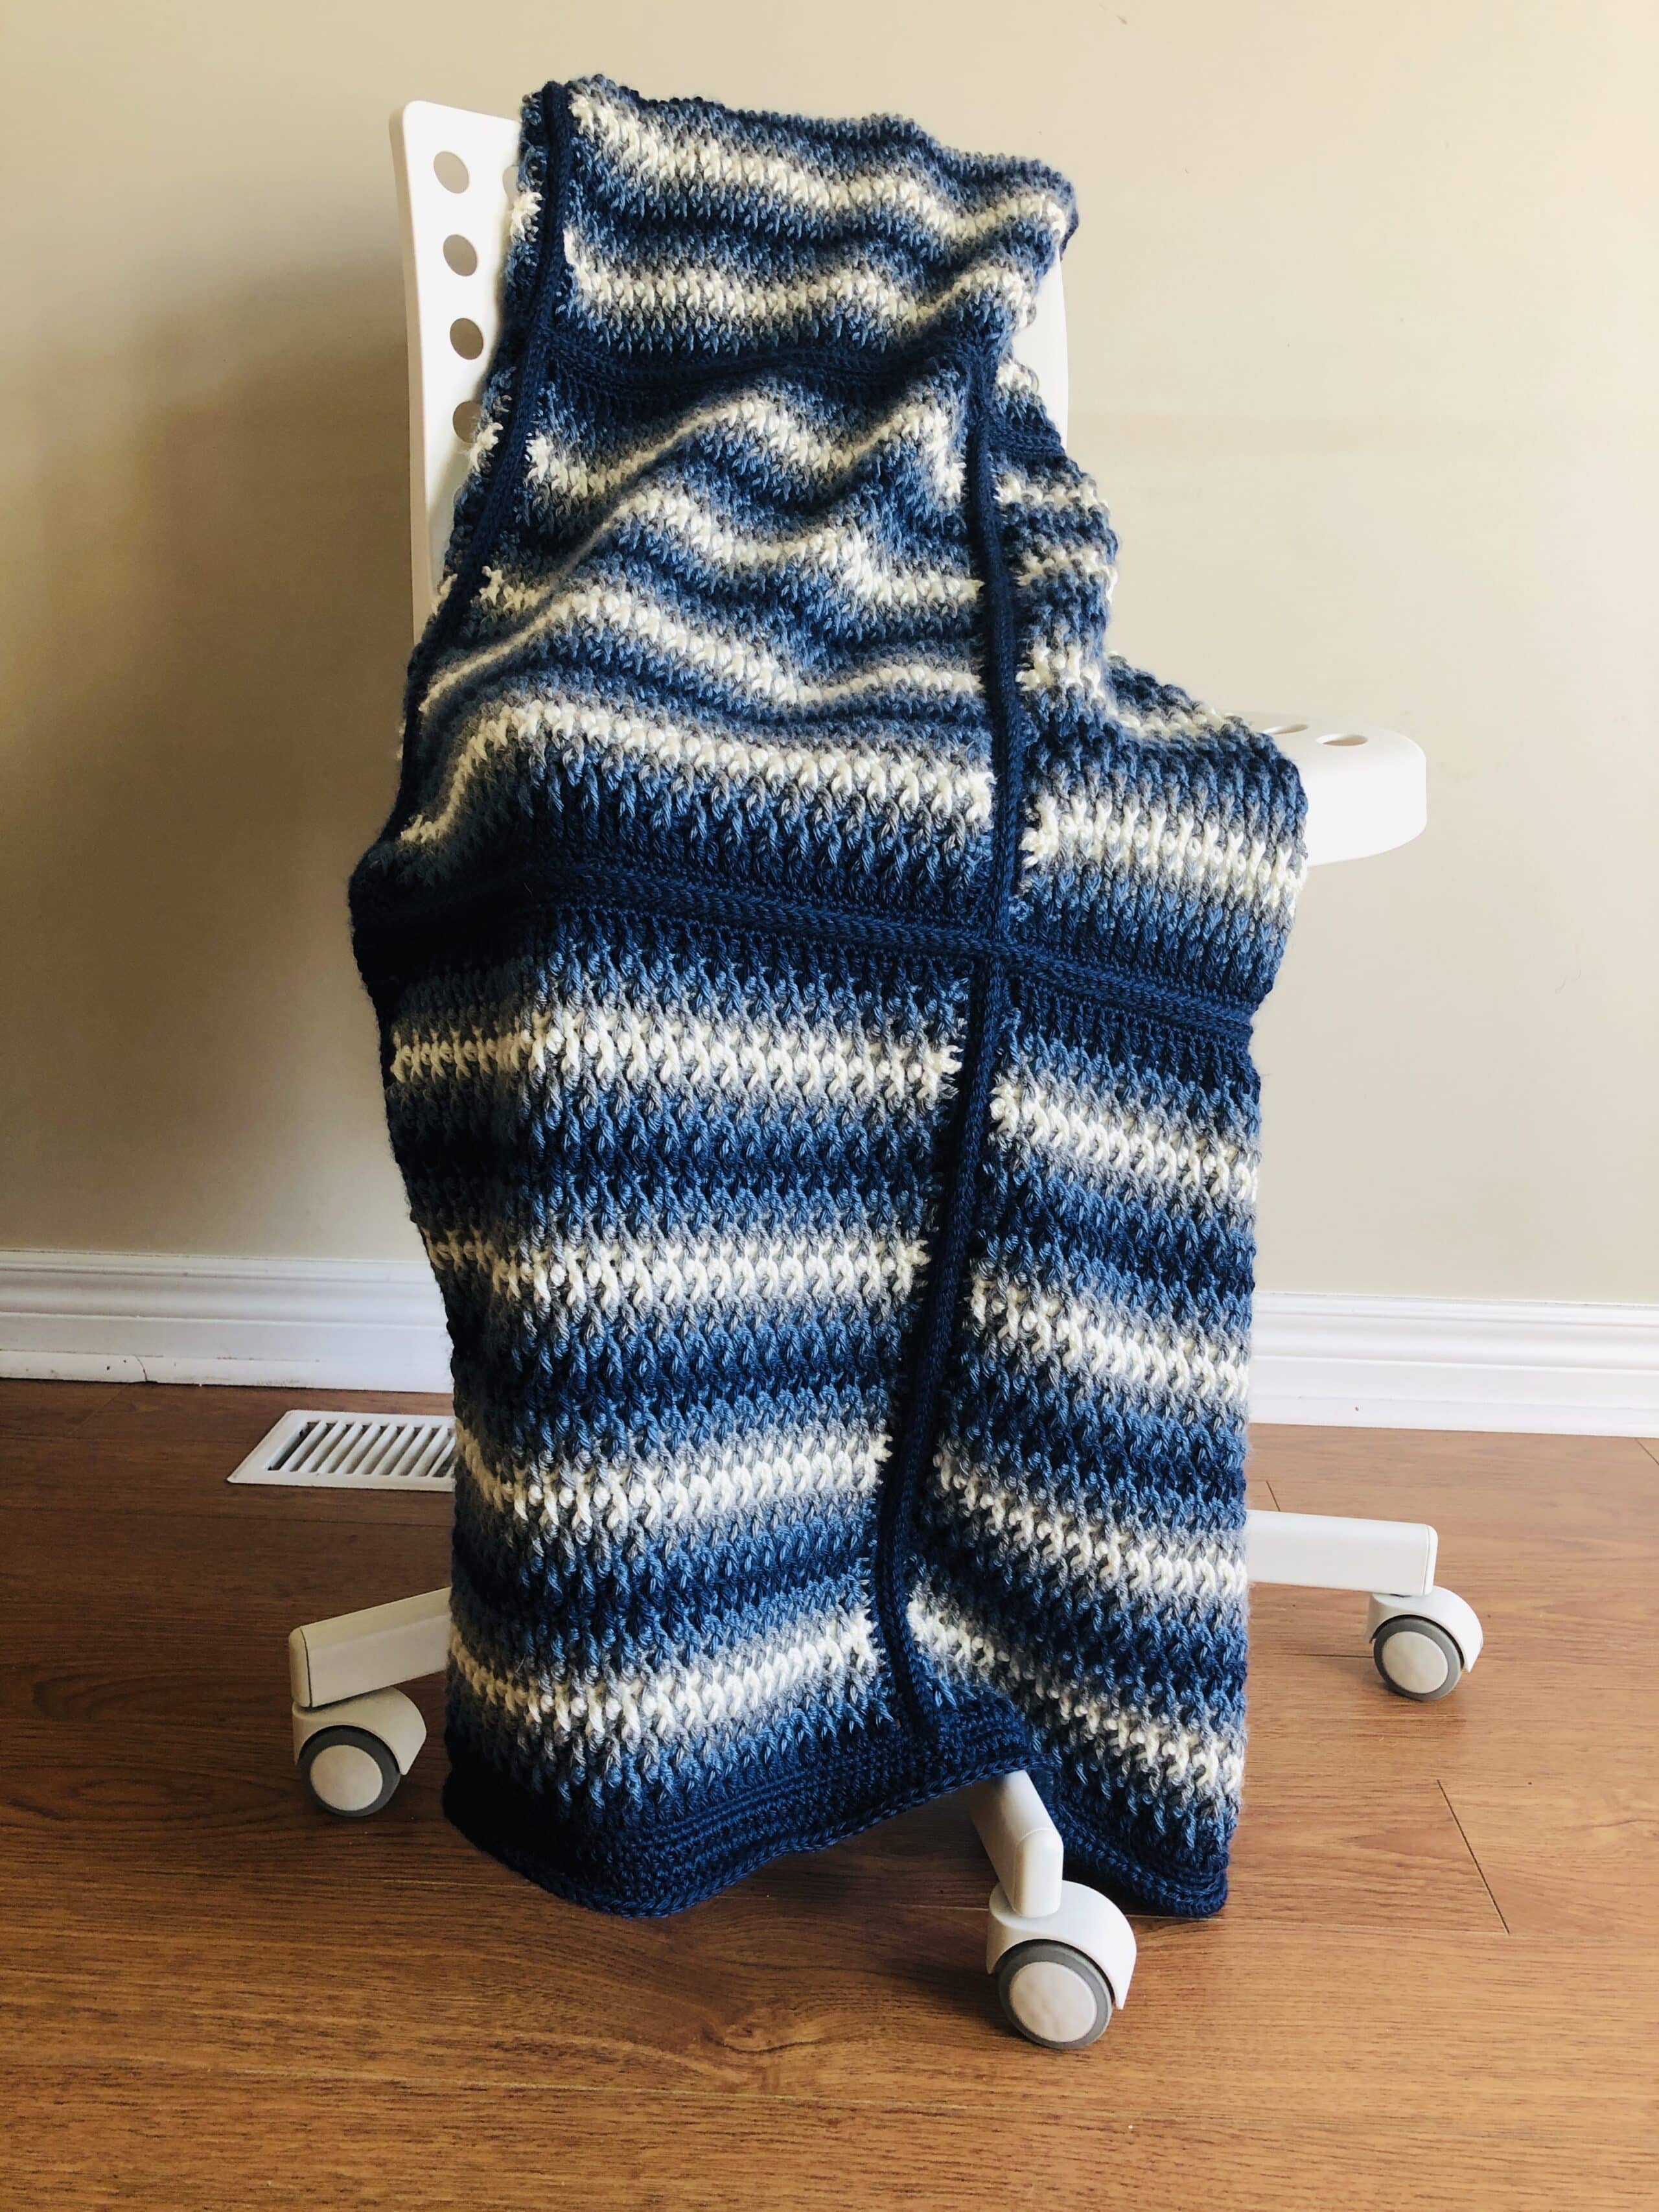
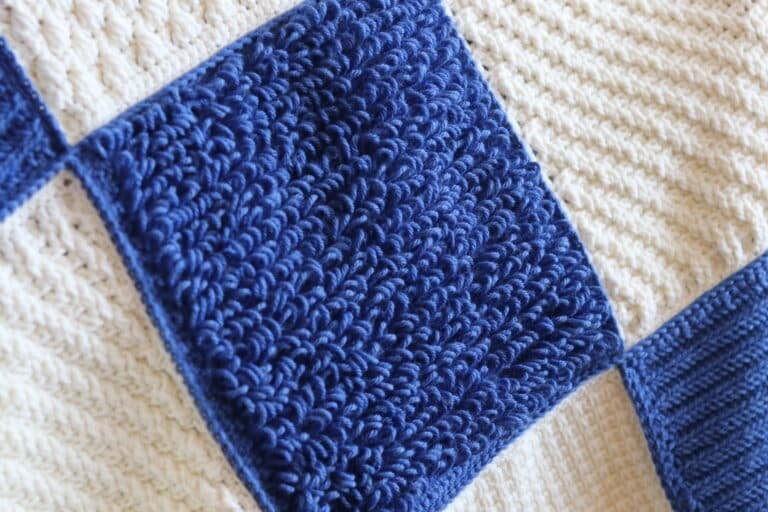
The Changing Tides crochet throw is made up of twelve individual blocks that are crocheted together in the end. The blocks are rectangular in shape and placed along side one another in a 3 x 4 grid.
Each block is worked in rows and features a pattern that is sometimes referred to as the Alpine Stitch. I love this stitch! It is quite fun to work and goes fairly quickly once you get the hang of it. Plus, the combination of double crochet and front post double crochet stitches creates a beautiful texture!
The Yarn:
The yarn I selected for this crochet throw is the Caron Simply Soft yarn by Yarnspirations. You can see all the details about it here on the Yarnspirations website: Yarnspirations.com.
I love the Caron Simply Soft yarn. It has a nice sheen to it, fabulous drape and is so so soft! I have worked blankets in this yarn before. You may remember the Erie Waters Throw found here: Erie Waters Throw CAL – Introduction and Materials.
The Changing Tides Throw features four different colours. When changing colours you may choose to fasten off and weave in the ends after each switch or you may choose to carry the yarn up the side of the blanket. This is the method I chose and that you can see in the video. Because you will be working an edging around each block, these tails are easily hidden.
PDF Copy:
The full crochet pattern can be found below followed by a video tutorial, however if you would like to add this pattern to your library or purchase an ad free PDF, you can do so through either my Etsy or Ravelry Shop linked below.
The Changing Tides Throw on Etsy
The Changing Tides Throw on Ravelry
Thank you so much for stopping by! Be sure to connect on social media and don’t hesitate to take a look around as some of the other great free crochet patterns here on my blog!
Until next time, happy crocheting!
Sarah
Please note: This page contains affiliate links which means I will earn a small commission from each purchase made through the link. Thank you so much for supporting RTC!
Changing Tides Throw:
Skill Level: Easy
Gauge: 14 sts x 13 rows of pattern = 4 inches.
Finished Size: Each block measures approximately 13 x 18 inches. Finished blanket measures approximately 45 x 65 inches.
Yarn:
Approximately 4 balls of Colour A: Dark Country Blue (Caron Simply Soft by Yarnspirations (%100 acrylic; 170 g / 6 oz, 288 meters / 315 yards; Worsted Weight)
Approximately 3 balls of Colour B: Country Blue (Caron Simply Soft by Yarnspirations (%100 acrylic; 170 g / 6 oz, 288 meters / 315 yards; Worsted Weight)
Approximately 4 balls of Colour C: Grey Heather (Caron Simply Soft Heathers by Yarnspirations (%100 acrylic; 141 g / 5 oz, 288 meters / 250 yards; Worsted Weight)
Approximately 3 balls of Colour D: Off White (Caron Simply Soft by Yarnspirations (%100 acrylic; 170 g / 6 oz, 288 meters / 315 yards; Worsted Weight)
Hook: Size J/10 (6.0 mm). Adjust hook size if necessary to obtain correct gauge. I’m using a Wooden Furls Crochet Streamline hook in Ebony. BUY IT NOW
Notions: Yarn Needle.
Stitches and Abbreviations:
Ch – Chain
Dc – Double Crochet
Hdc – Half Double Crochet
Fpdc – Front post Double Crochet (a double crochet stitch worked around the post of the double crochet two rows below)
Lp – Loop
Lps – Loops
Rpt – Repeat
Sc – Single Crochet
Sk – Skip
Sl st – Slip stitch
Yo – Yarn over
Pattern Notes:
- Pattern is written in American English terms.
- Pattern is worked in rows.
- Ch 1 at the beginning of a row does not count as a stitch.
- Ch 3 at the beginning of a row counts as a dc.
- To work around the post of the double crochet, with your hook in front of your work, yarn over, insert your hook from right to left behind the post of the double crochet stitch indicated two rows below. Complete the stitch as you would for a double crochet worked in the top of the stitch.
Free Crochet Pattern:
With Colour A, ch 49.
Row 1: Dc in the 4th chain from hook and each each ch st to the end. Turn. (47 sts)
Row 2: Ch 1, Sc in the first st and in each across. Turn. Change to colour B. (47 sts)
Row 3: With Colour B, ch 3 (counts as dc), sk first sc, * sk next sc, but working around the post of the dc below fpdc, dc in next sc; Rpt from * to end of row, dc in the final st. Turn. (47 sts)
Row 4: Ch 1, Sc in the first st and in each across. Turn. Change to colour C. (47 sts)
Row 5: With Colour C, ch 3, sk first sc, dc in next sc, * sk next sc, but working around the post of the dc below fpdc, dc in next sc; Rpt from * to end of row, dc in the final st. Turn. (47 sts)
Row 6: Ch 1, Sc in the first st and in each across. Turn. Change to colour D. (47 sts)
Row 7: With Colour D, ch 3 (counts as dc), sk first sc, * sk next sc, but working around the post of the dc below fpdc, dc in next sc; Rpt from * to end of row, dc in the final st. Turn. (47 sts)
Row 8: Ch 1, Sc in the first st and in each across. Turn. Change to colour C. (47 sts)
Row 9: With Colour C, ch 3, sk first sc, dc in next sc, * sk next sc, but working around the post of the dc below fpdc, dc in next sc; Rpt from * to end of row, dc in the final st. Turn. (47 sts)
Row 10: Ch 1, Sc in the first st and in each across. Turn. Change to colour B. (47 sts)
Row 11: With Colour B, ch 3 (counts as dc), sk first sc, * sk next sc, but working around the post of the dc below fpdc, dc in next sc; Rpt from * to end of row, dc in the final st. Turn. (47 sts)
Row 12: Ch 1, Sc in the first st and in each across. Turn. Change to colour A. (47 sts)
Row 13: With Colour A, ch 3, sk first sc, dc in next sc, * sk next sc, but working around the post of the dc below fpdc, dc in next sc; Rpt from * to end of row, dc in the final st. Turn. (47 sts)
Rows 14-49: Rpt rows 2-13 three more times.
Fasten off and weave in ends.
Block Edging (Worked in rounds):
With Colour A and with the right side facing, join yarn with a sl st in the top right corner.
Rnd 1: Ch 1, sc in the same st as joining and in each st across, work 3 sts in the corner st. Working along the side of the square, evenly work 59 sc across, work 3 sc in the corner st, sc in each st across, 3 sc in the corner st, work 59 sc evenly across, work 2 sc in final corner. Join with a sl st in first sc.
Rnd 2: Ch 1, sc in each st, 3 sts in each corner all the way around. Join with a sl st in the first sc.
NOTE: You may change the number of stitches worked along the long edge. Simply make sure that you are consistent for each block as it will make it easier to join them. Fasten off, weave in ends.
Joining Blocks Together:
Lay out blocks in a grid that is 3 x 4 with the right sides facing.
I worked the long rows first.
Beginning on the right end of the blanket, and working in the back loops only of two blocks lying side by side, join yarn with a sl st.
Continue working in the back loops only of each block, and sl st in each st through both blocks side by side all the way across. Repeat until all blocks are joined to one another.
Fasten off and weave in ends.
Blanket Edging (Worked in rounds):
With colour A and the right side facing, join yarn with a sl st in the top right corner.
Rnds 1-3: Ch 1, hdc in each st and 3 hdc in each corner all the way around. Join with a sl st in the first st.
Fasten off and weave in your ends! Block if desired.
Video Tutorial:


Hello there! I love your changing tides throw blanket/throw but I was wondering if I could just make the blanket/throw in one piece rather than in squares? Thank you kindly
Hi! Yes you can – you’ll want to change the length of your starting chain and to do that you’ll want to add multiples of 2
in your pattern you say chain 49 and once you turn you’ll have 47 st. in each row. If you want to do 1 piece is it multiples of 2 plus 2 on your starting chain?
Can I just make one piece? Will that affect the stitch count? If so what is the stitch multiple, I didn’t see it when reading the pattern. This Blanket and stitch is absolutely stunning.
Greetings! I love your blanket as well! Is it possible to do this with a bulky yarn (7 oz. 247 yd)
Good morning can you please do a video on left hand crochet how to keep your Stitchers even and not going off centered did that sound all right thank you
Just finished crocheting this Afghan. It took me longer than normal as I usually don’t gravitate towards multiple color changes like this. But…the colors were perfect for the recipient. Loved the simple video instructions. Thank you for the pattern.