
This post contains affiliate links. This means that when you purchase through one of these links we will receive a small commission at no additional cost to you. Thank you for supporting Rich Texture Crochet!
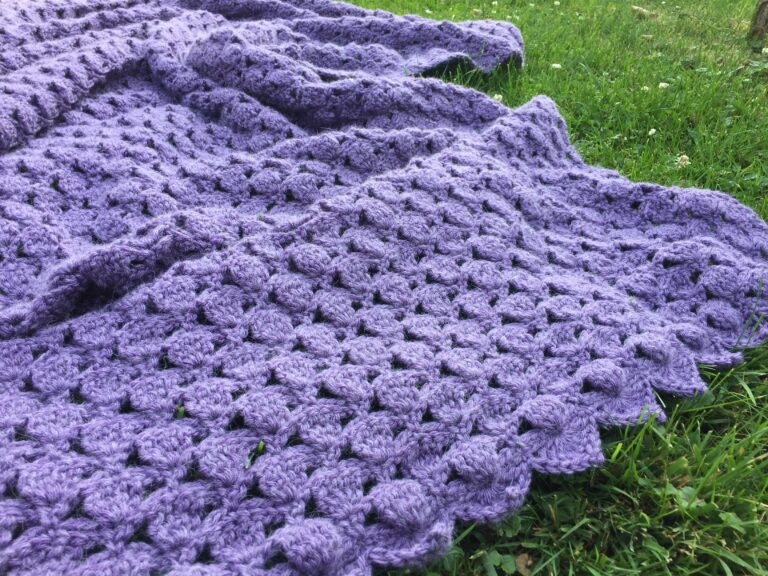
The Ember Stitch crochet pattern is a unique looking crochet pattern with lots of texture perfect when wanting to add striking design to your crochet project.
I have worked the Ember Stitch crochet pattern using two different colours which really brings out the texture in the stitch.
In order to construct the stitch you will work rows of cluster stitches and rows of front post stitches with rows of single crochet in-between. All of the texture is to the front side of the fabric. You could use this stitch pattern in many different kinds of projects!

The Materials:
For this tutorial today I will be using a small amount of the Basic Stitch Anti Pilling yarn by Lion Brand in two different colours. It is a soft worsted weight 100% acrylic yarn. The hook shown in the video below is a 5 mm Furls Metal Streamline Hook in the colour Blush. You may use any hook and yarn combination you choose.
Thank you so much for stopping by! If you enjoy the tutorial below, be sure to also check out some of the many other crochet stitch tutorials on my site and pin this for later! You may wish to start with the Timber Stitch | How to Crochet.
Ember Stitch Crochet Pattern:
Ch – Chain Stitch
CL – Cluster Stitch ([Yo, insert your hook into the space indicated, yo and draw up a loop, yo and draw through 2 loops] three times, yo and draw all the loops on your hook. Cluster Stitch made.)
Fpdc – Front Post Double Crochet Stitch
Rpt – Repeat
Sc – Single Crochet Stitch
Sl St – Slip Stitch
Yo – Yarn Over
Pattern Notes:
This stitch is worked in rows in this tutorial and it may be worked in one colour or many. I will be working this pattern in two colours: Colour A and colour B.
This pattern is written using American crochet terms.
To begin make a slip knot and make a foundation chain. For this stitch you will need an even number of stitches for your foundation chain.
For example, with colour A, ch 34.
Row One:
Sc in the second ch from your hook and in each st across, ch 1, turn.
Row Two:
Sc in the 1st st, *ch 1, sk the next st, sc in the next st; Rpt from * across. Switch to colour B in the final st, ch 3, turn.
Row Three:
CL in the next ch-1 sp, *ch 1, CL in the next ch-1 sp; Rpt from * across, dc in the final st. Ch 1, turn.
Row Four:
Sc in each st and each ch-1 sp across. Change to colour A in the final st, ch 1, turn.
Row Five:
Sc in the 1st st, *fpdc around the post of the middle stitch in the CL 2 rows below, sk the next st, sc in the next st; Rpt from * across, sc in the final st. Ch 1, turn.
Row Six:
Sc in the 1st st, *ch 1, sk the next st, sc in the next st; Rpt from * across, switch to colour B in the final st. Ch 3, turn.
And that’s it!
For the rest of the pattern simply repeat rows 3-6 changing colours every two rows. Fasten off, weave in your ends.
Video Tutorial:
CLICK HERE TO WATCH THE VIDEO TUTORIAL FOR THE EMBER STITCH ON YOUTUBE


I follow you on YouTube and I love your patterns but I really do need your help when you change colors on a crochet project how do you weave in the threads because I don’t see you cutting them I just see you carrying them up to the next row you’ll start using that color again and do you just leave them like that and then crochet a border around the entire piece I’m at a loss if you could help me I would be so very grateful
For me it depends on the project. Because I really don’t like weaving in ends I will often leave them if I can and then, yes, when I add an edging or another piece on, I will work over top of the strands. If I am not working an edging, then I will trim and weave in 🙂