This post contains affiliate links. This means that when you purchase through one of these links we will receive a small commission at no additional cost to you. Thank you for supporting Rich Texture Crochet!
Hello and welcome to Learn to Crochet: How to check your gauge.
You will have come across this little five letter word in your pattern and you may have seen it on a yarn label. Or maybe you have been crocheting for a little bit but have had trouble with the size of your end result. Some may have suggested that you “check your gauge.”
But what is a projects “gauge” and how do you measure it?
These are the questions that I hope to help you answer. If you are a new crocheter (perhaps you have been following me along in this course), and are not confident with crochet stitches such as chain stitches and single crochet stitches, some of this may be a bit overwhelming for you. But don’t worry, file it in the back of your mind it will all fall into place soon!
So, what is “gauge?”
Simply put gauge is a measurement. It is a way of measuring your stitch tension. It is the number of stitches per inch and rows per inch made with a specific yarn worked with a specific hook. Everyone crochets differently. Some people may make their stitches really tight, while others crochet looser. Because of this the final measurements of a crochet project may differ from one person to another. A crochet pattern or a yarn label will give you a guideline to follow, a measurement of a smaller section (swatch) of the project so that you can match the recommended stitches per inch and come out with a final project that measures to the recommended dimensions.
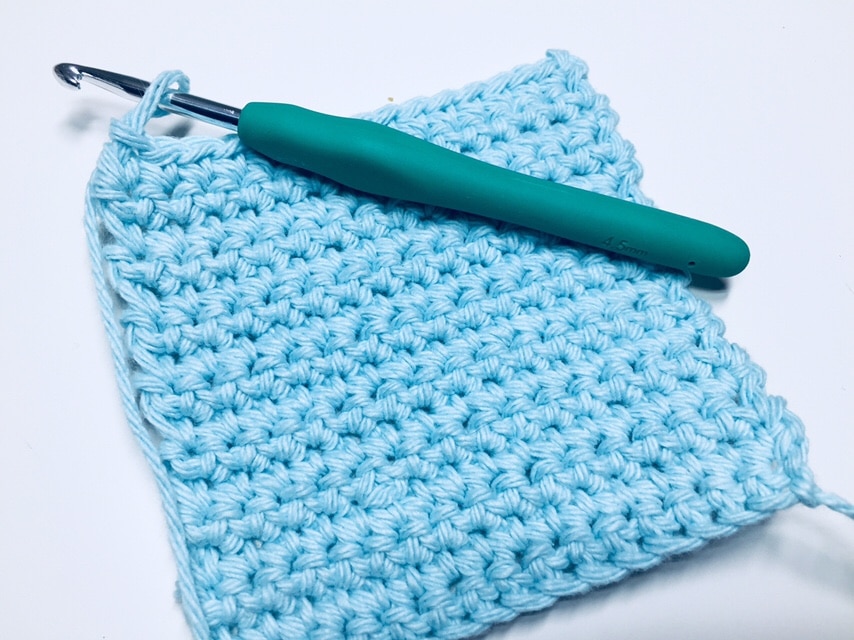
Sometimes the gauge may not be very important, such as for a simple dishcloth. But other times, perhaps if you are completing a garment such as a cardigan, your gauge will be very important. If your gauge is off your garment may not fit to size, it will end up being smaller or larger (or various pieces a mixture of both!).
When a pattern (or yarn label) gives a recommended hook size, such as a 5 mm, it is only a suggestion. Because every crochets with a different tension, if your swatch measures smaller or larger, you can sometimes easily fix it by selecting a larger or small crochet hook.
For example, when you complete your gauge swatch, if it is slightly smaller than recommended, you may want to select a larger hook. This will help you to loosen your stitches. If your swatch is slightly bigger, you may want to select a smaller hook which will help you tighten your stitches.
Let’s take a closer look. Following this picture tutorial your will find this information also in video format.
Let’s say your pattern says this:
Gauge: 16 sc x 16 rows = 4 inches.
Yarn: Approximately 34 yards of Bernat Handicrafter Cotton Stripes™, colour Mod Stripes (100% Cotton; 43g / 1.5 oz, 62 meters / 68 yards; weight: 4 – Medium – Worsted)
Hook: 5 mm (US H/8)
To check to see if you have the same tension as the designer, you will begin by selecting the recommended hook along with, in this case, the same yarn, or a worsted (#4) weight yarn.
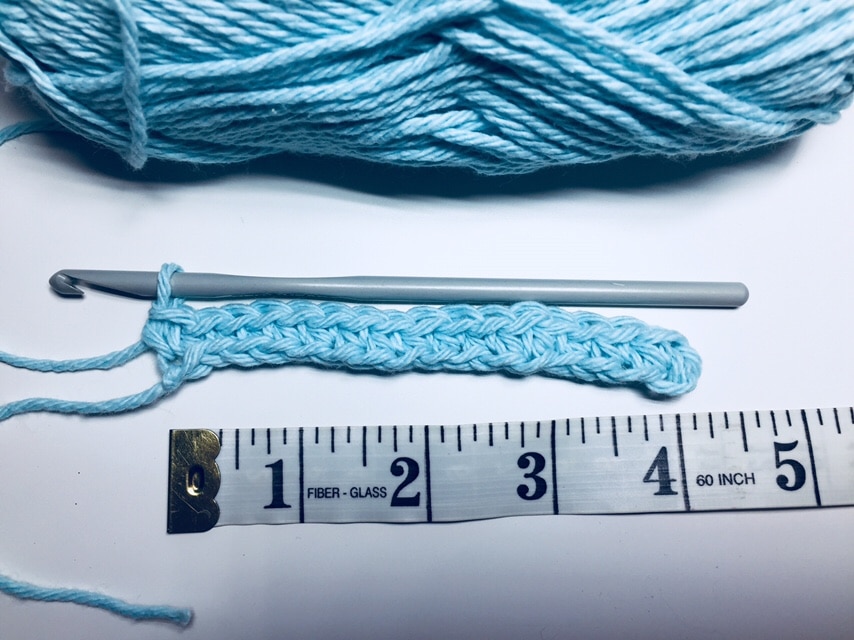
You will then chain at least 17 sts (16 + 1 for your turning chain). Some people would recommend more (at least an inch on either side), so that you can take a more accurate measurement from the middle of the swatch. If you were to measure this way you will want to chain 25 (24 +1 for your turning chain) as each inch equals 4 stitches (you’re adding then two inches to your swatch.

Because the gauge in this pattern is calculated with single crochet stitches (sc) you will continue working row upon row of single crochet stitches until you have completed your swatch. In this case you will work at least 16 rows (24 if your adding the extra inches).
The gauge for each project is different, depending on a variety of factors, and this includes the stitch used. The designer will always let you know though which stitch you should use to check your gauge.
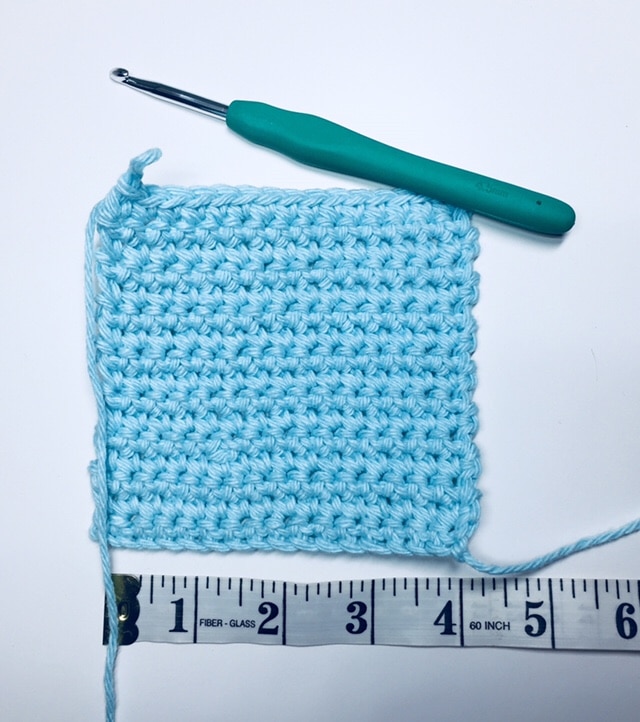
At the end of your work you will lay it flat, and then using a measuring tape or ruler, you will measure the piece (or the number of stitches indicated for the gauge) and see if it matches up.
If it does, yippee! Begin working on your project with confidence 🙂
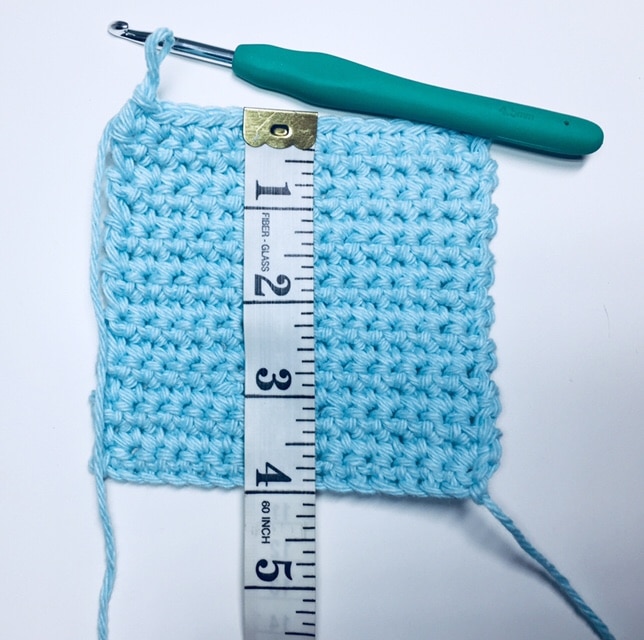
If it does not, there are a few things you can do.
There are several factors that will affect your gauge: You’re own personal style, whether your tension is tight or loose, your crochet hook, the yarn or even how you’re feeling that day! So how you fix your gauge, if it does not match is a bit of trial and error.
I have already briefly mentioned above, the first thing you can do is switch hook sizes. If your swatch is measuring smaller, it means that your stitches are tighter than the designers (remember this is not a bad thing or a mistake!), and you will want to loosen them. Try going up one or two hook sizes – in the case above try a 5.5 mm or 6 mm hook – this will naturally increase your stitch tension to make them looser.
If your swatch is measuring larger, it means that your stitches are looser than the designers (again, not a bad thing! We all crochet differently!) and you will want to tighten them. Try goin down one or two hook sizes – in the case above try a 4.5 mm or a 4 mm hook – this will naturally tighten your stitch tension.
Another option you have, especially if you are substituting the recommended yarn for another, is to again select a different yarn. Some yarns, depending on the fibre that they are made up with or how tightly they are spun, even though they are considered the same weight, may differ in how they work up. You may have two worsted weight yarns, but when you work them with a 5 mm crochet hook the finished items may differ in size. Two yarns that come to mind where I find this to be the case is between a Bernat Premium and a Red Heart Super Saver. The Super Saver, is a bit more of a stiffer yarn than the Premium. Because of this the stitches work up slightly larger.
You could also simply try crocheting tighter or looser, however it is important that your tension remains throughout your project and that part way through you don’t gradually revert to your natural tension.
Other than that, tension takes practice. The more you crochet, the more relaxed with it you become, the easier it is to maintain an even tension and match the recommended.
I hope that clears the air a bit about checking your gauge! Thank you so much for joining me for this tutorial on how to check your gauge! Be sure to check in on Facebook (FOUND HERE) and Instagram @RichTexturesCrochet. I look forward to bringing you more great tutorials and patterns soon!
Happy Crocheting!
Sarah