This post contains affiliate links. This means that when you purchase through one of these links we will receive a small commission at no additional cost to you. Thank you for supporting Rich Texture Crochet!
Have you wanted to design your own crochet scarf? Use this Stitch Sampler Scarf crochet pattern and guide help you!
It’s no secret that I love learning new crochet stitches and then designing with the textures that they create! If you enjoy learning and practicing new crochet stitches, a scarf is a great way to do so.
This past fall I had the opportunity to travel to Prince Edward Island, Canada for their annual fibre festival. One of the workshops that I led focused on learning new crochet stitches and then combining those stitches into our very own unique crochet scarf.

Below is a guide to help you design your own crochet scarf.
I have selected ten of my favourite textured crochet stitches and included their patterns. You can either work the stitches and pattern below as a stitch sampler scarf or you may pick and choose one or more of these stitches and mix them into your own pattern.
How to design your own crochet scarf:
You will begin by selecting a favourite yarn and crochet hook. All of the stitches here may be worked in any weight of yarn.
Next, I typically start by choosing an edging for the scarf. In the instructions below I have worked a ribbed edging of front and back post double crochet. You may simply choose to start with a favourite stitch pattern followed by adding a fringe at the end to each end of the scarf. It’s up to you!
Next, using the sample stitches as a guide, choose some favourites and begin adding them into your scarf. Work solid patches as I have or switch them up every few rows. Have fun with it!
As you go you may add in more colours of yarn, or keep it solid. There is no right or wrong as you are now the designer!

If you enjoy working crochet blankets, I invite you to check out my book: Barn Quilt Blankets! It is a collection of five blanket crochet patterns that feature a beautiful geometric designs. The book is now available in both paperback and ebook formats on Amazon! You can read about it here: BARN QUILT BLANKETS
PDF Copies of this crochet pattern:
The Stitch Sampler Scarf crochet pattern will be written out in full below and it is free to follow here on Rich Textures Crochet. However, if you would like to add this pattern to your library or purchase an ad free PDF, you can do so from my Etsy and Ravelry shops linked below:
CLICK HERE TO PURCHASE THE PDF FOR THE STITCH SAMPLER SCARF CROCHET PATTERN ON ETSY
CLICK HERE TO PURCHASE THE PDF FOR THE STITCH SAMPLER SCARF CROCHET PATTERN ON RAVELRY
Thank you so much for stopping by! Don’t forget to sign up for my email newsletter below so that you never miss a new free crochet pattern.
Happy Crocheting!
Sarah

Crochet Stitch Lovers! I have a new book out including 102 crochet stitches focused on texture and colour! If you love learning new crochet stitches, this book is for you! It is available on Amazon in ebook, paperback and hardcover formats. Learn more about it here: Intermediate Crochet Stitches
Stitch Sampler Scarf Crochet Pattern:
Skill Level: Intermediate
Gauge: 18sts x 12 rows of back and front post dc = 4 inches
Finished Size: 8 x 65 inches
Yarn Shows: Heatherly® by Knitpicks/WeCrochet® Yarn (80% acrylic/20% Merino Wool; 218 yds, 100 g; (4) Worsted/Medium weight): 4 skeins, each a different colour.
Hook: Size H/8 (5 mm) Hook. Adjust hook size if necessary to obtain correct gauge
Stitches and Abbreviations:
3rd loop – Looking at the back of your hdc st you will see a horizontal loop running along under the top back loop. This loop under the back loop is called the “3rd loop.”
Blo – Back Loop Only
Bpdc – Back Post Double Crochet
Bpsc – Back Post Single Crochet
Ch – Chain
Dc – Double Crochet
Fpdc – Front Post Double Crochet
Fpsc – Front Post Single Crochet
Hdc – Half Double Crochet
Rpt – Repeat
Sc – Single Crochet
Sk – Skip
Sl St – Slip Stitch
Yo – Yarn Over
Pattern Notes:
- Pattern is written in American English terms.
- Pattern is worked in rows along the short end.
- Ch 1 at beginning of row does not count as stitch.
- Ch 2 at the beginning does not count as a stitch.
- Turn at the end of each row.
- Weave in ends as needed.
- To change the size of your scarf, you will need an odd number of stitches for your foundation chain.
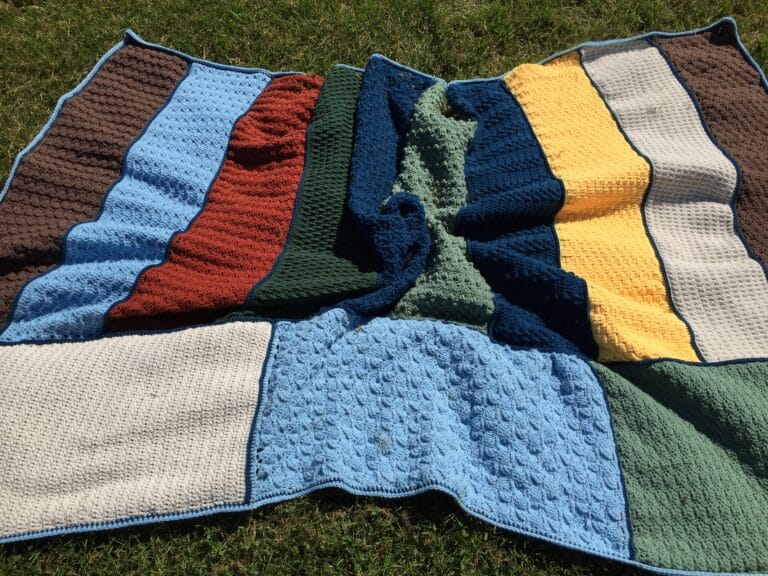
You Be the Designer!
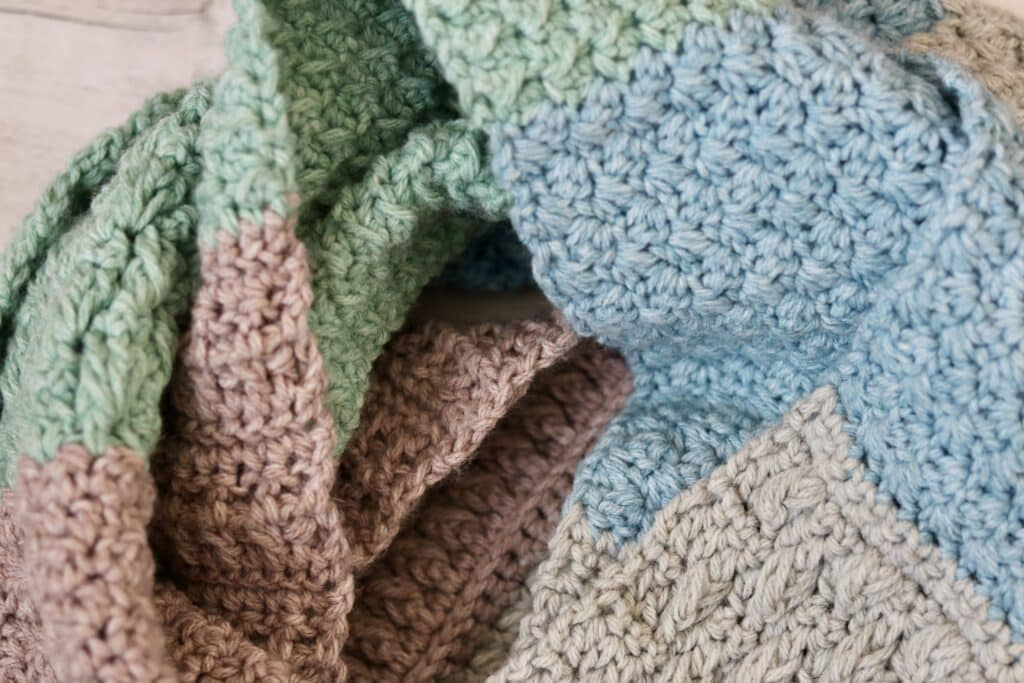
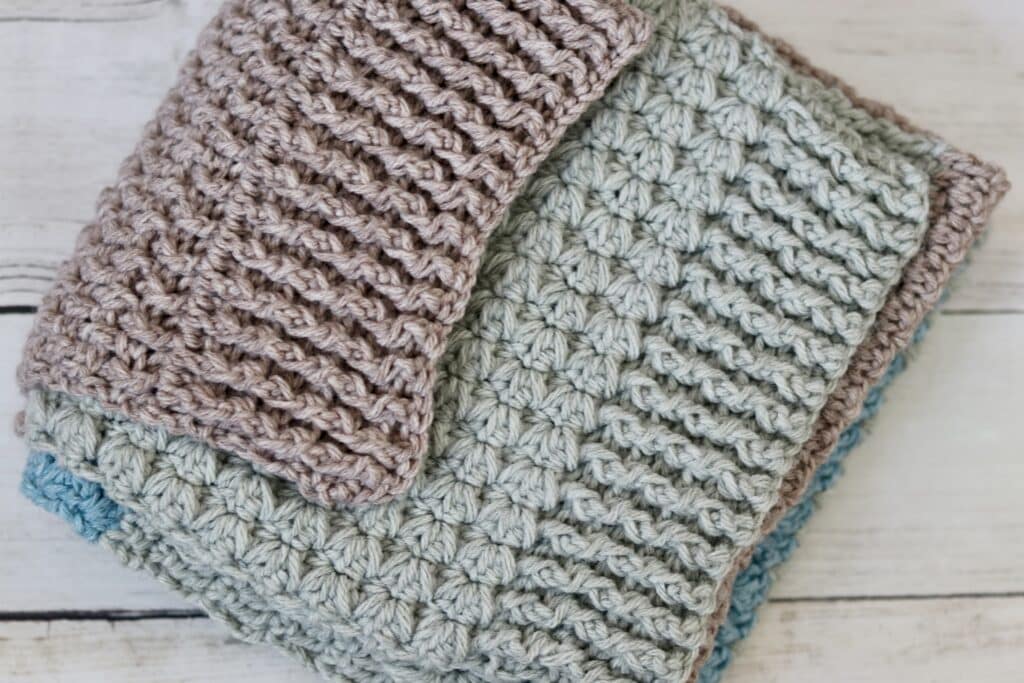
Below is a collection of 10 different crochet stitches that I have worked into a scarf. In my design, I have worked larger colour blocks of each of the 10 stitch patterns to create my design. You are welcome to work the stitches in the order that I have worked them, or you can mix it up!
Materials:
- I used the yarn and hook indicated above (four different colours of a worsted weight yarn and a 5 mm crochet hook), but these stitches may be worked in any weight of yarn and corresponding crochet hook.
- Experiment with colour! Use four different colours in your scarf as I have, or many more, or even a single colour.
Modify the pattern:
- Start with an odd number of stitches
- Work the double crochet ribbing to begin.
- Choose some stitches! All of the stitches below will work well together – use one, use them all in your project!
- Start crocheting!
- Will you work large blocks of colour or thinner stripes?
- Will you work large blocks of as I have or will you work a few rows before switching to the next?
- Don’t be afraid to mix it up!
Not liking the combination you are seeing? Don’t be afraid to pull it out and start again or rework certain pieces!
Free Crochet Pattern:
To begin, with colour A, ch 35.
Double Crochet Ribbing:
Row 1: Dc in the 3rd ch from your hook (ch-3 at start counts as a dc) and dc in each ch-st across. Ch 1, turn.
Row 2: Hdc in the top of the 1st st, *fpdc in the next st, bpdc in the next; Rpt from * across to the final st, hdc in the final st. Ch 1, turn.
Row 3: Hdc in the top of the 1st st, *bpdc in the next st, fpdc in the next; Rpt from * across to the final st, hdc in the final st. Ch 1, turn.
Rows: 4-7: Repeat rows 2 and 3 twice more.
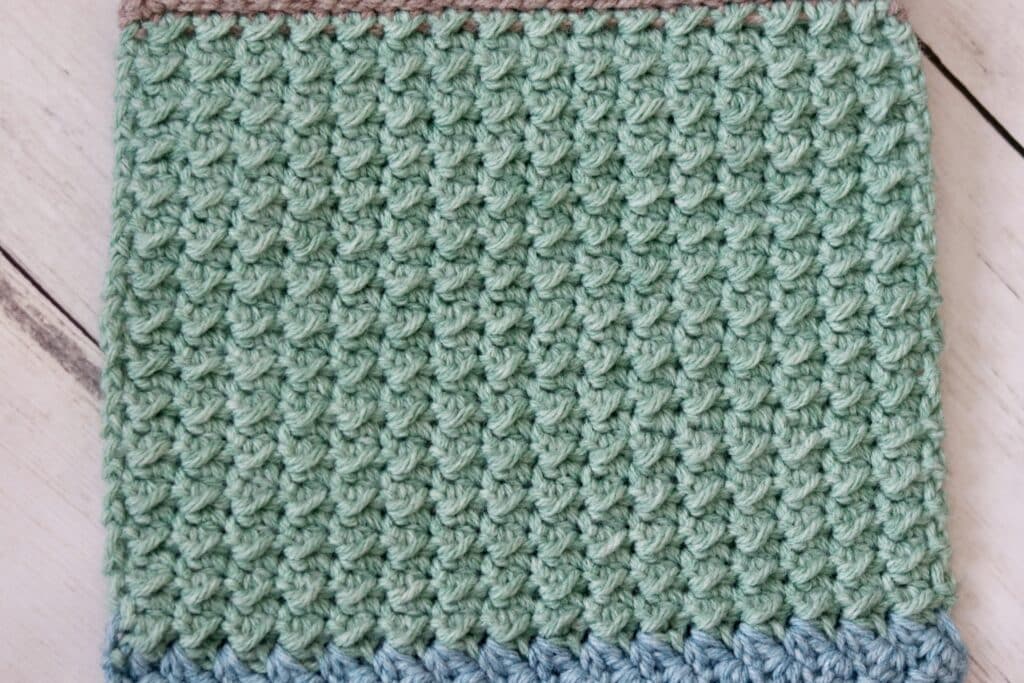
Single Crochet Puff Stitch:
Special Stitch: Puff St – Puff Stitch (Yo, insert your hook into the same st, yo and draw up a loop, yo and insert your hook into the same st, yo and draw up a loop. Yo and draw through all the loops on your hook. Puff Stitch made.)
Row 1: (Sc, puff st) in the 1st sc, sk the next st, *(sc, puff st) in the next sc, sk the next st; Rpt from * across ending with an sc in the final sc. Ch 1, turn.
Rows 2-17: Repeat Row 1.
Switch to colour B.
Regal Stitch:
Special Stitch: FpCL – Front Post Cluster Stitch ([yo, bring your hook in front of your work and insert around the post of the indicated st, yo and draw up a loop] twice, yo and draw through 4 loops on your hook, yo and draw through 2 loops on your hook. Front Post Cluster Stitch made.)
Row 1: Sc in the 1st st and in each st across. Ch 1, turn.
Row 2: Sc in the 1st st, bpdc in each st across to the final st, sc in the top of the final st. Ch 3, turn.
Row 3: Dc in the next st and in each st across. Ch 3, turn.
Row 4: *FpCL in the next st, dc in the next st; Rpt from * across, dc in the top of the final st (turning ch). Ch 1, turn.
Rows 5-16: Repeat rows 1-4 for a total of 3 more times.
Rows 17-18: Repeat rows 1 and 2 once more.
Switch to colour C.
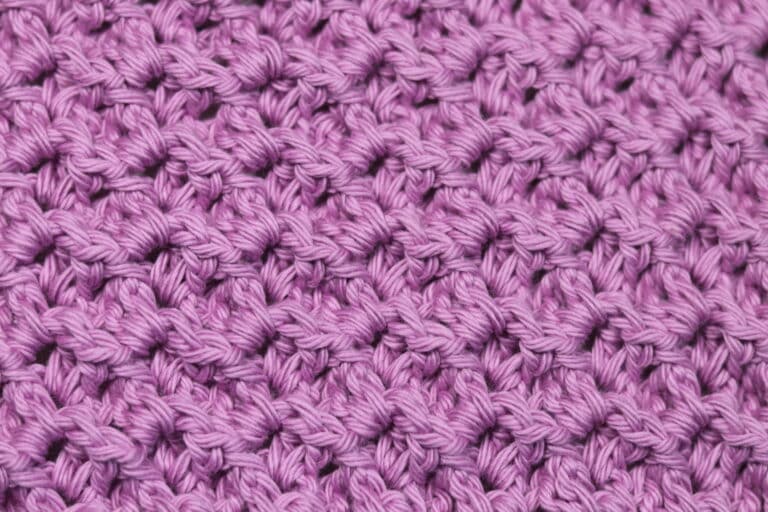
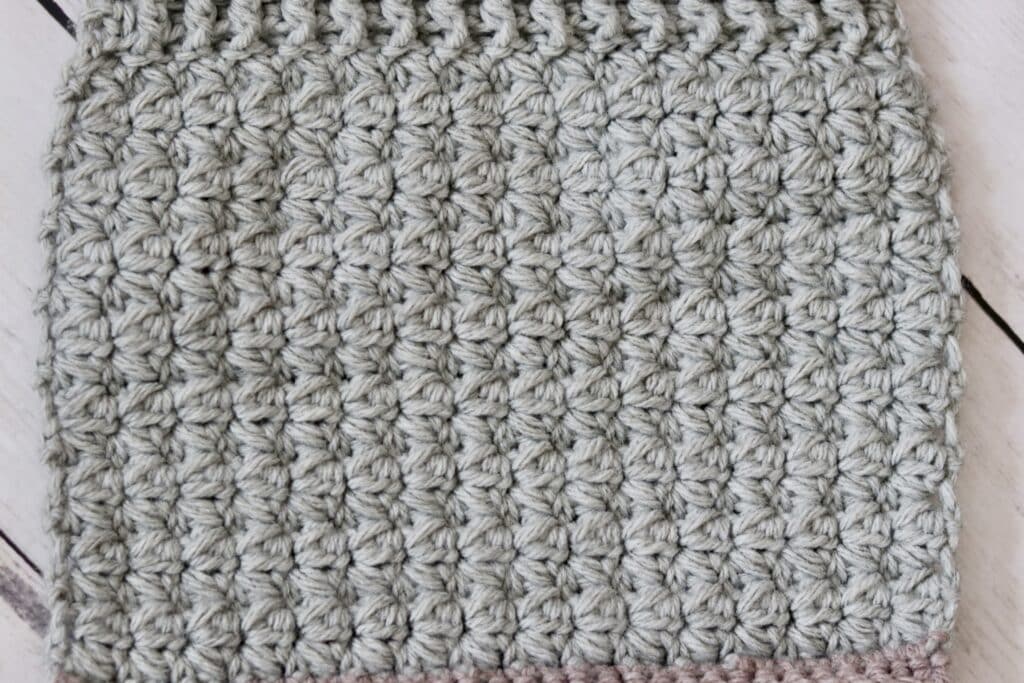
Even Moss Stitch:
Row 1: Sl st in the 1st st, *hdc in the next st, sl st in the next st; Rpt from * across. Ch 1, turn.
Row 2: Hdc in the 1st st, *sl st in the next st, hdc in the next st; Rpt from * across. Ch 1, turn.
Rows 3-29: Repeat rows 1 and 2
Switch to colour D.
Suzette Stitch:
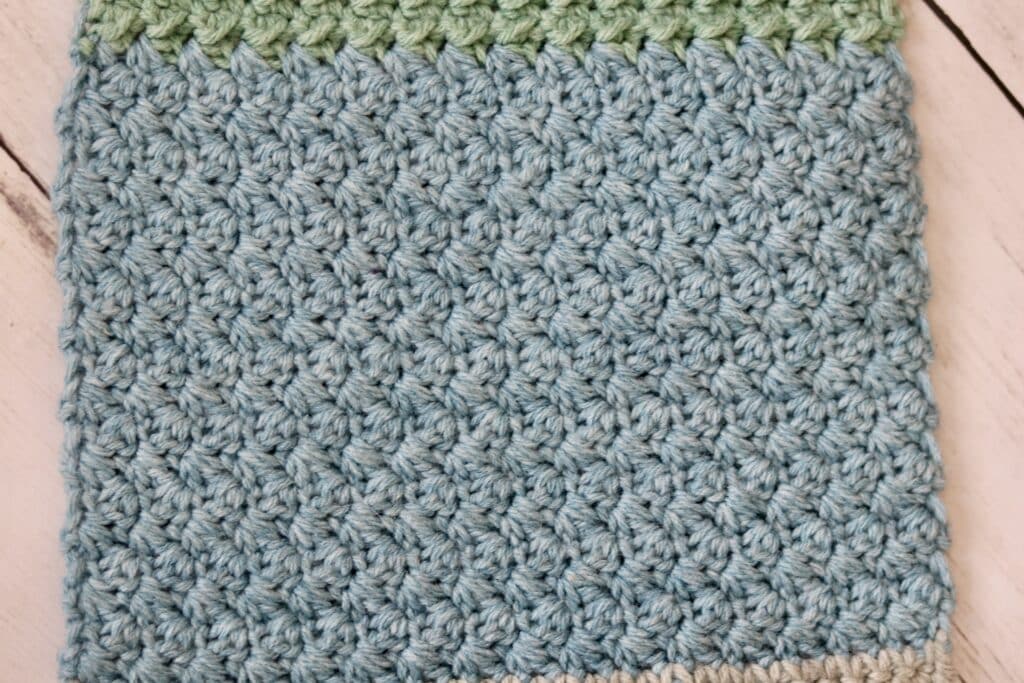
Row 1: [Sc, dc] in the 1st, sk the next st, *[sc, dc] in the next st, sk the next st; Rpt from * across ending with an sc in the final st. Ch 1, turn.
Rows 2-18: Repeat row 1.
Switch to colour A.
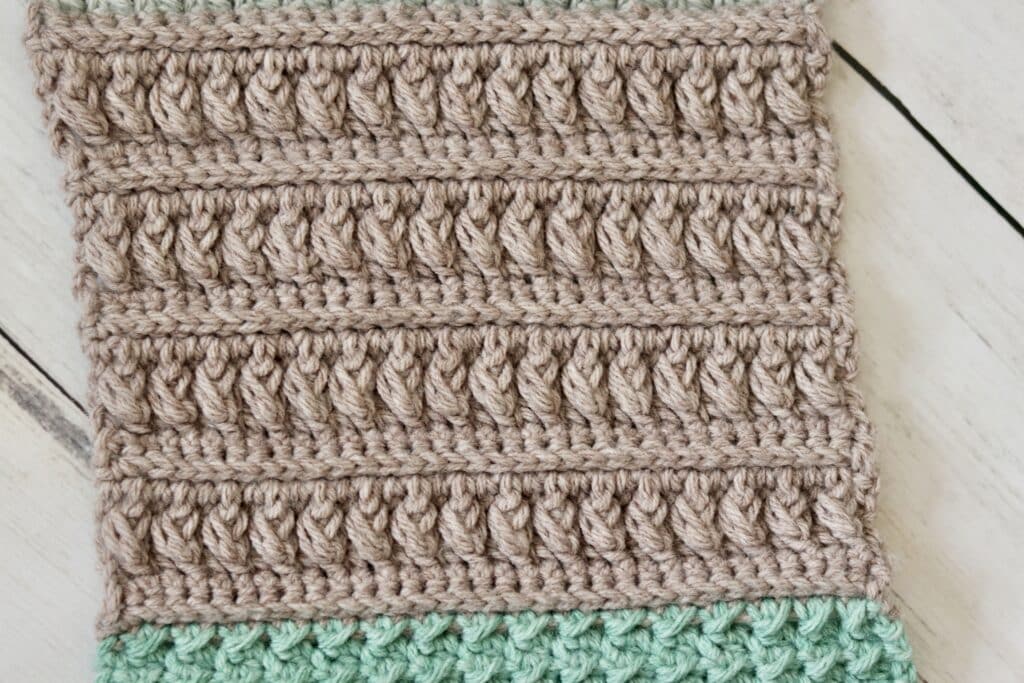
Falling Leaves Stitch:
Special Stitch: CL (yo, [insert your hook around the post of the stitch two rows below, yarn over and draw up a loop] twice, yo and draw through 4 loops on your hook, yo and draw through 2 loops on your hook. Cluster Stitch made.)
Row 1: Sc in the 1st st and in each st across. Ch 1, turn.
Row 2: Sc in the 1st st and in each st across. Ch 2 (does not count as a st), turn.
Row 3: Dc in the 1st st, dc in the next st, CL around the post of the next st 2 rows below, *dc in each of the next 3 sts CL around the post of the next st 2 rows below; Rpt from * across to the final 2 sts, dc in each of the final 2 sts. Ch 1, turn.
Row 4: Sc in the 1st st and in each st across. Ch 2, turn.
Row 5: Dc in the 1st st, dc in each of the next 4 sts, CL around the post of the next st 2 rows below, *dc in each of the next 3 sts CL around the post of the next st 2 rows below; Rpt from * across to the final 4 sts, dc in each of the final 4 sts. Ch 1, turn.
Row 6: Sc in the 1st st and in each st across. Ch 2, turn.
Switch to colour B.
Griddle Stitch:
Row 1: Dc in the 1st, sc in the next, * dc in the next st, sc in the next st; Rpt from * across. Ch 1, turn.
Rows 2-16: Repeat row 1.
Switch to colour C.
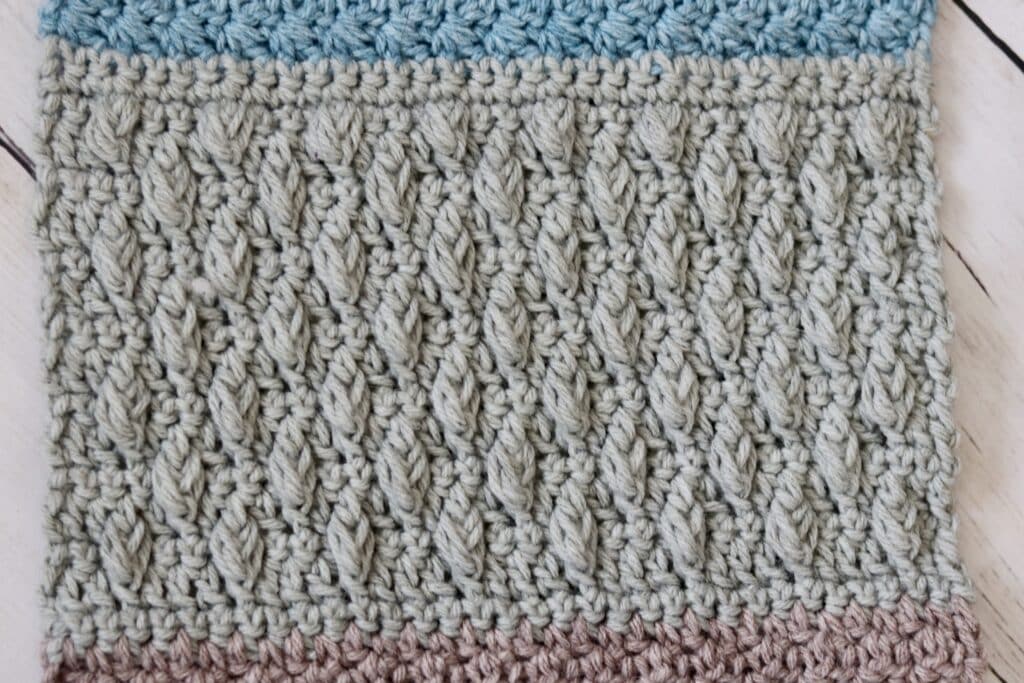
3D Twisted Granny Stitch:
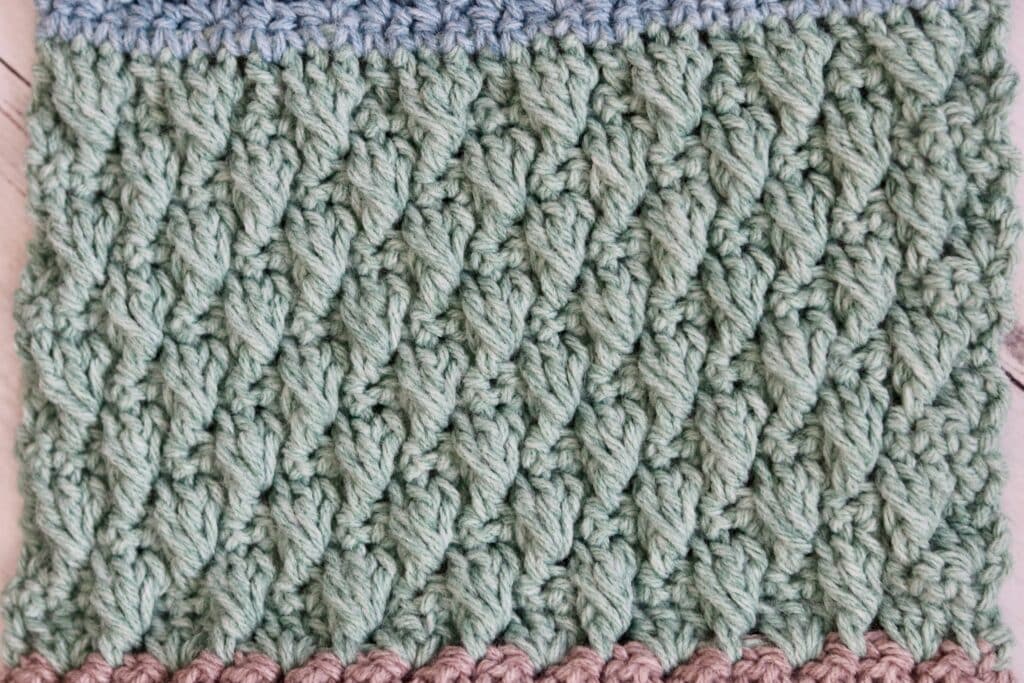
Row 1: Dc in the 1st st, *sk the next st, 3 dc in the next st, sk the next st, dc in the next st; Rpt from * across. Ch 1, turn.
Row 2: Sc in the 1st st, sc in each st across. Ch 1, turn.
Row 3: 2 dc in the 1st st, * sk the next st, dc in the next st, sk the next st, 3 fpdc around the post of the next st 2 rows below; Rpt from * across until 3 sts remain, dc in the next st, sk the next st, 2 dc in the final st. Ch 1, turn.
Row 4: Sc in the 1st st and in each st across. Ch 1, turn.
Row 5: Dc in the 1st st, * sk the next st, 3 fpdc around the post of the next st 2 rows below, sk the next st, dc in the next st; Rpt from * across ending with a dc in the final st. Ch 1, turn.
Rows 6-17: Repeat rows 2-5 for a total of 3 more times.
Rows 18-19: Repeat rows 2 and 3 once more.
Switch to colour D.
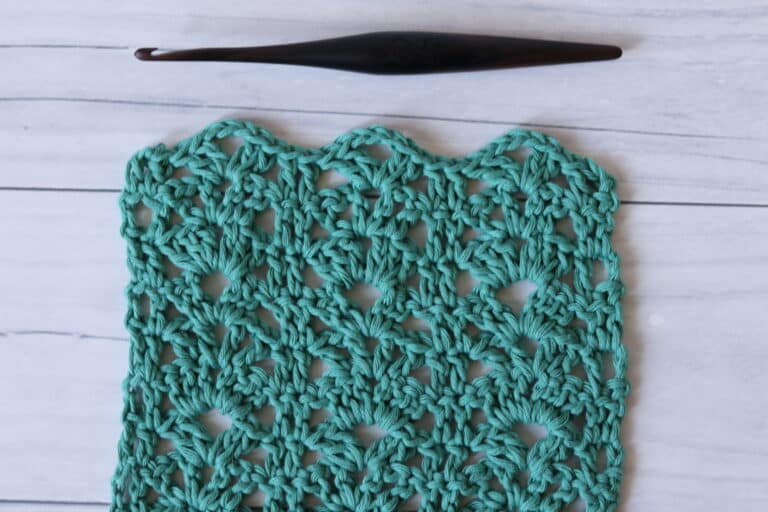
Wavy Shell Stitch:
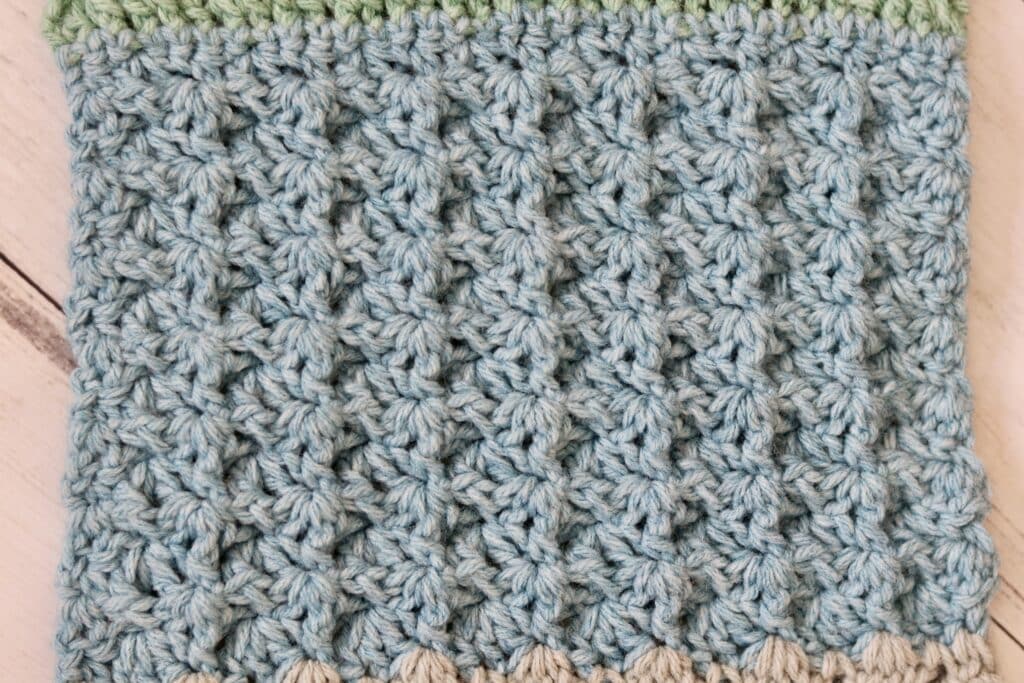
Row 1: Sc in the 1st st and in each st across. Ch 1, turn.
Row 2: Sc in the 1st st, *sk the next st, 3 dc in the next st, sk the next st, sc in the next st; Rpt from * across. Ch 1, turn.
Row 3: 2 dc in the 1st st, sk the next st, fpsc in the next st, *sk the next st, 3 dc in the next sc, sk the next st, fpsc in the next st; Rpt from * across, ending with 2 dc in the final st. Ch 1, turn.
Row 4: Sc in the 1st st, *sk the next st, 3 dc in the next st, sk the next st, fpsc in the next st; Rpt from * across. Ch 1, turn.
Rows 5-14: Repeat rows 3 and 4 for a total of 5 times.
Row 15: Repeat row 3.
Switch to colour A.
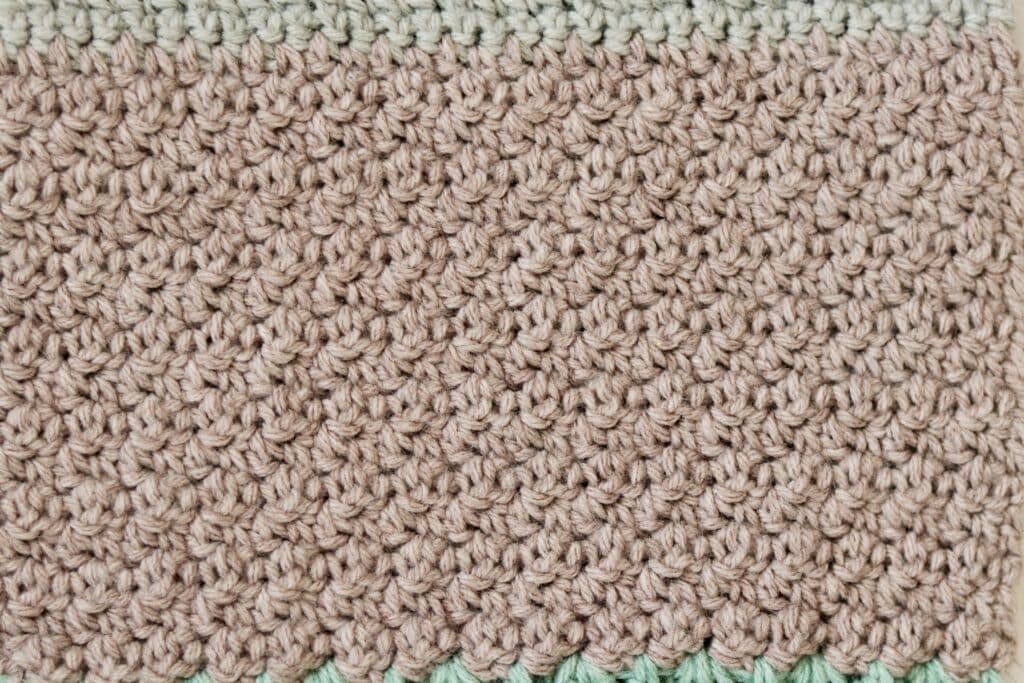
Shell Stitch:
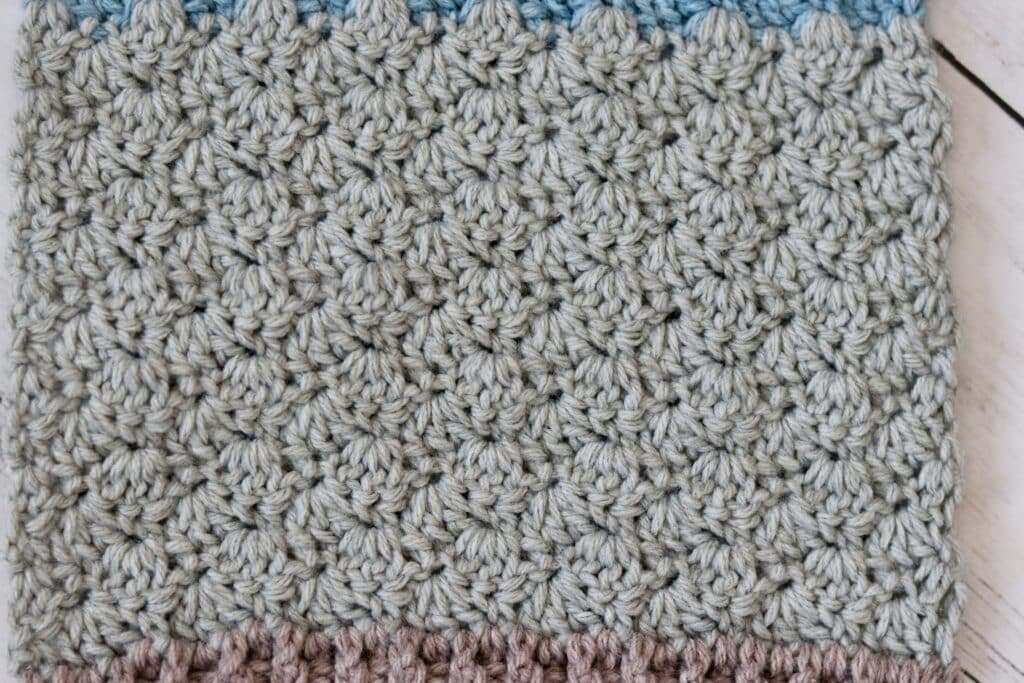
Row 1: Sc in the 1st st, *sk the next st, 3 dc in the next st, sk the next st, sc in the next st; Rpt from * across. Ch 1, turn.
Row 2: 2 dc in the 1st st, sk the next st, sc in the next st, *sk the next st, 3 dc in the next sc, sk the next st, sc in the next st; Rpt from * across, ending with 2 dc in the final st. Ch 1, turn.
Row 3: Sc in the 1st st, *sk the next st, 3 dc in the next st, sk the next st, sc in the next st; Rpt from * across. Ch 1, turn.
Rows 5-13: Repeat rows 2 and 3 for a total of 6 times.
Row 14: Repeat row 2.
Switch to colour B.
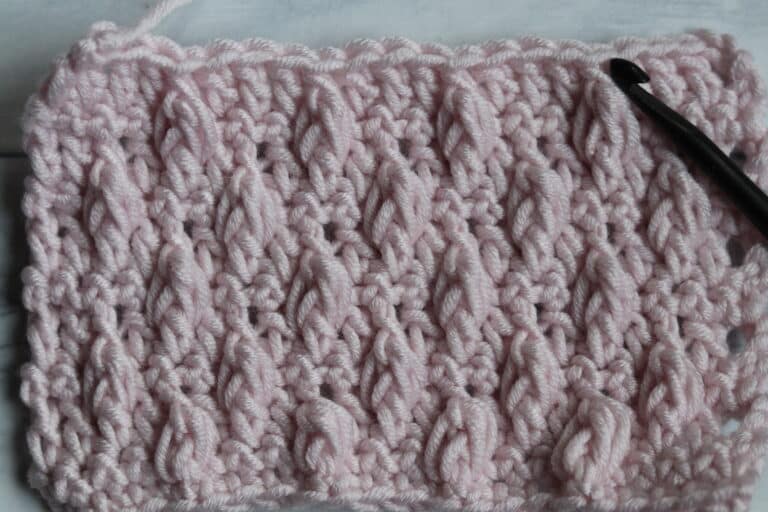
Twisted Stitch:
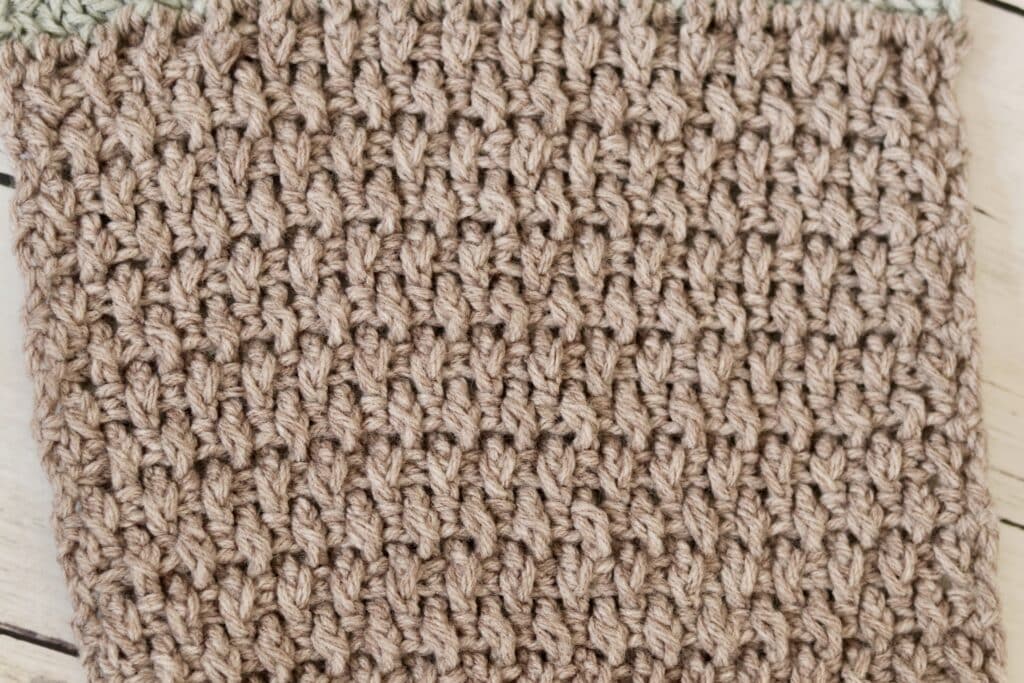
Row 1: Ch 3 (count as a dc st), dc in each st across. Ch 1, turn.
Row 2: Hdc in the 1st st, *fpdc around the post of the next st, bpdc around the post of the next st; Rpt from * across, hdc in the top of your 1st st (for this 2nd row only it will be the top of your turning ch). Ch 1, turn.
Rows 3-14: Repeat row 2.
Continue working in colour B.
Double Crochet Ribbing:

Row 1: Dc in the 1st st and in each st across. Ch 1, turn.
Row 2: Hdc in the top of the 1st st, *fpdc in the next st, bpdc in the next; Rpt from * across to the final st, hdc in the final st. Ch 1, turn.
Row 3: Hdc in the top of the 1st st, *bpdc in the next st, fpdc in the next; Rpt from * across to the final st, hdc in the final st. Ch 1, turn.
Rows: 4-7: Repeat rows 2 and 3 twice more.
Fasten off, weave in your ends!