This post contains affiliate links. This means that when you purchase through one of these links we will receive a small commission at no additional cost to you. Thank you for supporting Rich Texture Crochet!
These Monster Ice Pack covers are a must have once those busy summer months arrive for your kids!
Every year during the summer months, the amount of bumps and bruises increases tenfold! Whether the kids are riding their bikes and scooters, hiking through the forests, or playing on the playground, at some point a bump will happen and they will need a cold compress or ice pack. These little ice pack covers come in handy!
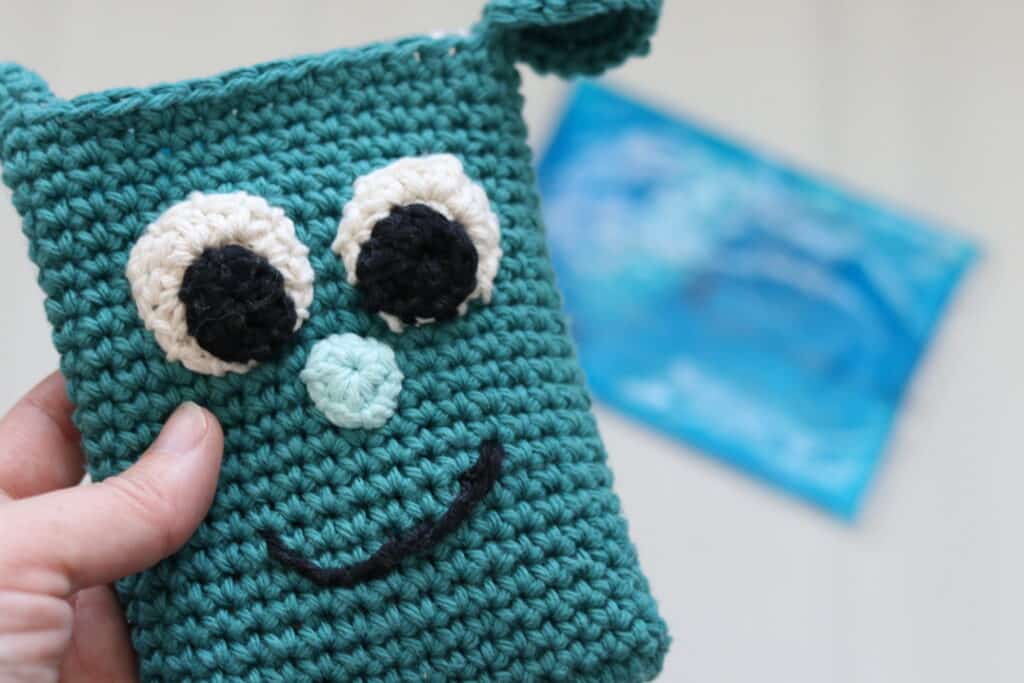
Not only are they sure to bring a smile, but they provide a protective covering for the ice pack against children’s delicate skin!
This post contains affiliate links. This means that when you make a purchase through one of these links, Rich Textures Crochet will earn a small commission at no additional cost to yourself. Thank you for supporting Rich Textures Crochet!
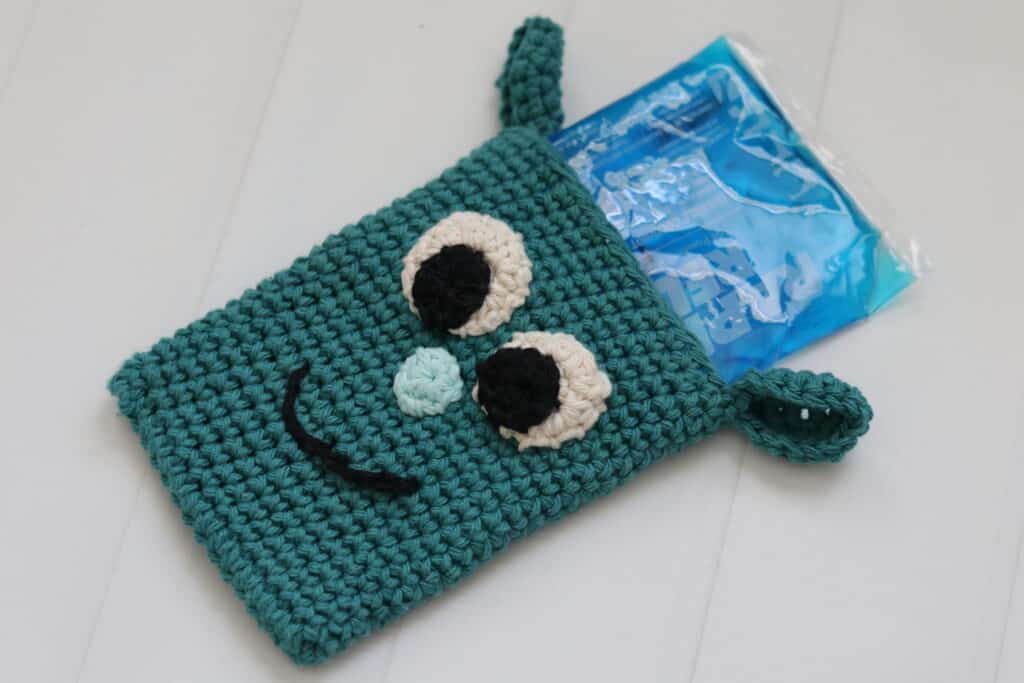
These little crochet ice pack covers are easy to customize. When you are working the “body” of the monster, not particular stitch multiple is required for the foundation chain. Simply work to the desired width and then begin your single crochet rounds. You will work the rounds to the desired height before fastening off. My finished cover is approximately 4 x 6 inches.
Along with the dimensions, you may also adjust your colours and monster facial expressions. Have fun!
Materials:
For this crochet ice pack and cold compress cover I will be using small amounts of scrap cotton yarn. One of my favourites is the Pima Cotton Yarn by Lion Brand Yarn. It is a worsted weight yarn. The hook shown in the video below is a 5 mm birchwood crochet hook by Rowan Yarns.
Thank you so much for stopping by! If you enjoy the tutorial below, be sure to also check out some of the many other crochet patterns on my site and pin this for later!
PDF Copies of this Pattern:
This pattern will be written out in full followed by a full video tutorial below. If you would like to add this pattern to your library, or purchase an ad free PDF, you may do so from either my Etsy or Ravelry Shop linked below:
Click Here for the Monster Ice Pack Cover on Etsy
Click Here for the Monster Ice Pack Cover on Ravelry
Thank you so much for stopping by and if you LOVE this pattern, you may also wish to try another great summer project such as this Traveller Market Bag Crochet Pattern!
Enjoy and happy crocheting!
Sarah
Monster Ice Pack Crochet Pattern:
Skill Level: Easy
Gauge: 16 sts x 16 rows of sc = 4 inches
Finished Size: 4 x 6 inches excluding ears
Yarn: Your favourite worsted weight cotton in 4 different colours. Colour A (body and ears): 100 yards; Colour B (Eyes): 40 yards, Colour C (Eyes and Mouth): 20 yards; Colour D (Nose and back): 30 yards.
Hook: Size 5 mm (H/8) Crochet Hook.
Notions: Yarn Needle, stitch marker.
Stitches and Abbreviations:
Ch – Chain
Dc – Double Crochet
Hdc – Half Double Crochet
Lp – loop
Rpt – Repeat
Sc – Single Crochet
Sk – Skip
Sl st – Slip stitch
Sp – space
Yo – Yarn over
Pattern Notes:
- Pattern is written in American English terms.
- Pattern is worked in rounds.
- Ch 1 at beginning of row does not count as a st.
- Weave in ends as needed
- To change the size of your cover, adjust the length of your starting chain to match the desired width. You may use any multiple of stitches. Then work the cover to the desired height.
Free Crochet Pattern:
Body:
With colour A, ch 16.
Rnd 1: Sc in the 2nd ch from your hook and in each st across to the final st, 3 sc in the final ch, turn work so that you are working along the opposite side of the chain and sc in each across to the final ch, 2 sc in the final ch. Do not join, but work continuous rounds always marking the 1st st. (32 sts)
Rnds 2-26: Sc in each st around. Do not join but work continuous rounds.
Fasten off, weave in your ends.
Ears (Make 2):
With colour A:
Rnd 1: Ch 2, 6 sc in the 2nd ch from your hook. Join with a sl st in the 1st st. Do not turn.
Rnd 2: Ch 1, 2 sc in each st around. Join with a sl st in the 1st st. Do not turn.
Rnd 3: Ch 1, *sc in the next st, 2 sc in the next st; Rpt from * around. Join with a sl st in the first st.
Fasten off leaving a long tail. Ears are to be sewn (using the long tail) on each side/corner of the body opening at the top. Before sewing, fold ear in half and attach one on each side.
Eyes (Make 2):
With Colour B:
Rnd 1: Ch 2, 6 sc in the 2nd ch from your hook. Join with a sl st in the 1st st. Do not turn.
Rnd 2: Ch 1, 2 sc in each st around. Join with a sl st in the 1st st. Do not turn.
Rnd 3: Ch 1, *[sc in the next st, 2 sc in the next st] 3 times, hdc in the next st, 2 dc in the next st, dc in the next st, 2 dc in the next st, hdc in the next st, 2 sc in the final st. Join with a sl st in the first st.
Fasten off, Leaving a long tail (to be used to sew the eyes on the body).
Pupils (Make 2):
With Colour C:
Rnd 1: Ch 2, 6 sc in the 2nd ch from your hook. Join with a sl st in the 1st st. Do not turn.
Rnd 2: Ch 1, 2 sc in each st around. Join with a sl st in the 1st st. Do not turn.
Fasten off leaving a long tail. Using the long tail, sew the pupils onto the whites of the eyes. Next position and sew the whole eye onto the monster body using the long tail from part one.
Nose:
With Colour D:
Rnd 1: Ch 2, 6 sc in the 2nd ch from your hook. Join with a sl st in the 1st st.
Fasten off leaving a long tail and use this tail to position the nose and sew the nose onto the monster body.
Weave in any ends!
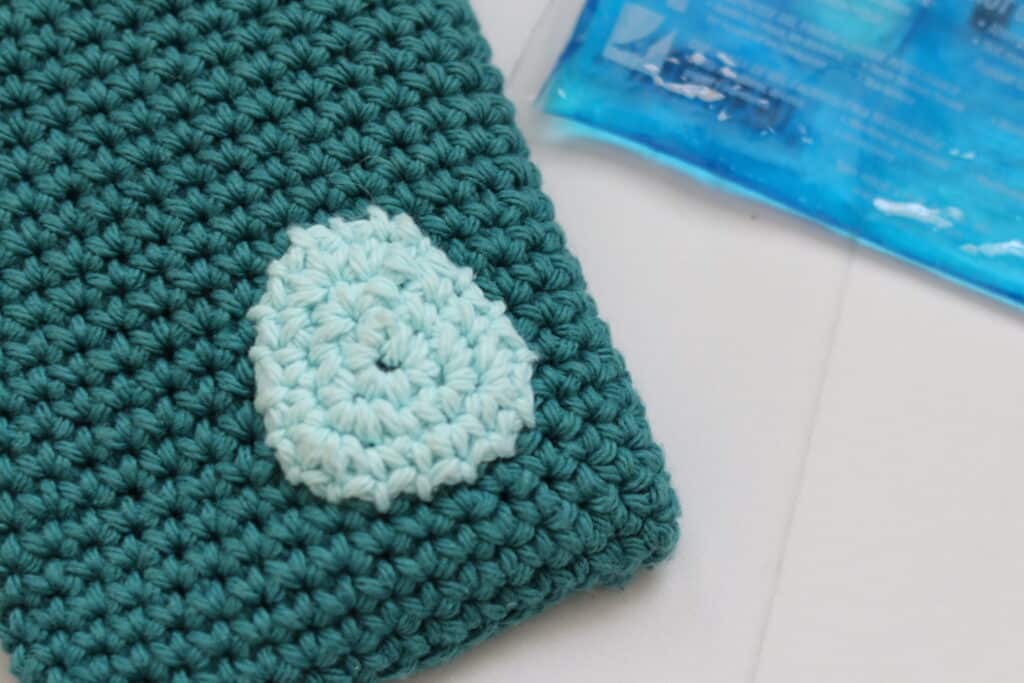
Back Patch:
With Colour D:
Rnd 1: Ch 2, 6 sc in the 2nd ch from your hook. Join with a sl st in the 1st st. Do not turn.
Rnd 2: Ch 1, [3 sc in the next st, sc in the next st], 3 times. Join with a sl st in the 1st st. Do not turn.
Rnd 3: Ch 1, sc in the 1st st, [3 sc in the next st, sc in each of the next 3 sts] 3 times ending with sc in each of the final 2 sts. Join with a sl st in the 1st st.
Fasten off leaving a long tail. Using the long tail, position the patch on the back of the monster and sew into place.
Weave in any ends!
Video Tutorial:
The photographs and pattern contained in this document are the property of Rich Textures Crochet.
This pattern is for personal use only.
No unauthorized reproduction, in whole or in part, or distribution of this pattern or content is permitted. ALL FINISHED PRODUCTS from this pattern can be used for local sales and sold online.
Thank you so much for supporting Rich Textures Crochet! To stay in touch or see more great products, be sure to visit me on Facebook and Instagram (Rich Textures Crochet). Thanks again! Happy Crocheting!