
This post contains affiliate links. This means that when you purchase through one of these links we will receive a small commission at no additional cost to you. Thank you for supporting Rich Texture Crochet!
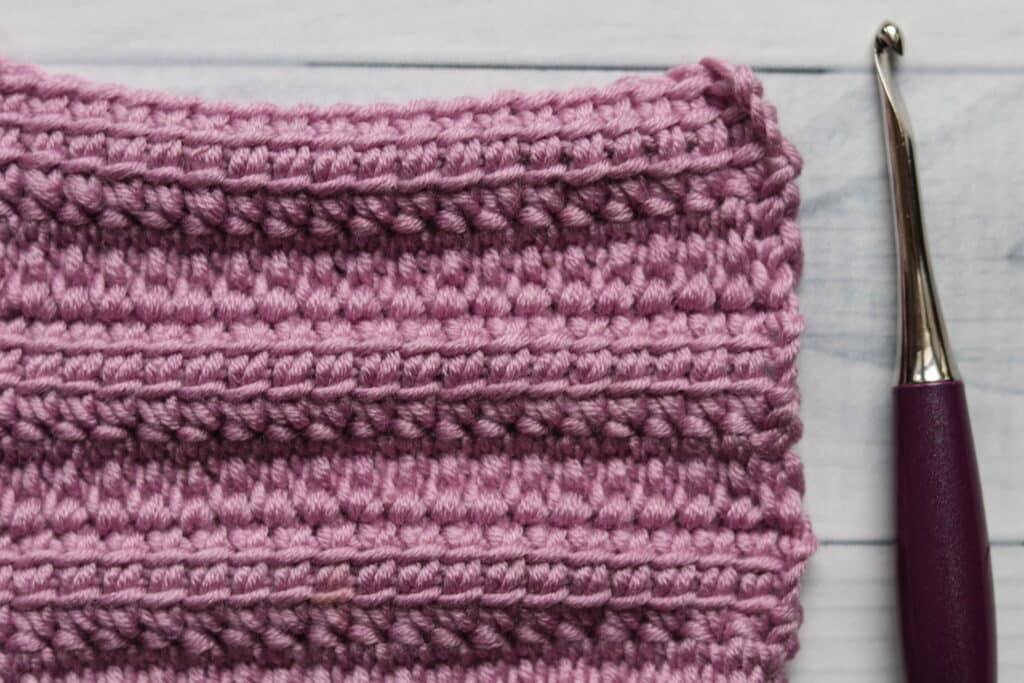
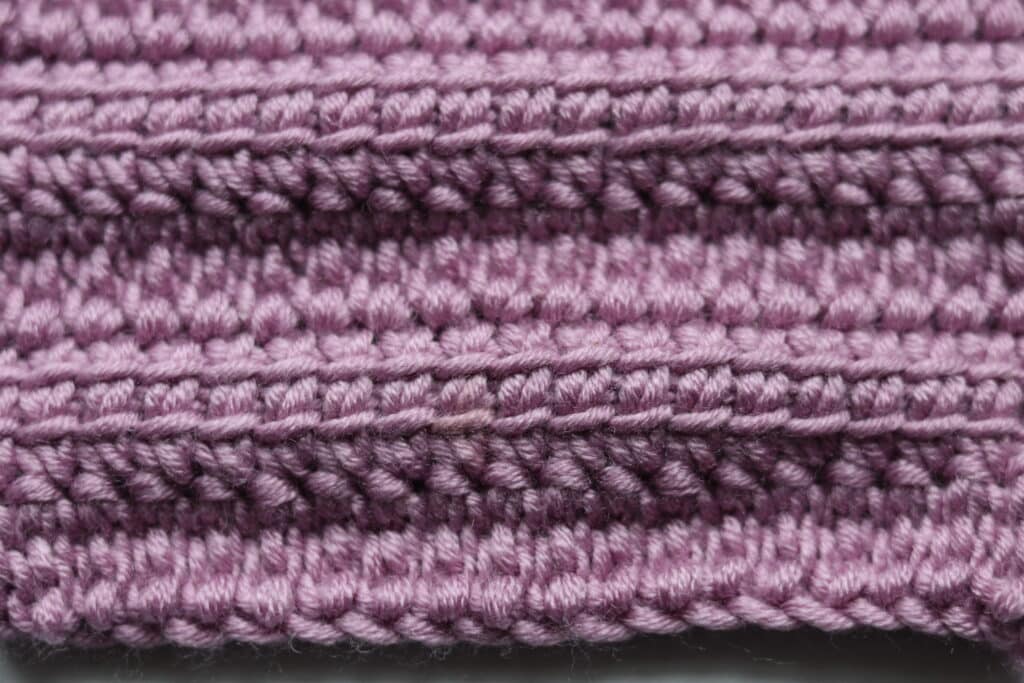
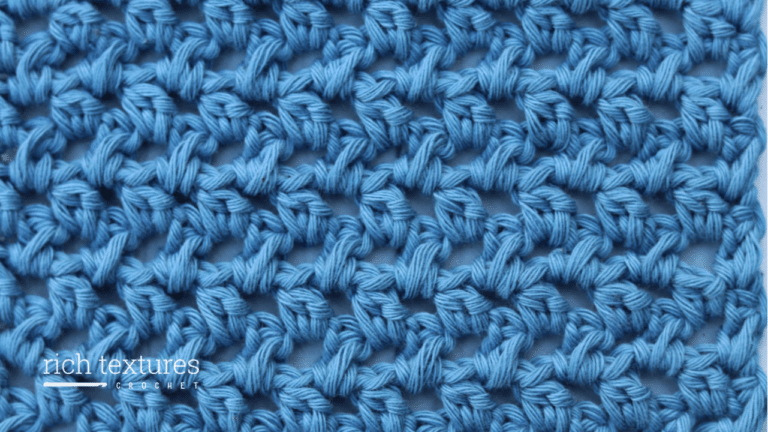
The Linked Treble Crochet Stitch is an easy stitch to work. The stitches are the height of a treble/triple crochet stitch, but connected to one another so there are no gaps!
If you were to crochet a blanket with strictly treble crochet stitches, you would find that there were gaps between the stitches. Especially if it was a blanket for a young child, it would be easy for them to get a finger or toe caught in-between the stitches.
With the linked treble crochet stitch, you don’t have this challenge. As you work the next stitch, you connect it to the one beside it. As a result you will have a piece of fabric that works up just as quickly but is more dense.
You can use a similar technique when working a double crochet stitch. You can even modify this treble crochet stitch to make it even taller – just change the length of the starting chain.
Materials:
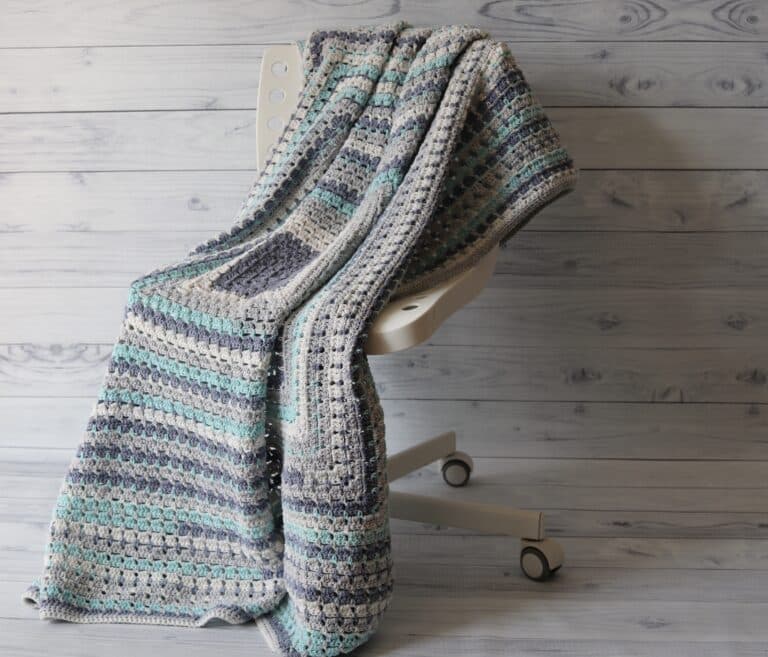
For this tutorial I will be using the Caron x Pantone yarn by Yarnspirations along with a 6 mm crochet hook. The hook shown here and in the video below is a wooden streamline hook by Furls Crochet. However you may use any hook and yarn combination you choose.
Linked Treble Crochet:
This stitch is worked in rows in this tutorial. At the end of each row you will need to chain 3 and turn your work. The chain 3 at the beginning of a row will be where you work your first treble crochet stitch.
Don’t forget to check out the free video tutorial linked below!
For this stitch pattern you can use any multiple of stitches plus chain 3 (which will be the foundation for your first stitch in each row).
For my swatch I will be making a foundation chain of 21 chain stitches.

Row One:
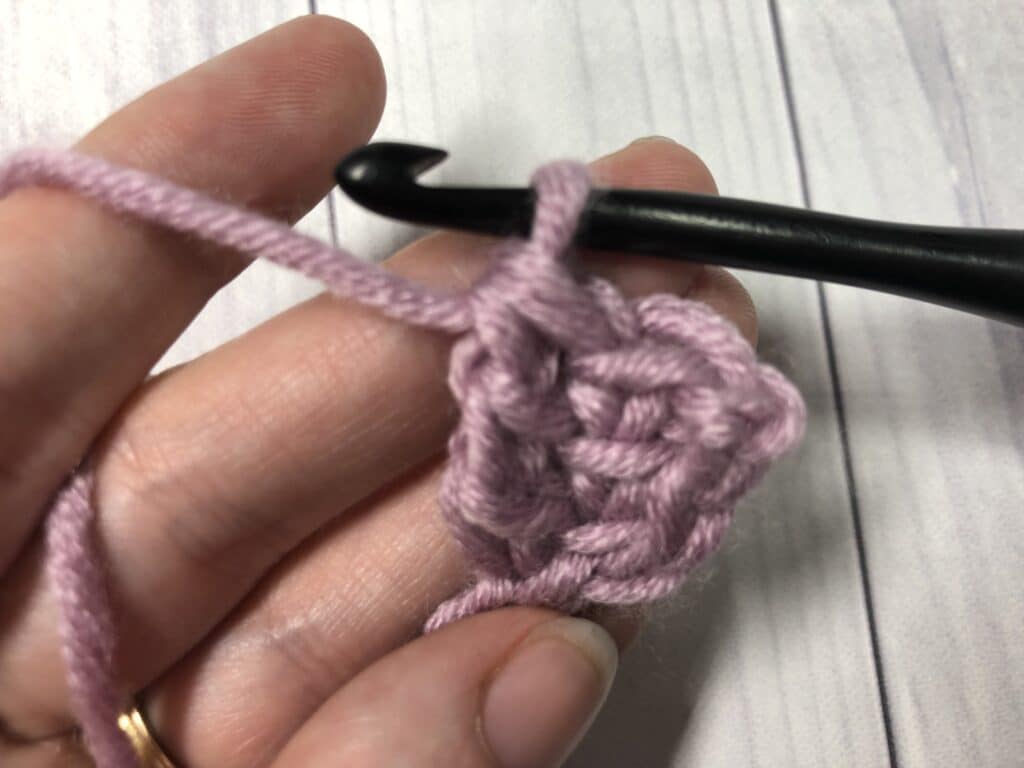
First Stitch in your Foundation Chain:
Once your foundation chain is the desired length, insert your hook into the second chain from hook, yarn over and draw up a loop.

Insert your hook into the 3rd chain, yarn over and draw up a loop.

Insert your hook into the 4th chain, yarn over and draw up a loop

Yarn over and draw through two loops on your hook. Yarn over and draw through two more loops on your hook. Yarn over once again and draw through the final two loops on your hook.

Second stitch (and every stitch after):
Looking at the post of the stitch just made, you will see two horizontal bars going across the centre of the post. Insert your hook under the first horizontal bar, yarn over and draw up a loop.

Insert your hook into the second horizontal bar and draw up a loop.

Now insert your hook into the next stitch on your foundation chain, yarn over and draw up a loop.

Yarn over and draw through two loops on your hook three times.
Repeat this process across your foundation chain.
Chain 3 and turn your work.
Row Two:
First Stitch:
Insert your hook into the second chain, yarn over and draw up a loop.
Next, insert your hook into the third chain, yarn over and draw up a loop.
Insert your hook into the stitch at the base of the chain three, yarn over and draw up a loop.
Yarn over and draw through two loops three times.
Second Stitch (and every stitch after):
Looking at the post of the stitch just made, you will see two horizontal bars going across the centre of the post. Insert your hook under the first horizontal bar, yarn over and draw up a loop.
Insert your hook under the second horizontal bar and draw up a loop.
Next, insert your hook into the next stitch on your foundation chain, yarn over and draw up a loop.
Yarn over and draw through two loops on your hook three times.
Repeat this process across your foundation chain.
And that’s it!
Finally, repeat row two for as long as you would like. Fasten off and weave in your ends.
Video Tutorial:
Would you like to learn how to crochet the Linked Treble Crochet stitch? Get the tutorial here: Linked Double Crochet Stitch | How to Crochet
Thank you for stopping by! If you enjoyed this stitch tutorial, your may also wish to check out the tutorial for the Post and Shell Stitch | How to Crochet.
See you next week!
Sarah


WOW Sarah! I can’t wait to try this on some pillow covers. I hate when you can see through the crocheted fabric, and this stitch should make them last longer, too!! Whoopee! Thank you!
Does this stitch turn out a sort of wavy fabric, or ‘hilly?’