
This post contains affiliate links. This means that when you purchase through one of these links we will receive a small commission at no additional cost to you. Thank you for supporting Rich Texture Crochet!
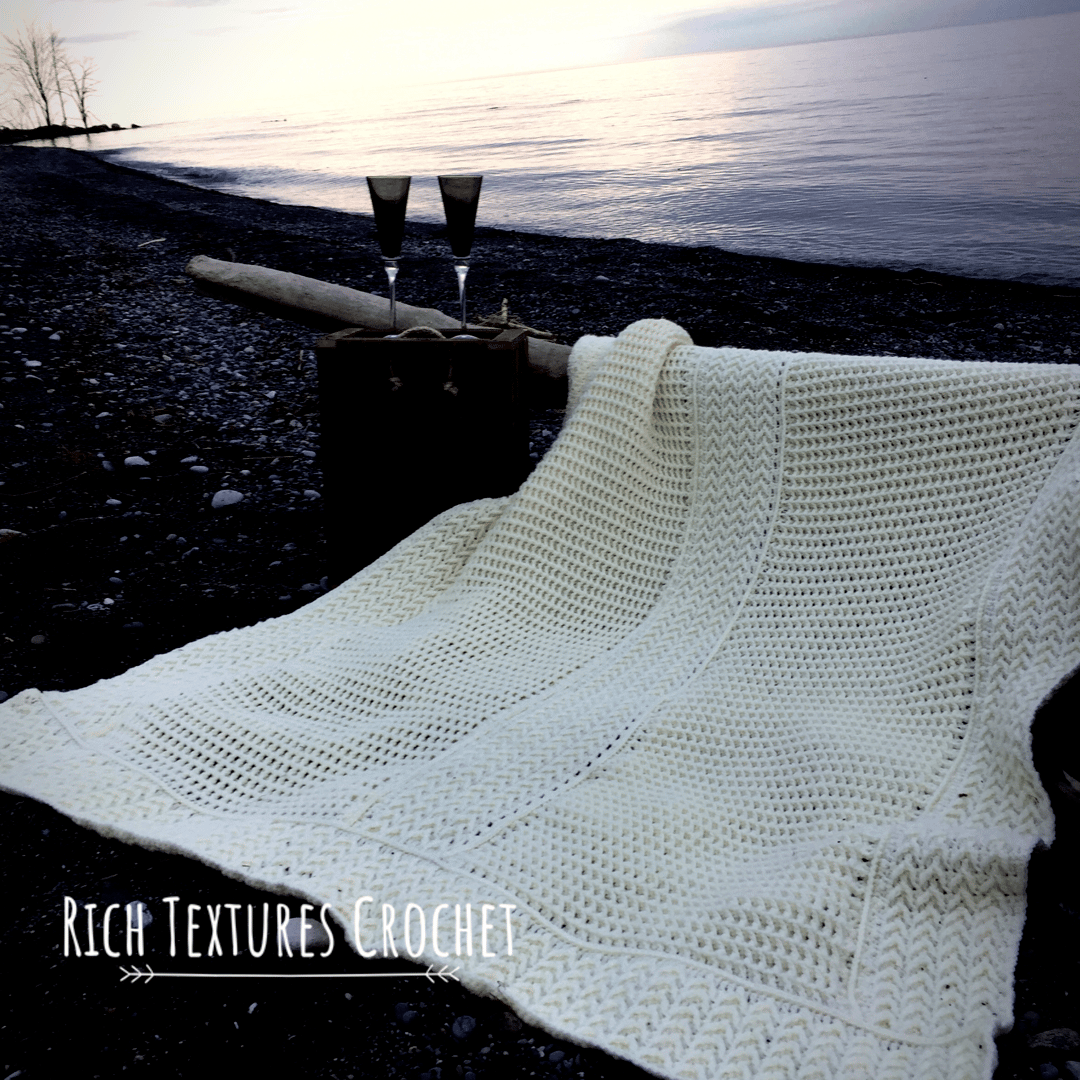
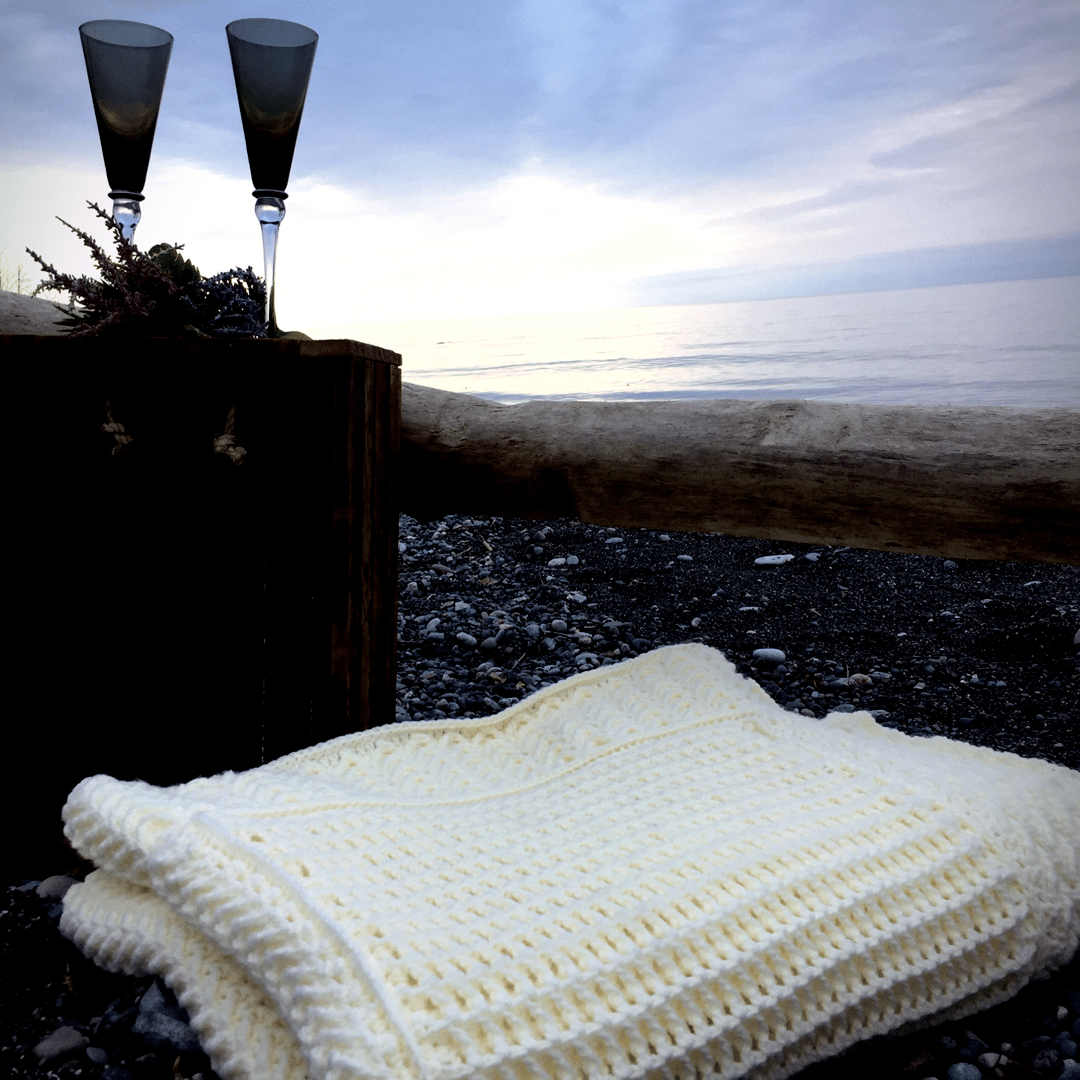
Hello Everyone and welcome to the final week of the Wedding Throw Crochet Along! Today you’ll find the patterns for the final two panels of this beautiful textured blanket.
First of all, thank you so much for joining me over these past five weeks to make this beautiful blanket! I am so happy to be finishing this project with you and I have enjoyed seeing all of your progress photos on social media and in the RTC Facebook Community Group.
If you haven’t already, be sure to like/follow Rich Textures Crochet on Facebook (https://www.facebook.com/RichTextures/) and there you will find the request to join the Facebook Community group where you can share photos and receive answers to questions about the crochet along.
Now, on to week five!
This week you will be working on the final two panels for this blanket. When finished, each of these panels will be placed at either end of the throw.
If you have not already, I recommend joining the first five panels to ensure that your two end panels are the proper length.
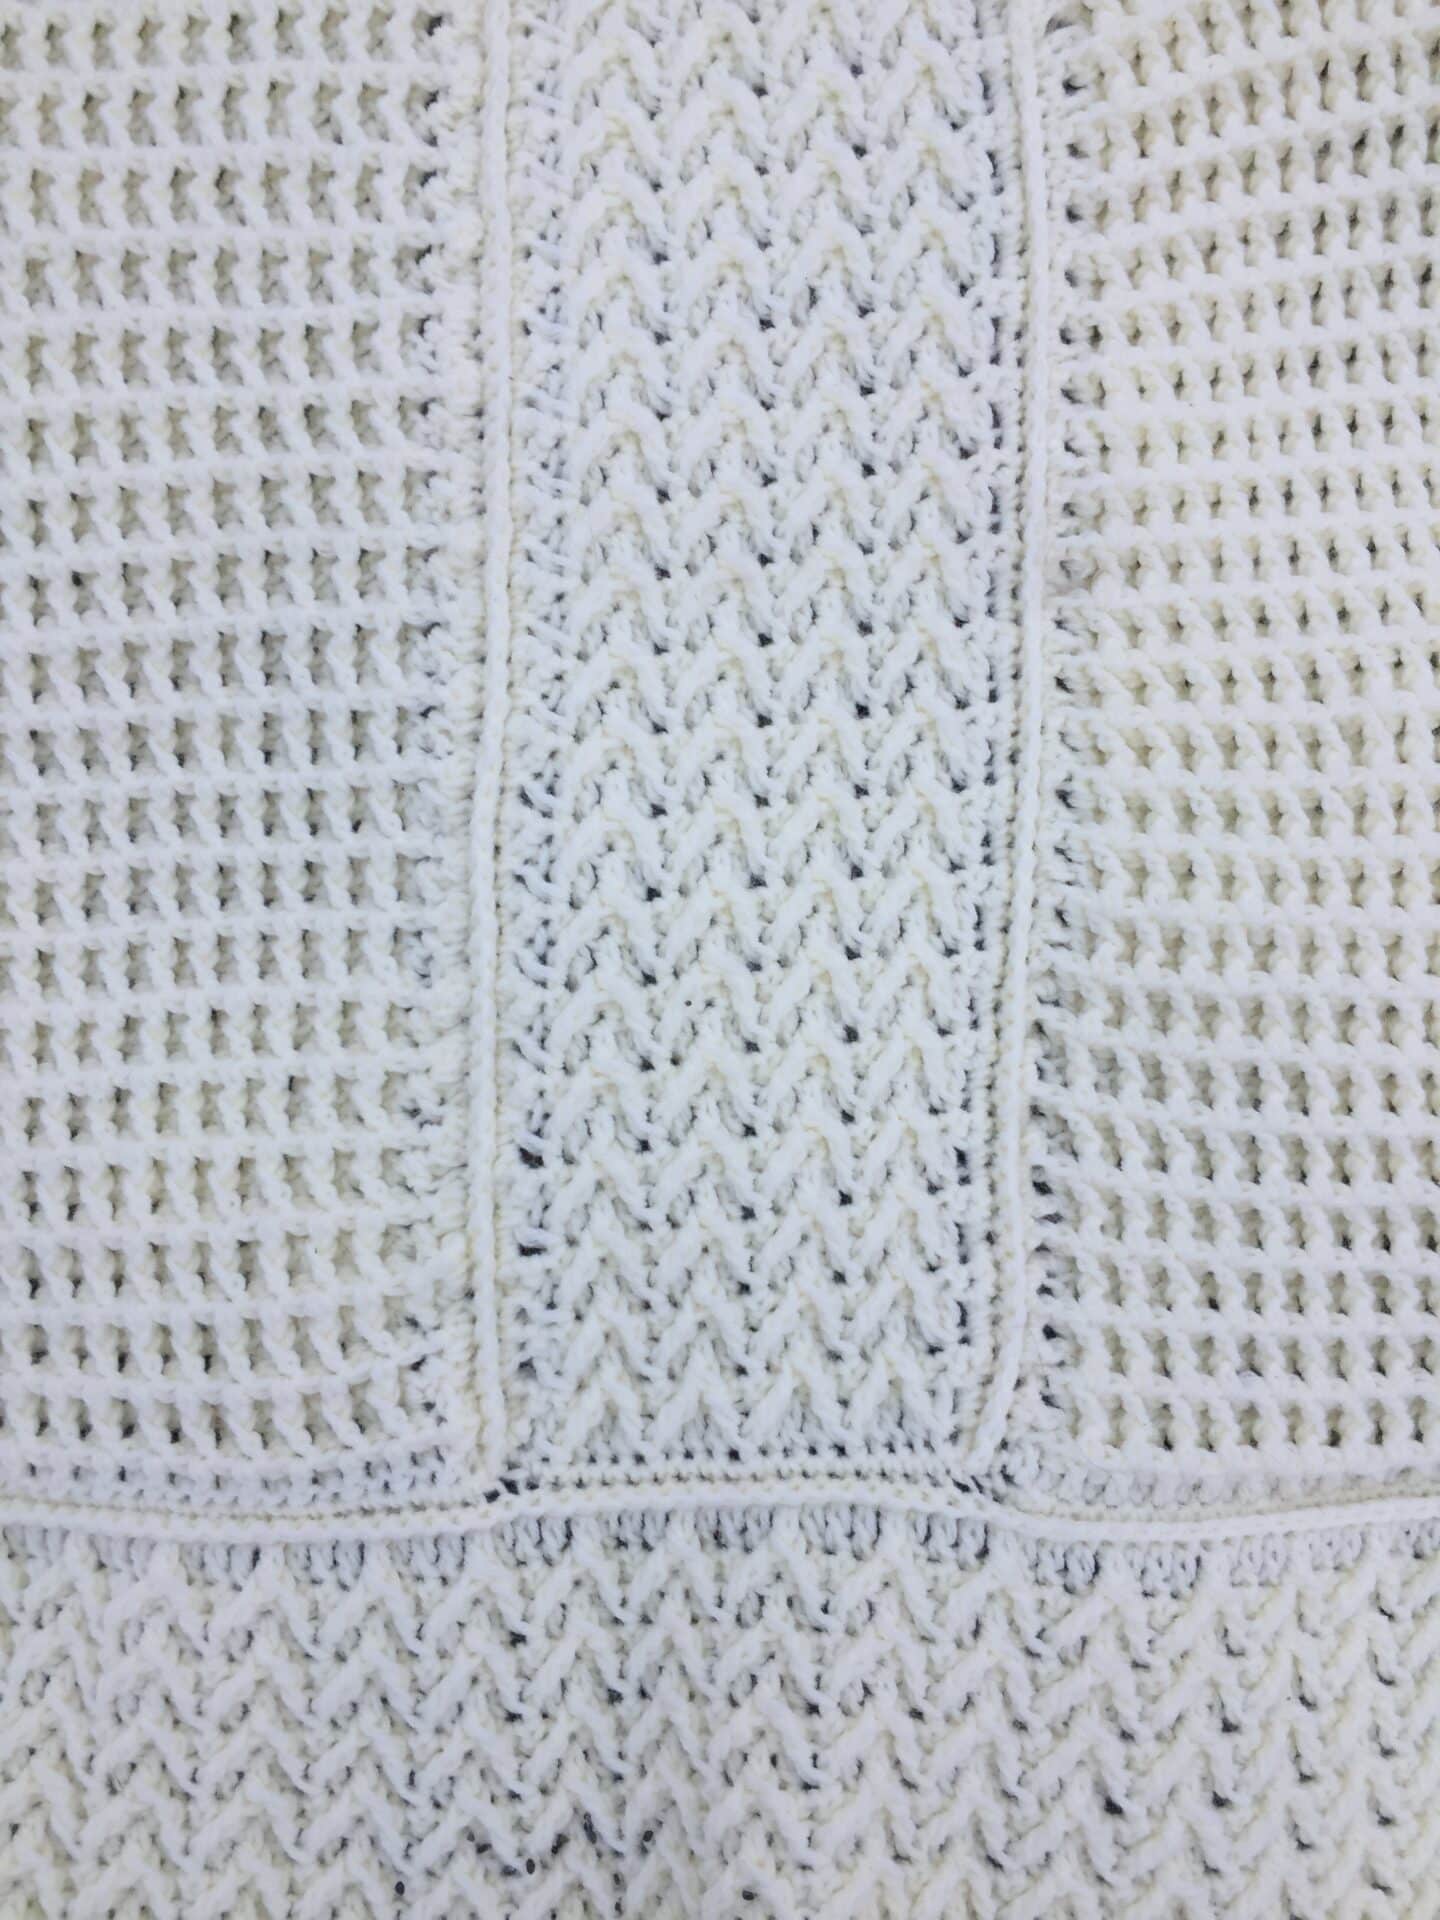
The two end panels are worked similar to those of week three and feature those cabled arrow stitches running the full length across the width. Because the design is similar, at the end of this written pattern I will include the week three video tutorial. All you will need to do is change the stitch count 🙂
Once you have completed the two panels, they will be joined to the top and bottom of the throw in the same manner as the previous panels.
To finish off my blanket I simply added one round of single crochet stitches all the way around.
If you missed the first week of this crochet along, you can find all the details here: The Wedding Throw – Free Crochet Along
It’s that easy!
This week I look forward to finally packing up my blanket and sending it on it’s way to my brother. It’s hard to believe that after waiting all of these months since they announced their engagement that the wedding date is only a couple of weeks away. It’s going to be so much fun and I am so proud and happy to be celebrating with them.
PDF Now Available:
The downloadable PDF is now available! If you would like to save this pattern to your library or purchase the PDF for $2.50 CAD, you may do so through either my Etsy or Ravelry shop. The pattern will also remain here for free on my blog. The direct links are as follows:
Once again, thank you so much for joining me over these past several weeks! Until next time, Happy Crocheting!
Sarah
The Wedding Throw: Week Five
Skill Level: Intermediate
Gauge: 15 sts x 10 rows = 4 inches.
Finished Size of Panel: Approximately 5 x 49 inches.
Yarn: Approximately 1, 200 yards Pound of Love® by Lion Brand® (%100 Acrylic; 16 oz/454 g; 1, 020 yd/932 m; #4 Worsted Weight). Colour: Antique White
Hook: Size J/10 (6.0 mm). Adjust hook size if necessary to obtain correct gauge.
Notions: Yarn Needle.
Stitches and Abbreviations:
Beg fptrcl – Beginning Front Post Triple (yarn over, insert hook in the first specified st, yarn over and draw up a loop, yarn over and draw through 2 loops on your hook. Yarn over twice, insert your hook from right to left around the post of the stitch indicated, yarn over and draw through two loops on your hook twice, yarn over and draw through the remaining loops on your hook.
Ch – Chain
Dc – Double Crochet
End fptrcl – End front post triple (Yarn over twice, insert your hook from right to left around the post of the stitch indicated, yarn over and draw through two loops on your hook twice, insert your hook into the top of the first beg fptrcl and join with a sl st.
Fptr2tog – Front Post Triple two stitches together (Yarn over twice, insert your hook from right to left around the post of the stitch indicated, yarn over and draw through two loops on your hook twice. Yarn over twice, insert hook around the post of the next specified st, yarn over and draw up a loop, yarn over and draw through 2 loops on your hook twice. Yarn over and draw through the remaining loops on your hook.
Rpt – Repeat
Sc – Single Crochet
Sk – Skip
Sl St – Slip Stitch
Yo – Yarn Over
Pattern Notes:
- Pattern is written in American English terms.
- Pattern is worked in rows.
- Ch 1 at the beginning of a row does not count as a stitch.
- Ch 3 at the beginning of a row counts as a dc.
Free Crochet Pattern:
Ch 195.
Row 1: Dc in the 4th ch from hook and in each st across (193 sts). Turn.
Row 2: Ch 1, sc in each st across. Turn.
Row 3: Ch 3, beg fptrcl working the first part of the st in the first st and the second part of the st around the post of the third dc in the rnd below, dc in each of the next 3 sts, *fptr2tog with the first part of the st worked around the same post as the previous fptr below, sk 3 dc and work the second part of the st around the post of the next st, dc in each of the next 3 sts (Note: You will start the first of these dc sts in the next st after skipping the st behind the fptr2tog); rpt from * around to the final st, end fptrcl around the same post as the previous fptr and completing the st in the top of the next st, dc in the final st. Turn. (44 Raised V Stitches)
Row 4: Ch 1, sc in each st all the way across. Turn.
Row 5: Ch 3, beg fptrcl working the first part of the st in the next sc and the second part of the st around the post of the 2nd dc in group of 3 dc 2 rnds below, dc in each of the next 3 sts, *fptr2tog with the first part of the st worked around the same post as the previous fptr below, sk 3 sts and work the second part of the st around the post of the next st, dc in each of the next 3 sts; rpt from * around to the final st, end fptrcl around the same post as the previous fptr and completing the st in the top of the first st, dc in the final st. Turn.
Repeat rows 4 and 5 until work from the beginning measures approximately 5 inches (You will have 6 rows of the cabled V’s). Fasten off, weave in ends.
Edging:
With the right side facing, join yarn with a sl st in the top right corner.
Rnd 1: Sc in the same st as joining and in each st across, work 3 sc in the corner st. Working along the side of the panel, evenly work 18 sc across, work 3 sc in the corner st, sc in each st across, 3 sc in the corner st, work 18 sc evenly across, work 2 sc in final corner. Join with a sl st in first sc.
Fasten off, weave in ends. Set Panel aside, Repeat for Panel 7.
Join your Panels Together:
To join your panels together you will lay them side by side with the right sides facing up. If it helps, you may want to pin them together to make sure that they line up.
These panels are to be added to the two ends of the blanket.
With the right sides facing and working through both thicknesses, join your yarn with a slip stitch through the front loops only on each panel. Single crochet in the same stitch.
Now working in the front loops only and through both panels, work one single crochet stitch in each stitch all the way across. Fasten off and weave in your ends.
Repeat until both end panels have been joined.
Final Blanket Edging:
For my final edging, I simple worked one sc in each stitch all the way around the blanket, working 3 sc in each corner stitch. Join with a sl st in the first st. Fasten off and weave in your ends.
Video Tutorial:
This is the video tutorial from week three as the design in the panels is the same. Simply remember to change the stitch counts:
The photographs and pattern contained in this document are the property of Rich Textures Crochet.
This pattern is for personal use only.
No unauthorized reproduction, in whole or in part, or distribution of this pattern or content is permitted. ALL FINISHED PRODUCTS from this pattern can be used for local sales and sold online.
Thank you so much for supporting Rich Textures Crochet! To stay in touch or see more great products, be sure to visit me on Facebook and Instagram (Rich Textures Crochet). Thanks again! Happy Crocheting!


Hi Sarah,
I am on the final two panels of your beautiful blanket and have run into a problem. I am working on the first row of the raised V’s and my end of the row does not calculate as described in the pattern. Should the end of the row be the same as the beginning? After the last complete V stitch I still have 4 stitches remaining.
Also, I have 47 V stitches??
Please help!! I have frogged this three times and restarted twice and keep getting the same result.
Thank you!!
I will try to take a look this evening – it’s possible I have the stitch count wrong 🙂
I have the same issue! Just wondering if there’s an update for this?
Thank you for creating this beautiful pattern!
I have the same issue. 47 arrows of v’s upside down.
I have the same problem. I have 47 v stitches and 4 left over. Did you ever figure out if the stitch count was wrong? Trying to make this for my daughter who is getting married
Thank you
Katinka
I worked it out!!! The panels with v stitches need to be multiples of 4 + 3. If the whole length of the throw is 193 stitches, including the edging, these long v stitch panels need to be 191 long before the edging. Which gives 47 v stitches. Hope that helps!!! 🙂