
This post contains affiliate links. This means that when you purchase through one of these links we will receive a small commission at no additional cost to you. Thank you for supporting Rich Texture Crochet!
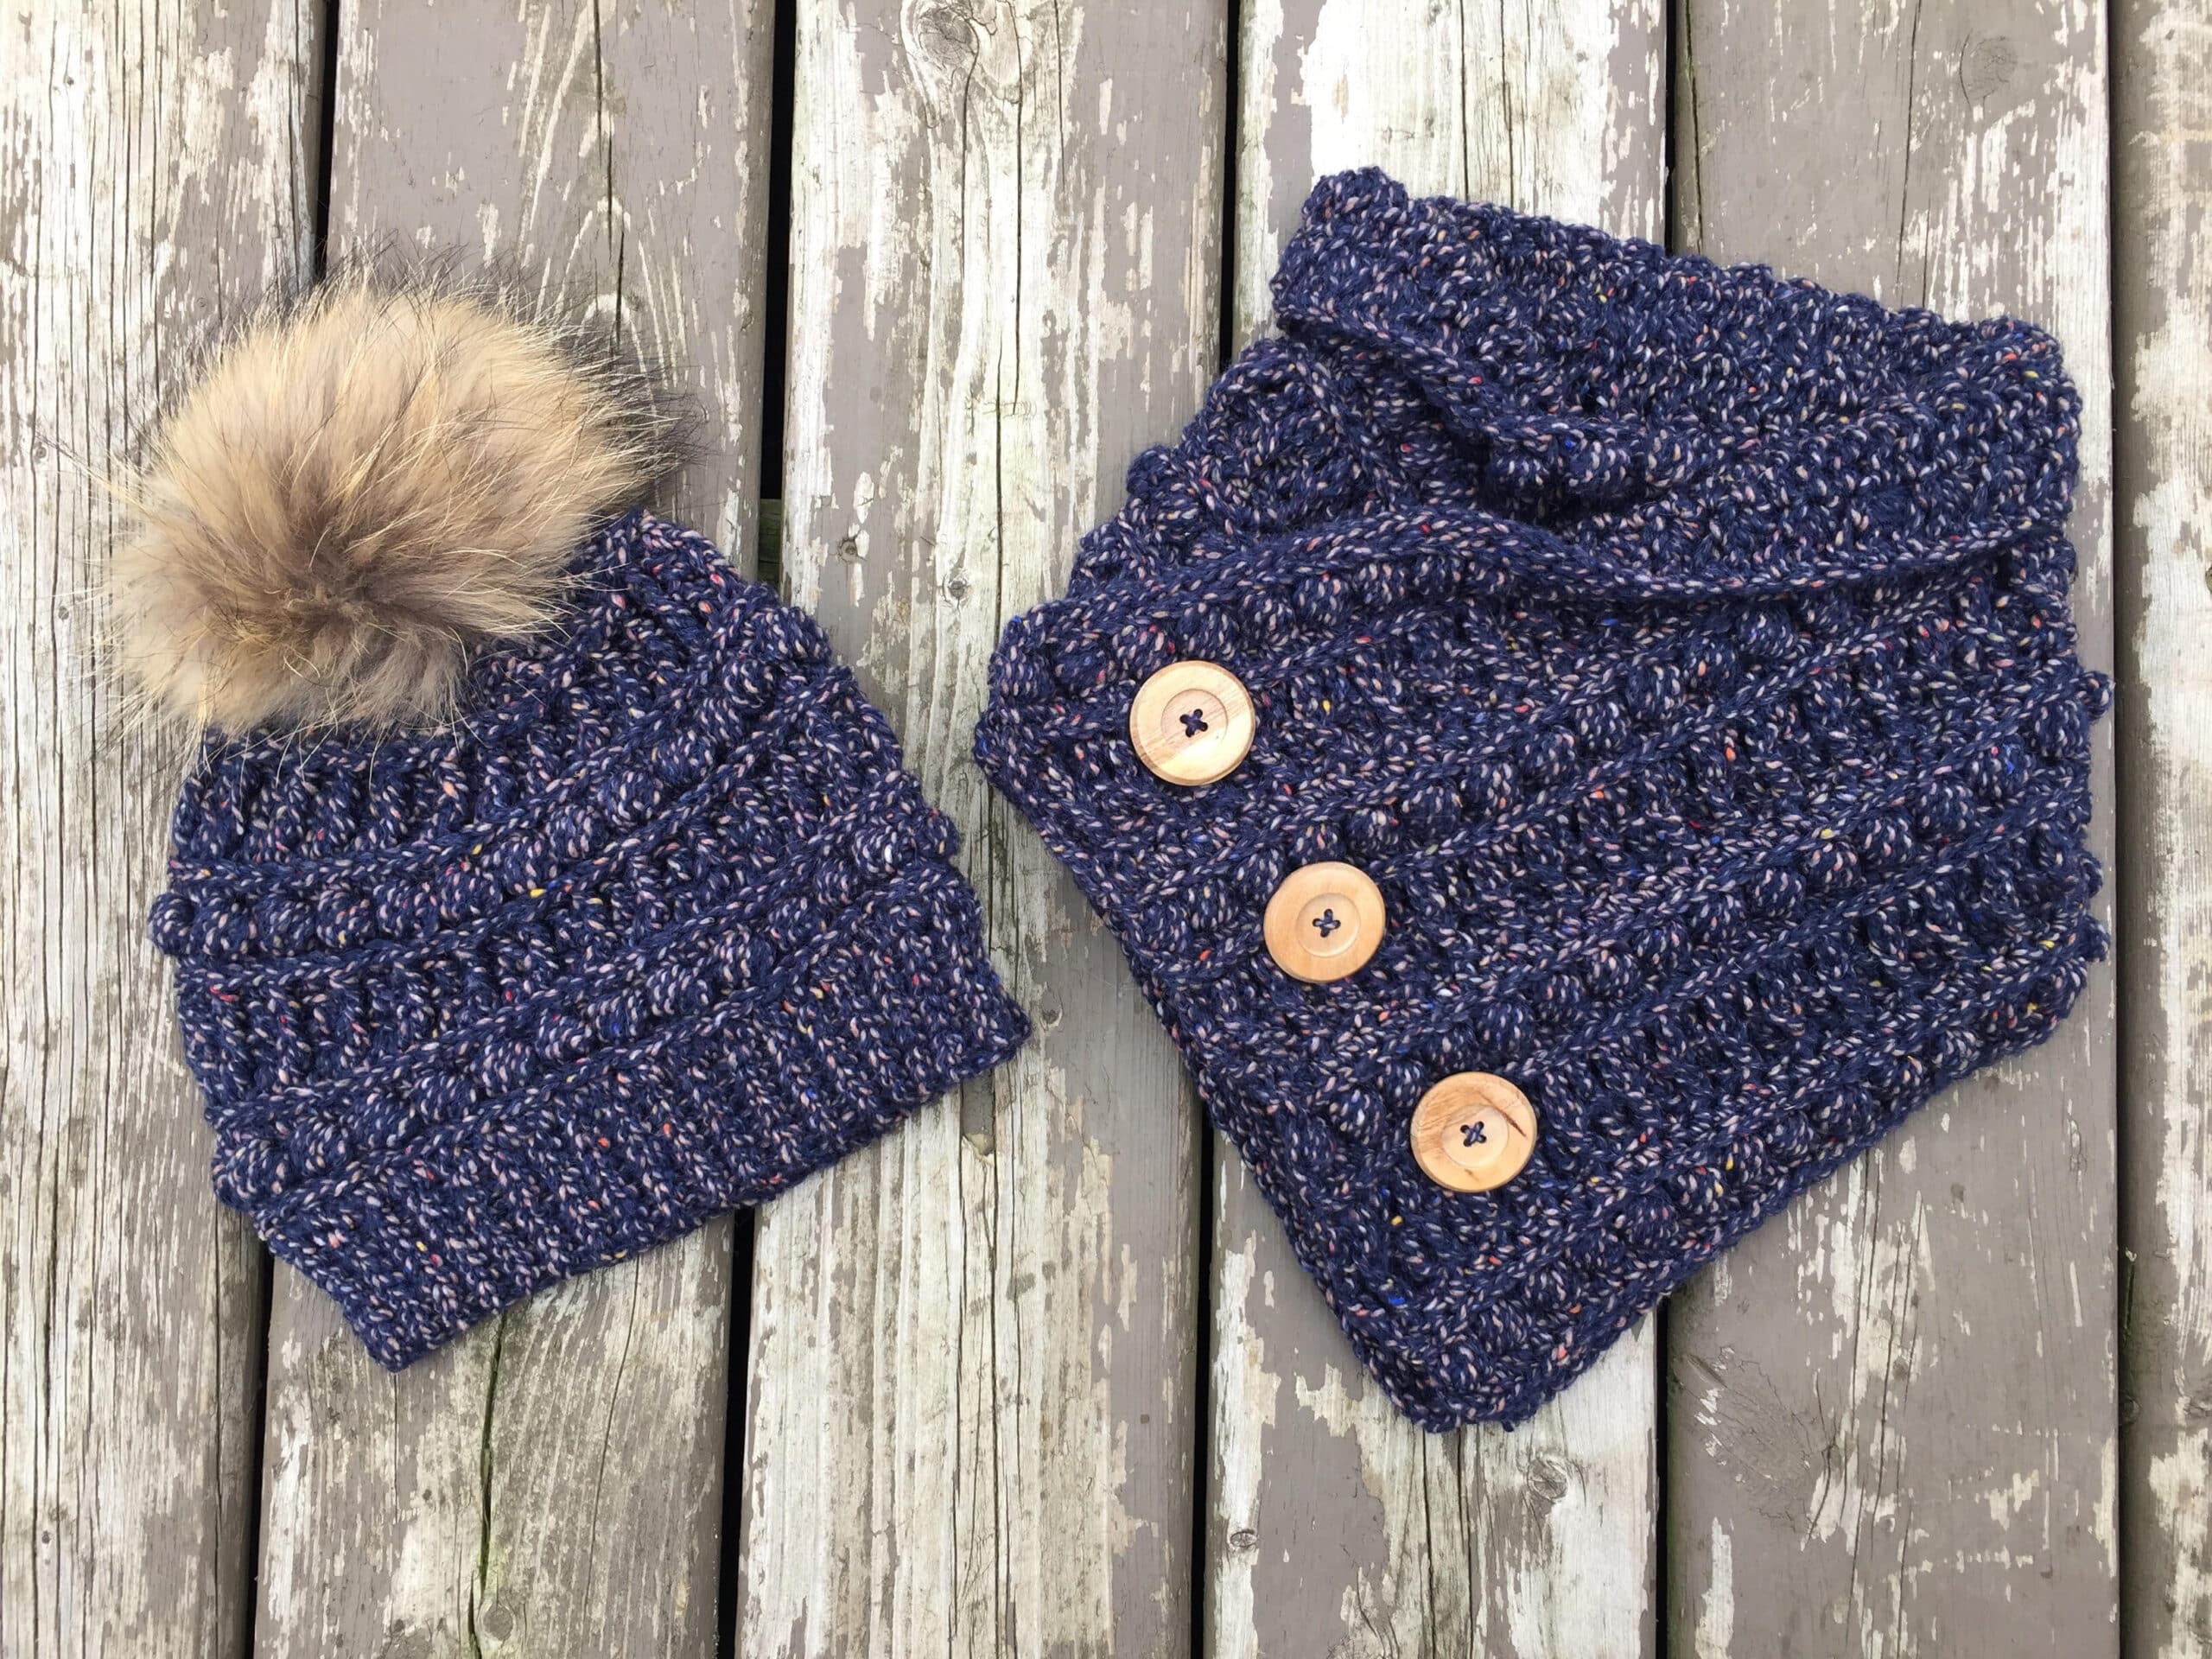
Now that you’ve had a chance to make up the Rustic River Beanie, it’s now time to introduce you to the free crochet pattern and video tutorial for the Rustic River Cowl!

The Yarn:
Once again this cowl is made with the beautiful Canoe yarn by Sugar Bush yarns. It is a bulky weight yarn that is a blend of fibres making it super soft and squishy! One of the things I love about this yarn is the hint of colour that is woven throughout the strand of yarn. It makes it truly unique.
If you’d like to know more about Sugar Bush Yarns, you can find their website (along with a shop finder) here: https://www.sugarbushyarns.com/yarn/canoe.html
Definitely check them out, with their wide selection of colours and fibres you won’t be disappointed!
The Cowl:
As I mentioned above, this cowl complements a hat that I designed by the same name and yarn. If you’d like to check out that pattern (which includes a video tutorial), you’ll find it here:
Rustic River Beanie – Free Crochet Pattern
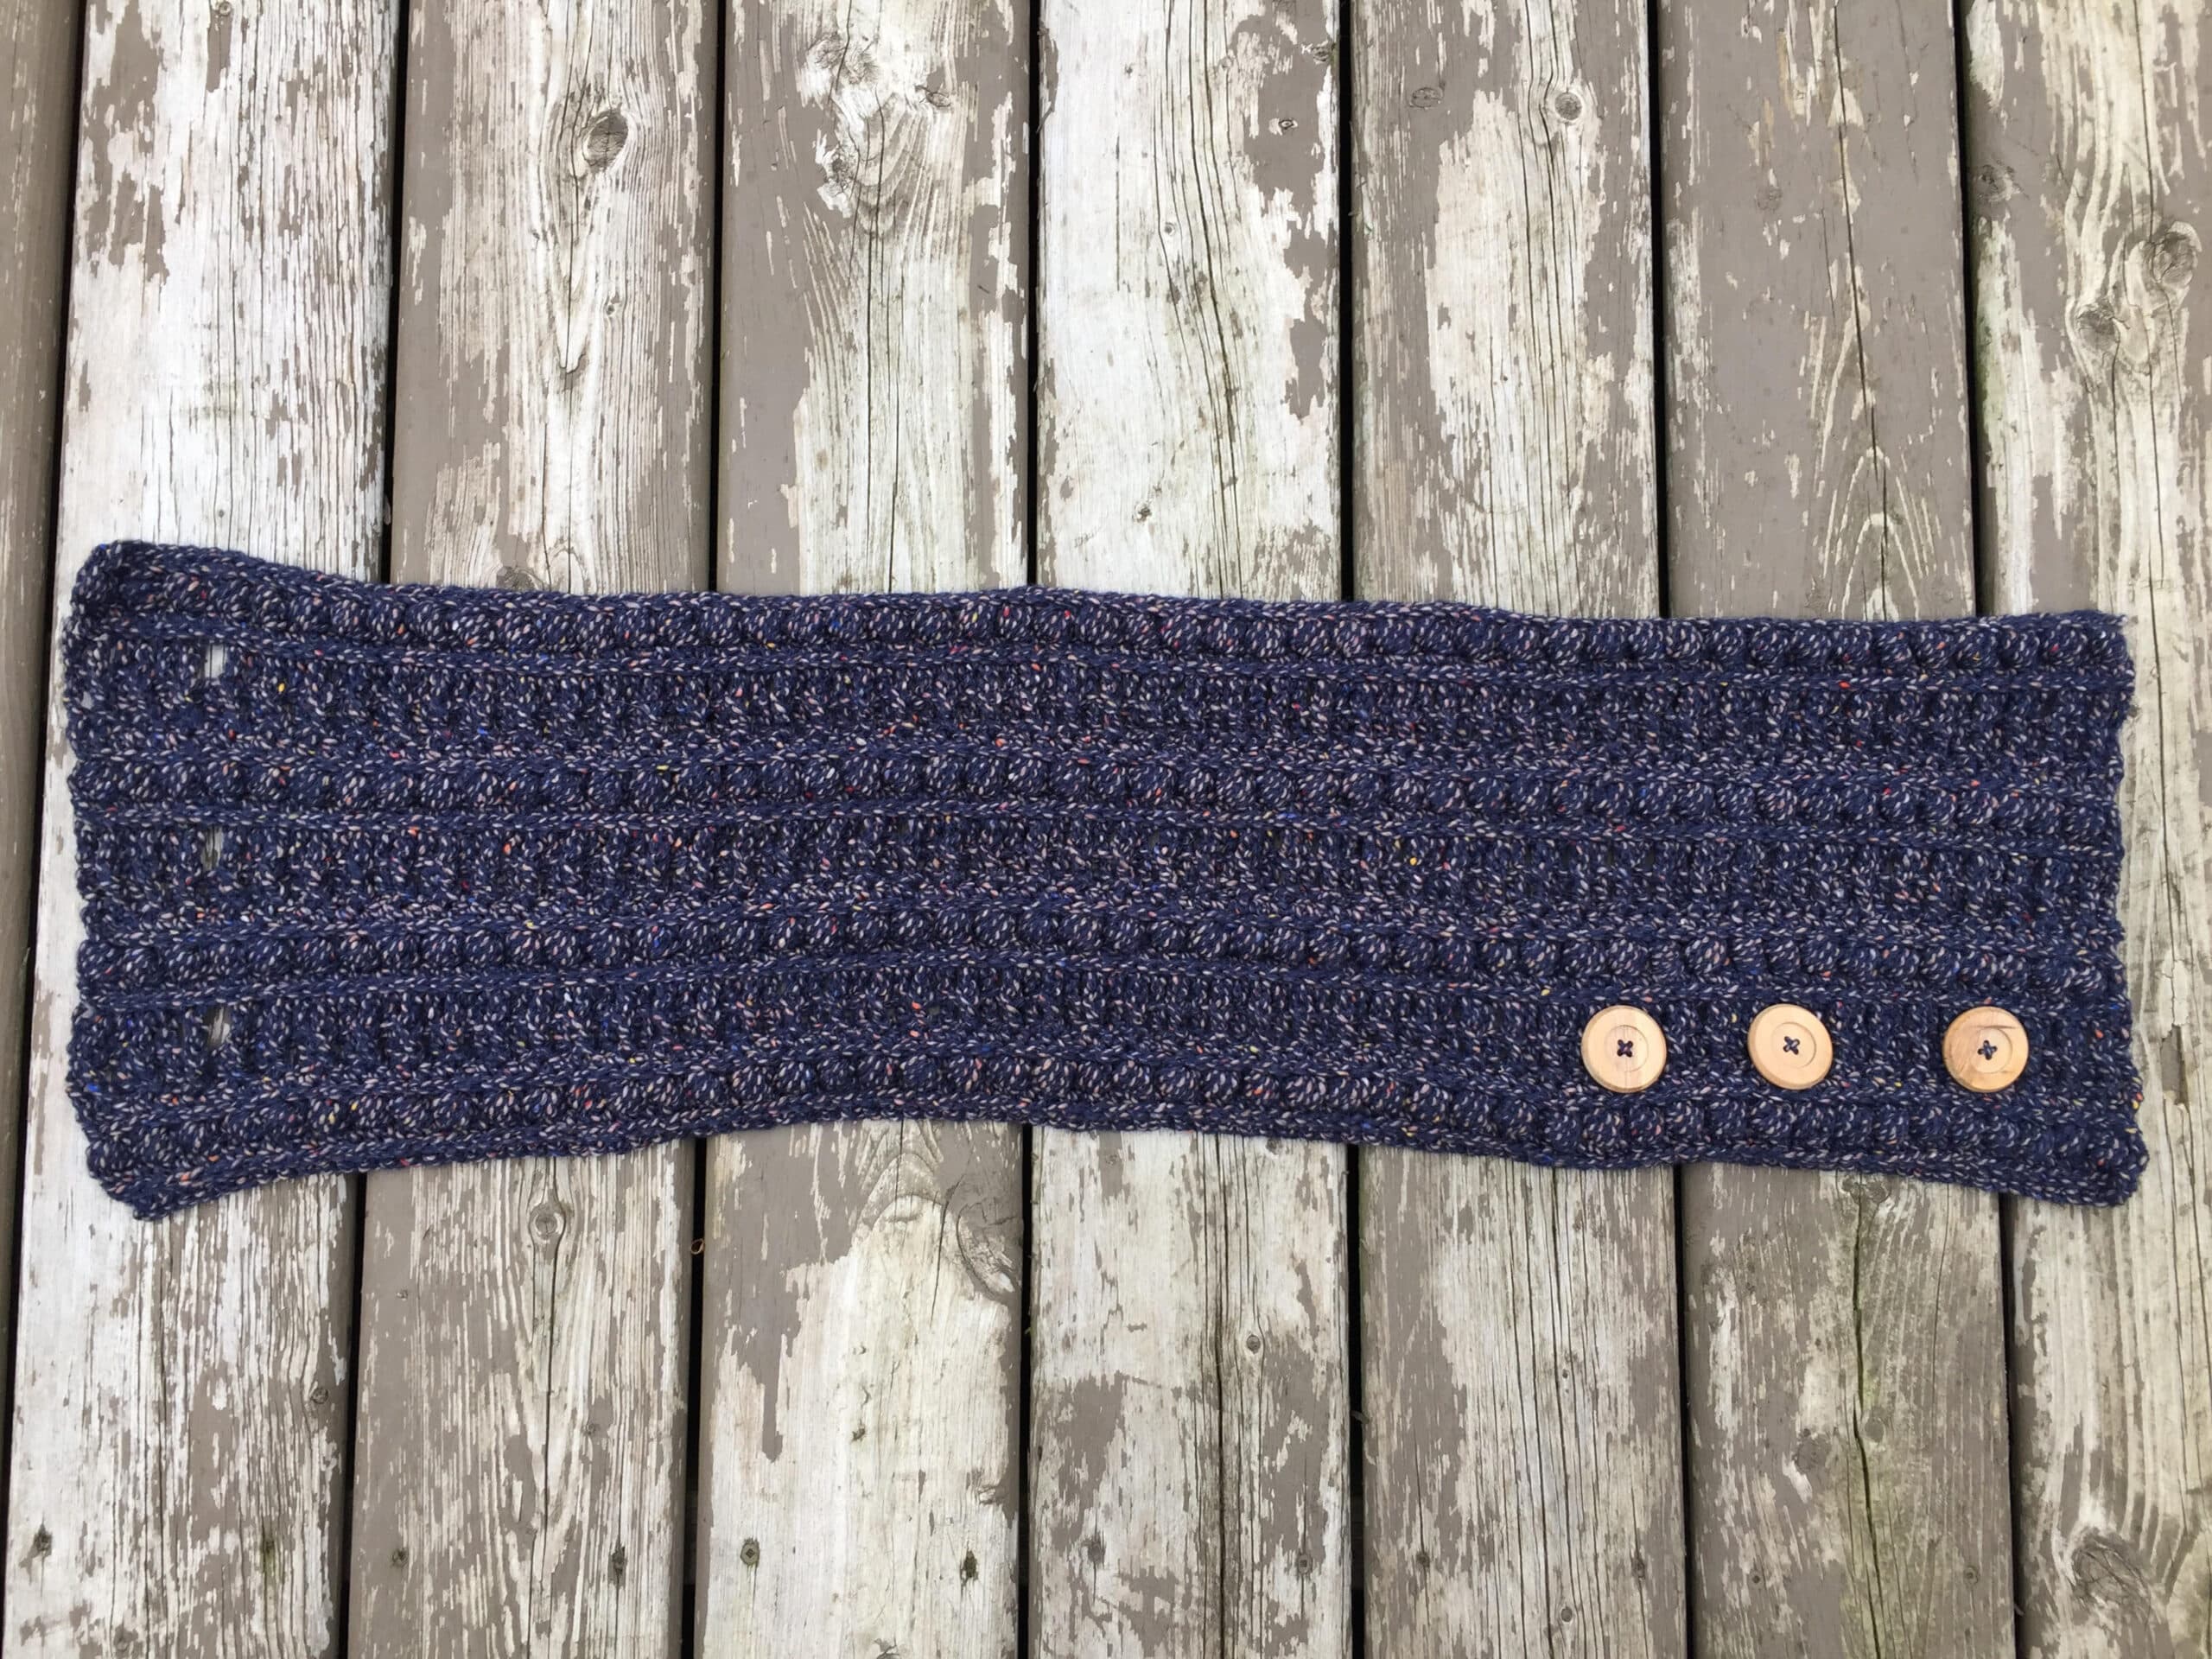
This cowl features a lot of the same stitches which gives it a great texture. The design is nice as it is not too bulky when worn under a coat, and would even look nice over top of a coat or sweater. The bulky weight yarn means it works up quickly.
The pattern is graded as an intermediate pattern simply because of the variety of stitches. To help you along your way a complete video tutorial for the cowl can be found below.
For the cowl you will need about 3.5 skeins (or about 340 yards) of yarn and an 8 mm crochet hook. You will also need 3 buttons that are between 1.25-1.5 inches in diameter.
To save this pattern:
If you wish to purchase a downloadable pdf of this pattern, or save it to your library, you may do so from either of my Etsy or Ravelry shops:
As always, thank you so much for stopping by and supporting Rich Textures Crochet! Also a huge thank you to Sugar Bush Yarns who so graciously provided the yarn for these projects, allowing me to enjoy some of their gorgeous yarn!
Happy Crocheting!

The Rustic River Beanie:
Skill Level: Intermediate
Gauge: 11 dc x 4 rows = 4 inches
Finished Size: Approximately 37 inches across x 9 inches tall laid flat.
Yarn: 3. 5 skeins of Canoe® by Sugar Bush Yarns™ (61% wool, 26% alpaca, 13% nylon; 1.75 oz, 50 g; 95 yds, 87 m). Bulky Weight (5). Colour: Lakeshore.
Hook: Size L/11 (8.00 mm) hook.
Notions: Yarn Needle, 3 buttons 1.25-1.5 inches in diameter, 3 stitch markers.
Stitches and Abbreviations:
Blo – Back Loop Only
Bpdc – Back Post Double Crochet
Bpsc – Back Post Single Crochet
Ch – Chain
Fpdc – Front Post Double Crochet
Fphdc – Front Post Half Double Crochet
Fpsc – Front Post Single Crochet
Hdc – Half Double Crochet
Hdc2tog – Half Double Crochet Two Stitches together
Puff – Puff Stitch (Puff Stitch ([Yarn over, insert hook in stitch indicated and draw up a loop] four times, yarn over and draw through all loops on hook)
Rpt – Repeat
Sc – Single Crochet
Sk – Skip
Sl st – Slip stitch
Yo – Yarn over
Pattern Notes:
– Pattern is written in American English terms.
– Pattern is worked in rows.
– Ch 1 at beg of row does not count as stitch.
– Ch 3 at beginning counts as dc.
– Weave in ends as needed.
Pattern:
Ch 100
Row 1: Hdc in the 2nd ch from hook and in each across. Turn. (99 sts)
Row 2: Ch 1, working in the 3rd loop, sc in the first st, * puff in the next st, sc in the next st; Rpt from * in each st across. Turn.
Row 3: Ch 1, hdc in each st all the way across. Turn.
Row 4: Ch 3, working in the 3rd loop, dc in the next st and in each st across to the last 7 sts, ch 1, sk 1, dc in each of the last 6 sts. Turn. (Note: The ch-1 space will form the first button hole).
Row 5: Ch 3, * fpdc in the next st, dc in the next st; Rpt from * across (Note: when you come to the ch-1 sp, you will place your dc st in the ch-1 followed by your fpdc in the next st). Turn.
Row 6: Ch 1, sc in the first st, * bpsc in the next st, sc in the next st; Rpt from * across. Turn.
Row 7: Ch 1, hdc in each st across. Turn.
Row 8: Ch 1, working in the 3rd loop, sc in the first st, * puff in the next st, sc in the next st; Rpt from * in each st across. Turn.
Row 9: Ch 1, hdc in each st across. Turn.
Row 10: Ch 3, working in the 3rd loop, dc in the next st and in each st across to the last 7 sts, ch 1, sk 1, dc in each of the last 6 sts. Turn. (Note: The ch-1 space will form the second button hole).
Row 11: Ch 3, * fpdc in the next st, dc in the next st; Rpt from * across (Note: when you come to the ch-1 sp, you will place your dc st in the ch-1 followed by your fpdc in the next st). Turn.
Row 12: Ch 1, sc in the first st, * bpsc in the next st, sc in the next st; Rpt from * across. Turn.
Row 13: Ch 1, hdc in each st across. Turn.
Row 14: Ch 1, working in the 3rd loop, sc in the first st, * puff in the next st, sc in the next st; Rpt from * in each st across. Turn.
Row 15: Ch 1, hdc in each st across. Turn.
Row 16: Ch 3, working in the 3rd loop, dc in the next st and in each st across to the last 7 sts, ch 1, sk 1, dc in each of the last 6 sts. Turn. (Note: The ch-1 space will form the third button hole).
Row 17: Ch 3, * fpdc in the next st, dc in the next st; Rpt from * across (Note: when you come to the ch-1 sp, you will place your dc st in the ch-1 followed by your fpdc in the next st). Turn.
Row 18: Ch 1, sc in the first st, * bpsc in the next st, sc in the next st; Rpt from * across. Turn.
Row 19: Ch 1, hdc in each st across. Turn.
Row 20: Ch 1, working in the 3rd loop, sc in the first st, * puff in the next st, sc in the next st; Rpt from * in each st across. Turn.
Row 21: Ch 1, hdc in each st across. Turn.
Row 22: working in the 3rd loop, sc in each st across.
Fasten off, weave in ends.
To position buttons: Lay cowl flat with the wrong side facing and the button holes along the right side. To figure out where to place your buttons, take the left hand side and cross it over the middle of the Cowl. Next take the right hand side and cross it over top of the left side. The Cowl should form a nice “V” at the bottom. Take three stitch markers and place them attaching them to the fabric through the button holes. Re open your Cowl and sew your buttons in place where the stitch markers are placed.
Fasten off and weave in ends.
Video Tutorial:
https://youtu.be/H93XwrJ6Y1Y
The photographs and pattern contained in this document are the property of Rich Textures Crochet.
This pattern is for personal use only.
No unauthorized reproduction, in whole or in part, or distribution of this pattern or content is permitted. ALL FINISHED PRODUCTS from this pattern can be used for local sales and sold online.
Thank you so much for supporting Rich Textures Crochet! To stay in touch or see more great products, be sure to visit me on Facebook and Instagram (Rich Textures Crochet). Thanks again! Happy Crocheting!


Thank you so much for your web site. Forty years ago I crocheted and made many items as gifts. Today, I am making gifts again. I have learned so much from you and enjoy crocheting. Thank you for new patterns and updating me about new yarns. I really like the Sugar Bush Yarns. Sincerely, Martha
Thank you so much Martha!