
This post contains affiliate links. This means that when you purchase through one of these links we will receive a small commission at no additional cost to you. Thank you for supporting Rich Texture Crochet!
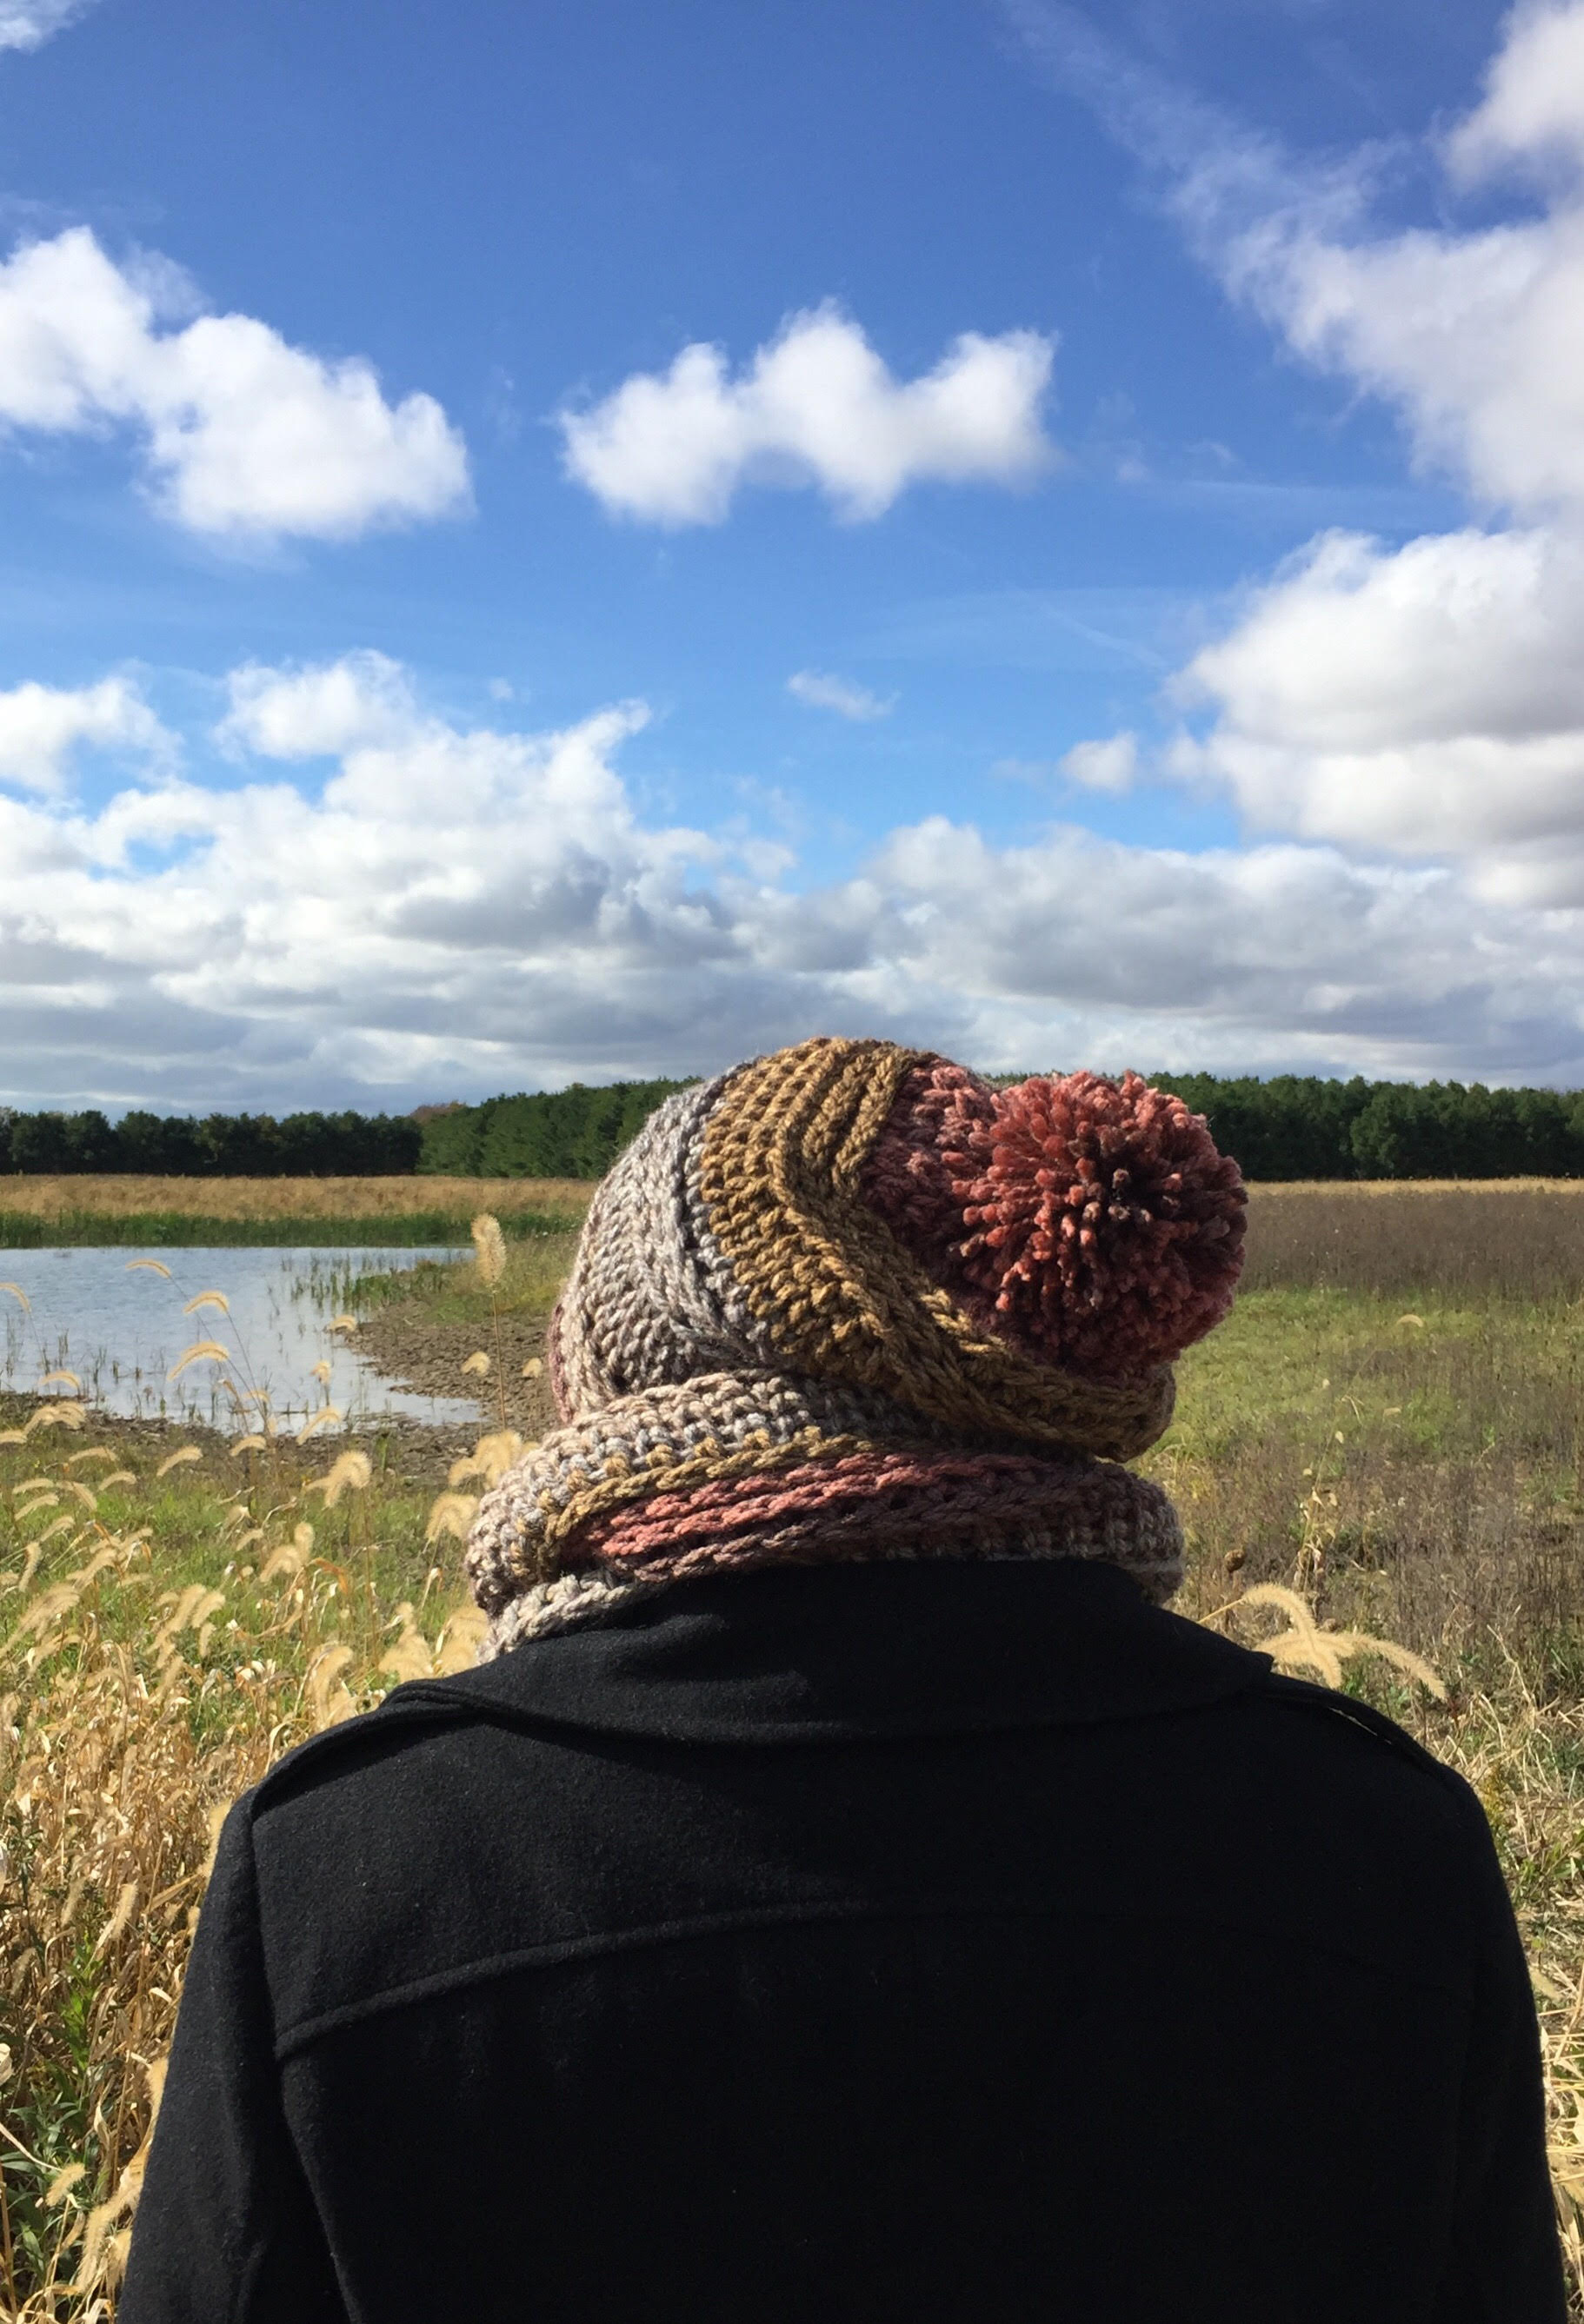
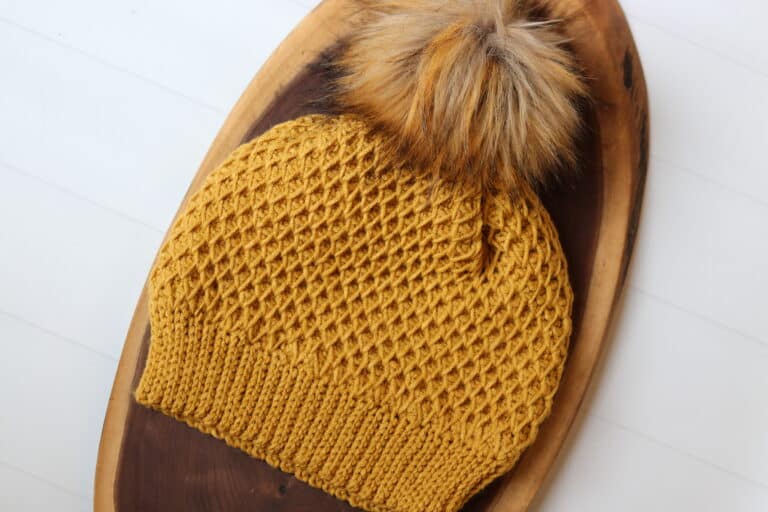
Hi Everyone! I was so excited this morning as a took my kids out for school! Even though we are well into Fall here in Southwestern Ontario, Canada, the weather has been unseasonably warm. But this morning all that changed and it was finally cool enough for me to bundle up and show off my new Slouchy Hat and Cowl set!

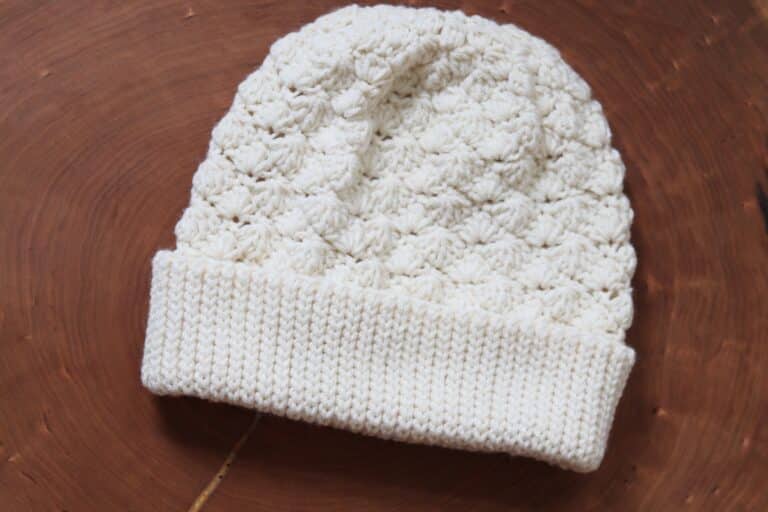
This is what a cool crisp morning in rural Ontario looks like! Below I would like to share the pattern with you for this gorgeous set (along with some more photos!). To make the set you will need two Caron Tea Cakes, or a yarn of the same weight as a substitute. I also used a Bernat Softee Chunky Yarn which is %100 acrylic when testing the pattern and it worked up beautifully as well! So grab an 8mm hook, some super soft and cozy yarn and a cup of tea or coffee and enjoy!
Would you like a convenient download and go PDF? (Also includes photo tutorial for particular stitches) You may purchase one for $2.00 CAD in my shops:
Etsy – https://www.etsy.com/ca/listing/553538606/ginger-spice-slouch-hat-and-cowl-set
Ravelry: https://www.ravelry.com/patterns/library/ginger-spice-hat-and-cowl-set
You will find a video tutorial for the Ginger Spice Hat here:
(More Photos can be found at the end of this post!)
Gauge: 2sc x 2 rows = 1 inch
Materials:
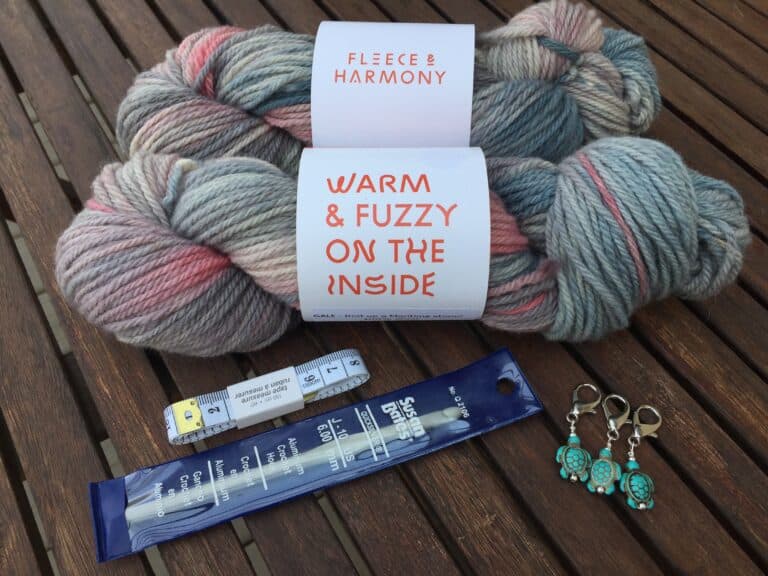
Yarn: Caron Tea Cakes by Yarnspirations™ (%80 acrylic/%20 wool, 8.5 oz. skein, 204 yds). Super Bulky Weight. Colour: Ginger Spice Quantity: Two.
**alturnative yarn: Bernat Softee Chunky. 4 Balls or about 400 yards.
Hook: Size L-11 (8 mm) Hook. Adjust hook size if necessary to obtain correct gauge.
Notions: Yarn Needle.
To Make Pom Pom: Two empty toilet paper rolls, scissors and yarn needle.
Finished Size:
Hat: (not inc. Pom Pom) 10 inches tall, 21 inch circumference
Cowl: 7 inches tall, 50 inch circumference
Stitches and Abbreviations:
Ch – Chain
Hdc – Half double crochet
Hdc2tog – Half double crochet two together
Knit Stitch (ks) – Also called the “waistcoat stitch,” the knit stitch is a single crochet worked through the middle of the single crochet or knit stitch of the previous round. Because you are working your stitch through the middle of the stitch in the previous round and pulling your loop up through the center, a knit look is created.
Knit Stitch 2 together (ks2tog) – Work the ks2tog as you would the sc2tog, but working through the space in the stitch of the previous round that you would typically work a knit stitch.
Rpt – Repeat
Sc – Single Crochet
Sc2tog – Single crochet two together
Sk – Skip
Sl st – Slip stitch
Pattern Notes:
- Pattern is written in American English terms.
- Pattern is worked in rounds from the bottom of hat to the top.
- Ch 1 at beg of rnd does not count as sc or hdc.
- Weave in ends as needed.
- I find the knit stitch works best when your tension is kept quite loose. Loose stitches allow for you to insert the hook in the proper space more easily.
- To work in the 3rd loop: In the hdc stitch, the “third loop” is found at the back of the stitch, below the top two loops that you would normally complete your stitch in. When you crochet in this back loop, it should push the top of the stitch from the previous round to the front of your work creating a “knit” look.
Hat Pattern:
Ch 42. Being careful not to twist ch, join with a sl st in first chain to make a round.
Rnd 1: Ch 1, hdc in each ch around. Join with a sl st in first sc. (42 hdc).
Rnd 2: Ch 1, working in the 3rd loop, hdc in each st around. Join with a sl st in the first hdc. (42 hdc).
Rnds 3-5: Repeat Rnd 2 (42 sc).
Rnd 6: Ch 1, working in the 3rd loop, loosely sc in in each st around. Join with a sl st (in the space that you would work the next ks. See pattern notes). (42 sc).
Rnd 7: Ch 1, ks in each sc around. Join with a sl st. (42 ks)
Rnd 8: Ch 1, ks in each sc around. Join with a sl st. (42 ks)
Rnd 9: Ch 1, working in the same space in stitch of previous row that you would work for a ks, hdc in each st around. Join with a sl st. (42 hdc).
Rnd 10: Ch 1, working in the 3rd loop, hdc in each st around. Join with a sl st in the first hdc. (42 hdc).
Rnd 11: Repeat Rnd 10. (42 hdc)
Rnd 12: Ch 1, working in the 3rd loop, loosely sc in in each st around. Join with a sl st (in the space that you would work the next ks. See pattern notes). (42 sc).
Rnd 13: Ch 1, ks in each sc around. Join with a sl st. (42 ks)
Rnd 14: Ch 1, ks in each sc around. Join with a sl st. (42 ks)
Rnd 15: Ch 1, working in the same space in stitch of previous row that you would work for a ks, hdc in each st around. Join with a sl st. (42 hdc).
Rnd 16: Ch 1, working in the 3rd loop, hdc in each st around. Join with a sl st in the first hdc. (42 hdc).
Rnd 17: Ch 1, working in the 3rd loop, * hdc 12, hdc2tog. Rpt from * around. Join with a sl st. (39 sts)
Rnd 18: Ch 1, working in the 3rd loop, loosly * sc 5, sc2tog. Rpt from * around, sc in the last 4 sts. Join with a sl st in the first st. (34 sts)
Rnd 19: Ch 1, * ks 4, ks2tog. Rpt from * around, ks in the last 4 sts. Join with a sl st in the first st. (29 sts).
Rnd 20: Ch 1, * ks 3, ks2tog. Rpt from * around, ks in the last 4 sts. Join with a sl st in the first st. (24 sts).
Rnd 21: Ch 1, * ks 2, ks2tog. Rpt from * around. Join with a sl st in the first st. (18 sts).
Rnd 22: Ch 1, * ks 1, ks2tog. Rpt from * around. Join with a sl st in the first st. (12 sts).
Rnd 23: Ch 1, * ks2tog. Rpt from * around. Join with a sl st in the first st. (6 sts).
Fasten off leaving a long tail. Sew opening at top of the hat closed. Weave in ends.
Make pom pom if desired and fasten to top.
Cowl Pattern:
Ch 86. Being careful not to twist chain, join with a sl st in first ch to make a ring.
Rnd 1: Ch 1, hdc in each ch around. Join with a sl st in first sc. (86 hdc).
Rnd 2: Ch 1, working in the 3rd loop, hdc in each st around. Join with a sl st in the first hdc. (86 hdc).
Rnd 3: Repeat Rnd 2 (86 sc).
Rnd 4: Ch 1, working in the 3rd loop, loosely sc in in each st around. Join with a sl st (in the space that you would work the next ks. See pattern notes). (86 sc).
Rnds 5-6: Ch 1, ks in each sc around. Join with a sl st. (86 ks)
Rnd 7: Ch 1, working in the same space in stitch of previous row that you would work for a ks, hdc in each st around. Join with a sl st. (86 hdc).
Rnd 8: Ch 1, working in the 3rd loop, hdc in each st around. Join with a sl st in the first hdc. (86 hdc).
Rnds 9-15: Repeat Rnds 2-8. (86 hdc)
Rnds 16-17: Ch 1, working in the 3rd loop, hdc in each st around. Join with a sl st in the first hdc. (86 hdc).
Fasten off. Weave in ends.


The photographs and pattern contained in this document are the property of Rich Textures Crochet.
This pattern is for personal use only.
No unauthorized reproduction, in whole or in part, or distribution of this pattern or content is permitted. ALL FINISHED PRODUCTS from this pattern can be used for local sales and sold online.
Thank you so much for supporting Rich Textures Crochet! To stay in touch or see more great products, be sure to visit me on Facebook and Instagram @RichTexturesCrochet. Thanks again! Happy Crocheting!


When you join on the 3rd lol only rounds do you join only in the 3rd loop? I’m finding the back of my hat is very messy looking
I join in the top, then ch 1 and do the hdc in the third. I have done it the other way though too, I just felt that the join wasn’t as tight when I joined in the third.
No matter how I join my joins are quite visible. I’ve pulled the hat apart and crocheted again twice. Love the pattern, just having major join problems. Joins are invisible on reverse side. Agh!!!! Suggestions?
Hi Janet, there are two ways that I like to join – I will get back to you this evening (after my kids are in bed) and share some photos. The third option is not to join at all but work continuous rounds using a stitch marker to mark the first stitch in the round. Just be sure to keep moving the marker as your work progresses.
Thank you thank you thank you, look forward to hearing from you later
Me too! Any hints?!
This is a lovely pattern! Thank you!
You’re welcome!
I’m having difficulty with the initial foundation chain. 42 seems pretty small for an adult hat. I dont feel like my foundation chain is too tight but Is it supposed to be a super loose chain? What am I doing wrong..lol!!!?
Hi Kaiti, thanks for trying the pattern! First I would check to make sure you are using a super bulky weight yarn (6) and an 8mm Hook, and check to see if your gauge is the same as mine indicated in the pattern. Then I would try increasing in Hook size (perhaps try a 10mm) as that will make your stitches looser. You’re chain should measure approximately 22 inches. Let me know if that helps! Thanks again!
I had the same issue. I’m using super bulky and 8mm too. Going up a needle size won’t change look?
It won’t change the look, but it may make it slightly larger 🙂
You will also be adding an edging which will take away some of the curl
Went the other day to buy a ton of yarn to do this pattern in several colors. Love it. Unfortunately have take first project out several times. Also having issues with getting seam straight. Fairly self taught and have googled invisible seams. Problem is they are usually only for the hdc rows. Any suggestions on how to get a straight invisible seam? txs
Hi Laurie, yes the hat has a seam at the back. I find that being sure to pull the joining sl st at the end of each row tight helps, but because there is a join at the end of each row, there will be a seam. You can try to see if it makes a difference for you, either join each round in the 3rd loop and continue, or join in the top of the hdc, then work the first st in the 3rd loop as indicated.
The other way that might work for you is by not joining at the end of each round and working continuous rounds. Use a stitch marker to mark your first stitch and be sure to move it up as work progresses. Instead of joining at the end of each round, simply start the next. You will have a little jump at the end of the first round (pull a little tighter), but after that it will be seamless. I hope that helps! Thank you for trying the pattern, and let me know how it goes.
Thanks for reply. Will try all three to see what works best for me. Where do I join to keep seem straight once I start the ks row? tx again.
You can try either joining in the space that you would work the ks or join in the top of the stitch and then work the ks.
where you gave the option to “or join in the top of the hdc, then work the first st in the 3rd loop as indicated” after joining in hdc is the first stitch in the 3rd loop of the same stitch or the next one? tx
Yes, in the same stitch. And the same stitch if you join in the top loops before working the ks
Thanks for reply. Will try all three to see what works best for me. Where do I join to keep seem straight once I start the ks row?
Where you gave the option to “or join in the top of the hdc, then work the first st in the 3rd loop as indicated” after joining in hdc is the first stitch in the 3rd loop of the same stitch or the next one? Txs
Thanks again – now I am equipped to tackle the yarn! Will make sure to keep notes so i don’t forget when I go to make the others. I am starting my christmas presents for next year. Was able to snag the year end yarn sale in several colors – especially the ginger spice (bought 3 sets of these lol).
Yay! Have fun! Great that you’re getting your Christmas presents started early!!
Hi Laurie,
I have the correct yarn and size hook.
I did 42 chains and could not get it on my head. Please advise.
Hi Laurie, I would try going up one or two hook sizes. And see if that helps. You’re tension may be slightly tighter than mine. You’re starting chain should measure about 21-22 inches.
Hello Laurie, I have updated the pattern to include a video tutorial on YouTube that may help! You can find it here: https://www.youtube.com/watch?v=slRLvf5lvMI
Hello Wendy, I have updated the pattern to include a video tutorial on YouTube that may help! You can find it here: https://www.youtube.com/watch?v=slRLvf5lvMI
Hi – new question (and thanks for posting video!) – did you roll you yarn before you started the project or just started directly from cake? tx
I just started from the Cake – I take the yarn from the outside though (not the inside). If you put the cake in a large bowl on the floor it will keep it from rolling around 🙂
Love your hooks! Where did you get them? I’d like to order some. 🙂 Great pattern, clear instructions, thank you! (PS – round 1 says to join in first sc, and I think you mean hdc 🙂
Ha ha yes, it should be hdc :). The wooden crochet hook shown in the video was a handmade one by Viscount Turning in Stratford, Ontario, Canada. Unfortunately i picked them up at a fibre fest and I am not sure if he sells them online. He has an etsy shop that he will update with any stock that he’s shipping 🙂
Love the hat. Thank you, my daughter loves it and it only took a little of my evening to make.
I am glad! Enjoy!!
Is there anyway to adjust the pattern for a smaller weight yarn?
Hi Hayley, for your starting chain I would chain the number of stitches needed for you to comfortably wear the hat (or you can try making the chain to measure 18-20 inches) and then work the pattern. You may have to add extra rounds in the pattern
thanks for sharing this free pattern and keep creating more. I am going to use Hometown USA, a lion brand #6 bulky yarn, as that is what I have in my stash. Going to follow you on instragram for more of your creations. thanks again Sarah:)
You’re welcome Susie and thank you for stopping by!
Just finished…Love it. The video was great, didn’t have any problems at all. Thanks for the great hat pattern.
You’re very welcome! I’m glad you enjoyed it!
Thank you for this pattern. I have been looking for a textured slouchy for a while now. It’s lovely.
You’re very welcome!
Good morning,
Thank you for this lovely pattern. I appreciated how you provided two methods of joining the hat. Either way seemed like it would create a seam. I am trying to crochet it flat like a scarf and then join it with a slip stitch seam.
Do you think that would work?
Thank you
Yes there is a seam – you can certainly try it the way you are suggesting, the challenge will be working the HDC in the 3rd loop which is easiest when working in a round
Hi! Love this pattern! Would like to make it for my daughter – any suggestions on how to downsize it to fit a 10 year old please?
Hello, I was just wondering if you had any advice/help for me. i wanted to use medium worsted yarn instead simply because it’s all the yarn I have. I’m self taught but still have trouble with gage, yarn size and re-sizing in general. I really love your pattern and wish to make a hat….
Hello! Yes you can use worsted weight by doubling it up (using two strands instead of one). It will give you roughly the same thickness 🙂