
This post contains affiliate links. This means that when you purchase through one of these links we will receive a small commission at no additional cost to you. Thank you for supporting Rich Texture Crochet!
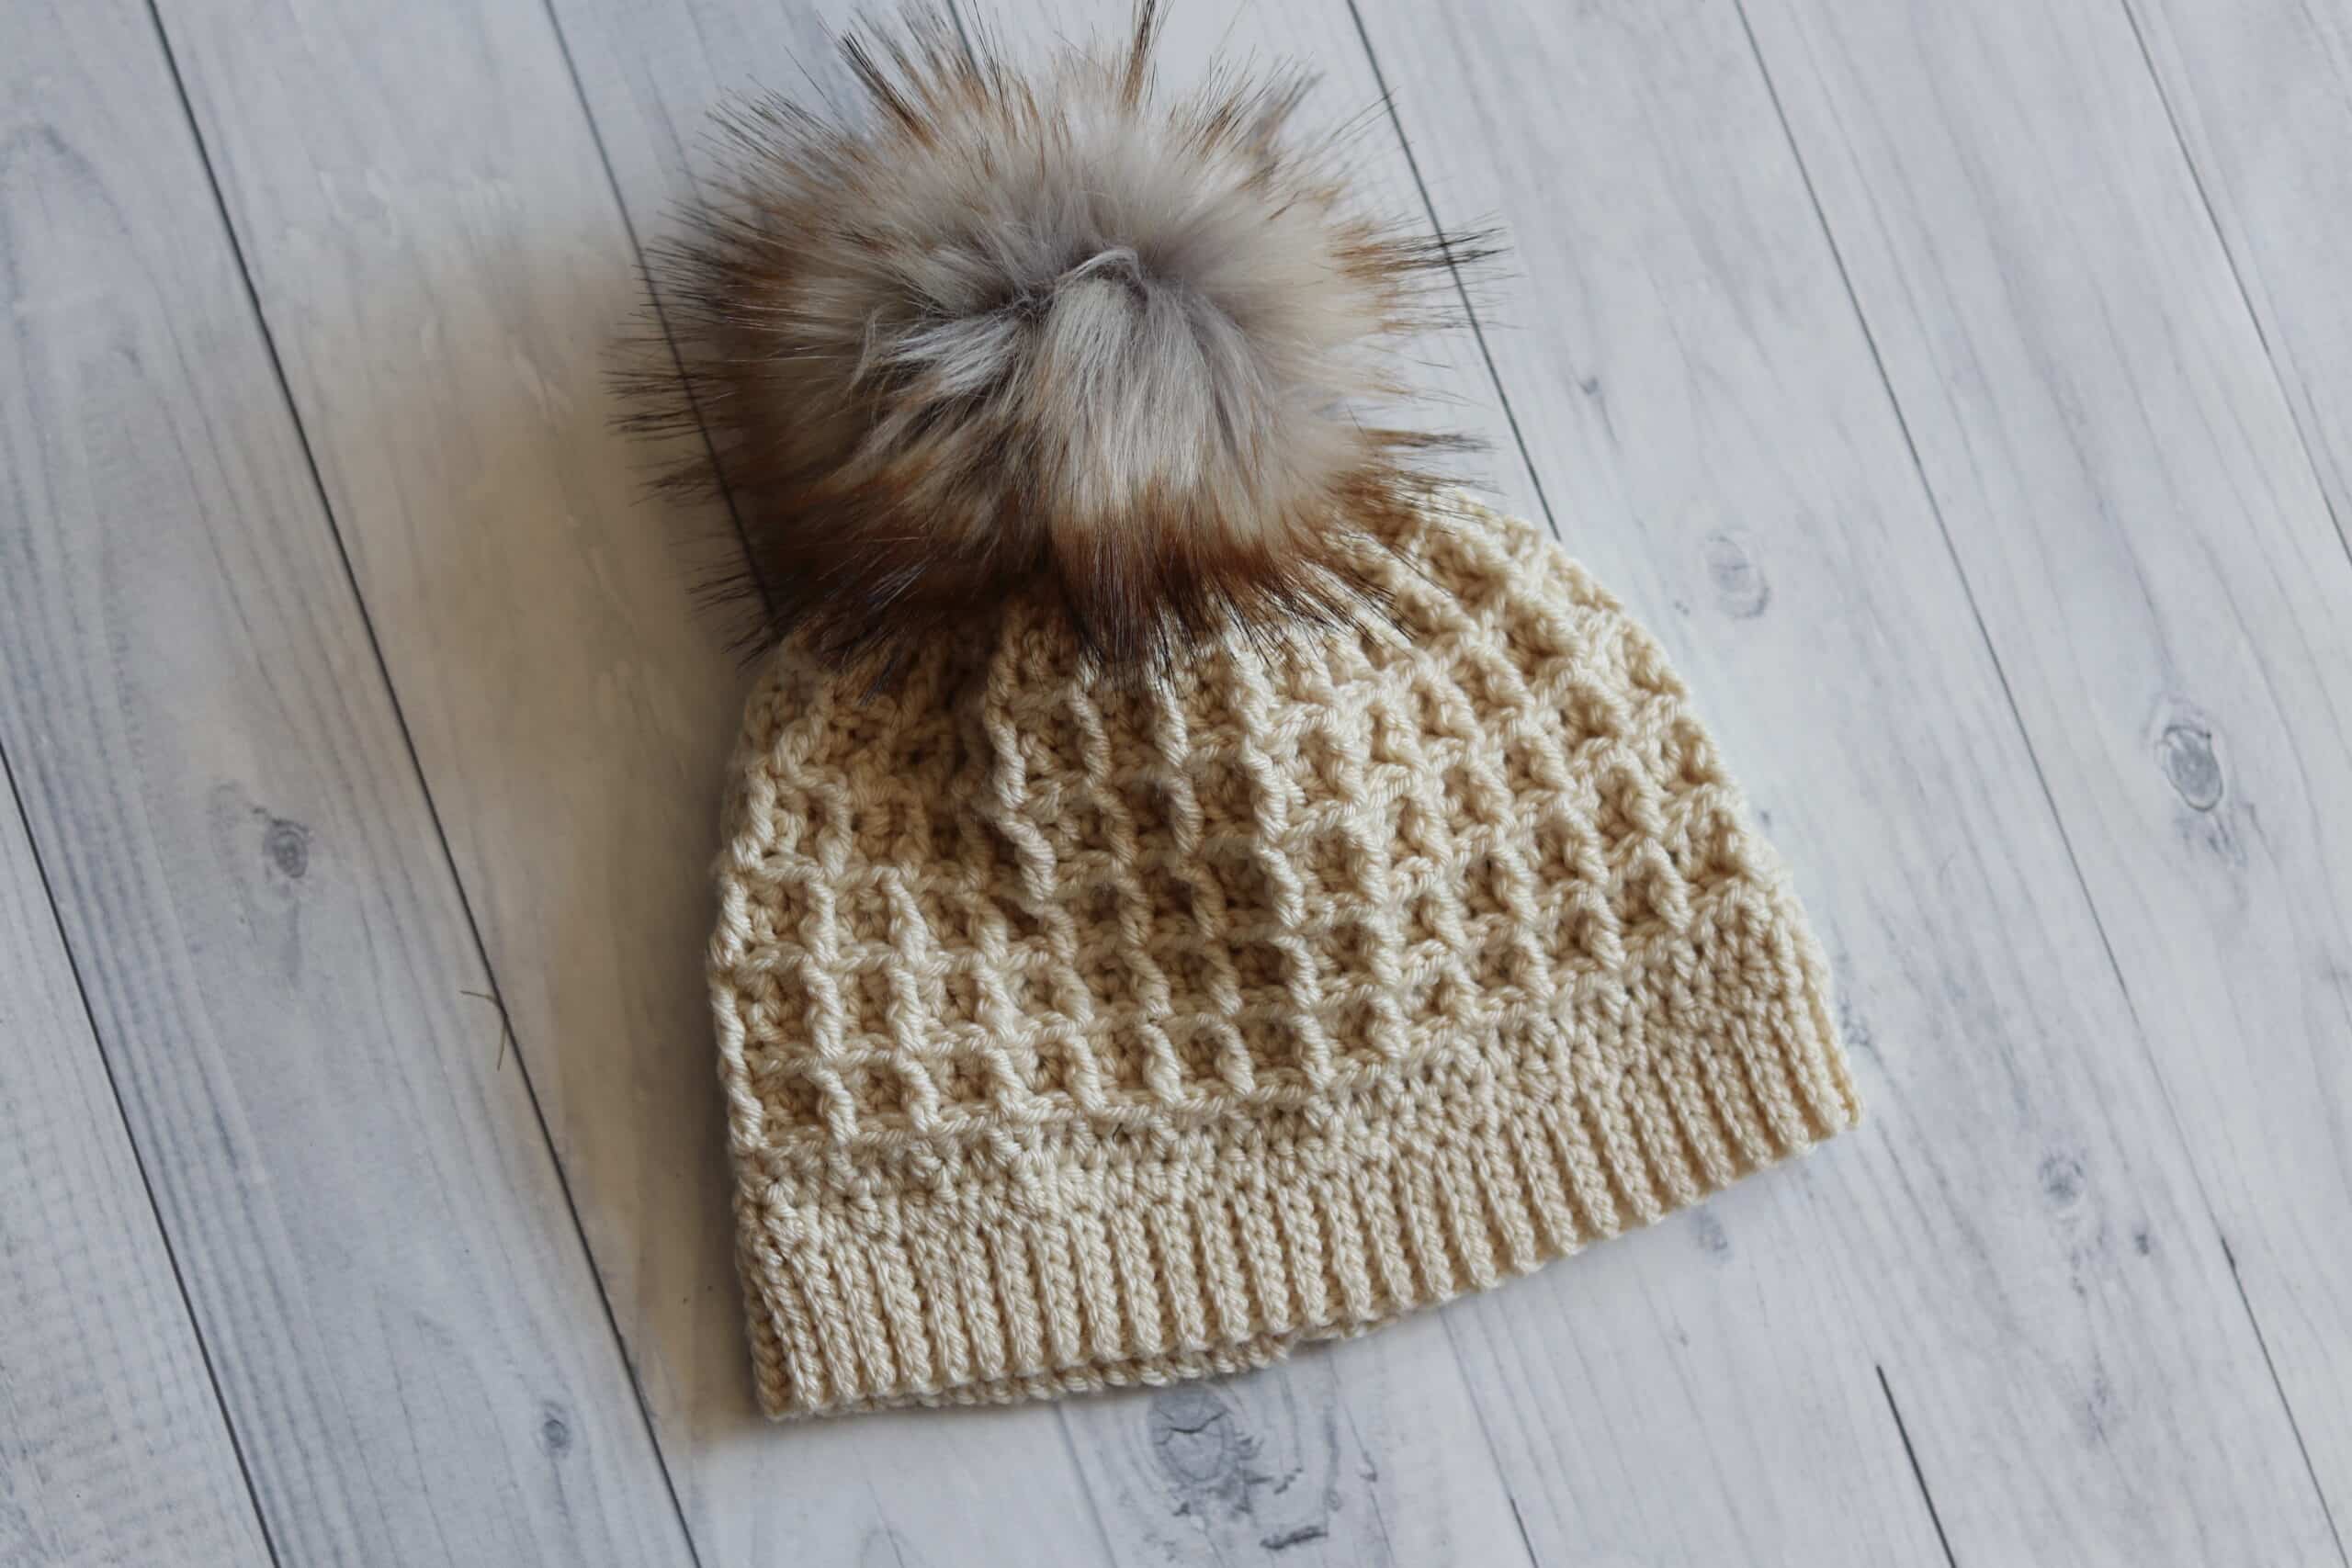
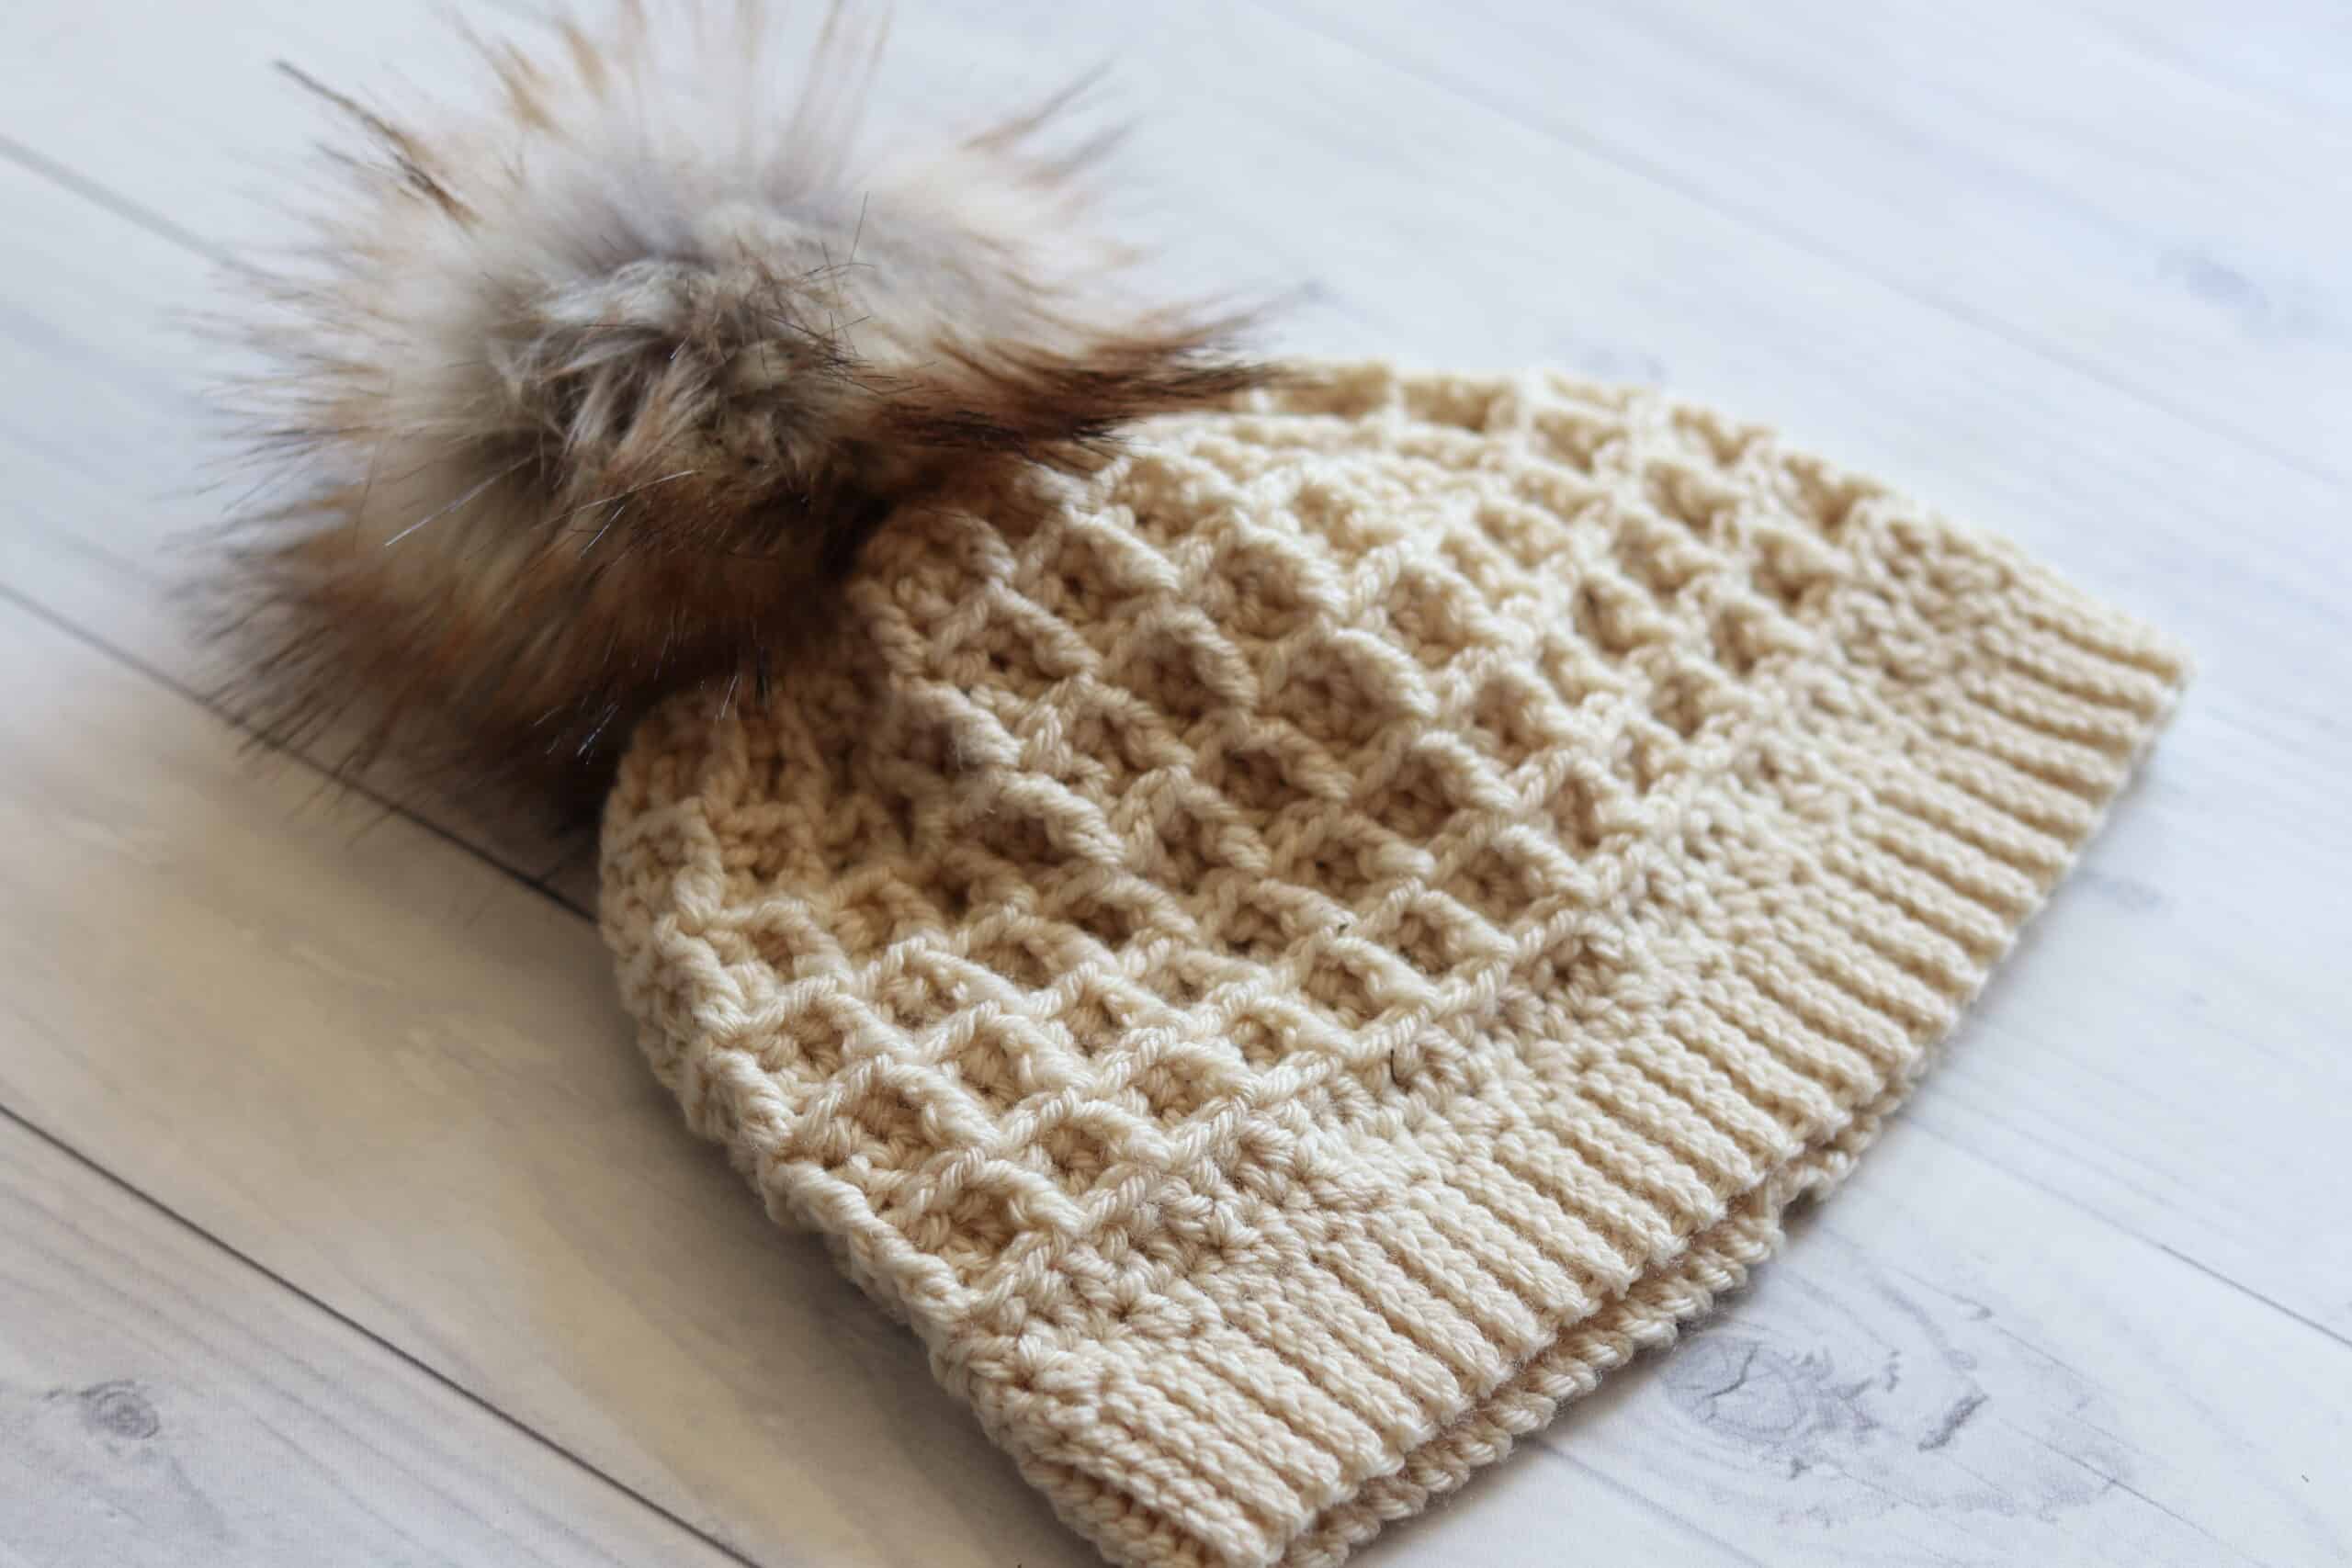
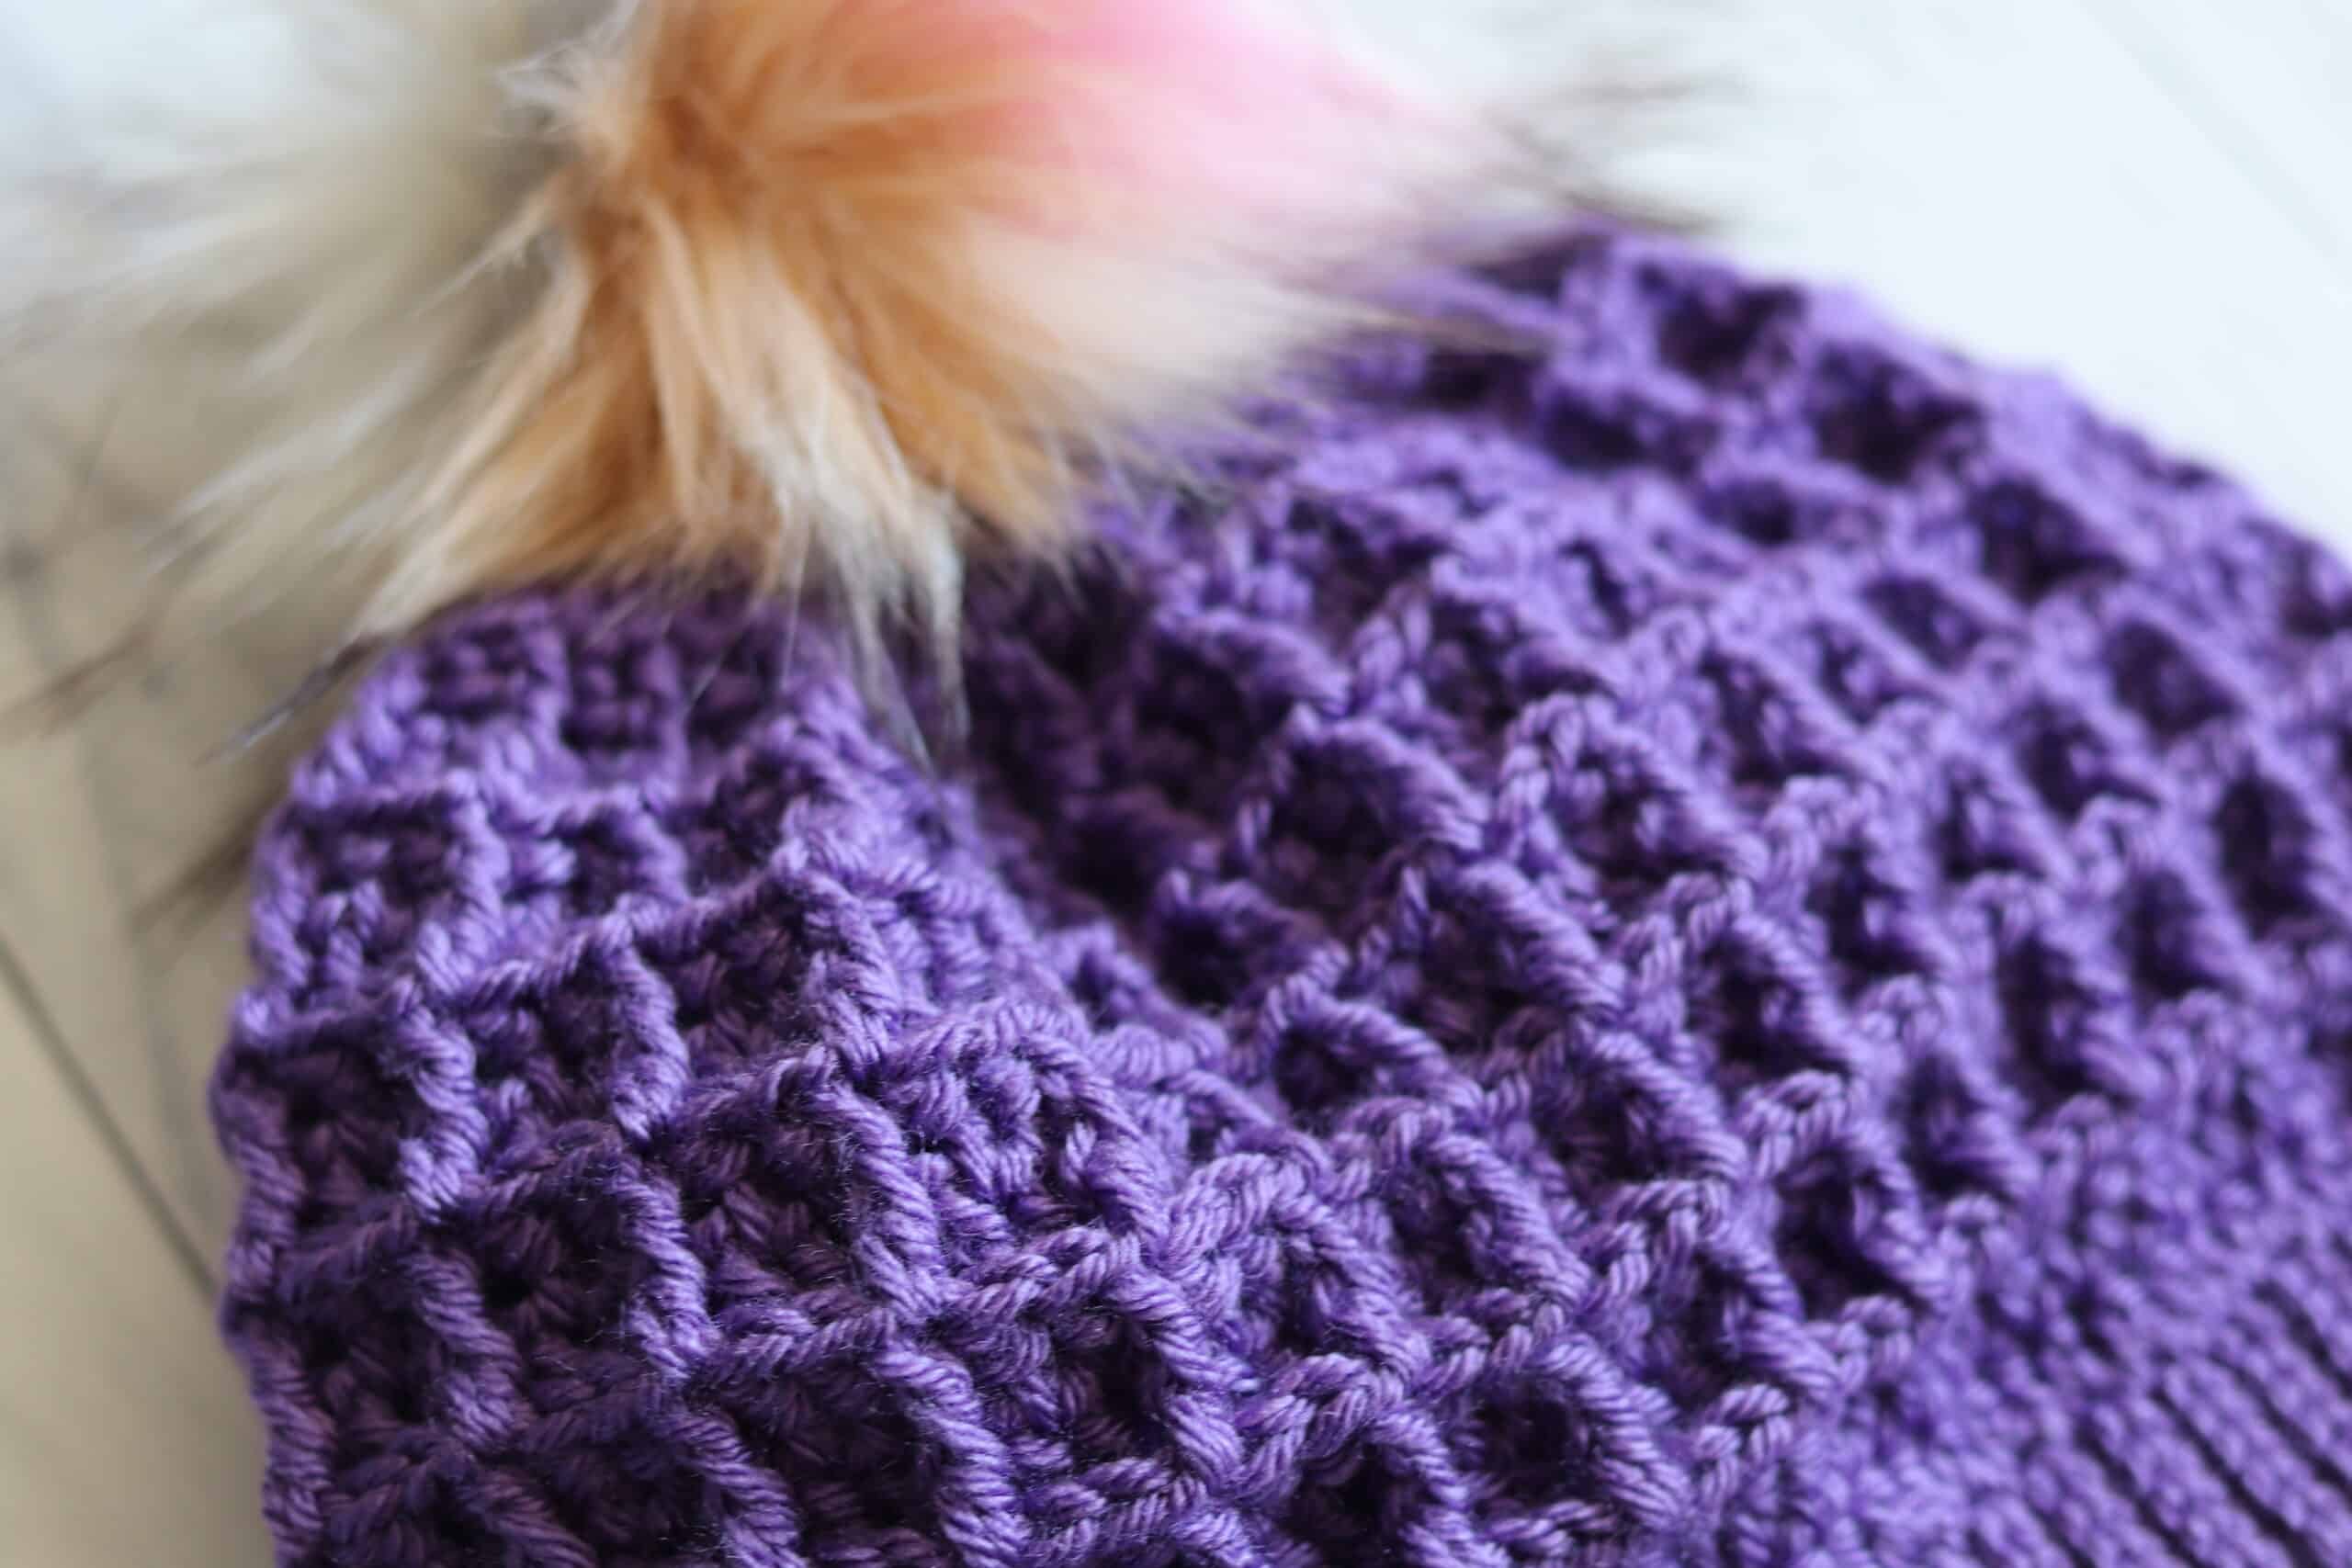
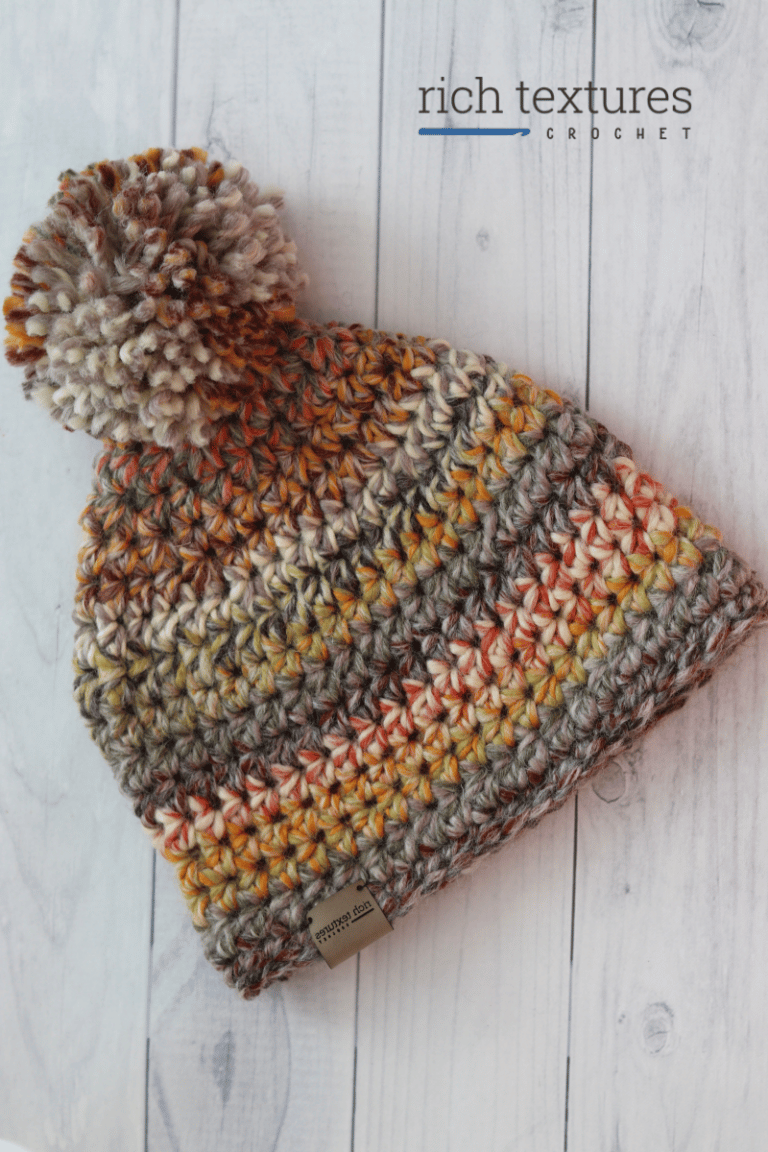
The Waffle Stitch Beanie features the beautiful texture of the crochet waffle stitch. Welcome to week three of the Wonderful Hats Crochet Along!
If you missed last week, don’t worry! These hat patterns will remain on my blog and in my Etsy and Ravelry shops, so there is lots of time to catch up!
If you have not heard of the Wonderful Hats Crochet along yet, I invite you to take a quick browse through this introduction post: Hats, hats, Wonderful Hats! Free Crochet Along.
Last week’s hat, the Elizabeth Beanie, can be found here: Elizabeth Beanie Crochet Pattern
This is week three of the Wonderful Hats Crochet Along. Today we will learn how to make the Elizabeth Beanie.

This post contains affiliate links. This means that when you make a purchase through one, I will receive a small commission at no additional cost to yourself. Thank you for supporting Rich Textures Crochet!
Materials:
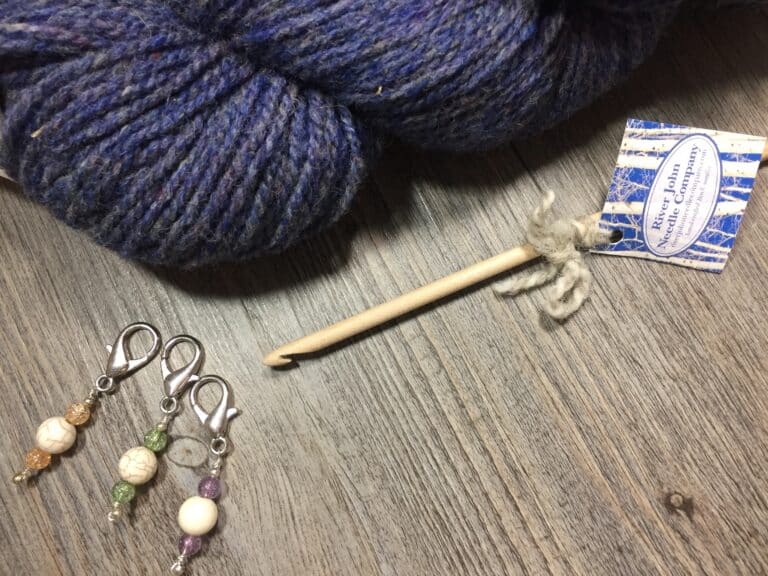
For this crochet beanie, I will be using one ball of the Patons Canadiana Yarn by Yarnspirations. I will be pairing it with a 5 mm crochet hook. For those curious about the hook that I show in my video today, it is a handmade hook of Birdseye Maple made by KnitBrooks in beautiful Nova Scotia.

The Design:
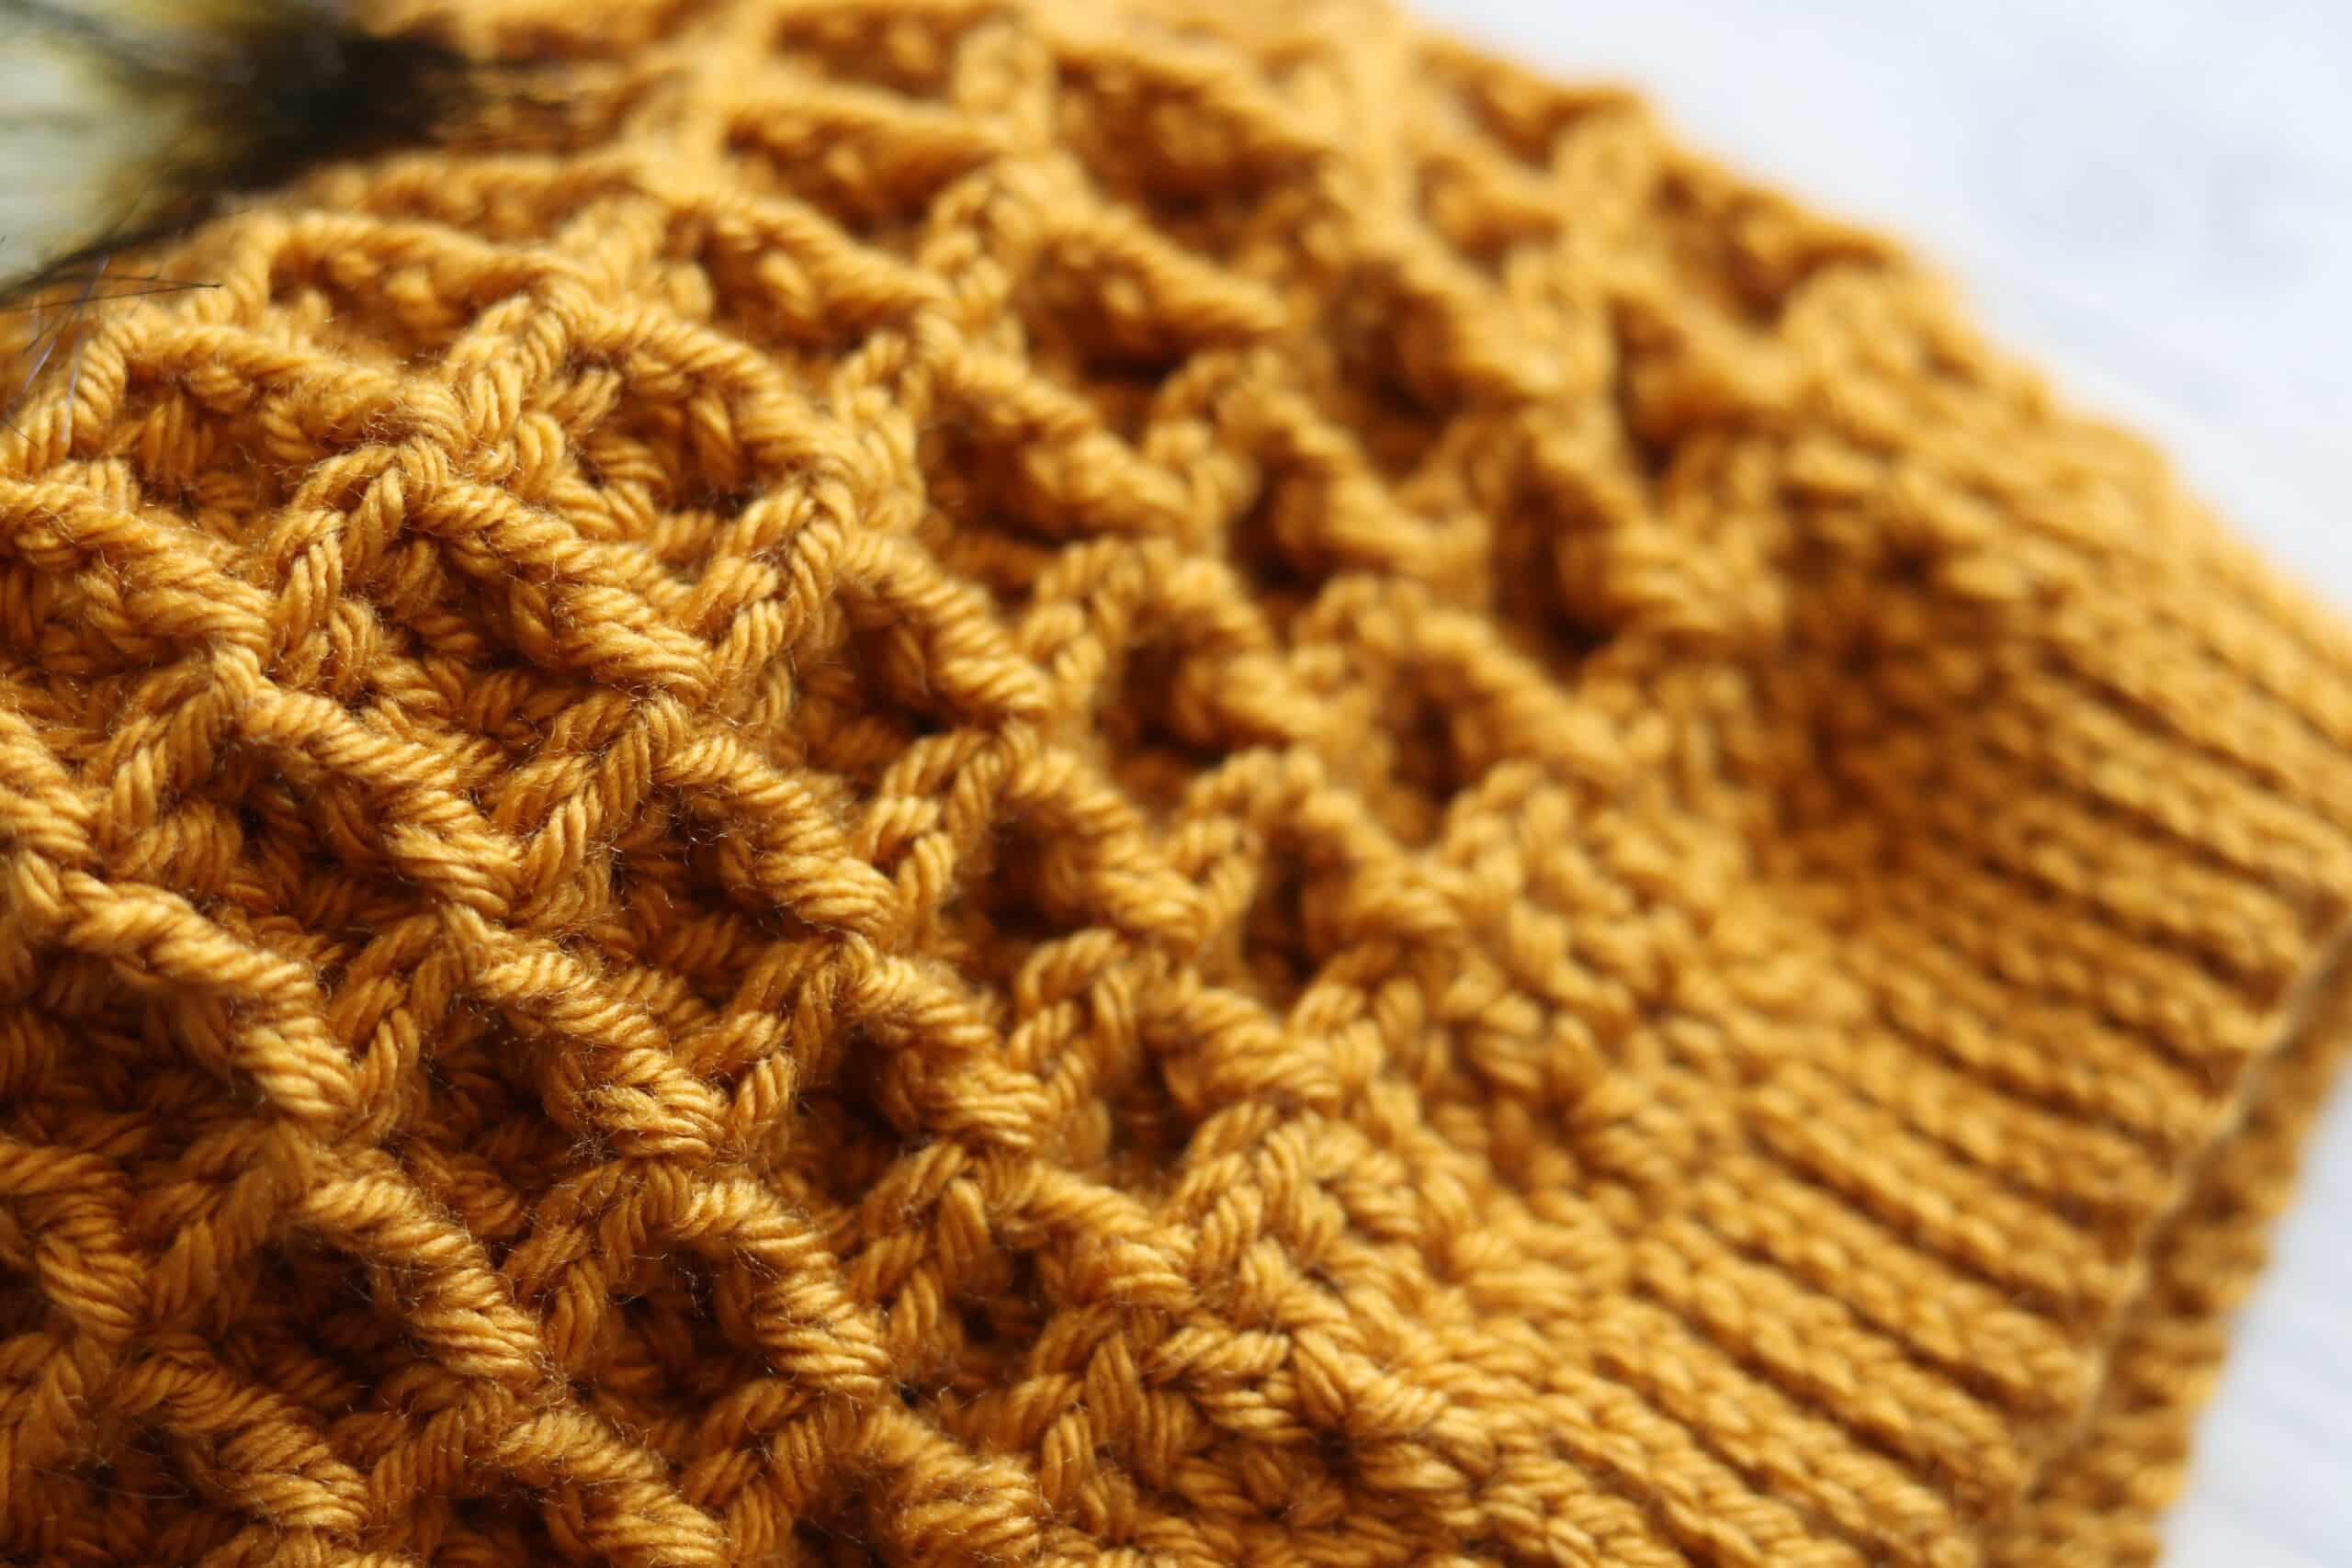
The stitch pattern used in the beanie today is called the waffle stitch. It is worked using a combination of double crochet, front post double crochet and back post double crochet stitches. It has lots of texture and is a very cozy hat!Like the other hat patterns in this crochet along, it is worked from the bottom (starting at the Brim) up. You can add a pompom to the top, or leave it without, both options look great!
The Construction:
The Brim of the hat is worked in rows. In my design I use a series of slip stitches worked in the back loops only, however, if you are not a fan of slip stitches (as I know many are!), then you may substitute the slip stitches for single or even half double crochet stitches.

PDF Copies are available:
I will write out the pattern in full below and will follow it with a free video tutorial. But for those of you who wish, you may also find a PDF copy of the pattern available for purchase in my Etsy and Ravelry Shops linked below:
Click here for the Elizabeth Beanie on Etsy
Click here for the Elizabeth Beanie on Ravelry
Thank you so much for stopping by! I can’t wait to see all of your creations! Be sure to join the Rich Textures Crochet community on Facebook (Don’t forget to answer the membership questions!): https://www.facebook.com/groups/richtexturescrochetcommunity
When sharing on Instagram, I invite you to tag me @ RichTexturesCrochet and #wonderfulhatscal so I’ll be able to find you!Have fun! And I will see you again soon!
Sarah
Waffle Beanie Crochet Pattern:
Skill Level: Intermediate
Gauge: 17 sts x 11 rows of Waffle stitch pattern = 4 inches
Finished Size: 9 x 7.5 inches laid flat excluding pompom
Yarn: Patons® by Canadiana (100% Acrylic; 3.5 oz, 100 g; Approx. 205 yds, 187 m). Worsted/medium Weight (4). You will need 1 ball/hat. Colours Shown: Fool’s Gold, Oatmeal, Grape Jelly.
Hook: Size H/8 (5 mm) Hook. Adjust hook size if necessary to obtain correct gauge
OPTIONAL: Pompom to attach to the top
Stitches and Abbreviations:
Bpdc – Back Post Double Crochet
Ch – Chain
Dc – Double Crochet Stitch
Fpdc – Front Post Double Crochet
Fpdc2tog – Front Post Double Crochet two Stitches Together
Rpt – Repeat
Sc – Single Crochet
Sk – Skip
Sl St – Slip Stitch
Yo – Yarn Over
Pattern Notes:
- Pattern is written in American English terms.
- Brim of hat is worked in rows, body of hat is worked in rounds.
- Ch 1 at beginning of round does not count as stitch.Turn at the end of round.
- Weave in ends as needed.
- OPTIONAL: Brim of hat may be worked using either single crochet stitches or half double crochet stitches instead of the slip stitches.
Free Crochet Pattern:
Brim (Worked in rows):
Ch 8.
Row 1: Sl st in the 2nd ch from hook and in each ch across. Ch 1, turn. (7 sl sts)
Row 2: Working in the blo, sl st in each st across. Ch 1, turn. (7 sl sts)
Continue to repeat row 2 until work from the beginning measures approximately 19 inches.
Do not fasten off, but fold brim of hat so that two shorter ends meet. Now working through both thicknesses, sl st across working through the blo on each side. Do not fasten off, turn work right side out (so that the right side is facing you).
Now working around the edge of the brim, continue working in rounds as follows:
Hat Body (Worked in rounds):
Rnd 1: Ch 1, evenly work 81 hdc all the way around. Join with a sl st in the first st, do not turn. (81 sts)
Rnd 2: Ch 1, evenly work 81 dc all the way around. Join with a sl st in the first st, do not turn. (81 sts)
Rnd 3: Ch 1, bpdc in each of the first 2 sts, dc in the next st, * bpdc in each the next 2 sts, dc in the next st; rpt from * around, join with a sl st in the first st. (81 sts)
Rnd 4: Ch 1, dc in each of the first 2 sts, fpdc in the next st, * dc in each of the next 2 sts, fpdc in the next st; rpt from * around, join with a sl st in the first st.
Rnds 5-12: Repeat rounds 3 and 4 four times.
Rnd 13: Repeat rnd 3.
Rnd 14: Ch 1, * dc2tog, fpdc in the next st; rpt from * around, join with a sl st in the first st.
Rnd 15: Ch 1, bpdc in the first st, dc in the next st, * bpdc in the next st, dc in the next st; rpt from * around, join with a sl st in the first st. (54 sts)
Rnd 16: Ch 1, * fpdc2tog around the posts of each of the next dc sts skipping the bpdc in between; rpt from * around, fpdc in the final dc st, join with a sl st in the first st. (14 sts)
Rnd 17: Ch 1, * fpdc around, join with a sl st in the 1st st. (14 sts)
Fasten off leaving a long tail. Using the long tail, sew the top of the hat closed. Fasten off and weave in your ends. Attach Pompom to the top.
Video Tutorial:
The photographs and pattern contained in this document are the property of Rich Textures Crochet. This pattern is for personal use only. No unauthorized reproduction, in whole or in part, or distribution of this pattern or content is permitted. ALL FINISHED PRODUCTS from this pattern can be used for local sales and sold online.Thank you so much for supporting Rich Textures Crochet! To stay in touch or see more great products, be sure to visit me on Facebook and Instagram (Rich Textures Crochet). Thanks again! Happy Crocheting!


Why in the video you are doing two rows of double crochet but in the written pattern it is HDC? Can I still do a back post dc around a HDC?
If I want to make this in a child size, what would be the number of hdc in Round 1?
do you have a waffle beanie pattern adjusted for newborns
Unfortunately, at this time I do not