
This post contains affiliate links. This means that when you purchase through one of these links we will receive a small commission at no additional cost to you. Thank you for supporting Rich Texture Crochet!
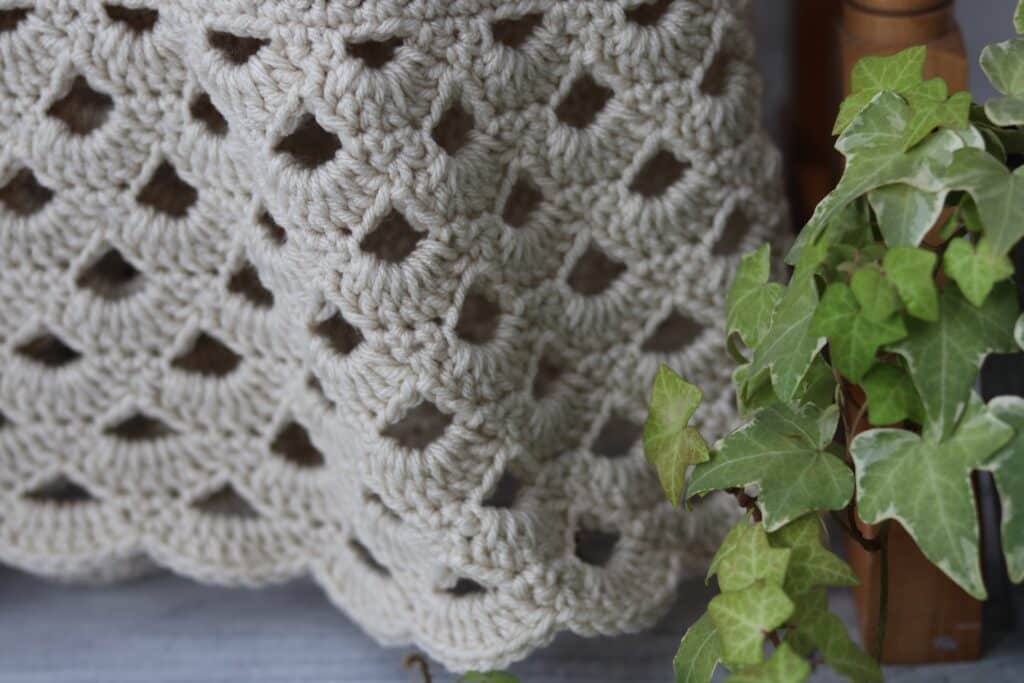
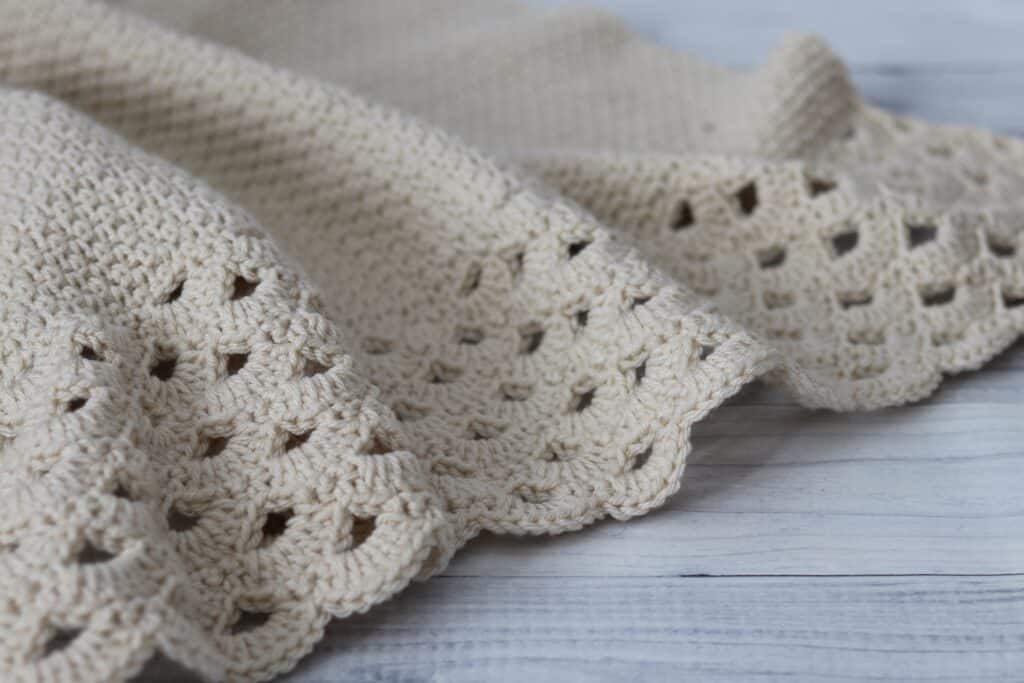
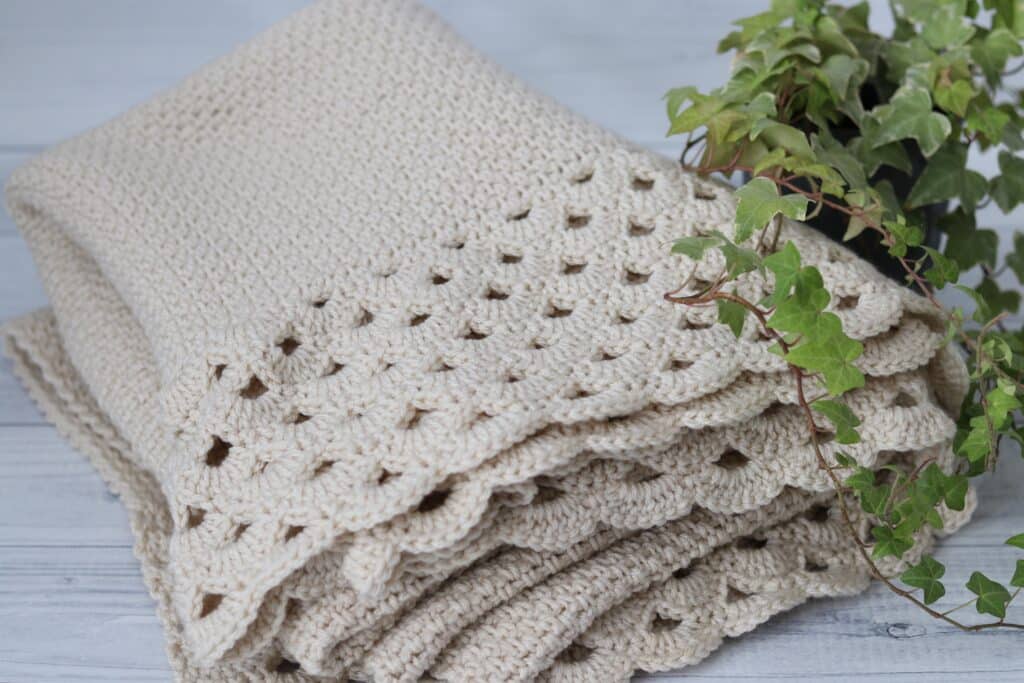
The Rose Trellis Throw Pattern is an easy crochet pattern! The bulk of the blanket is worked in the favourite moss stitch.
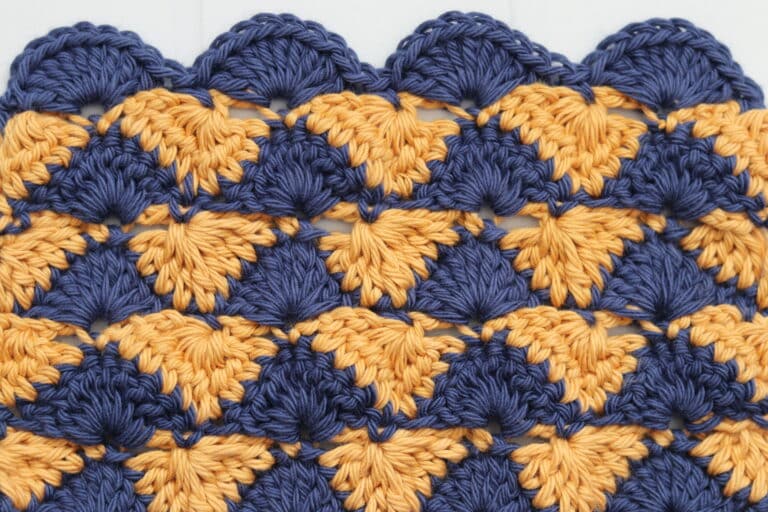
After you have worked the bulk of the blanket in the moss stitch, you will add an easy elongated edging to each end. The edging of this blanket is made up of single crochet, double crochet and chain stitches.
This post contains affiliate links. This means that when you make a purchase through one of these links, Rich Textures Crochet will earn a small commission at no additional cost to yourself. Thank you for supporting Rich Textures Crochet!

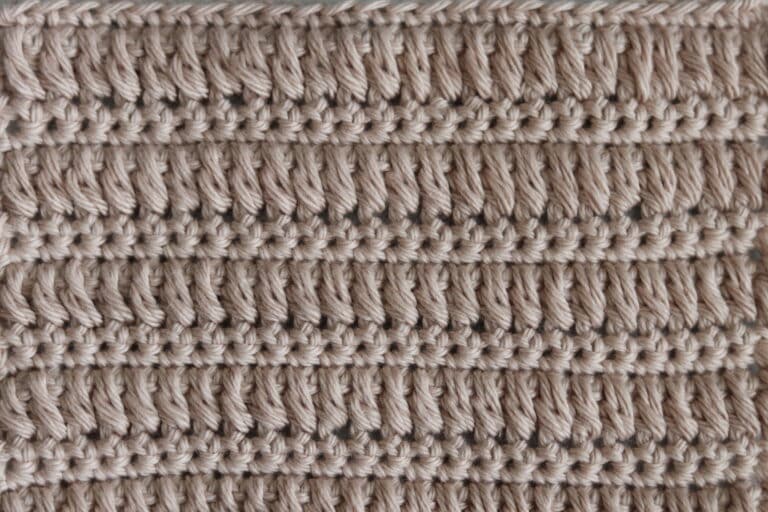
I love the moss stitch in blankets. I love the way it feels against your skin and it has great drape. The moss stitch is an easy pattern to work that creates a light weight fabric that is solid and the same on both sides.
The Edging:
The unique feature of this blanket is the edging. The edging is worked on both ends of the blanket and is quite a bit longer than most blanket edgings. As a full seven inches on both ends, it creates a striking contrast to the solid stitch in the body.
PDF Copies are Available:
If you would like to save this pattern to your library, or purchase an ad free PDF for this pattern, you may do so from my Etsy and Ravelry Shops:
The Rose Trellis Throw on Etsy
The Rose Trellis Throw on Ravelry
Thank you so much for stopping by! If you like this blanket, you may also wish to check out the Lavender Throw – A Free Crochet Pattern which also features the moss stitch!
Until next time, happy crocheting!
Sarah
Rose Trellis Throw Crochet Pattern:
Skill Level: Easy
Gauge: 17 sts x 15 rows of moss stitch = 4 inches
Finished Size: 46 x 68 inches
Yarn: Caron ® One Pound by Yarnspirations (100% Acrylic; 454g / 16 oz, 742 meters / 812 yards). Worsted/medium Weight (4). You will need about 3 balls. Colour Shown: Off White
Hook: Size I/9 (5.5 mm) Crochet Hook. Adjust hook size if necessary to obtain correct gauge
Crochet Stitches and Abbreviations:
Ch – Chain
Dc – Double Crochet Stitch
Rpt – Repeat
Sc – Single Crochet
Sk – Skip
Sl St – Slip Stitch
Yo – Yarn Over
Pattern Notes:
- Pattern is written in American English terms.
- Pattern is worked in rows.
- Ch 1 at beginning of round does not count as stitch.
- Weave in ends as needed.
- To adjust the size of your blanket your will need an even number of stitches for the body of the blanket and a multiple of 6 + 1 for the edging.
Crochet Pattern:
Ch 200
Row 1: Sc into the 4th ch from your hook, *ch 1, sk the next ch, sc in the next ch; rpt from * across. Ch 2, turn.
Row 2: Sc in the first ch-1 sp, *ch 1, sk the next sc, sc in the next ch-1 sp; Rpt from * across and sc in the final turning ch-3 sp, ch 2, turn.
Row 3: Sc in the first ch-1 sp, *ch 1, sk the next sc, sc in the next ch-1 sp; Rpt from * across and sc in the final turning ch-2 sp, ch 2, turn.
Repeat Row 3 until your work from the beginning measures approximately 54 inches. At the end, ch 1. Do not fasten off.
Edging (worked across both ends):
Row 1: Evenly work 193 sc across the end of your blanket. Ch 1, turn.
Row 2: Sc in each of the first 2 sts, ch 3, sk the next 3 sc, *sc in each of the next 3 sts, ch 3, sk the next 3 sts; rpt from * across, sc in each of the last 2 sts, ch 1, turn.
Row 3: Sc in the 1st st, sk the next sc, *7 dc in the next ch-3 sp, sk the next sc, sc in the next st; rpt from * across, sc in the final st. Ch 4, turn.
Row 4: Sk the 1st sc, sk the next 2 dc, sc in each of the next 3 sts, *ch 3, sk the next 5 sts, sc in each of the next 3 sts; rpt from * across to the final 3 sts, ch 2, dc in the final st. Ch 3, turn.
Row 5: 3 dc in the 1st ch-2 sp, sk the next sc, sc in next sc, sk the next sc, * 7 dc in the next ch-3 sp, sk the next sc, sc in next sc, sk the next sc; rpt from * across to the final ch sp, 4 dc in the final ch sp, ch 1, turn.
Row 6: Sc in each of the first 2 sts, ch 3, sk the next 5 sts, * sc in each of the next 3 sts, ch 3, sk the next 5 sts; rpt from * across, sc in each of the last 2 sts, ch 1, turn.
Repeat rows 3-6 twice more, repeat row 3 once more.
Fasten off, weave in ends and repeat the above steps for the edging once more.


The Rose Trellis Throw is absolutely beautiful and I have now begun making it. In your written instructions and video tutorial you indicate to sc in final ch-3 space but we are only ch 2 for turning. Typo? Or should we also do the chain after sc and then ch 2 for turning?
Selina
Only the second row is into the gain 3 at the end, the rest are chain 2
But at the end of the rows are chain 2 turn so do you get chain 3 space.
Do you think this pattern would work in multiple colors? I have some partial skeins of one pound that add up to 3 balls.
I think it would 🙂
If you wanted to make it smaller what would be the multiple? I normally make lap blankets and would like to make it smaller.
I have question regarding the edging. The instructions are to evenly work 193 sc across the end, but 200 sc were done at the beginning. Do I just skip 7 sc at some point?
Yes you will skip seven – I skipped even of the chain one spaces
Thanks. Love the pattern.
How do you do the edging on the other side?
I wondered that too, but I figured it out… Remember that after you chained the 200 then you turn your work and start your row 1 with a single crotchet into the 4th chain from the hook. This means there are 3 chains at the beginning of row 1. So when you come back to the end of doing row 2, you are putting the final stirches of row 2 into the chain 3 space created when you started row 1 at the 4th stitch from the hook. I hope I explained that so that it makes sense to you.