
This post contains affiliate links. This means that when you purchase through one of these links we will receive a small commission at no additional cost to you. Thank you for supporting Rich Texture Crochet!
So I’ve been very bad at keeping the blog updated lately! I promise though soon I will get back in the swing of things!
If you’re like me this is a busy time of year with craft fairs, fall and Christmas orders (if you sell your work), and even your own Christmas list to fill! This is what I have been swimming in as of late. In my Etsy Shop, along with my patterns I like to sell Infant Costumes and Photo Props just for this season. But I have finally hit the end of that list and am excited to be back to my pattern writing and Canadian Designer and Yarn Shop explorations!
So upcoming, I have a couple designers I’d like to share with you, a yarn shop or two, and I have to tell you about Woolstock (So much fun, lots of pictures coming to a post near you)!! This is all upcoming – hopefully I will be back into my routine for next week 🙂
IN THE MEANTIME:

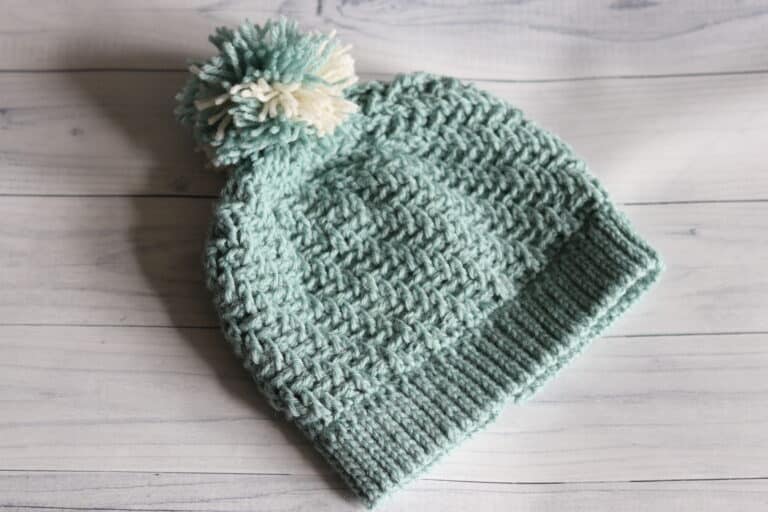
My kids (I have three of them) needed hats! We are just heading into our cooler weather here in my corner of Ontario, Canada so I thought I had better get my hook moving. They requested something “cool” and “Cozy.” I looked around for some super soft Acrylic yarn and came across Charisma by Loops and Threads (Michael’s Craft Store). Great texture, bulky, coordinating colours and super soft! I grabbed it! If you aren’t able to get your hands on this yarn, the Softee Baby Chunky by Yarnspirations will also work very well.
I whipped up these hats (After coming up with the pattern) in one to two hours. The bulky weight yarns makes them very fast to work up. Need Christmas presents or a few last minute craft fair items? This might be it! After my oldest wore it for a bit while I snapped some pictures for the pattern itself, he said several times “It’s just so warm and soft.” It passed his test 🙂
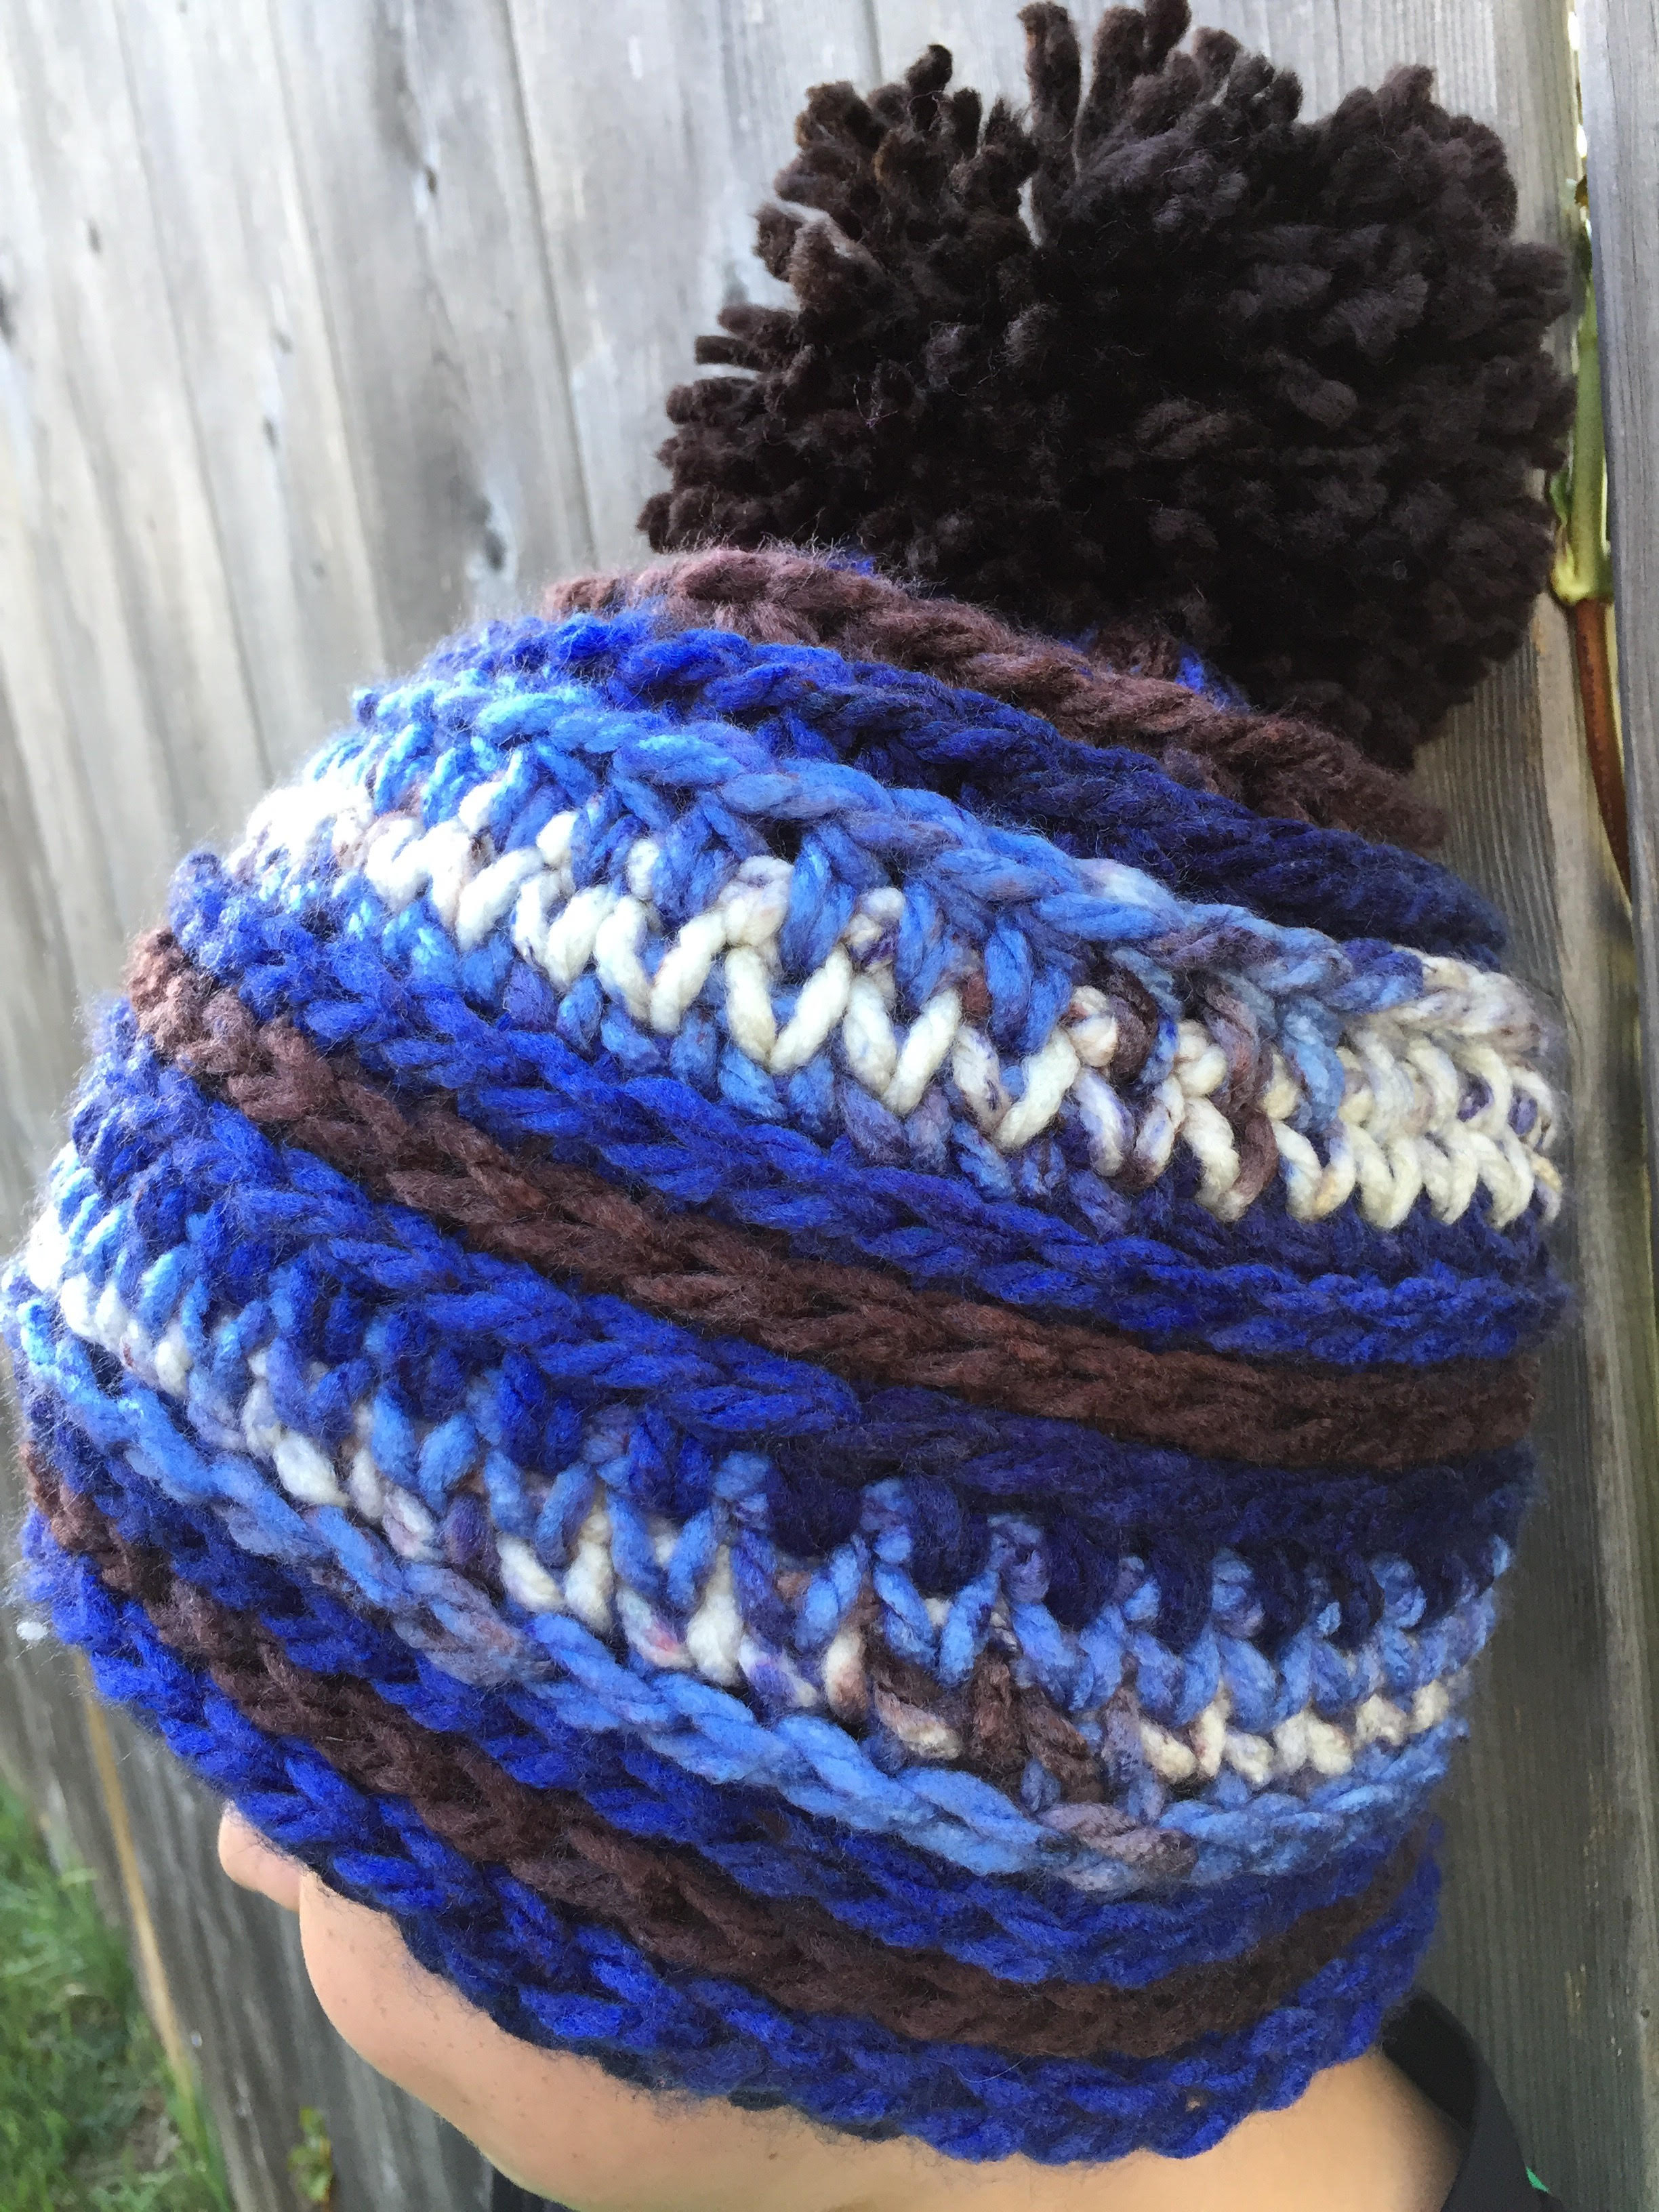
So here it is, my Children’s Textured Toque! Enjoy! Have fun with it! And if you would like a convenient download and go PDF (also includes photo tutorial for particular stitches) You may purchase one for $2.00 CAD in my shops:
Etsy: https://www.etsy.com/ca/listing/566062045/childrens-textured-toque-five-sizes-baby
Ravely: https://www.ravelry.com/patterns/library/childrens-textured-toque
Materials:
Yarn: Loops & Threads Charisma™ (%100 acrylic, 3.5oz. skein, 109 yds). Bulky Weight. Select two colours – one for body of hat the other for the pom pom. You may substitute this yarn for any other Bulky weight yarn such as Bernat Softee Baby Chunky™ by Yarnspirations™.
Hook: Size L-11 (8 mm) Hook. Adjust hook size if necessary to obtain correct gauge.
Notions: Yarn Needle.
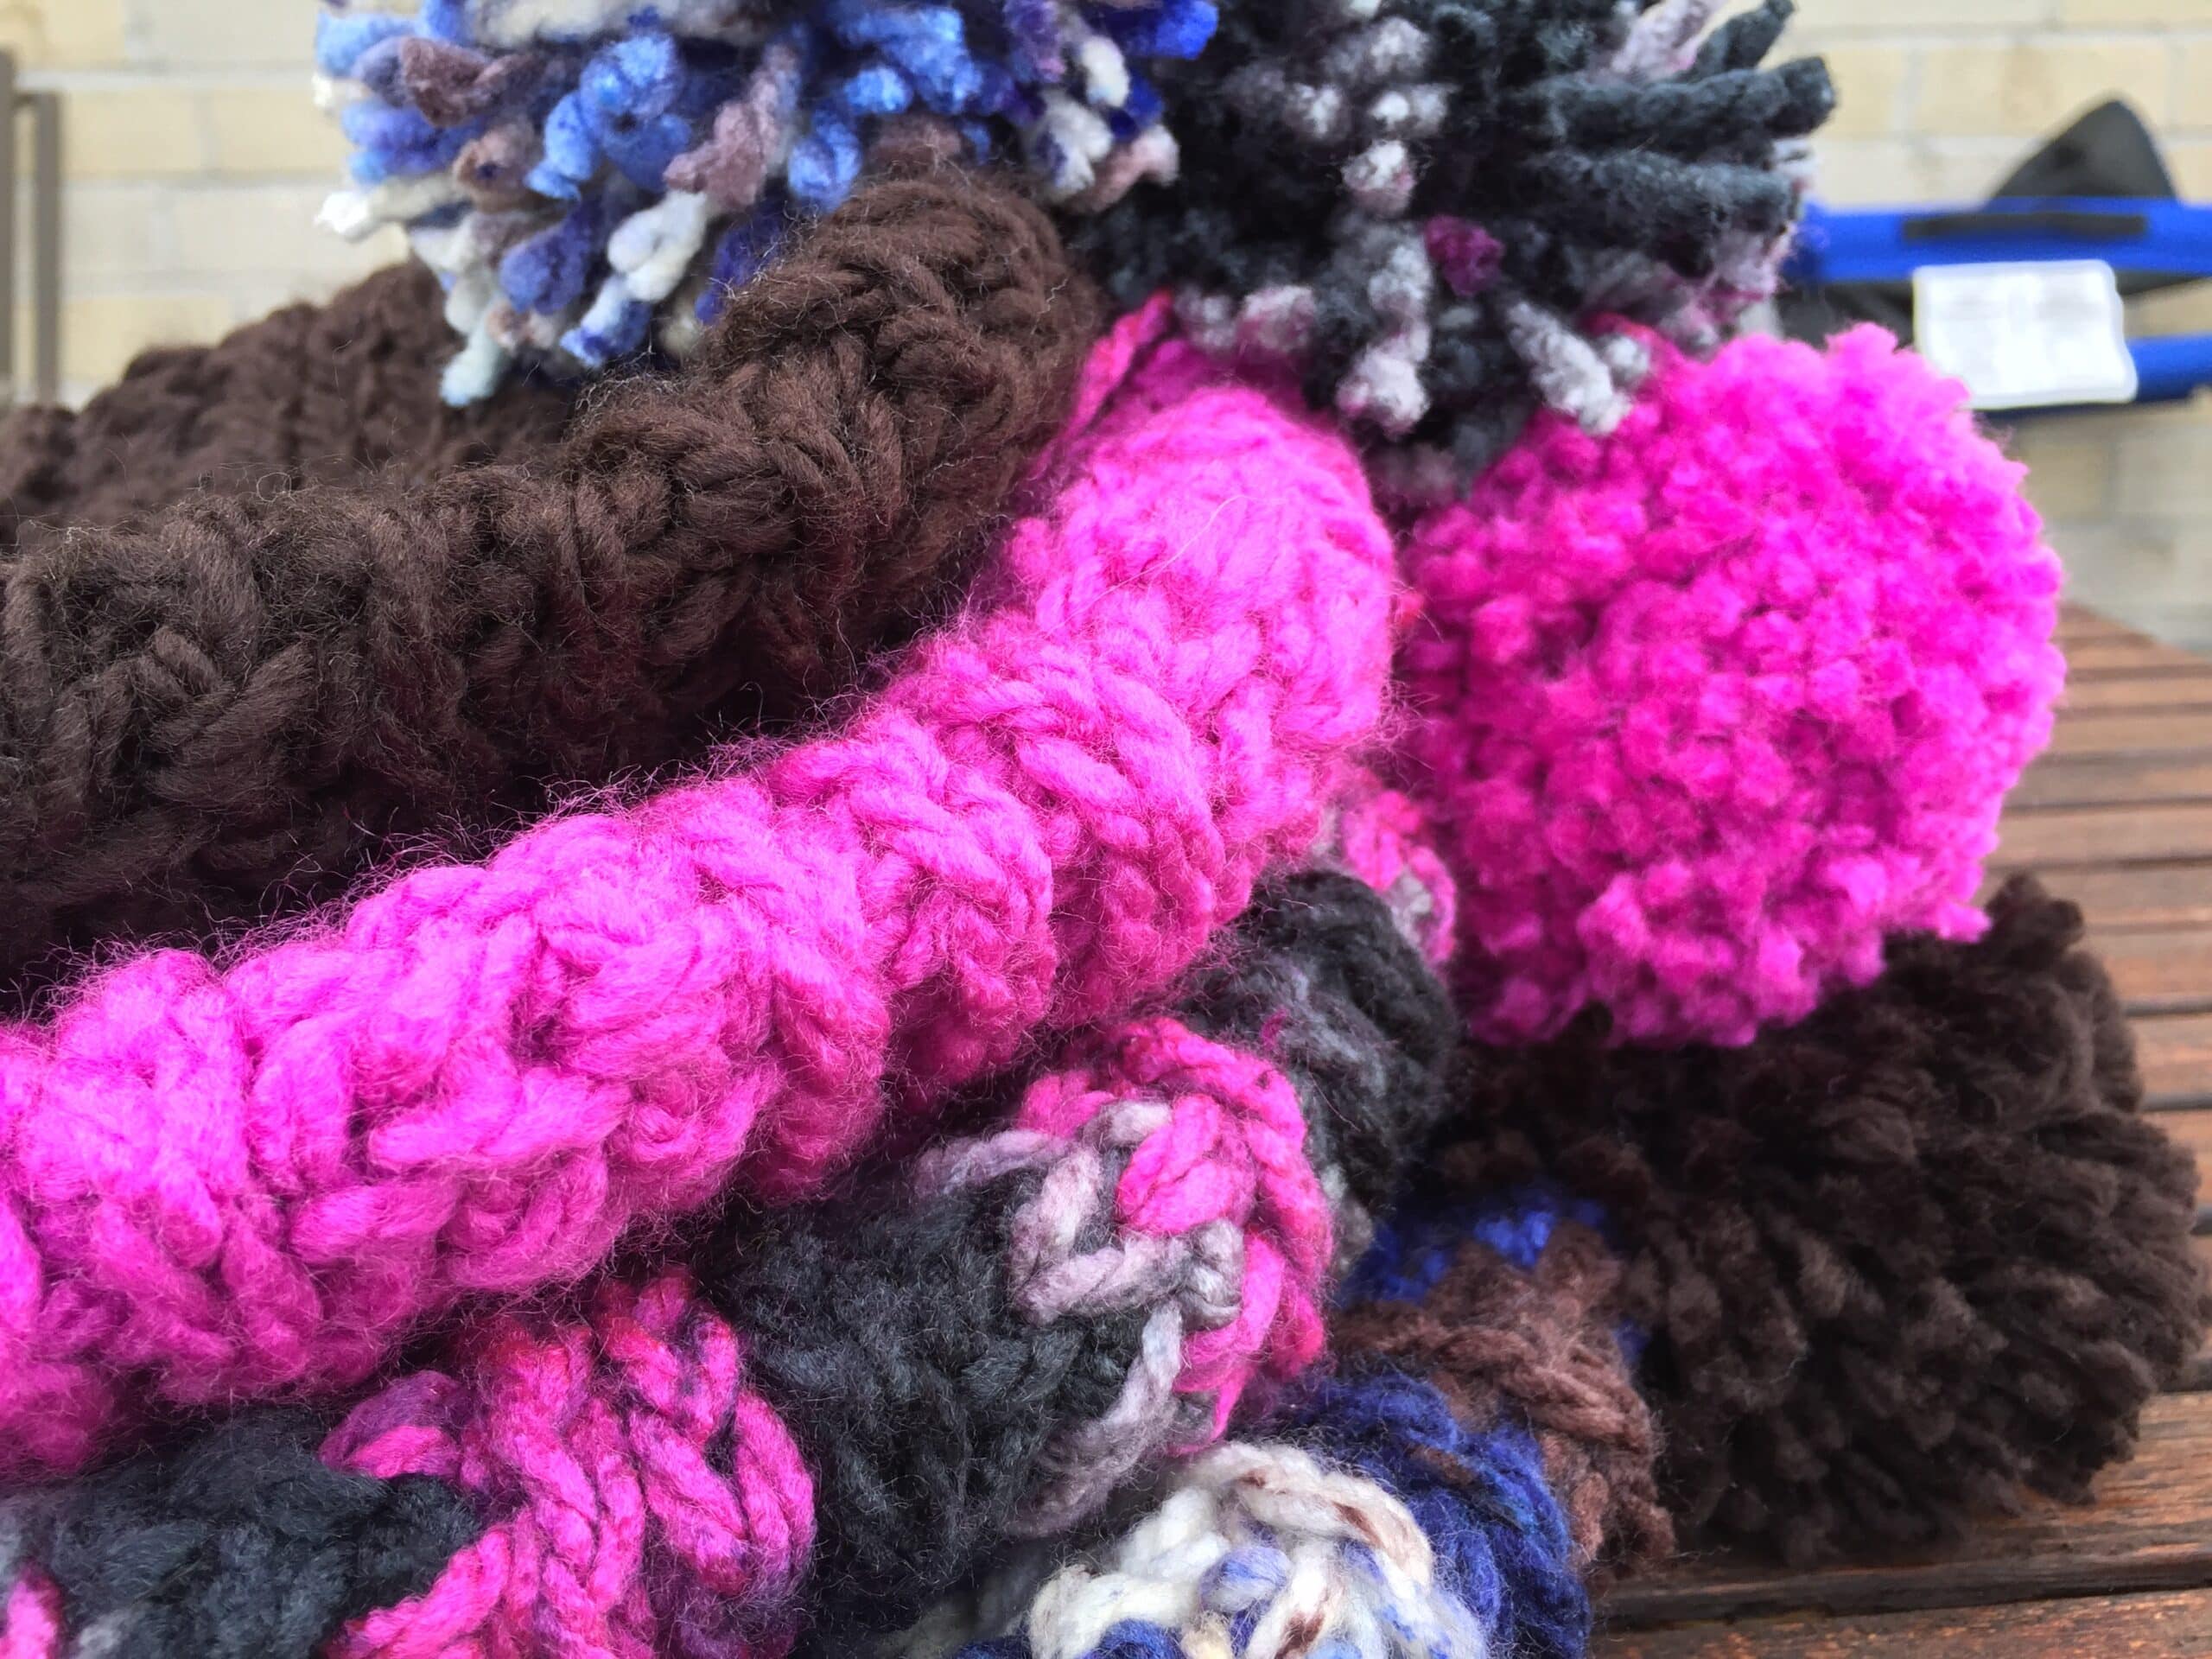
To Make Pom Pom: Two empty toilet paper rolls, scissors and yarn needle.
Finished Sizes (Not including Pom pom):
0-6 Months: 5.6 in. tall, 13.5 in. circumference
6-12 Months: 7 in. tall, 16 in. circumference
12-24 Months: 7.25 in. tall, 18 in circumference
Toddler: 7.5 in. tall, 19 in. circumference
Child: 8 in. tall, 20 in. circumference
Stitches and Abbreviations:
Ch – Chain
Hdc – Half double crochet
Hdc2tog – Half double crochet two together
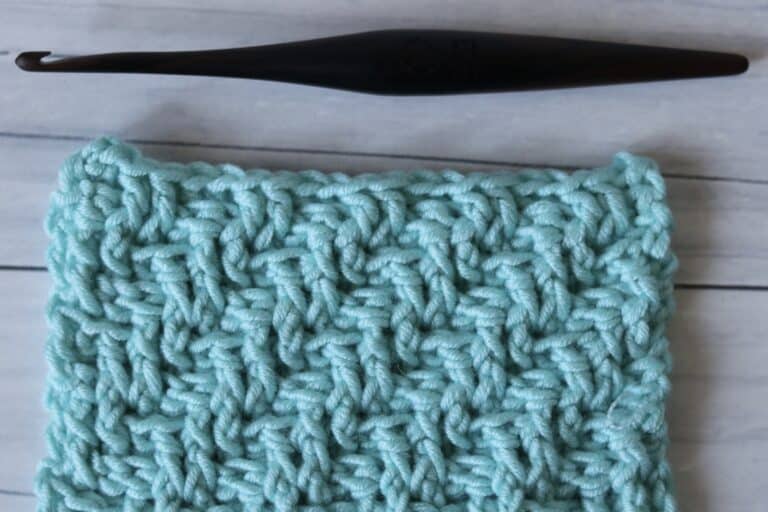
Knit Stitch (ks) – Also called the “waistcoat stitch,” the knit stitch is a single crochet worked through the middle of the single crochet or knit stitch of the previous round. Because you are working your stitch through the middle of the stitch in the previous round and pulling your loop up through the center, a knit look is created.
Knit Stitch 2 together (ks2tog) – Work the ks2tog as you would the sc2tog, but working through the space in the stitch of the previous round that you would typically work a knit stitch.
Rpt – Repeat
Sc – Single Crochet
Sc2tog – Single crochet two together
Sk – Skip
Sl st – Slip stitch
Pattern Notes:
- Pattern is written in American English terms.
- Pattern is worked in rounds from the bottom of hat to the top.
- Ch 1 at beg of rnd does not count as sc or hdc.
- Weave in ends as needed.
- When joining with a sl st prior to a ks row, I like to join in the space on the stitch where you would next work the knit stitch.
- I find the knit stitch works best when your tension is kept quite loose. Loose stitches allow for you to insert the hook in the proper space more easily.
- To work in the 3rd loop: In the hdc stitch, the “third loop” is found at the back of the stitch, below the top two loops that you would normally complete your stitch in. When you crochet in this back loop, it should push the top of the stitch from the previous round to the front of your work creating a “knit” look.
Pattern:
0-6 Months:
Ch 30. Being careful not to twist ch, join with a sl st in first chain to make a round.
Rnd 1: Ch 1, hdc in each ch around. Join with a sl st in first sc. (30 hdc).
Rnd 2: Ch 1, working in the 3rd loop, hdc in each st around. Join with a sl st in the first hdc. (30 hdc).
Rnd 3: Ch 1, working in the 3rd loop, hdc in each st around. Join with a sl st in first hdc. (30 hdc).
Rnd 4: Ch 1, working in the 3rd loop, loosely sc in in each st around. Join with a sl st (in the space that you would work the next ks. See pattern notes). (30 sc).
Rnd 5: Ch 1, ks in each sc around. Join with a sl st. (30 ks)
Rnd 6: Ch 1, working in the same space in stitch of previous row that you would work for a ks, hdc in each st around. Join with a sl st. (30 hdc).
Rnd 7: Ch 1, working in the 3rd loop, hdc in each st around. Join with a sl st in first hdc. (30 hdc).
Rnd 8: Ch 1, working in the 3rd loop, hdc in each st around. Join with a sl st in first hdc. (30 hdc).
Rnd 9: Ch 1, working in the 3rd loop, loosely sc in in each st around. Join with a sl st (in the space that you would work the next ks. See pattern notes). (32 sc).
Rnd 10: Ch 1, *ks 4, ks2tog over the next 2 sts. Rpt from * to end. Join with a sl st in first st. (24 sts)
Rnd 11: Ch 1, *ks 3, ks2tog over the next 2 sts. Rpt from * to end. Join with a sl st in first st. (18 sts)
Rnd 12: Ch 1, *ks 2, ks2tog over the next 2 sts. Rpt from * to end. Join with a sl st in first st. (12 sts)
Rnd 13: Ch 1, *ks 1, ks2tog over the next 2 sts. Rpt from * to end. Join with a sl st in first st. (6 sts)
Rnd 14: Ch 1, ks2tog around. Join with a sl st in first st. (3 sts)
Fasten off leaving a long tail. Sew opening at top of the hat closed. Weave in ends. Make pom pom if desired and fasten to top.
6-12 Months:
Ch 32. Being careful not to twist ch, join with a sl st in first chain to make a round.
Rnd 1: Ch 1, hdc in each ch around. Join with a sl st in first sc. (32 hdc).
Rnd 2: Ch 1, working in the 3rd loop, hdc in each st around. Join with a sl st in the first hdc. (32 hdc).
Rnd 3: Ch 1, working in the 3rd loop, hdc in each st around. Join with a sl st in first hdc. (32 hdc).
Rnd 4: Ch 1, working in the 3rd loop, loosely sc in in each st around. Join with a sl st (in the space that you would work the next ks. See pattern notes). (32 sc).
Rnd 5: Ch 1, ks in each sc around. Join with a sl st. (32 ks)
Rnd 6: Ch 1, working in the same space in stitch of previous row that you would work for a ks, hdc in each st around. Join with a sl st. (32 hdc).
Rnd 7: Ch 1, working in the 3rd loop, hdc in each st around. Join with a sl st in first hdc. (32 hdc).
Rnd 8: Ch 1, working in the 3rd loop, hdc in each st around. Join with a sl st in first hdc. (32 hdc).
Rnd 9: Ch 1, working in the 3rd loop, loosely sc in in each st around. Join with a sl st (in the space that you would work the next ks. See pattern notes). (32 sc).
Rnd 10: Ch 1, *ks 5, ks2tog over the next 2 sts. Rpt from * to end. Join with a sl st in first st. (28 sts)
Rnd 11: Ch 1, working in the same space in stitch of previous row that you would work for a ks, * hdc 4, hdc2tog. Rpt from * to end. Join with a sl st. (24 sts).
Rnd 12: Ch 1, working in 3rd loop, *hdc 3, hdc2tog over the next 2 sts. Rpt from * to end. Join with a sl st in first st. (20 sts)
Rnd 13: Ch 1, working in 3rd loop, *hdc 2, hdc2tog over the next 2 sts. Rpt from * to end. Join with a sl st in first st. (16 sts)
Rnd 14: Ch 1, working in 3rd loop *sc 1, sc2tog over the next two sts. Rpt from * to end. Join with a sl at. (12 sts)
Rnd 15: Ch 1, ks2tog around. Join with a sl st in first st. (6 sts)
Fasten off leaving a long tail. Sew opening at top of the hat closed. Weave in ends. Make pom pom if desired and fasten to top.
12-24 Months:
Ch 35. Being careful not to twist ch, join with a sl st in first chain to make a round.
Rnd 1: Ch 1, hdc in each ch around. Join with a sl st in first sc. (35 hdc).
Rnd 2: Ch 1, working in the 3rd loop, hdc in each st around. Join with a sl st in the first hdc. (35 hdc).
Rnd 3: Ch 1, working in the 3rd loop, hdc in each st around. Join with a sl st in first hdc. (35 hdc).
Rnd 4: Ch 1, working in the 3rd loop, loosely sc in in each st around. Join with a sl st (in the space that you would work the next ks. See pattern notes). (35 sc).
Rnd 5: Ch 1, ks in each sc around. Join with a sl st. (35 ks)
Rnd 6: Ch 1, working in the same space in stitch of previous row that you would work for a ks, hdc in each st around. Join with a sl st. (35 hdc).
Rnd 7: Ch 1, working in the 3rd loop, hdc in each st around. Join with a sl st in first hdc. (35 hdc).
Rnd 8: Ch 1, working in the 3rd loop, hdc in each st around. Join with a sl st in first hdc. (35 hdc).
Rnd 9: Ch 1, working in the 3rd loop, loosely sc in in each st around. Join with a sl st (in the space that you would work the next ks. See pattern notes). (35 sc).
Rnd 10: Ch 1, *ks 5, ks2tog over the next 2 sts. Rpt from * to end. Join with a sl st in first st. (30 sts)
Rnd 11: Ch 1, working in the same space in stitch of previous row that you would work for a ks, * hdc 4, hdc2tog. Rpt from * to end. Join with a sl st. (25 sts).
Rnd 12: Ch 1, working in 3rd loop, *hdc 3, hdc2tog over the next 2 sts. Rpt from * to end. Join with a sl st in first st. (20 sts)
Rnd 13: Ch 1, working in 3rd loop, *hdc 2, hdc2tog over the next 2 sts. Rpt from * to end. Join with a sl st in first st. (15 sts)
Rnd 14: Ch 1, working in 3rd loop *sc 1, sc2tog over the next two sts. Rpt from * to end. Join with a sl at. (10 sts)
Rnd 15: Ch 1, ks2tog around. Join with a sl st in first st. (5 sts)
Fasten off leaving a long tail. Sew opening at top of the hat closed. Weave in ends. Make pom pom if desired and fasten to top.
Toddler (Age 2-4):
Ch 40. Being careful not to twist ch, join with a sl st in first chain to make a round.
Rnd 1: Ch 1, hdc in each ch around. Join with a sl st in first sc. (40 hdc).
Rnd 2: Ch 1, working in the 3rd loop, hdc in each st around. Join with a sl st in the first hdc. (40 hdc).
Rnd 3: Ch 1, working in the 3rd loop, hdc in each st around. Join with a sl st in first hdc. (40 hdc).
Rnd 4: Ch 1, working in the 3rd loop, loosely sc in in each st around. Join with a sl st (in the space that you would work the next ks. See pattern notes). (40 sc).
Rnd 5: Ch 1, ks in each sc around. Join with a sl st. (40 ks)
Rnd 6: Ch 1, working in the same space in stitch of previous row that you would work for a ks, hdc in each st around. Join with a sl st. (40 hdc).
Rnd 7: Ch 1, working in the 3rd loop, hdc in each st around. Join with a sl st in first hdc. (40 hdc).
Rnd 8: Ch 1, working in the 3rd loop, hdc in each st around. Join with a sl st in first hdc. (40 hdc).
Rnd 9: Ch 1, working in the 3rd loop, loosely sc in in each st around. Join with a sl st (in the space that you would work the next ks. See pattern notes). (40 sc).
Rnd 10: Ch 1, ks in each sc around. Join with a sl st. (40 ks)
Rnd 11: Ch 1, working in the same space in stitch of previous row that you would work for a ks, hdc in each st around. Join with a sl st. (40 hdc).
Rnd 12: Ch 1, working in the 3rd loop, * hdc 8, hdc2tog. Rpt from * around. Join with a sl st. (36 sts)
Rnd 13: Ch 1, working in the 3rd loop, * hdc 4, hdc2tog. Rpt from * around. Join with a sl st. (30 sts)
Rnd 14: Ch 1, working in the 3rd loop, * sc 3, sc2tog. Rpt from * around. Join with a sl st. (24 sts)
Rnd 15: Ch 1, * ks 2, ks2tog. Rpt from * around. Join with a sl st. (18 sts)
Rnd 16: Ch 1, * ks 1, ks2tog. Rpt from * around. Join with a sl st. (12 sts)
Rnd 17: Ch 1, ks2tog around. Join with a sl st. (6 sts)
Fasten off leaving a long tail. Sew opening at top of the hat closed. Weave in ends. Make pom pom if desired and fasten to top.
Child (Age 5-12):
Ch 42. Being careful not to twist ch, join with a sl st in first chain to make a round.
Rnd 1: Ch 1, hdc in each ch around. Join with a sl st in first sc. (42 hdc).
Rnd 2: Ch 1, working in the 3rd loop, hdc in each st around. Join with a sl st in the first hdc. (42 hdc).
Rnd 3: Ch 1, working in the 3rd loop, hdc in each st around. Join with a sl st in first hdc. (42 hdc).
Rnd 4: Ch 1, working in the 3rd loop, hdc in each st around. Join with a sl st in first hdc. (42 hdc).
Rnd 5: Ch 1, working in the 3rd loop, loosely sc in in each st around. Join with a sl st (in the space that you would work the next ks. See pattern notes). (42 sc).
Rnd 6: Ch 1, ks in each sc around. Join with a sl st. (42 ks)
Rnd 7: Ch 1, working in the same space in stitch of previous row that you would work for a ks, hdc in each st around. Join with a sl st. (42 hdc).
Rnd 8: Ch 1, working in the 3rd loop, hdc in each st around. Join with a sl st in first hdc. (42 hdc).
Rnd 9: Ch 1, working in the 3rd loop, hdc in each st around. Join with a sl st in first hdc. (42 hdc).
Rnd 10: Ch 1, working in the 3rd loop, loosely sc in in each st around. Join with a sl st (in the space that you would work the next ks. See pattern notes). (42 sc).
Rnd 11: Ch 1, ks in each sc around. Join with a sl st. (42 ks)
Rnd 12: Ch 1, working in the same space in stitch of previous row that you would work for a ks, hdc in each st around. Join with a sl st. (42 hdc).
Rnd 13: Ch 1, working in the 3rd loop, * hdc 5, hdc2tog. Rpt from * around. Join with a sl st. (36 sts)
Rnd 13: Ch 1, working in the 3rd loop, * hdc 4, hdc2tog. Rpt from * around. Join with a sl st. (30 sts)
Rnd 14: Ch 1, working in the 3rd loop, * sc 3, sc2tog. Rpt from * around. Join with a sl st. (24 sts)
Rnd 15: Ch 1, * ks 2, ks2tog. Rpt from * around. Join with a sl st. (18 sts)
Rnd 16: Ch 1, * ks 1, ks2tog. Rpt from * around. Join with a sl st. (12 sts)
Rnd 17: Ch 1, ks2tog around. Join with a sl st. (6 sts)
Fasten off leaving a long tail. Sew opening at top of the hat closed. Weave in ends. Make pom pom if desired and fasten to top.
Thanks Again! Happy Crocheting!


I am curios what the gauge is? I don’t see it anywhere or is it the gauge of the particular yarn? TIA
I used Caron Simply Soft which is a worsted weight yarn. There is no gauge on this intro page as the gauge is different for each block
I’m confused. In the “materials” section of pattern, you stated you used Charisma yarn which is a Bulky # 5 yarn. However, in response to the question from Julie Fournier, you state that you used Caron Simply Soft, which is a light worsted weight # 4 yarn. Which yarn is the pattern based on.
Hello Heather yes, I misread what pattern the comment was referring to. For the children’s hat i did use the Charisma
Well I made a little boy’s hat with Charisma and it turned out fantastic. I’ll try to send you a pic if I can figure out how to do it. Thanks for your response.
I would love to see it! You can email if you’d like ([email protected]) or join the Rich Textures Crochet Community on Facebook and you can join it there! Tagging on IG @richtexturescrochet also works 🙂
I just did a request to join your group on FB
Added you!
Love your patterns. Well written and easy to follow.
Already made the Elizabeth Beanie and the Waffle Beanie. Beautiful!
Interested in the Children’s Textured Slouch and the Children’s Textured Toque. I see no gauge listed in these patterns.
I always rely on gauge as my tension often is different.
Please send gauge information.
Thank you,
Kathy
Love your patterns. Well written and easy to follow.
Already made the Elizabeth Beanie and the Waffle Beanie. Beautiful!
Want to make the Children’s Textured Slouch and the Children’s Textured Toque but there is no gauge listed in patterns.
I rely on the gauge info as I tend to crochet tighter than most patterns. Please give gauge for these patterns.
Thank you,
Kathy