
This post contains affiliate links. This means that when you purchase through one of these links we will receive a small commission at no additional cost to you. Thank you for supporting Rich Texture Crochet!
Making your own stitch markers is such a fun, creative, and quick way to add a bit of your personality to your work in progress! This tutorial will show you how!
There are many reasons why you may want to use a stitch marker in your crochet or knitting. Stitch markers are often used to mark the first stich if you are working in a round and not joining at the end so that there is a seam. They are also used to help keep count of stitches, or mark a stitch that you want to return to later or add an embellishment. There are lots of reasons to use stitch markers, so why not make them look pretty?
My Story:
I ran across my first hand made stitch markers about a year ago. I was visiting a little yarn shop on Prince Edward, Canada. There, at the cash register at the front, they were selling beautiful island themed handmade stitch markers. I did buy a couple, but on my way home I found myself thinking “I could make that!” (How often to we as creators find ourselves saying that?!).
I had forgotten about them until recently when I found the ones I had bought in my notions box and was once again inspired.
The Materials:
On my next trip to the craft store I took a bit of a detour from the yarn aisle and found myself in the jewelry making section where I found beautiful beads, clasps and charms in all shapes, sizes and colours! I grabbed a few that caught my eye and headed to the check out.
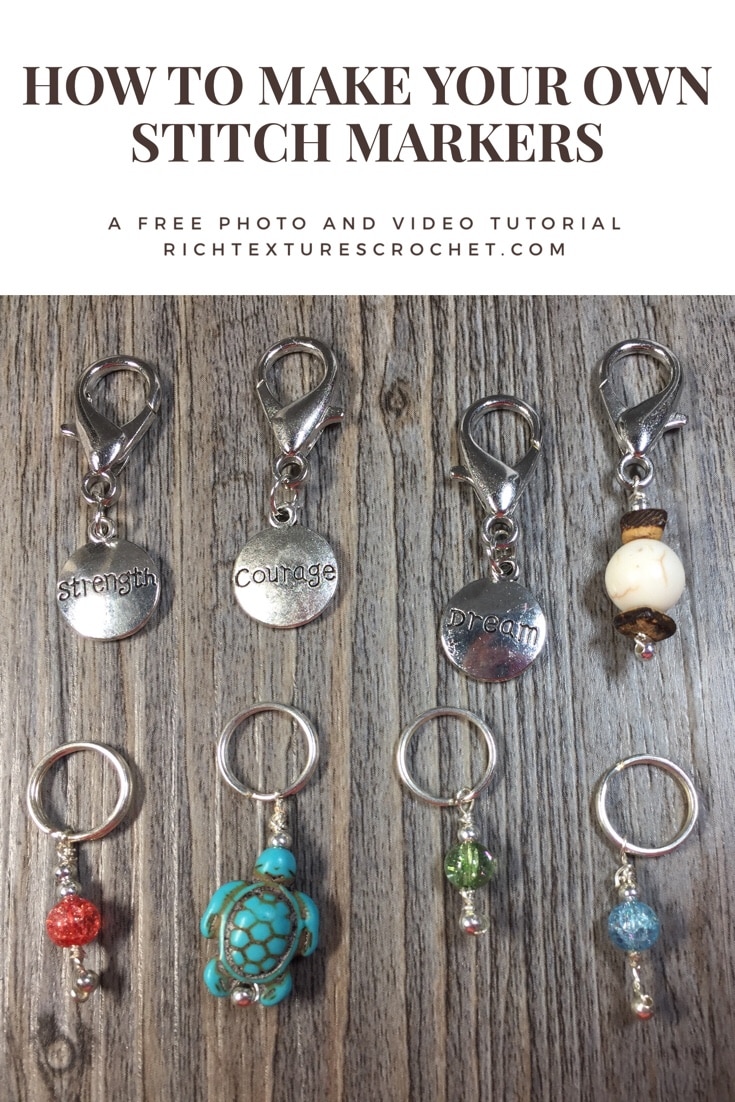
These are some of my finds!

The wooden one I actually had custom made (ordered from a Canadian shop on Etsy) so that I could make some “RTC” themed ones!
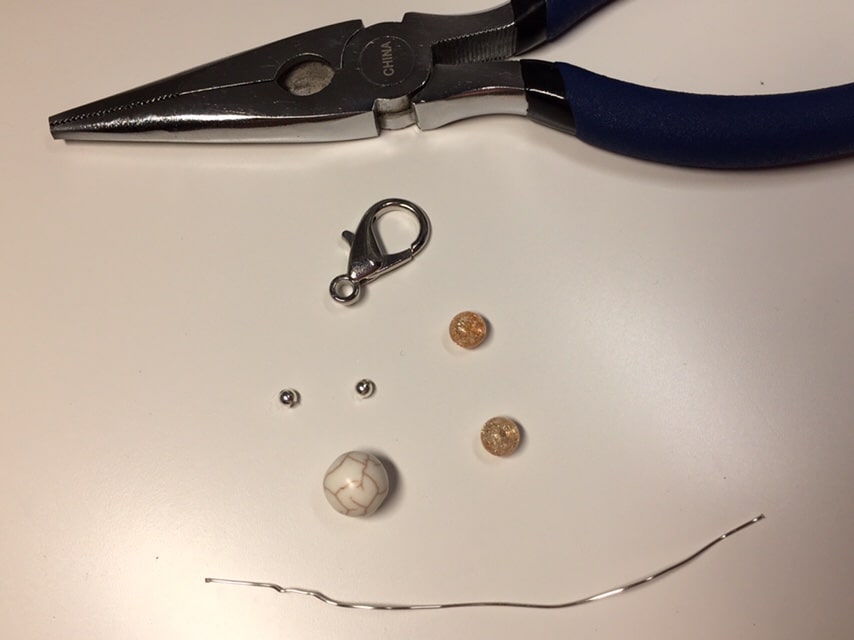
Along with the beads I also picked up some crafting wire, clasps and rings.


The wire comes in different weights (much like yarn!), just be sure to choose one that is not too thick (you want it to fit through the tiny holes in the beads!) nor too thin (you don’t want it to be too flimsy). For the wire I chose a 0.51mm thickness.
The clasps and rings you choose will depend on the craft and thickness of the yarn you want to work with.
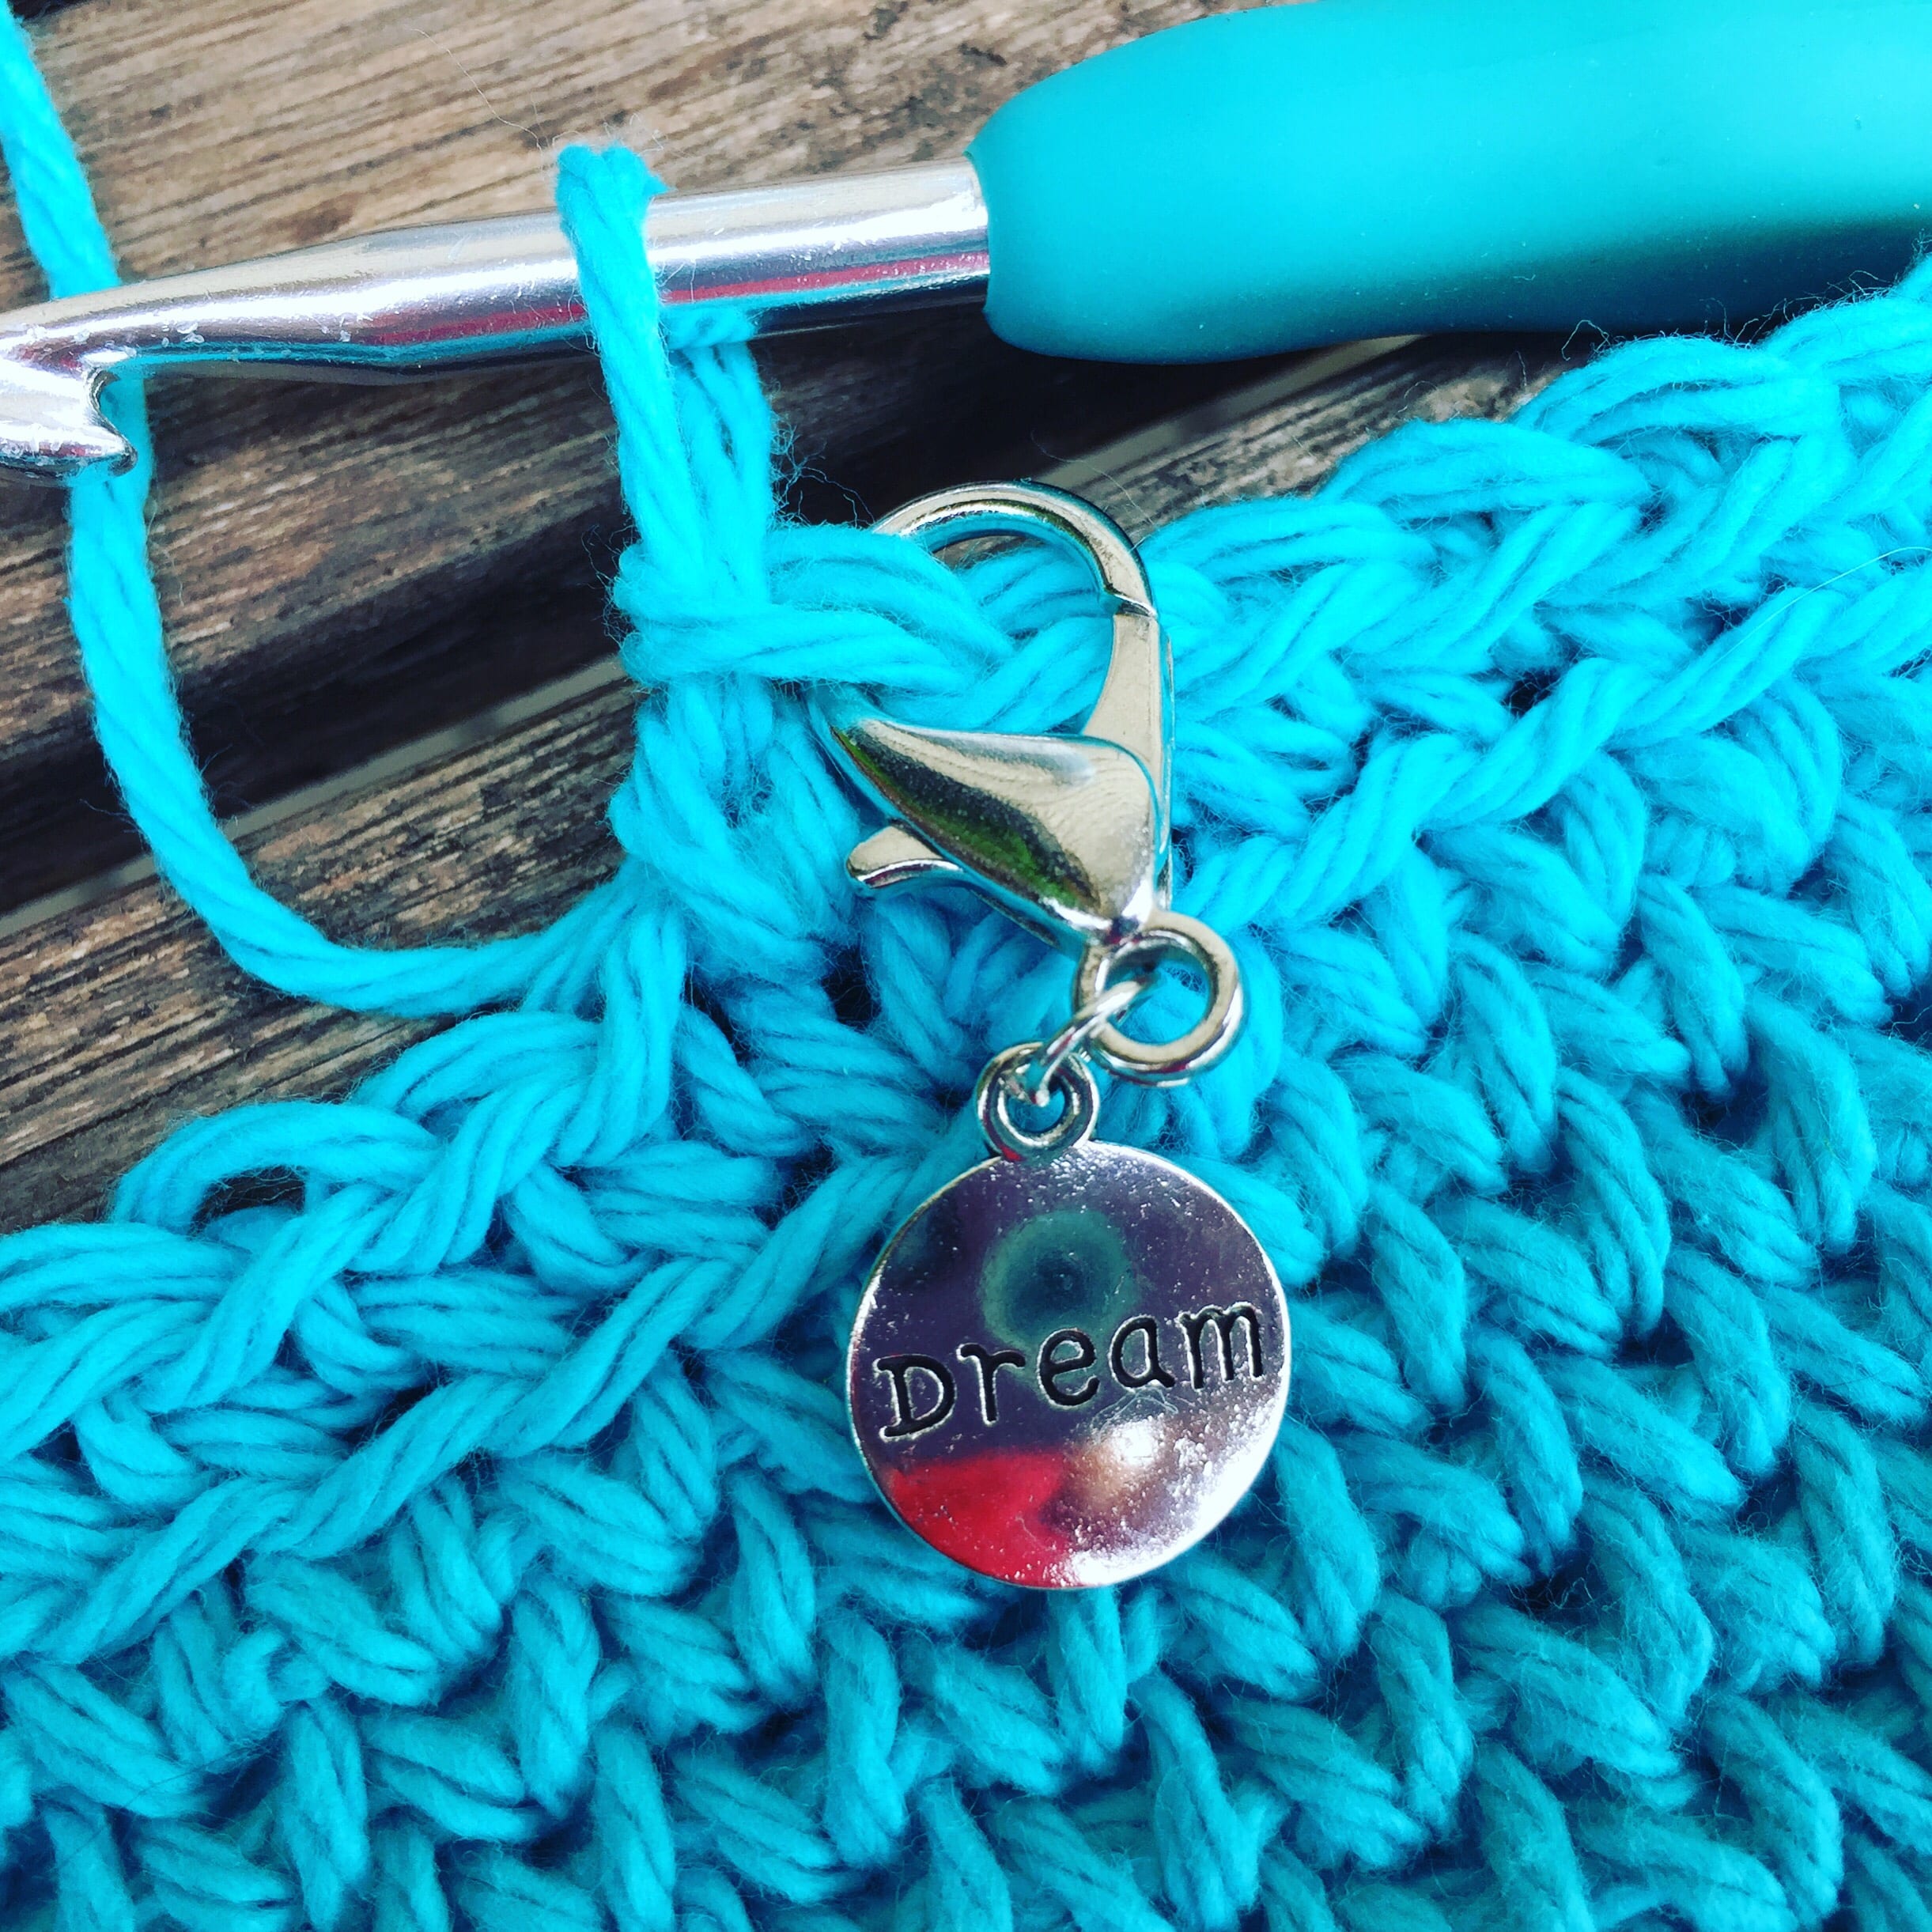
For crocheting you will need a clasp that can be opened and closed, such as the lobster clasps above. I chose the larger size because I work a lot with worsted and bulky weight yarns, but if you are working with thread you may want to choose something a little less bulky. The rings above are used for stitch markers for knitting. They slide easily on and off the knitting needle.
Tools:
I also dove into my husband’s tool box and grabbed his pliers (When he reads this post he’ll know that when he needs them back and goes looking for them, to check my craft corner first!). The pliers were handy for snipping the wire and for holding onto the tiny pieces and thin wire.
Ready to make some of your own? Grab your materials and find a surface with lots of light!
How to Make your own Stitch Markers:
The first thing that I did was cut some lengths of wire that were about three inches long. I found three inches gave me enough to hang onto, but not so much that I was trimming off wasting a lot.
Then taking the wire in one hand, and one of my smallest beads in the other, I slipped it a little ways onto the end of the wire.
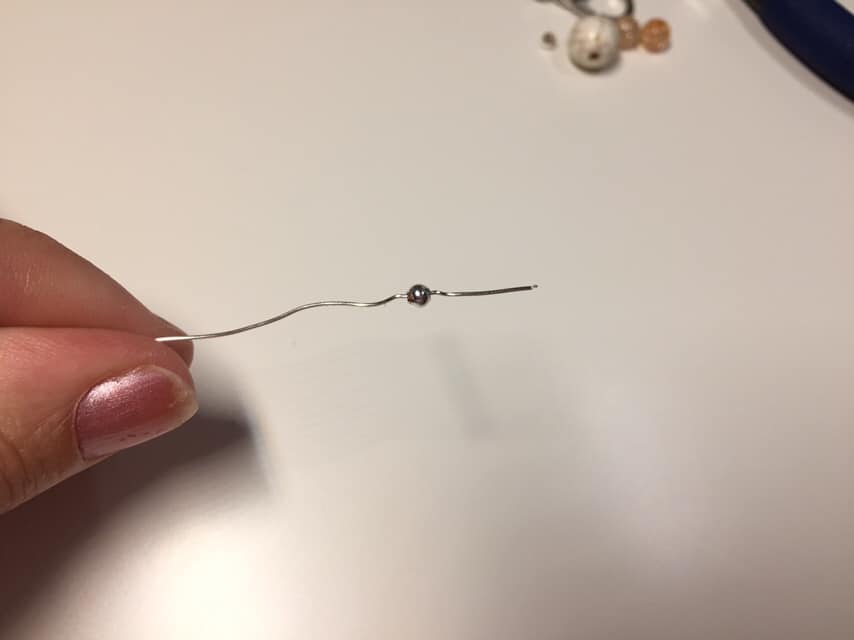
I then folded the wire around and wrapped it as tightly as I could around to secure the bead. The pliers were helpful here to hold the wire end while I twisted the bead. Make sure that the wire is securely wrapped around the longer wire quite close to the bead. You do not want to have the rough end of the wire sticking out at all so not to snag the yarn on your project.


Always remember to tuck in your ends!
Next add the rest of your beads to the wire in the order of your own choosing!
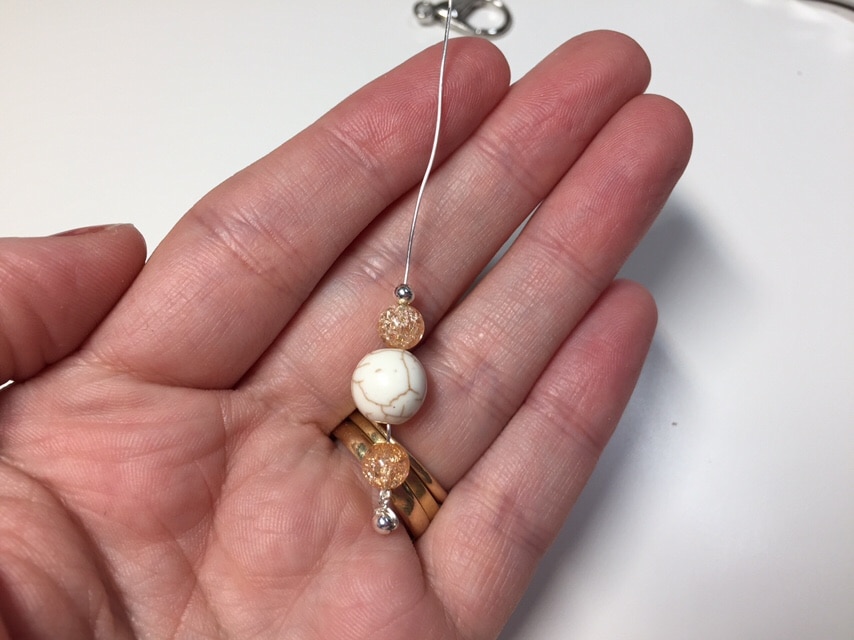
Once you’ve done that, your ready for the clasp! Slide the clasp on and up fairly close to the last bead. Once again twist the wire around at the end of the clasp to secure it.


Using your wire snips, cut the excess wire as close as you can to the base of the clasp and then use your pliers to twist and press the tiny tale close to your stitch marker. Important – get this tiny tail tucked in as close as you ca to avoid snagging your crochet/knitting project!


And then you’re done! Not only are these great for your own projects, but I think they would make a great gift for your knitting and crochet loving friend too!
Want to see the tutorial in action? I also show you a super simple one I made with some cute charms I found! Check out the free video tutorial below, and while your there please subscribe to my YouTube Channel (https://www.youtube.com/c/RichTexturesCrochet/) – I like to update it weekly!
So much fun, wasn’t it? Be creative! And please share your own creations with me! You may do so by following my Facebook page (https://www.facebook.com/richtextures/) and join the Community group you’ll find there!
Thank you so much for stopping by and supporting Rich Textures Crochet! Please share/pin/tweet about this post and be sure to check back soon!
Crochet something beautiful today!
Sarah


Which Etsy shop did you order the initial beads on please. Thanks
Hello Tammy: this is the link to the Etsy Shop: https://etsy.me/2MVgy9w – they were so quick and have a variety of letter options!