
This post contains affiliate links. This means that when you purchase through one of these links we will receive a small commission at no additional cost to you. Thank you for supporting Rich Texture Crochet!
The Elizabeth Beanie Crochet Pattern is the second hat featured in the Wonderful Hats Crochet Along!
Welcome to the second week of the wonderful hats crochet along! If you missed last week, don’t worry! These hat patterns will remain on my blog and in my Etsy and Ravelry shops, so there is lots of time to catch up!
If you have not heard of the Wonderful Hats Crochet along yet, I invite you to take a quick browse through this introduction post: Hats, hats, Wonderful Hats! Free Crochet Along.
Last week’s hat, the Primrose Beanie, can be found here: Primrose Beanie Crochet Pattern
This is week two of the Wonderful Hats Crochet Along. Today we will learn how to make the Elizabeth Beanie.

This post contains affiliate links. This means that when you make a purchase through one, I will receive a small commission at no additional cost to yourself. Thank you for supporting Rich Textures Crochet!
Materials:
For this crochet beanie, I will be using one ball of the Patons Canadiana Yarn by Yarnspirations. I will be pairing it with a 5 mm crochet hook. For those curious about the hook that I show in my video today, it is a handmade hook of Birchwood made by the River John Needle Company in Nova Scotia, Canada.
The Design:
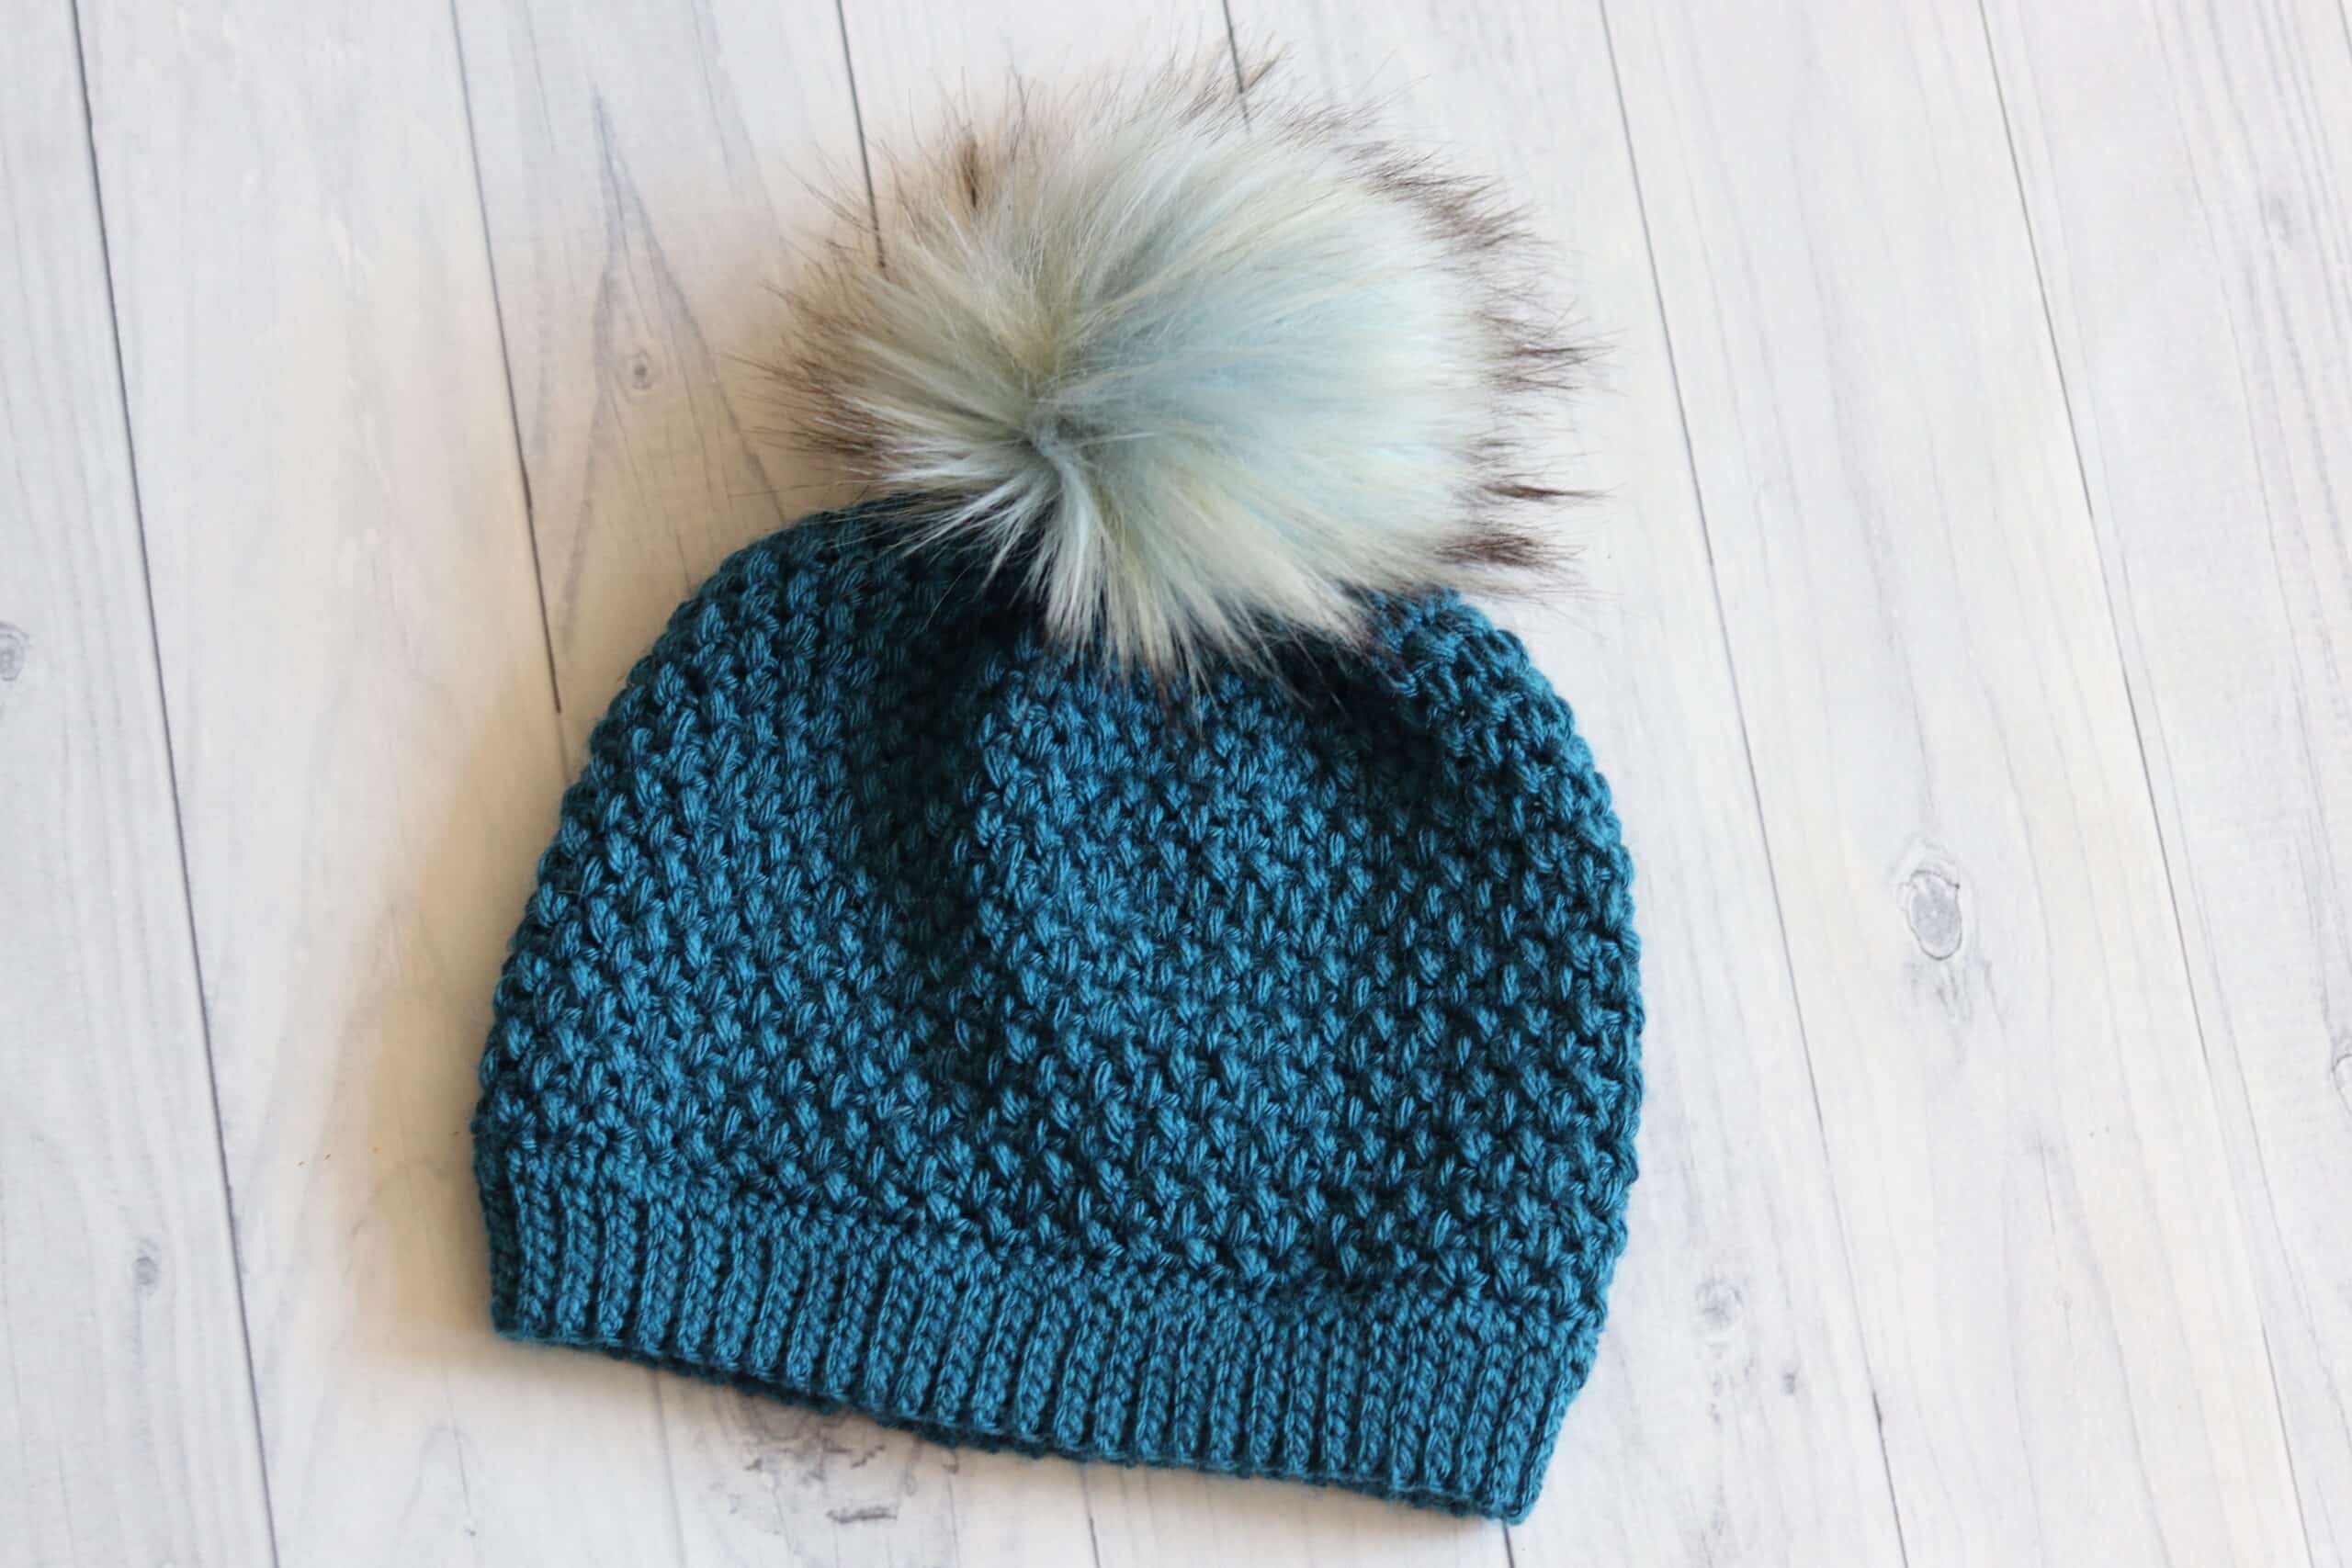
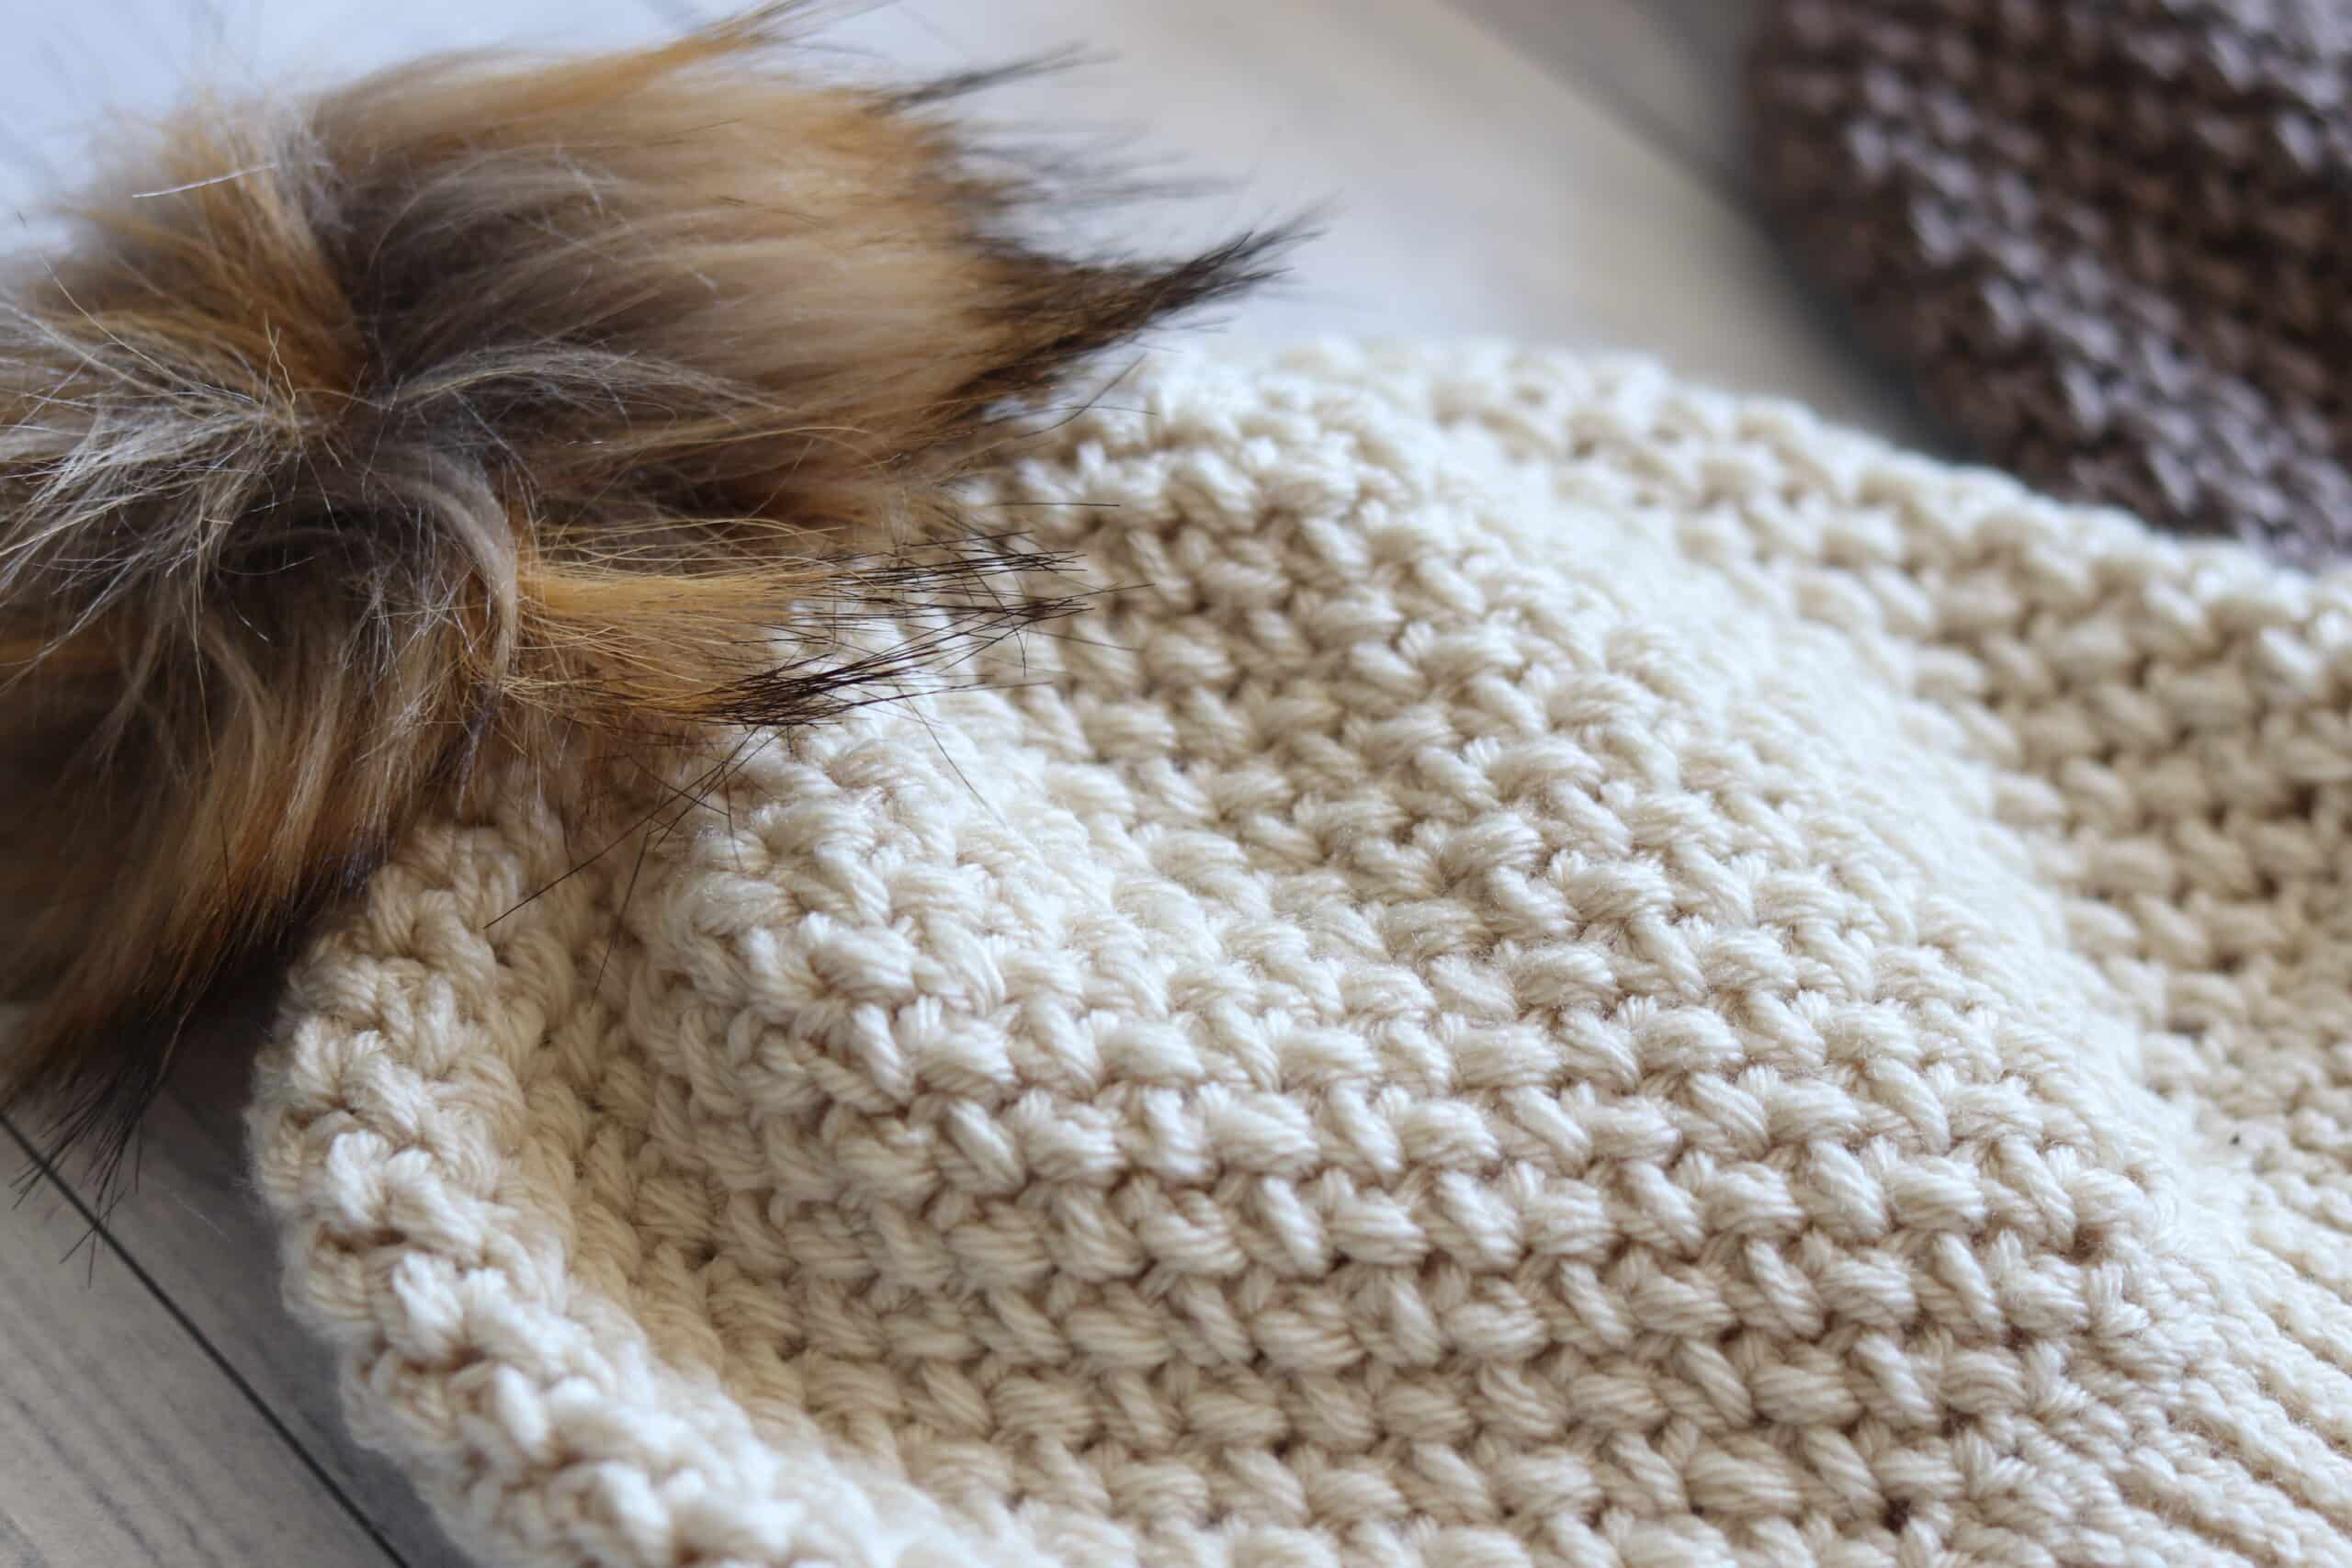
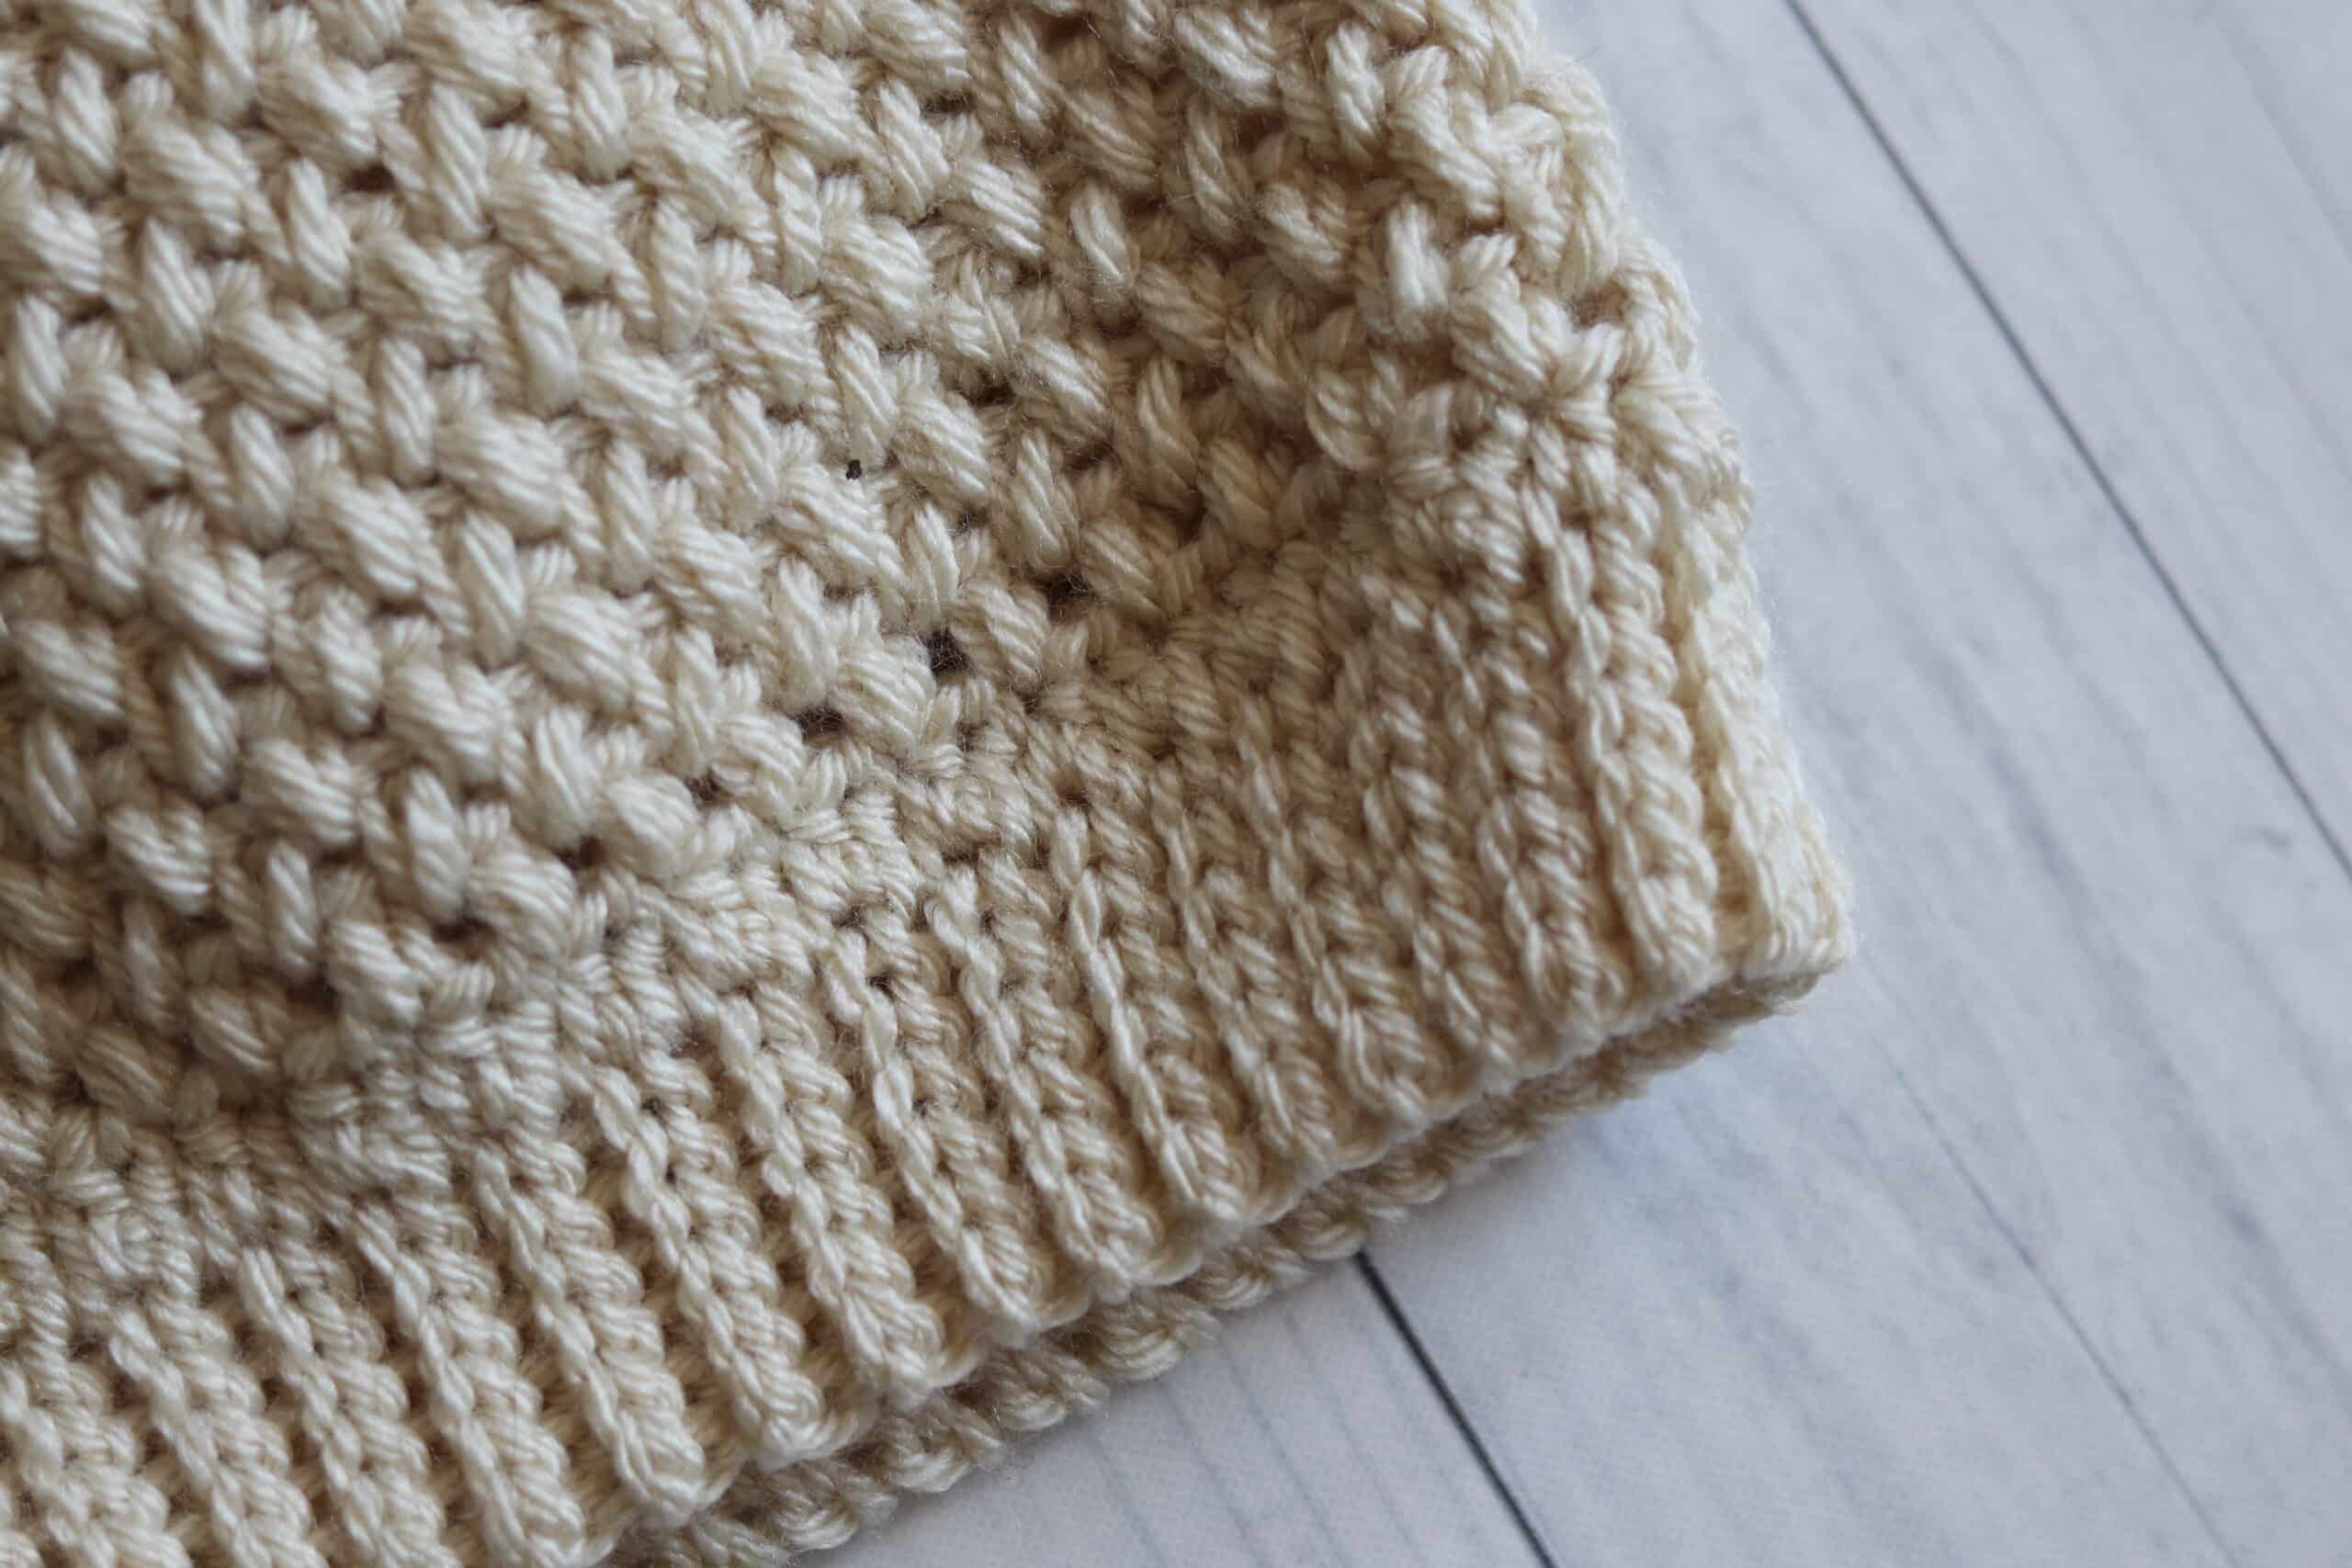
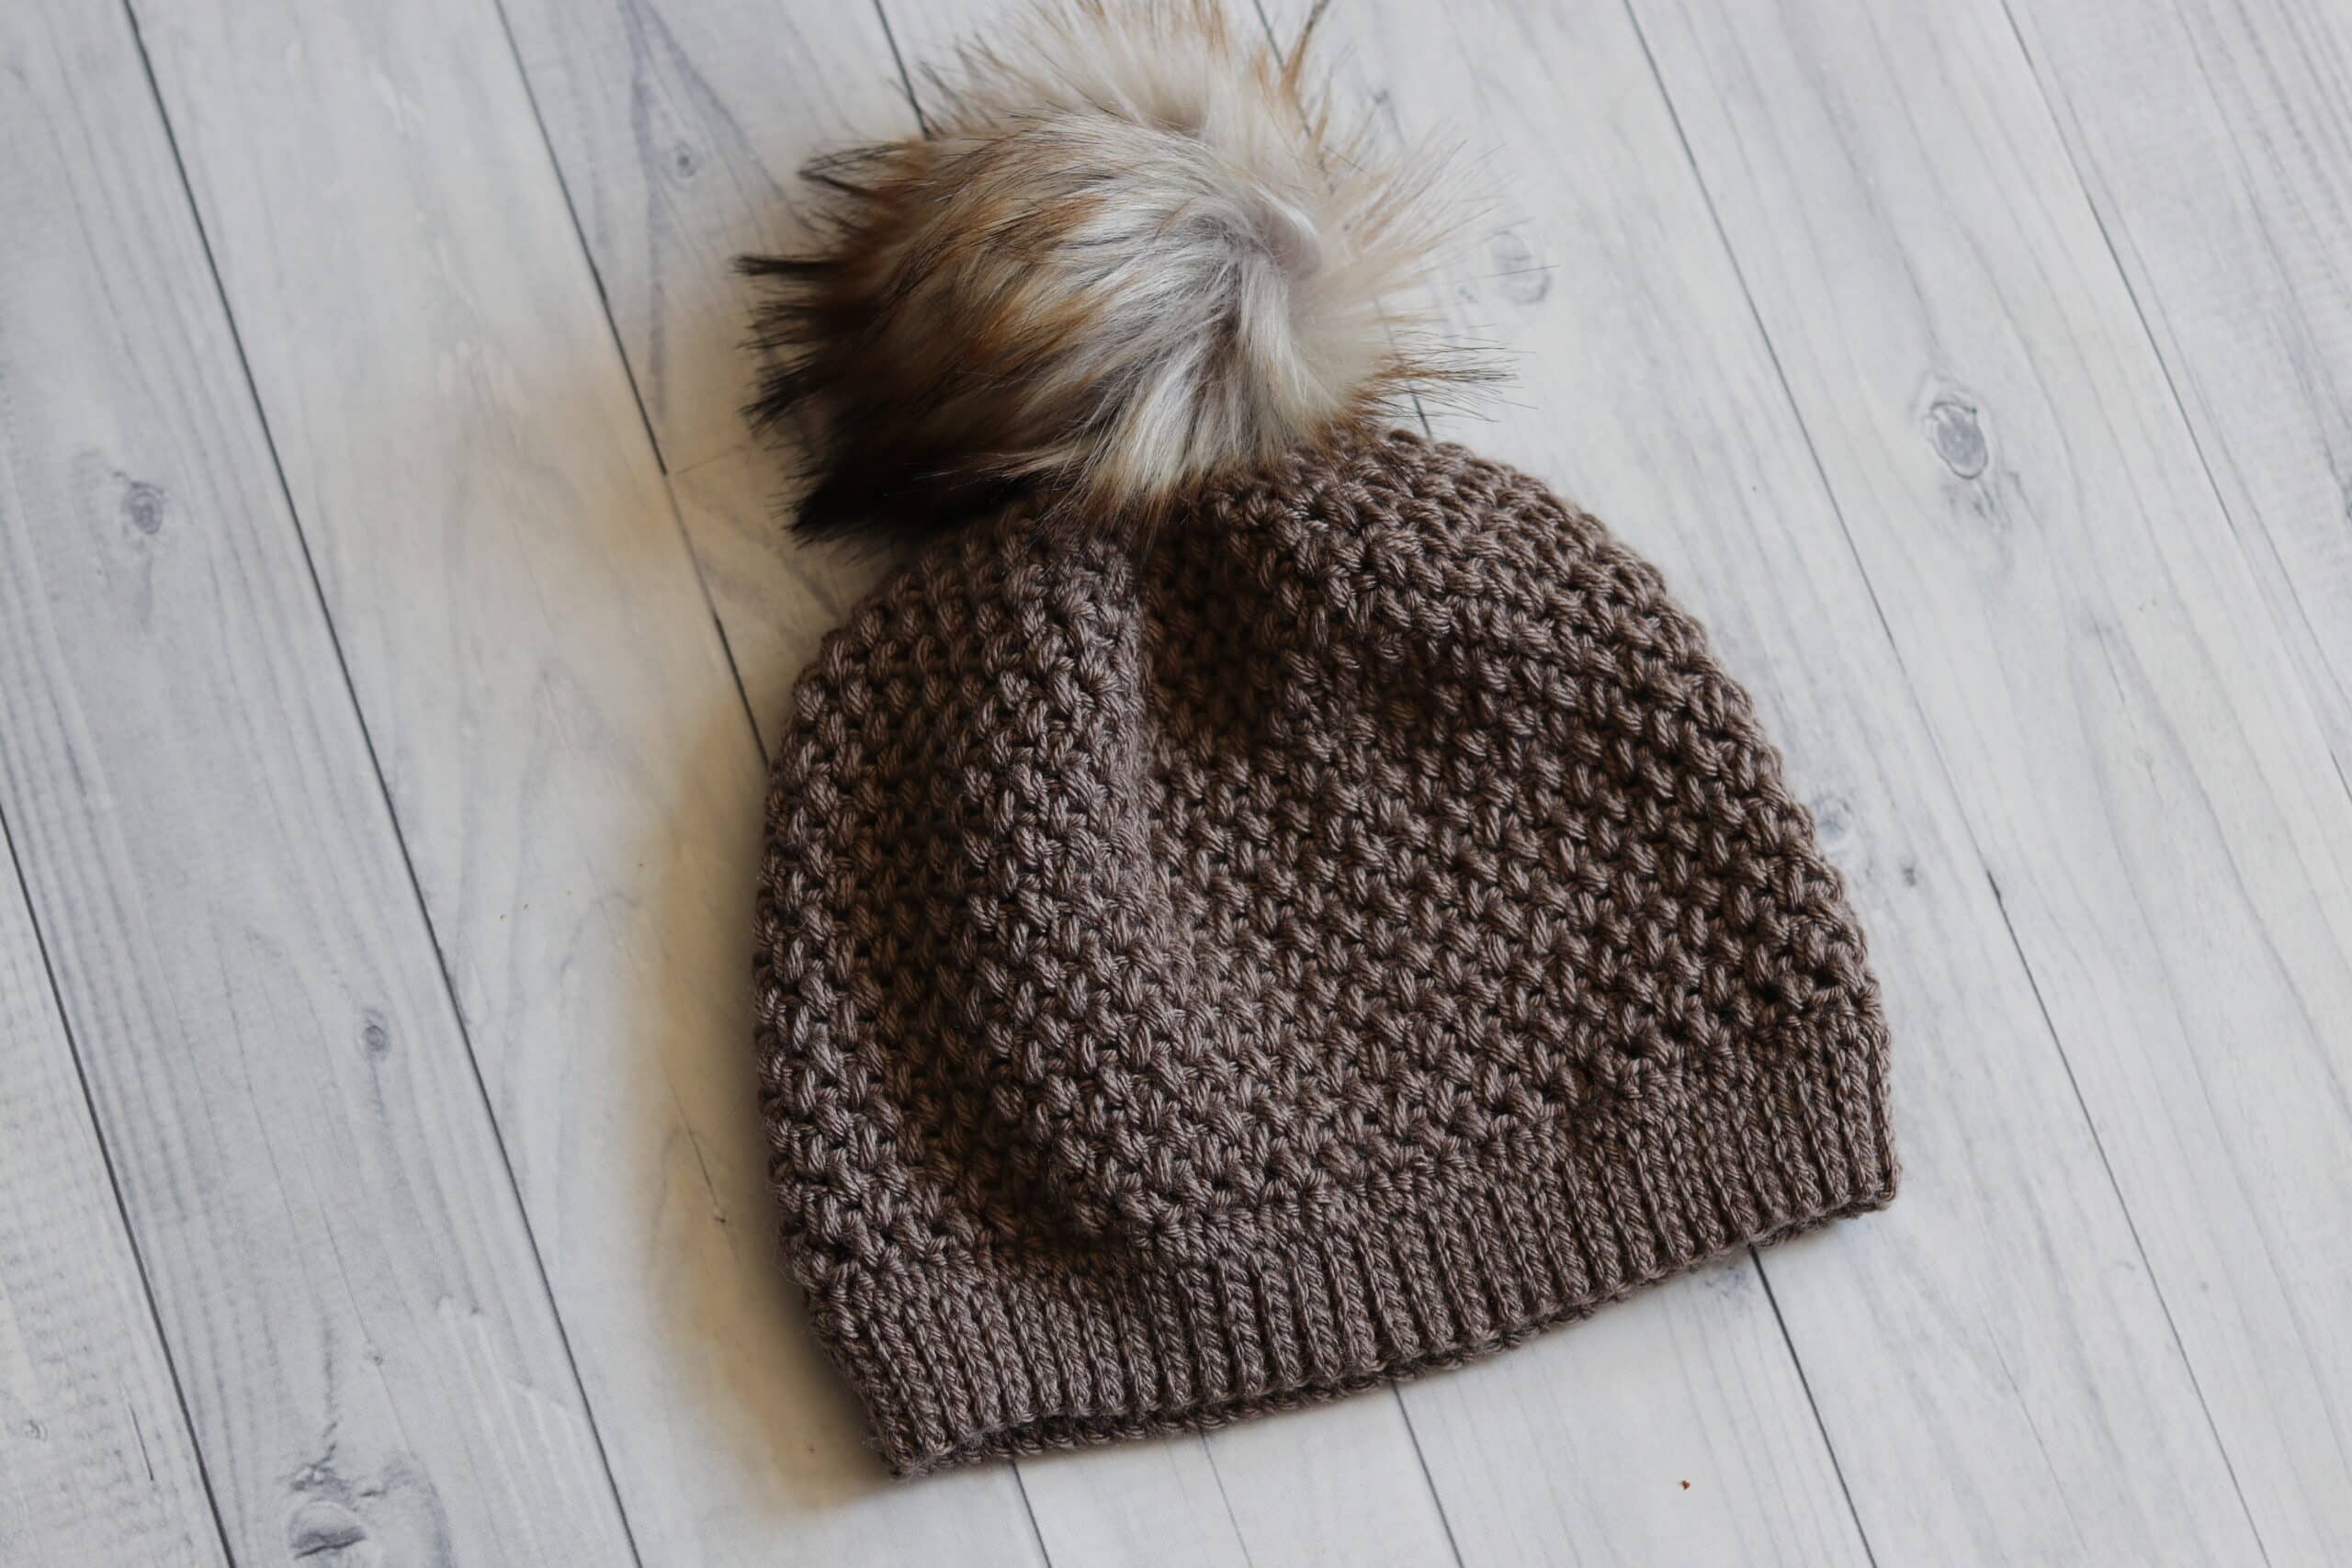
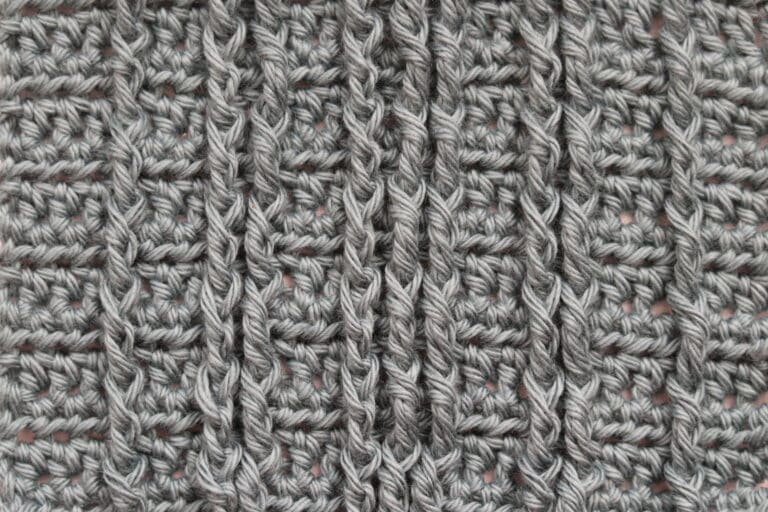
I love the Elizabeth stitch! This stitch is sometimes called the “mini bean” stitch. I love it! It is very textured, and pretty to look at with it criss cross design. Once you get going with this stitch, it goes quite quickly and is fun to work.
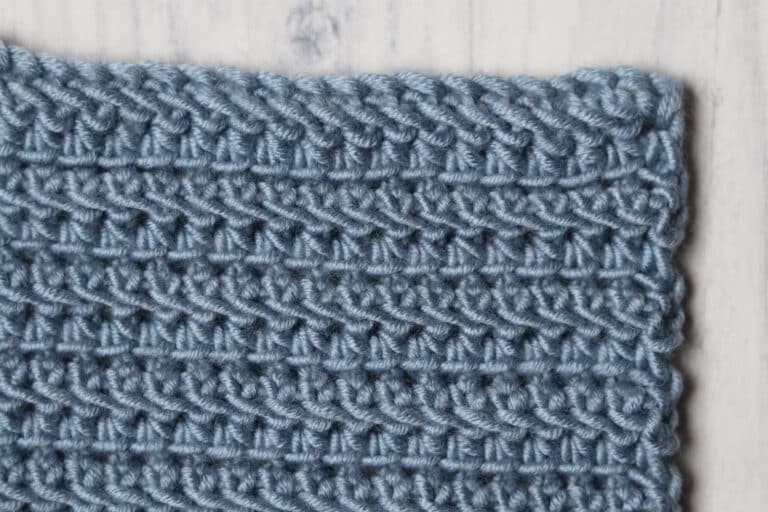
The Elizabeth Beanie is worked from the bottom/brim up. The brim of the hat is worked in rows and I have used slip stitches to work my ribbing, but you may choose to use a single crochet stitch, or even a half double crochet stitch instead.
The Construction:
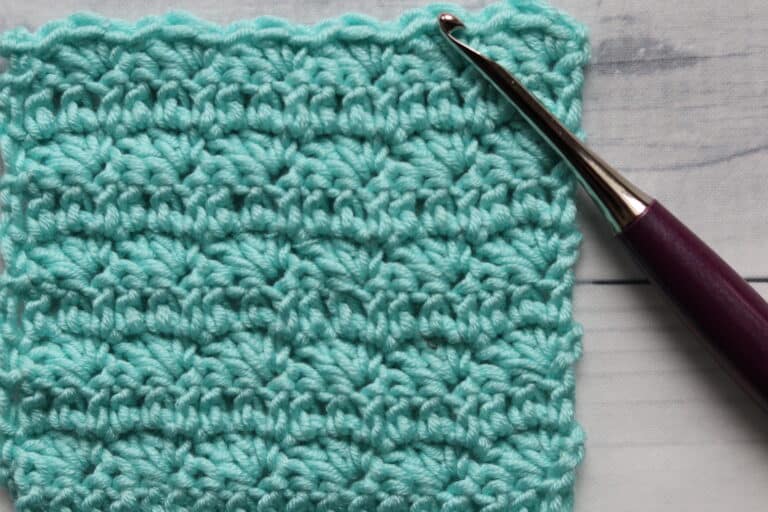
After the brim is complete, we will work on the body of the hat which features the Elizabeth or mini bean pattern. The hat body is worked in rounds, but with this hat we are going to turn at the end of each round. This will give us the criss cross look. At the top of the hat, after you quickly sew it closed, you are welcome to add a pompom of your choice, or even leave it without! Both options look great!
PDF Copies are available:
I will write out the pattern in full below and will follow it with a free video tutorial. But for those of you who wish, you may also find a PDF copy of the pattern available for purchase in my Etsy and Ravelry Shops linked below:
Click here for the Elizabeth Beanie on Etsy
Click here for the Elizabeth Beanie on Ravelry
Thank you so much for stopping by! I can’t wait to see all of your creations! Be sure to join the Rich Textures Crochet community on Facebook (Don’t forget to answer the membership questions!): https://www.facebook.com/groups/richtexturescrochetcommunity
When sharing on Instagram, I invite you to tag me @ RichTexturesCrochet and #wonderfulhatscal so I’ll be able to find you!
Have fun! And I will see you again soon!
Sarah
Elizabeth Beanie Crochet Pattern:
Skill Level: Easy
Gauge: 10 sts x 17 rows of Elizabeth stitch = 4 inches
Finished Size: 9 x 8 inches laid flat
Yarn: Patons® by Canadiana (100% Acrylic; 3.5 oz, 100 g; Approx. 205 yds, 187 m). Worsted/medium Weight (4). You will need 1 ball/hat. Colours Shown: Oatmeal, Teal Heather and Toasty Grey
Hook: Size H/8 (5 mm) Hook. Adjust hook size if necessary to obtain correct gauge
OPTIONAL: Pompom to attach to the top
Stitches and Abbreviations:
Bean – Insert hook into st indicated, yarn over, and draw up a loop. Yarn over and insert hook into the same st, yarn over and draw up a loop. Yarn over and draw through all loops on hook.
Bean2tog – Insert hook into st indicated, yarn over, and draw up a loop. Yarn over and insert hook into the same st, yarn over and draw up a loop. Insert hook into the next st, yarn over, and draw up a loop. Yarn over and insert hook into the same st, yarn over and draw up a loop. 7 loops on your hook, yarn over and draw through all loops on hook.
Ch – Chain
Rpt – Repeat
Sc – Single Crochet
Sk – Skip
Sl St – Slip Stitch
Yo – Yarn Over
Pattern Notes:
- Pattern is written in American English terms.
- Brim of hat is worked in rows, body of hat is worked in rounds.
- Ch 1 at beginning of round does not count as stitch.
- Turn at the end of round.
- Weave in ends as needed.
- OPTIONAL: Brim of hat may be worked using either single crochet stitches or half double crochet stitches instead of the slip stitches.
Free Crochet Pattern:
Brim (Worked in rows):
Ch 8.
Row 1: Sl st in the 2nd ch from hook and in each ch across. Ch 1, turn. (7 sl sts)
Row 2: Working in the blo, sl st in each st across. Ch 1, turn. (7 sl sts)
Continue to repeat row 2 until work from the beginning measures approximately 19 inches.
Do not fasten off, but fold brim of hat so that two shorter ends meet. Now working through both thicknesses, sl st across working through the blo on each side. Do not fasten off, turn work right side out (so that the right side is facing you).
Now working around the edge of the brim, continue working in rounds as follows:
Hat Body (Worked in rounds):
Rnd 1: Ch 1, evenly work 90 hdc all the way around. Join with a sl st in the first st, do not turn. (90 sts)
Rnd 2: Ch 1, bean in the same st as joining, ch 1, sk the next st, * bean in the next st, ch 1, sk the next st; rpt from * around, join with a sl st in the first st, ch 1, turn. (45 bean sts)
Rnd 3: * Bean in the next ch-1 sp, ch 1, sk the next st; rpt from * around, join with a sl st in the first st, ch 1, turn. (45 bean sts)
Rnds 4-19: Repeat round 3.
Rnd 20: * [Bean in the next ch-1 sp, ch 1, sk the next st] 7 times, bean2tog; Rpt from * around, join with a sl st in the first st, ch 1, turn.
Rnd 21: * [Bean in the next ch-1 sp, ch 1, sk the next st] 6 times, bean2tog; Rpt from * around, join with a sl st in the first st, ch 1, turn.
Rnd 22: * [Bean in the next ch-1 sp, ch 1, sk the next st] 5 times, bean2tog; Rpt from * around, join with a sl st in the first st, ch 1, turn.
Rnd 23: * [Bean in the next ch-1 sp, ch 1, sk the next st] 4 times, bean2tog; Rpt from * around, join with a sl st in the first st, ch 1, turn.
Rnd 24: * [Bean in the next ch-1 sp, ch 1, sk the next st] 3 times, bean2tog; Rpt from * around, join with a sl st in the first st, ch 1, turn.
Rnd 25: * [Bean in the next ch-1 sp, ch 1, sk the next st] 2 times, bean2tog; Rpt from * around, join with a sl st in the first st, ch 1, turn.
Rnd 26: * Bean in the next ch-1 sp, ch 1, sk the next st, bean2tog; Rpt from * around, join with a sl st in the first st, ch 1, turn.
Rnd 27: Bean2tog around, join with a sl st in the first st.
Fasten off leaving a long tail. Using the long tail, sew the top of the hat closed. Fasten off and weave in your ends. Attach Pompom to the top.
Video Tutorial:


I absolutely love the texture of this hat. Thank you so much.
You’re welcome!
Hi Sarah, after I have about 19″ of the brim, there’s only room for about 64 stitches. Do I still try to get 90? It would seem bulky. Thanks.
I used a size 5 yarn and a 6mm hook., I also used a sc stitch fo brim instead of slip stitch. This definitely changes the # of stitches in row for hat body. I ended up putting in 58 stitches in base row. After completing 2 additional rows it seems to be working ok. Too many base row stitches will bow out the rows too much, it needs to line up with the brim.
I’m curious of the same thing.
Hi Sarah, how do I use this pattern for a 18 month year old child? Many thanks!!
I’m trying to do this hat for my 6 year old and I also did sc for the brim, how do I determine how many hdc do I do? I have left a message on YouTube and never got a reply. Please help.
Hi Mary! For a child you will want the hat circumference to be 19-20 inches. So I would work the band to 16-17 inches (19-20 with a slight stretch). Then work your half double crochet round so that there is a multiple of 2. As I haven’t worked it out yet, I can’t give you an exact number as I haven’t tried that specific size, but I’m guessing about 80 hdc :). Hope that helps!
I’m curious why we turn the work? Can’t it be worked in the round? Does it show a different texture by turning? Thanks. 🙂
Yes, when you turn your work it will cause the stitches to fall in the opposite direction of the ones below
hi! i love this pattern, but i’ve found that my bean stitches are much larger than yours, so the hat is much wider after the brim. is there a way to fix this?
You can change your stitch counts in multiples of two if you would like and use a lesser amount of stitches in the first hdc round
I am getting stuck when the decreases start. When it says skip the next stitch and I skipping the next chain one space that I would normally put the bean in? When I did that it seemed more holey than yours. Watched the video in slow mo and couldn’t tell where you were going when you skipped the stitch. Any help would be appreciated!
Hi Sarah my yarn says that it needs 20sts and 24 rows with 4.5mm hook for 4 inches square do you have advice on how I can adapt your pattern? I’m thinking I could double the number of stitches ,?
Hi Sarah, where did you purchase the faux fur Pom Pom for the blue beanie?
All of my faux fur Pompom are purchased from Wool Interrupted. It’s a Canadian yarn box company (and they have beautiful snap on pompoms!)
How are you getting the foundation round to be 90?
Sometimes it helps to put a stitch marker about half way around, then work half on one side and half on the other
I have done that one side is 44 and the other is 34. So what am I doing wrong?
You may need to put your stitches closer together
I have done that oneside is 45 and thw other is 34 so what am I doing wrong. I have it at 19 inches I also added some new rows. But it still not adding to 90.
Thanks for your pattern. I’m working on the gauge swatch but I’m confused. It says 10 stitches and 17 rows of the Elizabeth should equal 4” I’ve gone down to a 4mm hook and Still too large. Do I now go to a 3mm hook?
Ok I’m still can’t get the 90 foundation round right. What am I doing wrong.
What I did was just fit them in evenly. They don’t go into any particular stitch you just fit them in wherever. If you need two in one spot then squeeze it in.